Sign In
Upload
Manuals
Brands
Canon Manuals
All in One Printer
imageCLASS MF5960dn
Canon imageCLASS MF5960dn Manuals
Manuals and User Guides for Canon imageCLASS MF5960dn. We have
5
Canon imageCLASS MF5960dn manuals available for free PDF download: Basic Operation Manual, Service Manual, Starter Manual, Settings Manual, Product Specifications
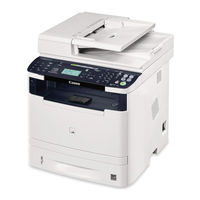
Canon imageCLASS MF5960dn Basic Operation Manual (176 pages)
Black & White Laser Multifunction Printer
Brand:
Canon
| Category:
Printer
| Size: 72.08 MB
Table of Contents
Table of Contents
8
Basic Operation Guide
1
Using the Fax Functions P
1
Contents
8
Manuals for the Machine
11
Available Features
12
How to Use this Manual
12
Symbols Used in this Manual
12
Important Safety Instructions
13
Power Supply
13
Maintenance and Inspections
15
Installation Requirements and Handling
17
Installation Space
17
Power Supply Requirements
17
Temperature and Humidity Conditions
17
Customer Support
18
Legal Notices
19
Users in Canada
21
Cdrh Regulations
23
Laser Safety
23
Chapter 1 Before Using the Machine
25
Before Using the Machine
25
Parts and Their Functions
26
Front Side
26
Back Side
27
Interior
27
Operation Panel
28
FAX Operation Panel
29
LCD (Standby Mode)
30
Copy Mode
30
Fax Mode
30
Scan Mode
30
USB Direct Print Mode
30
Navigating the Menu
31
Entering the Menu Screen
31
Scrolling the Menu
31
Selecting a Menu Item
31
Configuring Menus Using the Navigation Keys
31
Returning to the Default Screen
32
Entering Text
33
Changing the Entry Mode
33
Entering Text, Symbols, and Numbers
33
Moving the Cursor (Entering a Space)
33
Deleting Text, Symbols, or Numbers
33
Setting the Sleep Timer
35
Setting the Current Date and Time
36
Chapter 2 Document and Paper Handling
37
Document and Paper Handling
37
Scan Area
38
Copy
38
Fax
39
Scan
39
Document Type
38
Supported Document Types
38
Placing Documents
40
Placing Documents on the Platen Glass
40
Placing Documents in the Feeder
40
Supported Paper Types
42
Paper Size
42
Paper Type
43
Printable Area
44
Loading Paper
45
In the Paper Drawer
45
In the Multi-Purpose Tray
46
Precautions When Loading Paper
48
Paper Loading Capacity
48
Paper Loading Orientation
49
(Previously Printed Paper)
49
When Printing on Envelopes
49
When Printing Paper with a Letterhead or Logo
49
Setting the Paper Size and Type
50
For the Paper Drawer
50
Setting a Custom Paper Size
50
Registering the Default Paper Settings for the Multi-Purpose Tray
51
Selecting the Print Side
53
When <Print Speed Priority> Is Selected (the Default Setting)
53
When <Print Side Priority> Is Selected
53
Chapter 3 Copying
55
Copying
55
Basic Copy Operations
56
Checking and Canceling Copy Jobs
57
Canceling a Copy Job Using [ ] (Stop)
57
Checking and Canceling a Copy Job Using [ ] (Status Monitor/Cancel)
57
Copy Settings
58
Selecting Copy Papers
58
Adjusting the Density
59
Selecting the Document Type
59
Copy Settings
59
2-Sided Copying
60
Copy Settings
60
Enlarging/Reducing Copies
61
Copying Multiple Documents Onto One Sheet (N on 1)
61
Collating Copies
62
Erasing Dark Borders or Frame Lines ( Frame Erase)
62
Emphasizing Emphasize the Outline of an Image (Sharpness)
62
Copying an ID Card
63
Copying by Saving Paper
64
Registering and Using Combination of Copy Settings (Mode Memory)
65
Registering Mode Memory
65
Deleting Mode Memory
65
Calling and Copying Mode Memory
66
Changing the Default Settings
67
Viewing Copy Settings
67
Chapter 4 Printing from a Computer
69
Printing from a Computer
69
Preparing to Print from Your Computer
70
Printing from a Computer
71
Scaling Documents
71
Printing Multiple Pages on One Sheet
71
1-Sided Printing and 2-Sided Printing
72
Checking and Canceling Print Jobs
73
Chapter 5 Registering Destinations in the Address Book
75
Registering Destinations in the Address Book
75
Registering Destinations in the Address Book
76
One-Touch Keys
76
Coded Dial
76
Group Dialing
76
Registering and Editing One-Touch Keys
77
Registering and Editing from the Operation Panel
77
Registering and Editing One-Touch Keys Using the Remote UI
79
Registering and Editing Coded Dial Codes
80
Registering and Editing from the Operation Panel
80
Registering and Editing a Coded Dial Code Using the Remote UI
82
Registering and Editing Destinations for Group Dialing
83
Registering and Editing a Destination Group from the Operation Panel
83
Registering and Editing a Destination Group Using the Remote UI
86
Chapter 6 Using the Fax Functions
89
Using the Fax Functions
89
Basic Procedures for Sending Faxes
90
Changing the Scan Settings (Fax)
91
Resolution Settings
91
Density Settings
91
2-Sided Original
91
Sharpness Settings
91
Specifying Destinations
92
Specifying Destinations by Entering the Fax Number
92
Specifying Destinations Using One-Touch Keys
92
Specifying Destinations Using Coded Dial Codes
92
Specifying Destinations Using Group Addresses
93
Specifying Destinations Using the Address Book
93
Canceling Fax Jobs
94
Redialing (Manual Redialing)
95
Useful Features
96
Notifying the Recipient of an Incoming Fax by Telephone
96
Push-Button Telephone for Tone Dialing
96
Sending a Fax Abroad (Adding Pauses)
97
Sending to Multiple Destinations at a Time
98
Sequential Broadcast
98
RX Mode
99
Auto Mode
99
Fax/Tel Mode
100
Answer Mode
101
Manual Mode
101
DRPD (Distinctive Ring Pattern Detection) Mode
101
Changing the Receive Mode
102
Advanced Settings for the Fax/Tel Auto Switch Mode
102
Forwarding Fax Documents
103
Setting Document Transfer (Automatic Forwarding)
103
Forwarding Received Faxes Stored in Memory to Other Destinations (Manual Forwarding)
103
Other Destinations (Manual Forwarding)
103
Configurating Operations for Transfer Errors
104
Re-Fowarding/Printing/Deleting Documents in Which Transfer Is Failed
105
Which Transfer Is Failed
105
Managing Faxes Stored in Memory
106
Checking and Canceling Fax Jobs
106
Combining and Printing the Received Documents You Saved
106
Checking and Deleting Received Faxes
107
Checking the History of Received/Sent Faxes
108
Changing the Default Fax Settings
109
Button)
110
Options
110
Register Unit Telephone Number
110
Select Line Type
110
The Steps to Take for Configuring the Send Settings
110
Changing Fax Settings (Settings that Can be Specified Using the [Menu] Button)
110
Off-Hook Alarm
111
Change Defaults
111
Register Unit Name (Fax)
111
Ecm Tx
111
Pause Time
111
Auto Redial
111
Sender ID
112
Check Dial Tone before Sending
112
The Steps to Take for Configuring the Receiving Settings
112
Options
113
2-Sided Printing
113
Auto RX Switch
113
Ecm Rx
113
Incoming Ring
113
Remote RX
113
Continue Printing When Toner Is Low
114
Reduce RX Size
114
RX Page Footer
114
The Steps to Take for Configuring the System Settings
114
Options
115
Address Book PIN
115
Memory Lock Settings
115
RX Start Speed
115
Select Country/Region
115
TX Start Speed
115
Allow Fax Driver TX
116
Fax No. Confirmation Re-Entry
116
Restrict History TX
116
Restrict New Destinations
116
Restrict Sequential Broadcast
116
Chapter 7 Using the Scan Functions
117
Using the Scan Functions
117
Basic Scan Operations
118
Scanning Using Keys on the Operation Panel
118
Performing a Scan Using a Shortcut Key
119
Registering a Shortcut Key/Confirming the Destination Registered in the
119
Shortcut Key
119
Performing a Scan Using a Shortcut Key
120
Saving Scanned Documents to USB Memory Device
121
Device Status
122
Paper Information
122
E-Mailing Scanned Documents
123
Sending Scanned Documents to a File Server
124
Chapter 8 Maintenance
125
Maintenance
125
Cleaning the Machine
126
Cleaning the Exterior
126
Cleaning the Fixing Unit
126
Cleaning the Platen Glass
127
Cleaning the Feeder
127
Cleaning the Feeder Automatically
127
Precautions When Cleaning the Machine
128
Replacing Toner Cartridges
129
When a Message Appears
129
The Output Is Partially Faded
129
About Replacement Toner Cartridge
130
About the Supplied Toner Cartridge
130
Handling Toner Cartridge
130
Purchasing Consumables
131
Storing Toner Cartridges
131
Using the Toner Saver Mode
131
Before Replacing the Toner Cartridge
132
Replacing the Toner Cartridge
132
Precautions When Replacing Toner Cartridge
133
Recycling Used Cartridges
135
The Clean Earth Campaign
135
U.s.a. Program
135
Packaging
135
Shipping
136
Canada Program-Canada Programme
137
Relocating the Machine
138
Precautions When Relocating the Machine
139
Chapter 9 Troubleshooting
141
Troubleshooting
141
Clearing Jams
142
Document Jams in the Feeder
142
Paper Jams in the Output Area
144
Paper Jams in the Multi-Purpose Tray
144
Paper Jams in the Paper Drawer (Drawer 1 or 2)
144
Paper Jams in the Back Cover and Duplex Unit
145
Paper Jams in the Front Cover
146
Paper Jams in the 2-Sided Transport Guide
147
Onscreen Message
148
Error Codes
148
When <Incorrect Size/Setting> Appears
151
Troubleshooting
152
Check the Following First
152
Are the Settings Properly Configured
152
Has the Power Switch Been Just Turned on
152
Is the Error Indicator on or Blinking
152
Is the Machine in the Sleep Mode
152
Is the Power Switched on
152
Does a Message Appear on the Screen
153
Is the Telephone Line Connected or Configured Properly
153
If You Cannot Solve a Problem
153
When a Power Failure Occurs
154
Printing Results Are Not Good
155
Paper Curls
155
Paper Creases
156
Vertical Streaks Appear on the Output
157
Toner Smudges and Spatters Appear Around Text and Images
158
The Bottom Edge of Paper or Following Paper Has Smudge Marks
158
A Portion of the Page Is Not Printed
159
When a Problem Cannot be Resolved
160
Customer Support (U.S.A.)
160
Customer Support (Canada)
160
Setting Menu List
161
Printing a User Data List
161
Contents of the Setting Menu
161
Setting Menu List
162
Address Book List
162
Print Reports
162
Appendix
169
Main Specifications
170
Copy Specifications
170
Machine Specifications
170
Printer Specification
170
Wireless LAN Specification (Mf5950Dw Only)
170
Fax Specifications
171
Optional Drawer
171
Scanner Specifications
171
Telephone Specifications
171
Transmission Specification
171
For Macintosh Users
172
Are Unavailable on the Macintosh
172
Displaying a Driver's Help System
172
Displaying Driver Guides
172
Index
173
Advertisement
Canon imageCLASS MF5960dn Service Manual (176 pages)
Brand:
Canon
| Category:
All in One Printer
| Size: 15.41 MB
Table of Contents
Table of Contents
4
Safety Precautions
9
CDRH Provisions
10
Laser Safety
10
About Laser Beams
10
Handling Laser Scanner Unit
10
Toner Safety
11
About Toner
11
Handling Adhered Toner
11
Notes When Handling a Battery
11
Notes on Assembly/Disassembly
11
Product Overview
12
Product Lineups
12
Main Unit
13
Options
14
Product Features
15
Features
15
Specifications
15
Main Unit Specifications
15
ADF Specifications
17
FAX Specifications
17
Print Speed
18
Paper Types
18
Paper Size
18
Name of Parts
19
External View
19
MF5900/6100 Series
19
D1300 Series
20
Cross Sectional View
21
MF5900/6100 Series
21
D1300 Series
22
Operation Panel
23
Main Operation Panel
23
FAX Operation Panel
24
Technical Overview
25
Basic Configuration
25
Configuration Function
26
Basic Sequence
26
Basic Operational Sequence
26
Print Sequence
27
Print Mode
28
Document Exposure / Delivery System
29
Specifications / Control / Function List
29
Major Components
29
Document Feeder System
30
Pickup/Feed/Delivery Operation
30
Original Detection
31
Jam Detection
32
Service Tasks
32
Action for Parts Replacement
32
Maintenance
32
Service Notes
32
Controller System
33
Outline
33
Controls
33
Motor / Fan Control
34
Failure Detection
35
Low-Voltage Power Supply
35
Outline
35
Low-Voltage Power Supply Unit Failure Detection
36
Power-Saving Mode
36
Protective Function
36
Safety
36
Service Tasks
37
Action for Parts Replacement
37
Maintenance
37
Service Notes
37
Laser Exposure System
38
Outline
38
Optical Unit Failure Detection
38
Service Tasks
38
Action for Parts Replacement
38
Maintenance
38
Service Notes
38
Image Formation System
39
Outline
39
Image Formation Process
39
Developing Block
40
Latent Image Formation Block
40
Drum Cleaning Block
41
Fixing Block
41
Transfer Block
41
High-Voltage Power Supply
42
Outline
42
Service Tasks
42
Action for Parts Replacement
42
Maintenance
42
Notes on Field Service
42
Fixing System
43
Outline
43
Fixing Control Circuit
44
Throughput Reduction Control
44
Fixing Temperature Control
45
Protective Function
45
Failure Detection
46
Service Tasks
46
At Parts Replacement
46
Maintenance
46
Notes on Service Works
46
Pickup / Feed System
48
Outline
48
Drive Configuration
48
Jam Detection
49
Outline
49
Delivery Delay Jam
50
Delivery Stationary Jam
50
Door Open Jam
50
Fixing Paper Wrap Jam
50
Internal Residual Jam
50
Pickup Delay Jam
50
Pickup Stationary Jam
50
Reverse Delay Jam
50
Reverse Stationary Jam
50
Service Tasks
50
Periodical Services
51
Periodically Replaced Parts
52
Consumable Parts
52
Periodical Service
52
Cleaning
52
Disassembly/Assembly
53
List of Parts
53
External View
54
MF5900/6100 Series
54
D1300 Series
55
Main Unit
56
Main Parts
57
Sensor / Switch
57
Motor / Fan
58
Other
58
Pcb
59
Connector Layout Drawing
60
External Cover (D1300 Series)
64
Removing the Left Cover Unit
64
Removing the Left Rear Cover
66
Removing the Right Cover Unit
67
Removing the Front Cover Unit
69
Removing the Rear Cover Unit
70
Removing the Upper Cover
71
External Cover (MF5900/MF6100)
72
Removing the Left Cover Unit
72
Removing the Left Rear Cover
73
Removing the Right Cover
74
Removing the Front Cover
76
Removing the Rear Cover Unit
76
Removing the Upper Cover
78
Document Exposure / Delivery System
79
Removing the ADF Unit + Reader Unit
79
Removing the ADF Roller Unit
81
Removing the ADF Pickup Roller
82
Removing the ADF Separation Roller
83
Removing the ADF Separation Pad
85
Removing the ADF Pickup Feed Unit
86
Removing the ADF Pickup Motor Unit
89
Removing the ADF Delivery Solenoid Unit
90
Removing the Reader Unit Upper Cover
90
Removing the CIS Unit
92
Controller System
94
Removing the Controller Cover
94
Removing the Main Controller Board
94
Removing the NCU PCB (FAX Model Only)
96
Removing the off Hook PCB (FAX Model Only)
96
Removing the Controller Box
97
Removing the Engine Controller Unit
98
Removing the Control Panel
101
Removing the Main Motor
103
Removing the Main Fan
104
Removing the Main Drive Unit
105
Removing the Duplex Drive Unit
107
Removing the Duplex Reverse Solenoid
108
Removing the Cassette Pickup Solenoid
109
Laser Scanner System
110
Removing the Laser Scanner Unit
110
Image Forming System
111
Removing the Transfer Roller
111
Removing the Registration Unit
112
Fixing System
113
Removing the Fixing Assembly
113
Pickup / Feed System
115
Removing the Duplex Feed Unit
115
Removing the Cassette Pickup Roller
117
Removing the Cassette Separation Pad
118
Removing the MP Pickup Roller
118
Removing the MP Separation Pad
119
Adjustment
120
Overview
120
Actions after Replacement Parts
121
Document Exposure / Delivery System
121
After Replacing the ADF Unit
121
After Replacing the CIS Unit
121
After Replacing the Reader Unit
122
After Replacing the Reader Upper Cover Unit
122
Controller System
123
After Replacing the Main Controller PCB
123
Trouble Shooting
124
Test Print
124
Engine-Test Page
125
Controller Test Print
125
Trouble Shooting Items
126
Special Mode
126
Trailing Edge Image Soiling
127
Repetitive Image Defects Ruler
127
Nip-Width Specifications
128
Version
129
Overview of Upgrading
129
Firmware Configuration
129
Preparation
130
Before Downloading the System Software
130
Necessary System Environment
130
Downloading the System Software
131
Procedure of Downloading
131
Error Codes
133
Overview
133
Jam Code
133
Jam Code
134
Service Mode
138
Overview
138
Service Mode Menu
139
Backing up Service Mode
139
Screen Flow of Service Mode
140
Copier
141
Display
141
Err
141
Jam
141
Version
141
CCD
142
I/O
142
R-Con
142
Adjust
143
Adj-Xy
143
CCD
144
Feed-Adj
149
Function
150
CCD
150
Clear
151
Misc
151
System
152
Splman
152
Install
153
Body
154
User
155
Acc
155
Serial
155
Counter
156
Total
156
Pick
157
Jam
157
Feeder
157
Adjust
159
Function
160
Fax
161
List of SSSW
161
List of MENU
162
List of NUM
163
Setting of NCU Parameters
163
Tone/Pulse
163
2Nd DIAL TONE
164
Dial Tone
164
Busy Tone
165
Auto
166
Cng Detect
166
Multi
166
Reorder Tone
166
Dam
167
Ftsw Ogm
167
Pbx Busy Tone
167
Pbx Dial Tone
167
Rkey
167
Testmode
168
Print
168
Fax
169
Modem
169
Faculty
170
Appendex
171
Service Tools
171
Solvents and Oils
171
General Timing Chart
171
General Circuit Diagram
171
General Circuit Diagram (1/2)
174
General Circuit Diagram (2/2)
174
Backup Data
176
Canon imageCLASS MF5960dn Starter Manual (37 pages)
Black & White Laser Multifunction Printer
Brand:
Canon
| Category:
All in One Printer
| Size: 22.31 MB
Table of Contents
Fax Settings
2
Setting up
2
Supplied Toner Cartridge
3
Basic Operation Guide
5
Installation Site
6
Preparing the Toner Cartridges
8
Open the Front Cover
8
The Toner Cartridge
8
Loading Paper
10
Connecting the Power Cord
11
Initial Settings
12
Turn on the Machine
12
Setting a Paper Size and Type
13
Initial Fax Settings/Connecting Telephone Cable
14
Connect the Lan Cable
19
For Windows
20
Installing Via Network Connection
20
Connect the Usb Cable
23
Checking the Installation Results
24
Installing the Software
25
Connecting a Usb Cable
26
For Macintosh
27
Tcp/Ip Connection
28
Usb Connection
29
Checking the Ip Address
32
If You Want to Uninstall the Installed Software
33
Advertisement
Canon imageCLASS MF5960dn Settings Manual (21 pages)
Wireless LAN Setting Guide
Brand:
Canon
| Category:
Printer
| Size: 0.7 MB
Table of Contents
Step1 Checking before the Setup
3
Step2 Switching the Connection Method to Wireless LAN
4
Network Key
9
Troubleshooting
11
When an Error Message Appears
12
If Problems Occur
14
Checking Network Connections
16
Canon imageCLASS MF5960dn Product Specifications (4 pages)
Black & White Laser Multifunction Printers
Brand:
Canon
| Category:
All in One Printer
| Size: 5.37 MB
Advertisement
Related Products
Canon imageCLASS MF5950dw
Canon imageCLASS MF5900 Series
Canon MF5930dn
Canon MF5940dw
Canon MF5980dn
Canon MF5980dw
Canon imageCLASS MF5630
Canon imageCLASS MF5550
Canon imageClass MF5650
Canon imageCLASS MF5699 Series
Canon Categories
Printer
Digital Camera
All in One Printer
Camcorder
Scanner
More Canon Manuals
Login
Sign In
OR
Sign in with Facebook
Sign in with Google
Upload manual
Upload from disk
Upload from URL