Viessmann Vitotronic 100 GC1 Installation And Service Instructions Manual
Digital boiler control unit outdoor-reset logic digital cascade control, for installation in custom control panel
Hide thumbs
Also See for Vitotronic 100 GC1:
Table of Contents
Advertisement
Quick Links
Installation and
Service Instructions
\
for use by heating contractor
Vitotronic 100, Model GC1
Digital boiler control unit
Vitotronic 300-K, Model MW1S
Outdoor-reset logic digital cascade control, for installation in Custom Control Panel
VITOTRONIC 100, GC1
VITOTRONIC 300-K, MW1S
Certified as a component part
of Viessmann boilers only
5581 750 v1.3 11/2011
Advertisement
Chapters
Table of Contents
Troubleshooting

Related Manuals for Viessmann Vitotronic 100 GC1


Summary of Contents for Viessmann Vitotronic 100 GC1
- Page 1 Vitotronic 100, Model GC1 Digital boiler control unit Vitotronic 300-K, Model MW1S Outdoor-reset logic digital cascade control, for installation in Custom Control Panel VITOTRONIC 100, GC1 VITOTRONIC 300-K, MW1S Certified as a component part of Viessmann boilers only 5581 750 v1.3 11/2011...
- Page 2 General information Safety, Installation and Warranty Requirements Please ensure that this manual is read and uderstood before commencing installation. Failure to comply with the issues listed below and details printed in this manual can cause product/property damage, severe personal injury, and/or loss of life.
-
Page 3: Table Of Contents
Contents Index Page General information Product information ......................Heating system designs Summary of system versions . - Page 4 Contents Index (cont.) Installation – Vitotronic 300-K, MW1S Installing modules ........................Installing programming unit .
- Page 5 Contents Index (cont.) Function description – Vitotronic 300-K, MW1S Cascade control unit ..................... . Heating circuit control .
-
Page 6: Index (Cont.)
Contents Index (cont.) Coding – Vitotronic 300-K, MW1S Resetting codings to the factory setting ............. . Coding 1 . -
Page 7: General Information
General information Product information Vitotronic 100, GC1, and Vitotronic 300-K, MW1S Only for integration/installation on Viessmann boilers and for control panel mounting. These application examples are only recommendations, and must therefore be checked on site for completeness and function. Vitotronic 100, GC1, without LON communication module as part of the standard delivery. -
Page 8: Summary Of System Versions
General information Summary of system versions Boiler Characteristics Page 1 Vitorond Shunt pump for controlling return temperature for each boiler 2 Vitorond Common supply pump and low-pressure manifold Three-way mixing valve for controlling return temperature Low loss header and three-way mixing valve for controlling return temperature 5 Vitocrossal Several heating circuits and one low temperature heating circuit 6 Vitocrossal,... -
Page 9: System Versions 1 To 7
Heating system designs System version 1 Return temperature control of each boiler with shunt pump Vitorond 200 A Boiler with Vitotronic 100, GC1 B Vitotronic 300-K, MW1S C DHW tank D Mixing valve circuit Plug sÖM2/M3Heating circuit pump mixing lÖ Outdoor temperature sensor Burner Supply temperature sensor... - Page 10 Heating system designs System version 1 (cont.) Codings must be set on every Vitotronic 100, GC1. Vitotronic 100, GC1 Required coding 01: 2 Multi-boiler system with cascade control via LON BUS 02: 2 Modulating burner operation 03: 1 Oil fired operation (non-reversible) Setting the boiler number on the Vitotronic of 07: 2 boiler 2...
- Page 11 Heating system designs System version 2 Common supply pump and low pressure distribution manifold Vitorond 200 A Boiler with Vitotronic 100, GC1 B Vitotronic 300-K, MW1S C DHW tank D Mixing valve circuit Plug sÖA1 lÖ Outdoor temperature sensor Closing the mixing valves Burner Supply temperature sensor with external heating circuit...
- Page 12 Heating system designs System version 2 (cont.) Coding must be set on every Vitotronic 100, GC1. Vitotronic 100, GC1 Required coding 01: 2 Multi-boiler system with cascade control via LON BUS 02: 2 Modulating burner operation 03: 1 Oil fired operation (non-reversible) Setting the boiler number on the Vitotronic of 07: 2 boiler 2...
- Page 13 Heating system designs System version 2 (cont.) Possible applications Temperature sensor T1 If the distribution manifold is located in Wiring diagram for reducing the volume a remote location (> 20 m / 65 ft). The flow rate in heating systems with heat transfer to the heating circuits heating circuit control units, which are must be able to be reduced.
- Page 14 Heating system designs System version 3 Controlling the return temperature with a 3-way mixing valve Vitorond 200 A Boiler with Vitotronic 100, GC1 B Vitotronic 300-K, MW1S C DHW tank D Mixing valve circuit Plug sÖM2/M3Heating circuit pump mixing lÖ Outdoor temperature sensor Burner Supply temperature sensor...
- Page 15 Heating system designs System version 3 (cont.) Coding must be set on every Vitotronic 100, GC1. Vitotronic 100, GC1 Required coding 01: 2 Multi-boiler system with cascade control via LON BUS 02: 2 Modulating burner operation 03: 1 Oil fired operation (non-reversible) Setting the boiler number on the Vitotronic of 07: 2 boiler 2...
- Page 16 Heating system designs System version 4 Controlling the return temperature with a low loss header and a three-way mixing valve Vitorond 200 A Boiler with Vitotronic 100, GC1 E Low loss header B Vitotronic 300-K, MW1S D Mixing valve circuit C DHW tank Plug aVD/aVH External connections...
- Page 17 Heating system designs System version 4 (cont.) Coding must be set on every Vitotronic 100, GC1. Vitotronic 100, GC1 Required coding 01: 2 Multi-boiler system with cascade control via LON BUS 02: 2 Modulating burner operation 03: 1 Oil fired operation (non-reversible) Setting the boiler number on the Vitotronic of 07: 2 boiler 2...
- Page 18 Heating system designs System version 5 Heating circuit and one low temperature heating circuit Vitocrossal 300 A Boiler with Vitotronic 100, GC1 B Vitotronic 300-K, MW1S C DHW tank D Mixing valve circuit E Neutralising system Plug sÖM2/M3Heating circuit pump mixing Outdoor temperature sensor Burner (burner stage 1) gSA1...
- Page 19 Heating system designs System version 5 (cont.) Codings must be set on every Vitotronic 100, GC1. Vitotronic 100, GC1 Required coding 01: 2 Multi-boiler system with cascade control via LON BUS 02: 2 Modulating burner operation Setting the boiler number on the Vitotronic of 07: 2 boiler 2 07: 3...
- Page 20 Heating system designs System version 5 (cont.) Possible applications Vitocrossal 300 is operated via a Viessmann boiler control unit with outdoor reset function, modulating boiler water temperature, and load-dependent sequential control – two-stage or modulating burners are controlled. Vitocrossal 300 is equipped with two return connections.
- Page 21 Heating system designs System version 6 Heating circuit and one low temperature heating circuit plus Vitorond with shunt pump Vitocrossal 300 Vitorond 200, 125 kW-500 kW A Boiler with Vitotronic 100, GC1 D Mixing valve circuit B Vitotronic 300-K, MW1S E Neutralizing system C DHW tank Plug...
- Page 22 Heating system designs System version 6 (cont.) Coding must be set on every Vitotronic 100, GC1. Vitotronic 100, GC1 Required coding 01: 2 Multi-boiler system with cascade control via LON BUS 02: 2 Modulating burner operation Only with Vitotronic 100, GC1 for low temperature boiler: 03: 1 Oil fired operation (non-reversible) Setting the boiler number on the Vitotronic of...
- Page 23 (cont.) Possible applications The Vitocrossal 300 (lead boiler) and the Vitorond 200 (lag boiler) are operated via a Viessmann control system with outoor reset logic, modulating boiler water temperature, and load-dependent sequential control – two-stage or modulating burners are controlled.
- Page 24 Heating system designs System version 7 Three-way mixing valve, several heating circuits and one low temperature heating circuit Vitocrossal 300 Vitorond 200, 125KW- 500 KW A Boiler with Vitotronic 100, GC1 C DHW tank E Neutralizing system B Vitotronic 300-K, MW1S D Mixing valve circuit Plug Outdoor temperature sensor...
- Page 25 Heating system designs System version 7 (cont.) Coding must be set on every Vitotronic 100, GC1. Vitotronic 100, GC1 Required coding 01: 2 Multi-boiler system with cascade control via LON BUS 02: 2 Modulating burner operation 03 : 1 Only with Vitotronic 100, GC1 for low temperature boiler: Oil fired operation (non-reversible) Setting the boiler number on the Vitotronic of 07: 2...
- Page 26 For heating circuits with temperature differentials ≥20 °C / 68 °F The Vitocrossal 300 (lead boiler) and the next Vitorond (lag boiler) are operated via a Viessmann control system with outdoor reset logic, modulating boiler water temperature, and load-dependent sequential control – two-stage or modulating burners are controlled.
-
Page 27: Installation - Vitotronic
Installation – Vitotronic 100, GC1 Summary of electrical connections A1/M1 A1/M1 Low voltage connections (motherboard) Line voltage connections (motherboard) § sÖA1 DHW recirculation pump – lÖ Boiler temperature sensor Burner (burner stage 2/mod.) aBÖ No function External connections, Flue gas temperature sensor switched output e.g. - Page 28 Installation – Vitotronic 100, GC1 Summary of electrical connections (cont.) External line voltage connections...
-
Page 29: Inserting Cables And Applying Strain Relief
Installation – Vitotronic 100, GC1 Inserting cables and applying strain relief Run the cables from the connection enclosure into the control unit. Apply strain relief to cables (see below). Cables with moulded strain relief clamp Connect cable and strain relief clamp. Fasten cable to the cable lead with cable tie. -
Page 30: Inserting The Boiler Coding Card
Installation – Vitotronic 100, GC1 Inserting the boiler coding card Only use the boiler coding card included with the boiler. Boiler Coding card Part no. Vitocrossal 300, type CT3 1040 7820 144 Vitorond 200 1020 7820 142 Insert the boiler coding card through the cut-out in the cover into slot X7. -
Page 31: Setting Of The Fixed High Limit
Installation – Vitotronic 100, GC1 Setting of the fixed high limit (if required) Settings on the control unit The setting for the fixed high limit and the other settings are dependent in the safety equipment installed in The fixed high limit is supplied with accordance with applicable codes. -
Page 32: Changing The Adjustable High Limit
Installation – Vitotronic 100, GC1 Setting of the adjustable high limit (if required) The adjustable high limit is supplied with a factory setting of 95 °C/ 203 °F . Adjustment to 100 or 110 °C / 212 or 230 °F A B C 1. - Page 33 Installation – Vitotronic 100, GC1 Connection of the boiler temperature sensor The sensor measures the boiler water temperature of the boiler. The boiler temperature sensor is installed at the same time as the boiler insulation. Check the sensor 1. Disconnect plug § in the terminal compartment of the boiler control.
-
Page 34: Sensor Connection
Installation – Vitotronic 100, GC1 Connection of the return temperature sensor Strap-on temperature sensor and immersion temperature sensor For measuring the supply and return temperature. Electrical connection The sensor is inserted in socket ”17A” 17A or 17B or ”17B” on the control unit. Check the sensor 1. - Page 35 Installation – Vitotronic 100, GC1 Connection of the flue gas temperature sensor The sensor measures the flue gas temperature and monitors the selected limit value. Electrical connection The sensor is inserted in socket ”15” on the control unit. Check flue gas temperature sensor 1.
-
Page 36: Pump Connection
Installation – Vitotronic 100, GC1 Connection of the pumps A Connection enclosure on boiler Available pump connections control Shunt pump, boiler circuit pump B 120 VAC DHW tank pump or Terminals 6 - L, - G, - N in line voltage connection enclosure. -
Page 37: Connections To Boiler Return Mixing Valve Or Isolation/Modulating Valve Actuator
Installation – Vitotronic 100, GC1 Connection of boiler return mixing valve or isolation / modulating valve actuator 1 120V or 24V Valve Adaptor 1 120V Valve Adaptor 1 24V Valve Adaptor 2 DIN rail in connection enclosure 2 120V Valve actuator 2 24V Valve actuator 3 aBH Terminals 120V Valve Adaptor... -
Page 38: External Connections
Installation – Vitotronic 100, GC1 Connection of external controls A Boiler disable B Activate boiler as last in the boiler sequence C External changeover between staged/modulating burner Activate boiler as last in the boiler sequence. Connect dry contact at terminals “2” Boiler disable External changeover between and “3”... -
Page 39: Connection To Low Water Cut-Off Device
Installation – Vitotronic 100, GC1 Connection of the low water cut-off device 1.Disconnect power to control and burner 2.Remove jumper between terminals 12 and 15 3.Make connection as shown in diagram. aBH Power supply for accessories, 120 VAC aBÖ Connection for external safety equipment, 120 VAC... -
Page 40: Connection To Combustion Air Devices
Installation – Vitotronic 100, GC1 Connection of combustion air devices Connection of the Combustion Air Device Adaptor 1.Disconnect power to control and burners. 2.Install Combustion Air Device Adaptor, PN: 7134 563 on DIN Rail inside connection enclosure (refer to installation manual of Combustion Air Device Adaptor). - Page 41 Installation – Vitotronic 100, GC1 Connection of combustion air devices (contd.) Connection of the combustion air damper See damper manual for correct installation. Assure that the combustion air damper is suitable for this application. 1. Disconnect power to control and burner.
- Page 42 Installation – Vitotronic 100, GC1 Connection of single combustion air devices on mulitple boiler system If a single combustion air device is required for a multiple boiler system, a Common Combustion Air Interface must be installed. Rated voltage: 120 VAC Rating current: max 5 FLA Recommended connection...
- Page 43 Installation – Vitotronic 100, GC1 Connection of single combustion air devices on mulitple boiler system Connection of the combustion air blower A Common Combustion Air Device Interface B Combustion air device motor 120VAC, 5 FLA max. C Proving switch rated for 120 VAC D Power supply, 120 VAC ¨Safety instruction! Provide disconnect means and...
- Page 44 Installation – Vitotronic 100, GC1 Connection of single combustion air damper Connection of the combustion air damper A Common Combustion Air Device Interface B Combustion air device motor 120VAC, 5 FLA max. C Proving switch rated for 120 VAC D Power supply, 120 VAC E Relay, field supplied ¨...
- Page 45 Installation – Vitotronic 100, GC1 Connection of the compiled failure alarm Rated voltage: 120 VAC 60 Hz Rated current: max. 2 FLA Recommended connection wire size: AWG 14 1. Disconnect power to control and burner. 2. Connect the compiled failure alarm as shown in the diagram.
-
Page 46: Inserting The Lon Communication Module
Installation – Vitotronic 100, GC1 Plugging in the LON communication module Plug in the LON communication module in accordance with the illustration in the control unit. Making the LON connection See page 69. -
Page 47: Burner Connection, Burner Control Wiring
Installation – Vitotronic 100, GC1 Burner connection, burner control wiring For burners with plug-in connection The burner cables are included in the standard delivery of the Vitotronic. Connect the burner in accordance with applicable codes. ATo boiler control unit 1.Disconnect power to burner and BTo burner boiler control. - Page 48 Installation – Vitotronic 100, GC1 Burner connection, burner control wiring (continued) Caution! This is a generic connection drawing only! Follow the burner manufacturer’s connection drawings for Viessmann controls. Write the terminal numbers or markings on the drawing for future reference.
- Page 49 Burner connection, burner control wiring (continued) See burner manual for correct Burner motor power supply connection fuse and wire gauge sizing, and specific connections for Viessmann For burners with 120 VAC, 1PH power controls. supply and soft cable connection. 1.Disconnect power to burner and boiler control.
- Page 50 Burner motor power supply connection See burner manual for correct fuse and wire gauge sizing, and specific For burners with 120 VAC, 1PH power connections for Viessmann controls. supply and connection in conduit. 1.Disconnect power to burner and boiler control.
- Page 51 See burner manual for correct fuse For burners with 240 VAC, 1PH power and wire gauge sizing, and specific supply and connection in conduit. connections for Viessmann controls. 1.Disconnect power to burner and boiler control. 2.Connect 240 VAC power to the...
- Page 52 Burner motor power supply connection See burner manual for correct fuse and wire gauge sizing, and specific For burners with 3PH 208, 460 or connections for Viessmann controls. 575V power supply. 1.Disconnect power to burner and boiler control. 2.Connect 3PH power to the terminals 21, 22, 23 and 24 on the DIN rail inside the connection enclosure.
-
Page 53: Power Supply
Installation – Vitotronic 100, GC1 Connection to power supply 1. Ensure that the main power supply to the control contains overcurrent protection with a maximum rating of 15 A and 2 pole disconnect. WARNING The control must be grounded. Ensure that “L”, “N” and “G” are not interchanged. -
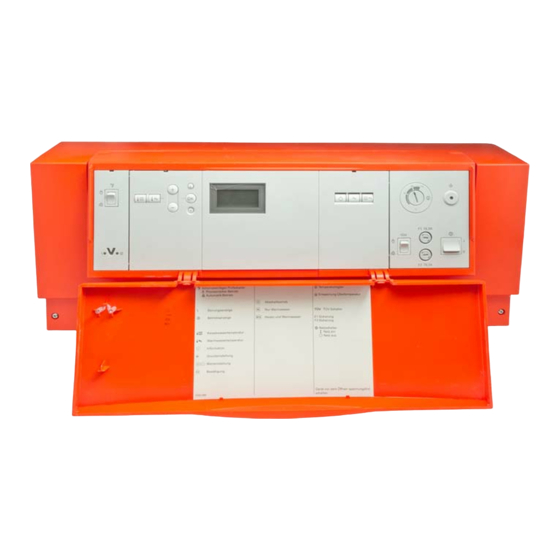
Page 54: Installing The Control Unit Front
Installation – Vitotronic 100, GC1 Installing the control unit front 1. Position the front part of the housing and clip hinges to counter-parts on main housing. 2. Release the stay bar, open it up and lock in position at point A. 3. -
Page 55: Opening The Control Unit
Installation – Vitotronic 100, GC1 Opening the control unit 1. Remove the cover of the connection enclosure. 2. Unscrew the screws from the front housing. 3. Swing up the front part of the control housing. 4. Position the stay bar so that it supports the front housing. -
Page 56: Installation - Vitotronic 300-K, Mw1S
Installation – Vitotronic 333, MW1S Installing modules 1. Install the modules in accordance with the layout indicated on DIN rail inside the control panel. 2. Connect the modules in accordance with the overview on page 58 and 59, using the connecting cables provided. - Page 57 Installation – Vitotronic 333, MW1S Installing the programming unit (cont.)
-
Page 58: Summary Of Electrical Connections
Installation – Vitotronic 300-K, MW1S Summary of electrical connections F1 4A (slow) - Page 59 Installation – Vitotronic 333, MW1S Summary of electrical connections...
-
Page 60: External Connections
Installation – Vitotronic 300-K, MW1S Summary of electrical connections A1 Power supply module A3 Power module fÖ sÖA1 Heating circuit pump or Power supply connection DHW tank loading system DHW tank pump (accessories) DHW re-circulation pump A2 Cascade electronic module Outdoor temperature sensor Shunt or supply pump gÖ... -
Page 61: Sensor Connection
Installation – Vitotronic 300-K, MW1S Sensor connection (continued) Outdoor temperature sensor The outdoor temperature sensor should be mounted 2 to 2.5 metres above ground level on the north or north-west facing wall of the building. In the case of multi-storey buildings, it should be mounted in the upper half of the second storey. - Page 62 Installation – Vitotronic 300-K, MW1S Sensor connection (continued) Strap-on temperature sensor and immersion temperature sensor For measuring the supply temperature. Electrical connection Connect in accordance with the overview on page 58 and 59 and the control panel wiring diagram. Remove the plug from the sensor cable.
- Page 63 Installation – Vitotronic 300-K, MW1S Sensor connection (continued) Strap-on temperature sensor and immersion temperature sensor For measuring the return temperature. Electrical connection 17A or 17B Connect in accordance with the overview on page 58 and 59 and the control panel wiring diagram. Remove the plug from the sensor cable.
- Page 64 Installation – Vitotronic 300-K, MW1S Sensor connection (continued) DHW tank temperature sensor The sensor measures the domestic hot Heating systems with domestic hot Check the sensor 1. Disconnect the sensor from the water tank temperature. water heating (single-boiler systems terminals. only) 1.
-
Page 65: Pump Connection
Installation – Vitotronic 300-K, MW1S Connection of the pumps Available pump connections sÖ Heating circuit pump or common supply pump, DHW tank loading system on A3 heating circuit pump, mixing valve circuits M2, M3 on A4 sA DHW tank loading pump on A3 sK DHW re-circulation pump on A3 sL Shunt pump or supply pump on A3 Implement the connection on A3 or A4... -
Page 66: External Connections
Installation – Vitotronic 300-K, MW1S Connection of external contacts Implement the connection aVD/aVH on Dry contacts: A External heating program A2 in accordance with the overview on page 58 and 59 and the control panel changeover/ wiring diagram. external ”Mixing valve open” B External blocking/ external ”Mixing valve close”... -
Page 67: Connection To Compiled Failure Alarm
Installation – Vitotronic 300-K, MW1S Connection of the compiled failure alarm Implement the connection in accordance with the overview on page 58 and 59 and control panel wiring diagram. -
Page 68: Making The Lon Connection
Installation – Vitotronic 300-K, MW1S Making the LON connection The Viessmann LON system is designed for the Line BUS topology with end of line resistors on both ends. Connection with Viessmann LON cable 7 m / 23 ft 7 m / 23 ft... - Page 69 900 m / 3000 ft. A Control unit or Vitocom Please note: B LON cable, part no. 7143 495 The Viessmann LON system always C End of line resistor (standard requires the two wires and shielding. delivery of Vitotronic 300-K, Wires are interchangeable.
-
Page 70: Power Supply
Installation – Vitotronic 300-K, MW1S Power supply Implement the connection in accordance with the overview on page 58 and 59 and control panel wiring diagram. -
Page 71: Steps
Initial start-up Steps Page 1. Checking the heating circuit allocation (Vitotronic 300-K, MW1S) ..................................2. Changing the display language selection (Vitotronic 300-K, MW1S, if necessary) ........................3. Checking the fixed high limit (Vitotronic 100) ..............................................4. Connecting control units into the LON system .............................................. -
Page 72: Further Step-By-Step Instructions
Initial start-up Further step-by-step instructions Checking the heating circuit allocation (Vitotronic 300-K, MW1S Check whether the label for heating Press the corresponding button circuit allocation has been affixed to before commencing any adjustments. the corresponding field of the Boiler temperature programming unit. -
Page 73: Connecting Control Units Into The Lon System
Initial start-up Further step-by-step instructions (cont.) Connecting control units to the LON system The LON communication module must be plugged in (see page 46). Please note: Data transfer via the LON system can take several minutes. Vitotronic 100, GC1 1. Setting the system type Set coding 1 to 01 : 2. - Page 74 Initial start-up Further step-by-step instructions (cont.) Updating the LON particpant list on Vitotronic 300-K, MW1S Only possible if all participants are connected and the control unit is programmed as fault manager (coding 79 : 1, factory default condition) Please note: In each heating system, only one Vitotronic may be encoded as fault manager.
- Page 75 Set coding 07 : 1 07 : 2 –– –– Number of connected boilers –– Set coding 35 : 2 Viessmann system number Viessmann system number Viessmann system number –– Coding Coding Coding 98 : 1 98 : 1 98 : 1...
-
Page 76: Carrying Out A Participant Check (Vitotronic 300-K, Mw1S)
Initial start-up Further step-by-step instructions (cont.) Carrying out a participant check (Vitotronic 300-K, MW1S) The communication with the system devices connected to the fault manager is tested with a participant check. Preconditions: The control unit must be encoded as fault manager (coding 79 : 1). The LON participant number must be encoded in all control units (see page 73). -
Page 77: Match The Coding Addresses To The Respective System Version
Function plug sÖ Oil or gas operation Function plug sL Boiler number Function plug gS LON participant number Viessmann system number Vitotronic 333, MW1S Function plug sL In coding 1, set the following coding Heating circuit pump logic Function plug gS... - Page 78 Initial start-up Further step-by-step instructions (cont.) Matching the control unit to a two stage burner (Vitotronic 100, GC1) 1. Start up the burner. 5. Press 9 and simultaneously Record the relevant value. for approx. two seconds. 2. Set the override switch to Relay test is activated.
- Page 79 Initial start-up Further step-by-step instructions (cont.) Matching the control unit to a modulating burner (Vitotronic 100, GC1) Please note: The burner must be fully adjusted. To achieve a wide modulating range, set the minimum output as low as possible (observe the chimney and flue gas system). 1.
-
Page 80: Checking Outputs (Actuators) And Sensors
Initial start-up Further step-by-step instructions (cont.) Checking outputs (actuators) and sensors Vitotronic 100 Relay test 1. Press 9 and simultaneously for 3. Press approx. two seconds. 1 2 3 4 5 6 7 2. Select the relay outputs with The following relay outputs may be selected: Display Relay function indication... -
Page 81: Selecting The Boiler Sequence (Vitotronic 300-K, Mw1S)
Initial start-up Further step-by-step instructions (cont.) Vitotronic 300-K, MW1S Relay test 1. Press 9 and simultaneously for 3. Press Relay test approx. two seconds. 2. Select the relay outputs with The following relay outputs may be selected: Output 20 ON Mixing valve (M2) open Please note: Output 29 ON... -
Page 82: Adjusting The Heating Curve (Vitotronic 300-K, Mw1S)
Initial start-up Further step-by-step instructions (cont.) Adjusting the heating curve (Vitotronic 300-K, MW1S) The heating curves illustrate the relationship between the outdoor temperature and the boiler water or the supply temperature. To put it simply: The lower the outdoor temperature, the higher the boiler water or supply temperature. The room temperature again depends on the boiler water or the supply temperature. - Page 83 Initial start-up Further step-by-step instructions (cont.) Changing slope and shift (for every heating circuit separately) 1. Call up slope with 2. Change the value with Slope adjustable value 0.2 to 3.5; call up shift with 3. Confirm the set value with adjustable value –13 to +40 °C / 8.6 to 104 °F.
- Page 84 Initial start-up Further step-by-step instructions (cont.) Adjusting the normal room temperature (for every heating circuit separately) Normal room temperature: The value will be automatically Select the normal day temperature transferred after approx. 2 seconds. Standard room temp. with the set value adjuster. Reduced room temperature: 2.
-
Page 85: Service Scanning - Vitotronic 100 Service Level Summary
Service scanning – Vitotronic 100, GC1 Service level summary Function Entry Exit Page Relay test Press the 9 and “OK” Press the “OK” button buttons simultaneously for approx. two seconds Temperatures, Press the 9 and rw Press the “OK” button boiler coding card buttons simultaneously for and brief scans... -
Page 86: Temperatures, Boiler Coding Card And Brief Scans
Service scanning – Vitotronic 100, GC1 Temperatures, boiler coding card and brief scans 1. Press 9 and rw simultaneously 3. Press for approx. two seconds. 1 2 3 4 5 6 7 2. Select the required scan with Subject to the system equipment level, the following values can be scanned: (for scans, see table below): Display Explanation... - Page 87 3 = Control 4 = Control open 5 = Open 6 = Time delay l l l l Output reduction 0 = OFF; 1 to 100% o o o o Equipment recognition Test code for Viessmann service technicians hexa-decimal: A0 decimal: 160...
-
Page 88: Scanning Operating Conditions
Service scanning – Vitotronic 100, GC1 Scanning operating conditions 1. Press 3. Press 1 2 3 4 5 6 7 2. Select the required operating condition scan with The following values can be scanned subject to the actual system layout: Display Explanation Notes... -
Page 89: Scanning And Resetting Maintenance Displays
Service scanning – Vitotronic 100, GC1 Scanning and resetting maintenance displays After limits have been reached, which were set up via coding addresses 1F, 21 and 23 (see page 143), the programming unit display flashes one of the following messages. Please note: Set coding 24 : 1 and then coding 24 : 0, if maintenance is implemented before a maintenance message is displayed;... -
Page 90: Service Scanning - Vitotronic 300-K, Mw1S Service Level Summary
Service scans – Vitotronic 300-K, MW1S Service level summary Function Entry Exit Page Adjusting display Press the “OK” and “+” –– –– contrast buttons simultaneously; the display will darken Press the “OK” and “-” buttons –– –– simultaneously; the display will get lighter Participant check Press the w and “OK”... -
Page 91: Temperatures And Brief Scans
Service scans – Vitotronic 300-K, MW1S Temperatures and brief scans 1. Press 9 and rw simultaneously Outside temp. adj. for approx. 2 seconds. 2. Select the required scan with 3. Press The following values can be scanned subject to the actual equipment level: Outdoor temperature dampened The dampened outdoor temperature Actual outdoor temperature... - Page 92 Scan Scan Display acc. to Number of KM system designs (s s ee coding address 00) participants Software version Software version Software version Software version Software version control unit programming mixing valve mixing valve Plug-in adaptor unit extension M2 extension M3 for ext.
-
Page 93: Scanning Operating Conditions
Service scans – Vitotronic 300-K, MW1S Scanning operating conditions 1. Press Outside temperature 2. Select the required scan with 3. Press The following values can be scanned subject to the actual equipment level: Participant number If a holiday program has been entered Holiday program with departure and return date Holiday program active... -
Page 94: Scanning And Resetting The Maintenance Display
Service scans – Vitotronic 300-K, MW1S Scanning and resetting maintenance display Vitotronic 300-K, MW1S displays a maintenance message if: Vitotronic 300-K, MW1S has been encoded as fault manager (coding 79 : 1) a maintenance message is displayed at a connected Vitotronic 100, GC1. 1. -
Page 95: Troubleshooting - Vitotronic 100 Fault Displays At The Programming Unit
Troubleshooting – Vitotronic 100, GC1 Faults displayed at the programming unit Red fault lamp A flashes for all faults. 1 2 3 4 5 6 7 A fault code flashes in the display if a fault message has been issued (see page 96). - Page 96 Troubleshooting – Vitotronic 100, GC1 Faults displayed at the programming unit (cont.) Fault Cause Remedy System characteristics code 0 0 0 0 f f f f Control mode Maintenance Carry out maintenance 0F is only displayed in the error Please note: history After maintenance, set coding 24 : 0.
- Page 97 Troubleshooting – Vitotronic 100, GC1 Faults displayed at the programming unit (cont.) Fault Cause Remedy System characteristics code b b b b 8 8 8 8 Control mode Flue gas temperature sensor open Check flue gas temperature sensor circuit (see page 124) b b b b f f f f Incorrect LON communication Replace communication module...
-
Page 98: Viewing Fault Codes From The Fault Memory (Error History)
Troubleshooting – Vitotronic 100, GC1 Viewing fault codes from the fault memory (error history) 1. Press rw and simultaneously for approx. 2 seconds. 1 2 3 4 5 6 7 2. Call up the individual fault codes with Order of fault Fault code codes occurred Last fault code... -
Page 99: Troubleshooting - Vitotronic 300-K, Mw1S Faults With Fault Display At The Programming Unit
Troubleshooting – Vitotronic 300-K, MW1S Faults displayed at the programming unit Fault Red fault indicator A flashes for all faults. If a fault message is recognized, Outdoor temp. sensor the display flashes Fault. D B G - Finding the fault 1. - Page 100 Troubleshooting – Vitotronic 300-K, MW1S Faults displayed at the programming unit (cont.) Fault display in plain text Calling up acknowledged fault Ext. fault messages Outdoor temperature sensor Press for approx. 3 seconds. Supply sensor The fault will then be displayed. DHW tank sensor (1 or 2;...
- Page 101 Troubleshooting – Vitotronic 300-K, MW1S Faults displayed at the programming unit (cont.) Fault Cause Remedy System characteristics code 4 4 4 4 0 0 0 0 Mixing valve closes Short circuit Check strap-on temperature sensor Strap-on temperature sensor (see page 126) of mixing valve circuit M2 4 4 4 4 4 4 4 4 Short circuit...
- Page 102 Troubleshooting – Vitotronic 300-K, MW1S Faults displayed at the programming unit (cont.) Fault Cause Remedy System characteristics code 7 7 7 7 0 0 0 0 Short circuit Shunt pump constantly ON Check temperature sensor Temperature sensor aJB With DHW heating: With DHW heating: (see page 126), (see page 126),...
- Page 103 Troubleshooting – Vitotronic 300-K, MW1S Faults displayed at the programming unit (cont.) Fault Cause Remedy System characteristics code b b b b c c c c Communication error Control mode without remote Check connections, cable, coding Vitotrol remote control, control address A0 and remote control DIP System circuit A1 switches (see page 137 and 154)
- Page 104 Troubleshooting – Vitotronic 300-K, MW1S Faults displayed at the programming unit (cont.) Fault Cause Remedy System characteristics code d d d d a a a a Control mode without room Short circuit Check room temperature sensor influence Room temperature sensor, (see page 139) and DIP switch on System circuit A1 Vitotrol (see page 130 and 132)
-
Page 105: Downloading Fault Codes From The Fault Memory (Error History)
Troubleshooting – Vitotronic 300-K, MW1S Viewing fault codes from the fault memory (error history) 1. Press rw and simultaneously Error history for approx. 2 seconds. 2. Call up the individual fault codes with Order of fault Fault code codes occurred Last fault code Error history last fault... -
Page 106: Function Description - Vitotronic 100 Boiler Temperature Control
Function description – Vitotronic 100 Boiler temperature control Brief description The boiler water temperature is Coding addresses which influence regulated by controlling a two stage the boiler temperature control or modulating burner. 02 to 06, 08 to 0b, 13 to 1C The set boiler water temperature For a description, see the coding set-point is controlled by Vitotronic... -
Page 107: Function Description - Vitotronic 300-K, Mw1S
Function description – Vitotronic 300-K, MW1S Cascade control unit Brief description The supply temperature is regulated by Subject to the system design, you starting or stopping the burner or by may select between one gross starting/stopping individual burner calorific strategy and two net stages. - Page 108 Function description – Vitotronic 300-K, MW1S Cascade control (cont.) Control sequence Stand-alone (Autonomous) type of control sequence Parallel boiler arrangement Boilers arranged in series (coding 3b : 0 without supply (coding 3b : 2 without supply temperature sensor or temperature sensor or coding 3b : 1 with supply coding 3b : 3 with supply temperature sensor)
- Page 109 Function description – Vitotronic 300-K, MW1S Cascade control (cont.) Sequential type of control sequence (coding 3b : 4) With the sequential type of control, the cascade control unit regulates to the required set supply temperature by pre-setting the output for each individual boiler.
- Page 110 Function description – Vitotronic 300-K, MW1S Cascade control (cont.) Net calorific strategy 1 Conventional boilers are preferably Benefit: operated at their upper output range, As few boilers as possible are active. to reliably prevent the formation of condensate due to low return temperatures.
- Page 111 Function description – Vitotronic 300-K, MW1S Cascade control (cont.) Control strategy example Two boiler system with modulating burner: Boiler 1: 100 kW rated output (basic load adjusted to 33 %, see page 78) Boiler 2: 100 kW rated output (basic load adjusted to 33 %, see page 78) Gross calorific strategy (coding 3C : 0) Start-up Switching OFF...
- Page 112 Function description – Vitotronic 300-K, MW1S Cascade control (cont.) Net calorific strategy 2 (coding 3C : 2) Start-up Switching OFF Time Time Boiler sequence The boiler sequence is determined by Boiler 1, 2, 3 or 4 permanent the boiler sequence selection and the lead boiler following coding addresses (see also Boiler 1, 2, 3 or 4 permanent...
-
Page 113: Heating Circuit Control
Function description – Vitotronic 300-K, MW1S Heating circuit control Brief description The control unit provides control system supply temperature. Coding addresses which influence the circuits for one high temperature The supply temperature of the heating circuit control (boiler) circuit and two mixing valve mixing valve circuits is regulated 9F, A2 to A7, A9, C4 to C7, C8, F1, circuits. - Page 114 Function description – Vitotronic 300-K, MW1S Heating circuit control (cont.) Domestic hot water temperature Room temperature Heating circuit pump logic With priority control: in conjunction with remote control (economy circuit) The set supply temperature will be and room temperature input (observe The heating circuit pump is switched set to 0 ˚C / 32 ˚F during DHW coding address b0).
- Page 115 Function description – Vitotronic 300-K, MW1S Heating circuit control (cont.) Extended economy circuit System dynamics – mixing valve circuit The heating circuit pump is switched (only in conjunction with a mixing valve OFF, and the set supply temperature circuit) is set to 0 ˚C / 32 ˚F, if the outdoor temperature exceeds the You can influence the control value selected via coding address A6...
- Page 116 Function description – Vitotronic 300-K, MW1S Heating circuit control (cont.) Supply temperature control Differential temperature: The differential temperature may be adjusted via coding address 9F; factory supplied setting 8 ˚C / 15 ˚F . The differential temperature is that minimum temperature differential by which the common supply temperature should be higher than the currently required supply temperature of the...
-
Page 117: Dhw Tank Temperature Control
Function description – Vitotronic 300-K, MW1S DHW tank temperature control Brief description The DHW tank control logic is a During DHW tank heating, a constant Coding addresses which influence set-point control. It is the result of boiler supply temperature will be set the DHW tank control starting and stopping the DHW pump. - Page 118 Function description – Vitotronic 300-K, MW1S DHW tank temperature control (cont.) Control sequence Pump delay Coding 55 : 1: Coding 55 : 3: The DHW pump continuous operation Adaptive DHW tank heating DHW tank control – DHW heating (for (coding 62 : 10) after the DHW tank DHW heating systems only) heating, until With adaptive DHW tank heating, the...
-
Page 119: Components - Vitotronic
Components – Vitotronic 300-K, MW1S Components from the parts list Power supply module A1 Programming unit The programming unit is set into Cascade ekectronics module A2 the front door of the control panel. Setting the: With PCB. Heating program Microprocessor with software Set values Switching times When replacing the Printed Circuit... - Page 120 Components – Vitotronic 300-K, MW1S Fuse F1 T4 A, 250 V, max. power loss x 1.6 W A1 Power supply module...
- Page 121 Components – Vitotronic 100, GC1 Components from the parts list LON communication module Plug in the LON communication module into the control unit. The communication interruption will be displayed. A Control unit or Vitocom 300 B Interconnecting cable for data LON LON LON LON exchange between the control...
- Page 122 Components – Vitotronic 100, GC1 Components from the parts list (cont.) Boiler water temperature sensor The sensor measures the boiler water temperature of the boiler. The boiler temperature sensor is installed at the same time as the boiler insulation. Check the sensor 1.
-
Page 123: Components From The Parts List
Components – Vitotronic 100, GC1 Components from the parts list (cont.) Strap-on temperature sensor and immersion temperature sensor For measuring the boiler return temperature. Electrical connection The sensor is inserted in socket 17A or 17B ”17A” or ”17B” on the boiler control. Check the sensor 1. -
Page 124: Flue Gas Temperature Sensor
Components – Vitotronic 100 Flue gas temperature sensor The sensor measures the flue gas temperature and monitors the selected limit value. Electrical connection The sensor is inserted in socket ”15” on the boiler control. Check flue gas temperature sensor 1. Disconnect plug aG in the terminal compartment of the boiler control. -
Page 125: Components - Vitotronic 300-K, Mw1S
Components – Vitotronic 300-K, MW1S Components from the parts list (cont.) DHW tank temperature sensor 3. Compare measurement with Connection See page 58 and 59. the actual temperature displayed (for scanning, see page 91). Check the installation and replace Check sensor 1. -
Page 126: Strap-On Temperature Sensor And Immersion Temperature Sensor
Components – Vitotronic 300-K, MW1S Components from the parts list (cont.) Strap-on temperature sensor and immersion temperature sensor To measure the supply or return temperature. Connection See page 58 and 59. Check sensor 1. Remove plug ?, aJA or aJB. 2. -
Page 127: Outdoor Temperature Sensor
Components – Vitotronic 300-K, MW1S Components from the parts list (cont.) Outdoor temperature sensor Connection See page 58 and 59. Check sensor 1. Remove plug !. 2. Check the sensor resistance at terminals 1 and 2 of the plug. Outdoor Resistance temperature in in Ω... -
Page 128: Mixing Valve Circuit Extension Kit
Components – Vitotronic 300-K, MW1S Mixing valve circuit extension kit, part no. 7450 650 Mixing valve motor , part no. 7133 390 A Plug in the mixing valve motor | Mixing valve motor open ~ Mixing valve motor close Changing the rotational direction Remove the cover and reinsert 3-pole Specification plug A turned by 180˚. -
Page 129: Installation Examples
Components – Vitotronic 300-K, MW1S Installation examples Mixing valve insert conversion (if required), see mixing valve installation instructions. Factory supplied of the mixing valve motor rotational Change the mixing valve motor rotational direction direction for these installation examples HR Heating return KR Boiler return HV Heating supply KV Boiler supply... -
Page 130: Remote Control
Components – Vitotronic 300-K, MW1S Remote control Vitotrol 200 , part no. 7450 017 (with integral room temperature sensor for room temperature feed-back in conjunction with a mixing valve circuit) Setting of Day temperature Heating program Economy and party mode Function changes can be made via coding addresses A0, b0 to b9, C0 to C2, E1 and E2 (see coding overview). - Page 131 Components – Vitotronic 333, MW1S Remote control (cont.) Specification Power supply via KM BUS. Safety class: Protection: IP 30 Permiss. ambient temperature during operation: 0 to +40 ˚C 32 to 104 ˚F 1 2 3 4 in storage and transport: –20 to +65 ˚C –4 to +149 ˚F D Printed Circuit Board DIP switches...
-
Page 132: Vitotrol 300
Components – Vitotronic 300-K, MW1S Remote control (cont.) Vitotrol 300 , part no. 7450 790 or 7179 060 (with integral room temperature sensor for room temperature feed-back in conjunction with a mixing valve circuit) Setting of Normal and reduced temperature Domestic hot water temperature Heating program Holiday program... - Page 133 Components – Vitotronic 300-K, MW1S Remote control (cont.) Specification Power supply via KM BUS. Safety class: Protection: IP 30 Permiss. ambient temperature in use: 0 to +40 ˚C 32 to 104 ˚F in storage and transport: D Printed Circuit Board DIP switches –20 to +65 ˚C (rear of the top casing) –4 to +149 ˚F...
-
Page 134: Connecting Several Remote Controls
Components – Vitotronic 300-K, MW1S Remote control (cont.) Connecting several remote control units When connecting several remote controls to the control unit, install a terminal box on site. Version 1 max. max. max. 15 m / 50 ft 15 m / 50 ft 15 m / 50 ft A To control unit On-site connection via terminal box:... - Page 135 Components – Vitotronic 300-K, MW1S Remote control (cont.) Version 2 max. 15 m / 50 ft max. 15 m / 50 ft max. 15 m / 50 ft A To control unit If several remote control units and B Terminal box (on site) additional KM BUS participants are C Vitotrol 1 connected, make the connections...
-
Page 136: Room Temperature Sensor
Components – Vitotronic 300-K, MW1S Room temperature sensor, part no. 7408 012 The room temperature sensor measures the actual room temperature, if the remote Vitotrol unit cannot be installed in a suitable location. Connection See page 58 and 59. Check sensor 1. -
Page 137: Input Module 0 To 10 V
Components – Vitotronic 300-K, MW1S Input Module 0 to 10 V, part no. 7134 561 From software version 7 of Vitotronic 300-K, MW1S, the Input Module can be connected (software version via scan 2: 1st digit, display ≥7). For external control of the boiler/supply temperature via a 0 to 10VDC signal 10 to 100 ˚C or 30 to 120 ˚C (50 to 212 ˚F or 86 to 248 ˚F) to signal reduced mode and regulate a heating circuit pump to a lower speed. -
Page 138: Coding 1
Coding – Vitotronic 100, GC1 Coding 1 Calling up coding 1 1. Press 9 and w simultaneously 3. Change the value with for approx. two seconds, until the confirm with 1 2 3 4 5 6 7 first arrow appears in the display. The value is transferred and does not flash for approx. - Page 139 Coding – Vitotronic 100, GC1 Coding 1 (cont.) Coding in the factory setting Possible change Boiler/burner 06: 87 Maximum boiler water temperature limit 06: 20 Maximum boiler water temperature limit 87 ˚C / 189 ˚F adjustable from 20 to 127 ˚C / 68 to 261 ˚F 06:127 Boiler 07: 1...
-
Page 140: Coding 2
Coding – Vitotronic 100, GC1 Coding 2 Calling up coding 2 1. Press w and rw simultaneously 3. Change the value with for approx. 2 seconds, until the first confirm with 1 2 3 4 5 6 7 two arrows appear in the display; The value is saved and does confirm with not flash for approx. - Page 141 Coding – Vitotronic 100, GC1 Coding 2 (cont.) Coding in the factory setting Possible change Burner (mod.) (see page 79) 05: 70 Burner curve 05: 0 Linear burner curve 05: 1 Non-linear burner curve (see page 79): 05: 99 in kW x 100 in kW in %...
- Page 142 Coding – Vitotronic 100, GC1 Coding 2 (cont.) Coding in the factory setting Possible change Boiler 0C: 5 Isolation valve modulating independently 0C: 0 No function Isolation valve modulating independently of set boiler water temperature of set boiler water temperature 0C: 1 Constant control of return temperature 0C: 2...
- Page 143 Coding – Vitotronic 100, GC1 Coding 2 (cont.) Coding in the factory setting Possible change Burner (two stage/mod.) Burner offset in ˚C / ˚F 16: 0 Offset during start-up optimization adjustable temporary reduction of set boiler water temperature from 0 to 15 ˚C / 0 to 27 ˚F after burner start 16: 15 Start-up optimization in minutes...
- Page 144 Coding – Vitotronic 100, GC1 Coding 2 (cont.) Coding in the factory setting Possible change Boiler/burner 24: 0 No maintenance indication 24: 1 Maintenance indication in display (address is automatically set and must be manually reset after maintenance has been carried out) Boiler/burner (two-stage) 26: 0 26: 1...
- Page 145 Coding – Vitotronic 100, GC1 Coding 2 (cont.) Coding in the factory setting Possible change General (cont.) 2C: 5 Maximum time delay of isolation valve 5 minutes 2C: 0 No time delay Maximum time delay of isolation valve 5 minutes 2C: 1 Time delay adjustable from 1 to 60 minutes...
- Page 146 94: 1 With plug-in adaptor for external safety equipment; equipment will be recognized automatically 98: 1 Viessmann system number 98: 1 System number adjustable from 1 to 5 (in conjunction with monitoring several systems within one LON system via Vitocom 300)
-
Page 147: Burner Switching Differential
Coding – Vitotronic 100 Burner switching differential For adjustment, see coding 04 on page 140. Switching differential 4 ˚C / 7 ˚F (coding 04 : 0) Time Lower Average Higher heat demand heat demand heat demand Heat demand-dependent switching differential ERB50 function (coding 04 : 1) Subject to heat demand, values between 6 and 12 ˚C / 11 and 22 ˚F result. -
Page 148: Coding 1
Coding – Vitotronic 300-K, MW1S Coding 1 Calling up coding 1 1. Press 9 and w simultaneously 3. Change the value with Code 1 for approx. 2 seconds. confirm with Cod. 1 The display briefly shows Adopted, 2. Select the required coding address then the address flashes again. - Page 149 Coding – Vitotronic 300-K, MW1S Coding 1 (cont.) Coding in the factory setting Possible change Multi-boiler control unit 36: 0 Electronic minimum system supply temperature 36: 1 Electronic minimum system supply temperature limit limit adjustable from 0 to 127 ˚C / 32 to 261 ˚F set to 0 ˚C / 32 ˚F 36:127 37: 80...
- Page 150 Coding – Vitotronic 300-K, MW1S Coding 1 (cont.) Coding in factory setting Possible change General (cont.) 77: 5 LON participant number 77: 1 LON participant number, adjustable from 1 to 99 Please note 77: 99 Allocate each number only once. DHW priority A1 A2: 2 DHW tank priority applicable to heating circuit A2: 0...
-
Page 151: Coding 2
Coding – Vitotronic 300-K, MW1S Coding 2 The summary from page 152 lists all possible coding addresses. The coding addresses are grouped in accordance with the adjacent System design sequence. Cod. 00 Multi-boiler control unit Cod. 35 to 3F General Cod. -
Page 152: Overall Summary
Coding – Vitotronic 300-K, MW1S Coding 2 (cont.) Overall summary Coding in the factory setting Possible change System design 00: 1 See page 148 Multi-boiler control unit 35: 4 4 boilers connected to Vitotronic 300-K, MW1S 35: 1 1 to 3 boilers connected to Vitotronic 333, MW1S 35: 3 36: 0 Electronic minimum system supply temperature... - Page 153 Coding – Vitotronic 300-K, MW1S Coding 2 (cont.) Coding in the factory setting Possible change Multi-boiler control (cont.) 3b: 1 Autonomous boiler parallel connection with 3b: 0 Autonomous boiler parallel connection supply temperature sensor without supply temperature sensor 3b: 2 Autonomous boiler series connection without supply temperature sensor 3b: 3...
- Page 154 Coding – Vitotronic 300-K, MW1S Coding 2 (cont.) Coding in the factory setting Possible change Multi-boiler control unit 41: 31 No ECO threshold boiler 1 41:–30 ECO threshold boiler 1 adjustable from –30 to +30 ˚C / –22 to +86 ˚F 41:+3 42: 31 No ECO threshold boiler 2 42:–30...
- Page 155 Coding – Vitotronic 300-K, MW1S Coding 2 (cont.) Coding in factory setting Possible change Multi-boiler control (cont.) 48: 35 Only for sequential type of control: Control amplification of supply temperature set to 3.5 %/K 48: 1 Control amplification adjustable from 0.1 to 19.9 %/K 48:199 1 setting step = 0.1 %/K 49: 40 Only for sequential type of control:...
- Page 156 Coding – Vitotronic 300-K, MW1S Coding 2 (cont.) Coding in the factory setting Possible change 54: 0 Without solar control unit 54: 1 With Vitosolic 100; will be recognised automatically 54: 2 With Vitosolic 200; will be recognised automatically 55: 0 DHW heating, 55: 1 Adaptive DHW heating active (speed of...
- Page 157 Coding – Vitotronic 300-K, MW1S Coding 2 (cont.) Coding in factory setting Possible change DHW (cont.) 64: 2 During party mode and after external changeover of operating program with permanently normal room temperature: Enable constant DHW heating enabled and DHW recirculation pump ON 64: 0 No DHW heating, DHW recirculation pump OFF 64: 1...
- Page 158 Coding – Vitotronic 300-K, MW1S Coding 2 (cont.) Coding in factory setting Possible change General 76: 0 Without communication module 76: 1 With LON communication module; will be recognised automatically 77: 5 LON participant number 77: 1 LON participant number, adjustable from 1 to 99 Please note: 77: 99 Allocate each number only once...
- Page 159 Coding – Vitotronic 300-K, MW1S Coding 2 (cont.) Coding in factory setting Possible change General (cont.) 82: 3 Daylight saving time starts: 82: 1 January March 82: 12 December 83: 5 Daylight saving time starts: 83: 1 Week 1 last week of month 83: 5 week 5 of selected month 84: 7...
- Page 160 97: 1 Outdoor temperature is adopted from LON BUS any connected Vitotronic 200-H 98: 1 Viessmann system number 98: 1 System number adjustable from 1 to 5 (in conjunction with monitoring several systems within one LON system with Vitocom 300)
- Page 161 Coding – Vitotronic 300-K, MW1S Coding 2 (cont.) Coding in factory setting Possible change General (cont.) 9A: 0 Connection to terminals 1 and 2 in plug aVD Contact affects: 9A: 1 No function (External mixing valve open) inactive (External mixing valve open) inactive 9A: 2 Mixing valve open Mixing valve circuit M2...
- Page 162 Coding – Vitotronic 300-K, MW1S Coding 2 (cont.) Coding in factory setting Possible change System circuit/mixing valve circuit A0: 0 Without remote control A0: 1 With Vitotrol 200 A0: 2 With Vitotrol 300 A2: 2 With DHW tank priority applicable to heating circuit A2: 0 Without DHW tank priority applicable to pump and mixing valve...
- Page 163 Coding – Vitotronic 300-K, MW1S Coding 2 (cont.) Coding in factory setting Possible change System circuit/mixing valve circuit (cont.) A5: 5 A5: 0 Without heating circuit pump logic function With heating circuit pump logic function With heating circuit pump logic function (economy circuit): (economy circuit): With heating circuit pump logic function:...
- Page 164 Coding – Vitotronic 300-K, MW1S Coding 2 (cont.) Coding in factory setting Possible change Systems/mixing valve circuit b0: 0 With remote control: Heating mode/ reduced mode: b0: 1 Heating mode: with outdoor reset with outdoor reset Reduced mode: with room temperature feed-back b0: 2 Heating mode: with room temperature feed-back...
- Page 165 Coding – Vitotronic 300-K, MW1S Coding 2 (cont.) Coding in factory setting Possible change Systems/mixing valve circuit (cont.) b8:10 With remote control unit and for heating circuit, operation with room temperature feed-back must be programmed: Heat-up gradient – start-up optimization b8: 11 Heat-up gradient adjustable from 11 to 10 minutes/ ˚C...
- Page 166 Coding – Vitotronic 300-K, MW1S Coding 2 (cont.) Coding in factory setting Possible change Mixing valve circuit C4: 1 System dynamics – mixing valve control C4: 0 Controller responds too quickly (cycles between characteristics open and close): C4: 3 select a higher value. Controller acts too slowly (temperature is not maintained correctly): select a lower value.
- Page 167 Coding – Vitotronic 300-K, MW1S Coding 2 (cont.) Coding in factory setting Possible change Mixing valve circuit F1: 0 Slab curing function inactive F1: 1 Slab curing function adjustable in accordance with four optional temperature-time profiles F1: 4 (see page 168) Please note: Observe slab curing supplier’s instructions.
-
Page 168: Slab Curing Function Diagram
Coding – Vitotronic 300-K, MW1S Slab curing function diagram Coding, see page 167. Temperature-time profile 1 (coding F1 : 1) (See back of manual for temperature conversion chart) Days Temperature-time profile 2 (coding F1 : 2) Days Temperature-time profile 3 (coding F1 : 3) Days Temperature-time profile 4 (coding F1 : 4) Days... - Page 169 Connection and wiring diagrams – Vitotronic 100, GC1 Summary A2 Low voltage motherboard A3 Line voltage motherboard A6 Programming unit A7 Optolink Printed Circuit Board/override switch A8 Supplementary Printed Circuit Board A9 Boiler coding card A10 LON communication module A11 Power supply unit Printed Circuit Board A12 Boiler control unit...
-
Page 170: Low Voltage Motherboard
Connection and wiring diagrams – Vitotronic 100, GC1 Low voltage motherboard § Boiler temperature sensor No function Flue gas temperature sensor aJA Temperature sensor T1 aJB Temperature sensor T2 aVD Connection for external equipment aVG KM BUS aVH Connection for external equipment LON Interconnecting cable for data transfer between control units... -
Page 171: External Connections
Connection and wiring diagrams – Vitotronic 100, GC1 Line voltage motherboard sÖ Control output DHW pump Shunt or boiler circuit pump fÖ Power supply, 120 VAC Burner, connection to DIN 4791 gÖ Compiled failure alarm Boiler isolation valve Boiler return valve lÖ... - Page 172 Connection and wiring diagrams – Vitotronic 100. GC1 Line voltage motherboard (cont.)
- Page 173 Parts List – Vitotronic 300-K, MW1S Parts list Vitotronic 300-K, MW1S When ordering spare parts Quote the part and serial no. (see type plate) and the item no. of the individual part (as per this parts list). Obtain common parts from your local supplier. Parts 001 Power supply module 120VAC 002 Cascade electronics module...
-
Page 174: Appendix Specification – Vitotronic 100, Gc1
Appendix Specification – Vitotronic 100, GC1 Rated voltage: 120VAC Relay output rating at 120VAC for Rated frequency: 60 Hz Switching output sÖ: Rated current: 2 × 6 A~ 2 FLA Power Shunt or consumption: boiler Safety class: circuit pump sL: Protection: IP 20 D to 2 FLA... -
Page 175: Specification – Vitotronic 300-K, Mw1S
Appendix Specification – Vitotronic 300-K, MW1S Rated voltage: 120VAC Relay output rating at 230 V~ for Rated frequency: 60 Hz Heating circuit pump Rated current: Power primary pump consumption: 10 W DHW tank heating system sÖ: Safety class: 2 FLA Protection: IP 20 D to DHW tank... -
Page 176: Additional Information
+176 +194 +100 +212 +110 +230 Viessmann Manufacturing Company (U.S.) Inc. Viessmann Manufacturing Company Inc. 45 Access Road 750 McMurray Road Warwick, Rhode Island • 02886 • USA Waterloo, Ontario • N2V 2G5 • Canada Tel. (401) 732-0667 • Fax (401) 732-0590 Tel.