Table of Contents
Advertisement
Quick Links
Download this manual
See also:
Musician's Manual
Advertisement
Table of Contents

Related Manuals for Kurzweil Artis


Summary of Contents for Kurzweil Artis
- Page 1 Part Number 910556-002 Rev.B...
- Page 3 ©2013 Young Chang Co., Ltd. All rights reserved. Kurzweil® is a product line of Young Chang Co., Ltd. Kurzweil®, Young Chang®, V. A. S. T.®, and Artis™ are trademarks of Young Chang Co., Ltd. All other trademarks and copyrights are property of their respective companies.
-
Page 4: Radio And Television Interference
CAUTION The lightning flash with the arrowhead symbol, within an equilateral triangle is intended to alert the user to the presence of uninsulated RISK OF ELECTRIC SHOCK "dangerous voltage" within the product's enclosure that may be of sufficient magnitude to constitute a risk of electric shock to persons. DO NOT OPEN CAUTION: TO REDUCE THE RISK OF ELECTRIC SHOCK, The exclamation point within an equilateral triangle is intended... -
Page 5: Important Safety Instructions
IMPORTANT SAFETY INSTRUCTIONS 1) Read these instructions. 2) Keep these instructions. 3) Heed all warnings. 4) Follow all instructions. 5) Do not use this apparatus near water. 6) Clean only with dry cloth. 7) Do not block any of the ventilation openings. Install in accordance with the manufacturer’s instructions. 8) Do not install near any heat sources such as radiators, heat registers, stoves, or other apparatus (including amplifiers) that produce heat. - Page 6 Kurzweil International Contacts Contact the Kurzweil office listed below to locate your local Kurzweil representative. Customers outside the US: US Customers: Young Chang Co., LTD. American Music & Sound 9th Floor, Bldg 102, I-Park, 22020 Clarendon Street, Suite 305 Woodland Hills, CA 91367...
-
Page 7: Table Of Contents
Main Features ................1-1 Sounds ..................1-2 Keyboard and Controllers ............. 1-2 Pedals (Optional) ................1-2 Keeping the Artis up to date ............1-3 Do You Have Everything? ............. 1-3 Music Rack (Optional) ..............1-3 Getting Started ........... 2-1 Before You Start… ................. 2-1 Quick Start .................. - Page 8 Contents Features of the Artis ........3-1 Powering Up Defaults ..............3-1 Parameters Reset To Defaults At Power-On ........ 3-1 Parameters Remembered After Power-On ........3-1 The Front Panel ................3-2 Pitch and Modulation Wheels ............3-3 Pitch Wheel ................... 3-3 Modulation Wheel .................
- Page 9 Contents Program Demo ................3-16 Demo ................... 3-17 Panic ................... 3-17 Assign ..................3-18 Enter + Zone (1–4) Button ............3-18 Enter + Controller ..............3-18 Enter + Key ................3-18 Terminology ..........4-1 The Operating Modes ........ 5-1 Program Mode ................5-1 Multi Mode ..................
- Page 10 Contents Transpose (Split Transposition) ..........6-12 Saving a Split ................6-12 The Layer Function ..............6-13 Prog (Layer Program) ............... 6-14 Vol (Layer Volume) ..............6-14 Transpose (Layer Transposition) ..........6-14 Saving a Layer ................6-15 Changing the Transmit MIDI Channel ........6-16 Panic .....................
- Page 11 Contents Saving a User Multi ..............7-15 Deleting User Multis ..................7-16 Multi Edit Mode ........... 8-1 About Multi Edit Mode ..............8-1 Selecting Parameters ..............8-3 The Display ................... 8-3 Changing Zones ................8-3 Param / Channel Buttons .............. 8-4 Alpha Wheel &...
- Page 12 Contents The Switch Parameters ............... 8-18 Mode ..................8-18 Dest (Destination) ..............8-18 On Value ................... 8-18 Off Value ................... 8-18 Entry State ................8-19 Exit State .................. 8-19 Continuous Controller Parameters ..........8-19 Dest (Destination) ..............8-19 Entry Value ................8-22 Exit Value..................
- Page 13 STORE Page ................. 9-17 Pressing STORE ................. 9-18 RESET Page ................. 9-20 Reset Global Mode parameters only (Soft Reset) ...... 9-20 Reset Artis to its factory state (Hard Reset) ........ 9-22 System Mode ..........10-1 Run Artis ..................10-2 System Update ................10-3 Install using a USB flash drive ............
- Page 14 Contents MIDI Implementation ........A-1 Physical Specifications ......B-1 Programs ............C-1 KB3 Programs ..........D-1 Introducing KB3 Programs ............D-1 First Some History .................D-1 Drawbars ..................D-2 KB3 Mode Buttons ................D-2 Brake .....................D-2 Chorus/Vibrato ................D-2 On/Off ..................D-2 Chor/Vib ..................D-2 Chorus/Vibrato Depth ..............D-3 Percussion ..................D-3 Percussion On/Off ..............D-3 Percussion Loud/Soft..............D-3 Percussion Decay F/S ..............D-3 Percussion Pitch H/L ..............D-3...
-
Page 15: Introducing Artis
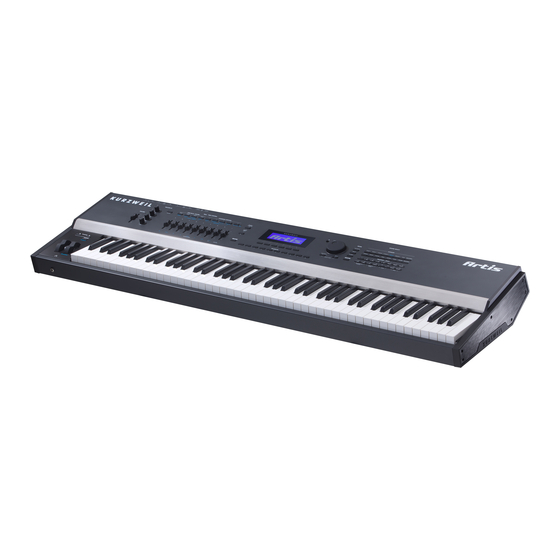
Artis. Main Features The Artis Stage Piano is the beginning of the next generation of Kurzweil’s professional performance instruments. It boasts hundreds of excellent preset sounds (including a new German Grand Piano) already on-board and ready to be played with 128 voice polyphony. -
Page 16: Sounds
• 1 jack on the rear panel for an optional continuous controller pedal: CC (Volume) Pedals (Optional) As described above, the Artis has three jacks on the rear panel for optional pedal controllers. Two jacks for switch pedals, which are typically used to control two-state (i.e., on / off) parameters such as sustain, sostenuto, and mute Zone. -
Page 17: Keeping The Artis Up To Date
• USB cable (Type-A-to-Type-B) • 4 self adhesive feet (see page 2-1) • Artis Musician’s Guide (this book) If you don’t have any of these components, please contact your Kurzweil / Young Chang dealer to get them. Music Rack (Optional) The optional KMR2 Music Rack attachment is a holder for sheet music or a computer tablet device. - Page 18 Introducing Artis Keeping the Artis up to date...
-
Page 19: Getting Started
Don’t connect anything until you make sure the Artis is properly and safely situated. If your Artis keyboard has been out in the cold, give it time to warm up to room temperature before starting it, since condensation may have formed inside. -
Page 20: Using Artis
7. Make sure your sound system is at a safe volume level. Also make sure that the Artis MASTER VOLUME slider (on the far left side of the front panel) is all the way down. -
Page 21: Start Up Details: The Rear Panel
Use the AC power jack to connect the Artis to the AC power supply. The USB Ports Use the USB ports to connect the Artis to a computer/tablet in order to do the following: • Use the Artis as a MIDI controller to play software instruments on a computer. -
Page 22: The Midi (In And Out) Ports
(i.e., “on / off ”) parameters, such as sustain, sostenuto, and Mute Zone. It is possible to connect up to 2 dual switch pedals having a single stereo plug (Kurzweil KFP-2S available separately) into the SW1 and SW2 jacks, (see Connecting a Dual Switch Pedal on page 2-8) or up to 2 half damper pedals having stereo jacks. -
Page 23: The Audio (Left/Mono And Right) Jacks
Connecting the Power Cable (Line Cord) The Artis runs on AC power and works with voltages from 90 - 265 volts at 50–60 Hz. The voltage level is detected and set automatically by the Artis. As you face the back of the Artis, the power connection is on the right. - Page 24 Getting Started Connecting to Your Audio System Artis connected to powered speakers and headphones Artis connected to a mixer, powered speakers and headphones...
-
Page 25: Connecting Pedals
NOTE : Ensure that pedals are plugged in before powering up the Artis and do not step on the switch pedals when powering up, as the pedal type and state of the pedal is detected as part of the power up sequence. -
Page 26: Connecting A Dual Switch Pedal
Artis. This ensures that the pedal will work properly (it might function in reverse—off when it’s down and on when it’s up—if you turn on your Artis before plugging in the pedal). Similarly, don’t press any of your switch pedals while powering up, as the Artis verifies each pedal’s orientation during power-up. -
Page 27: Connecting A Half Damper Pedal
SW1 and SW2 inputs on the rear panel. Some pedals have the wiper connected to the ring, and these pedals will require an adaptor to work with the Artis. Half damper pedals can be used to control external software and sound modules via MIDI, enabling finer control of sustain than a standard switch pedal. - Page 28 Getting Started Connecting Pedals The defaults assignment for the Switch Pedals is summarized in the table below. Pedal Single Switch Default Dual Switch Default SW1a Sustain (MIDI CC#64) Sustain (MIDI CC#64) SW1b Sostenuto (MIDI CC#66) SW2a Sostenuto (MIDI CC#66) Sostenuto (MIDI CC#66) SW2b Soft (MIDI CC#67) Expression (MIDI CC# 11)
-
Page 29: Connecting Midi
The reason is because the Artis does not include a Thru MIDI port; however, this simply means that the Artis must be at the start or at the end of the MIDI daisy chain. Using the Artis as the controller, connect the MIDI Out port of the MIDI In port of the first module, and then connect that module’s MIDI Thru port to the input of the next... -
Page 30: Connecting To A Computer Sequencer
Scenario 1: Artis as the MIDI controller Scenario 2: Artis as the last module in the MIDI chain Connecting to a Computer Sequencer To connect the Artis to a computer/tablet, simply connect Artis using the provided or compatible cable. 2-12... -
Page 31: Selecting Programs And Multis
If you wish to use your own cable, make sure that it is a Type-A-to-Type-B USB cable (the USB port of Artis being Type B). By default, the Artis will act as a MIDI controller (rather than a hard drive) when connected to a computer. - Page 32 2-14...
-
Page 33: Features Of The Artis
Chapter 3 Features of the Artis This chapter will help familiarize you with the features of the Artis. Many of these features have both general functions and mode-specific functions. For more in-depth descriptions of these features, refer to the chapters on the individual modes. -
Page 34: The Front Panel
Features of the Artis The Front Panel The Front Panel All the controls for Artis, both musical and navigational, are on its front panel Param/Channel buttons Soft buttons Five assignable switches LCD display Zone Mute/Volume buttons LCD contrast adjust Master EQ... -
Page 35: Pitch And Modulation Wheels
Features of the Artis Pitch and Modulation Wheels Pitch and Modulation Wheels Pitch Wheel The Pitch Wheel is the left most of the two wheels. It is spring-loaded, such that its center position is restored when it is not being used. That is because the Pitch Wheel is used for pitch-bending notes—its “off ”... -
Page 36: Real Time Control
Features of the Artis Real Time Control Real Time Control Sliders The nine sliders on the left of the front panel are assigned to control different sound parameters and effects for each Program. In Multi Mode, Sliders A-D default to controlling volume for Zones 1-4. -
Page 37: Zone Mute/Volume Buttons
The Switch Button LEDs illuminate red when the switch is active. Foot Switches and Controllers The Artis has sophisticated Pedal controller options allowing up to 4 Switch Pedals or up to 2 Half Damper Pedals as well as a Continous Controller Pedal to be connected. By default the Switch Pedals control SW1a - Sustain, SW1b - Sostenuto, SW2a - Sostenuto and SW2b - Soft. -
Page 38: Transpose & Variation Buttons
Features of the Artis Transpose & Variation Buttons Transpose & Variation Buttons The Transpose and Variation buttons are located at the very end of the left side of the Artis keyboard, just above the Pitch & Modulation Wheels. Transpose The Transpose buttons can be used to change the tuning of notes played on the Artis keyboard in semitones (ST), also known as half steps. -
Page 39: Master Eq
Features of the Artis Master EQ Master EQ The Master EQ allows you to have realtime control over the frequency response of all audio generated in either Program or Multi Modes. When the Master EQ On/Off button is “On”, the rotary knobs can change the high , middle & low frequencies of the audio. -
Page 40: Save Button
Features of the Artis Save Button Save Button The Save button is located beneath the “Save” label on the left side of the LCD screen. In Program Mode, pressing the Save button saves the current position of the sliders, switches and wheels as a User Program. (See Save and Delete User Programs on page 6-18.) In Multi Mode, pressing the Save button saves a copy of the current Multi. -
Page 41: Audio In
Audio In Audio In On the back panel of the Artis you will find a 1/8” sized stereo audio jack labelled AUDIO You can plug your MP3 player into theArtis and play along with the recorded music. There is no volume control for the Audio Input on the Artis itself, so you should control the mix... -
Page 42: Mode Buttons
Features of the Artis Mode Buttons Mode Buttons The Mode buttons are located beneath the “Mode” label on the right side of the Artis front panel. Program Button Pressing the Program button enters Program Mode (described in Program Mode on page 5-1 and, in further detail, in Program Mode on page 6-1). -
Page 43: Navigation
Features of the Artis Navigation Navigation The navigation section of the Artis front panel includes the LCD display, Previous & Next buttons, Param / Channel buttons, and the Alpha Wheel. The Display Contrast knob is easily located, above the Alpha Wheel. -
Page 44: Alpha Wheel
Features of the Artis Navigation When the highest or lowest MIDI transmit channel is reached, the list will wrap back to the last or first MIDI transit channel respectively. The top line of the display shows the current MIDI transmit channel. -
Page 45: Sound Select
/ Multi select any of the 16 sounds in that Category. CATEGORY The Artis makes it easy to select sounds by instrument type. The 16 Category buttons are clearly labelled for you to choose easily. If a Category button is lit, you are currently in that selected Category. -
Page 46: Kb3 Led
KB3 controls (printed in blue) are active. Double Button Presses Several pairs of the buttons on the Artis have timesaving secondary functions when pressed simultaneously—think of them as keyboard shortcuts. For convenience of reference, descriptions of all of the double-button press functions appear below. -
Page 47: Parameter Jump
Features of the Artis Double Button Presses In Multi Mode, the Value Jump double button press selects the first Multi of each Category, as well as the Category Default Multi of each Category (if a Category Default Multi has been set). -
Page 48: Midi Program Change
Features of the Artis Double Button Presses MIDI Program Change Pressing the 9 & 10 Program/Multi buttons enters the MIDI Program Change Function Page (described in further detail page 5-4). With the MIDI Program Change Function, you can send a MIDI Program Change message to any sound module in a MIDI chain connected to the Artis. -
Page 49: Demo
Demo Function on page 5-6). With the Demo Function selected, you can hear a demonstration Song that showcases many of the features of Artis. A label below the 13 & 14 Program/Multi buttons indicates the Demo double button press. -
Page 50: Assign
Features of the Artis Double Button Presses Assign Assign is the secondary function of the Enter button. The Assign symbol will be shown in the display next to parameters that can be selected with Assign. Pressing a key, switch, or moving a controller while holding down the Enter button will perform Assign in the following cases. -
Page 51: Terminology
Since there are no standard definitions for some of these terms, they are described here to avoid confusion. All of these terms appear with the first letter capitalized as proper nouns in this manual to make it easy to distinguish between the generic term and the Artis specific term. - Page 52 Terminology Kurzweil’s organ modelling simulation of the original Hammond B3 with Leslie rotary speaker emulation. A keyboard region of a Multi that has its own Program, Zone MIDI channel, and controller assignments. See About Zones on page 7-6 for more information on Zones.
-
Page 53: Soft Reset
Terminology A process that returns Artis back to a Factory state. All Hard Reset User Programs & User Multis are erased. All Global Mode parameters are reset back to their default settings as well. A process that resets all Global Mode parameters to their Soft Reset default factory settings. - Page 54 Terminology...
-
Page 55: The Operating Modes
Chapter 5 The Operating Modes This chapter will help familiarize you with the operating Modes of the Artis. Each of the four Modes (Program, Multi, Multi Edit, Global) has its own individual chapter. The four Functions (Split, Layer, MIDI Program Change, and Demo) are described in this chapter in Functions on page 5-3. -
Page 56: Multi Mode
The Operating Modes Multi Mode Multi Mode Multi Mode allows you to select and play Multis. A Multi allows up to 4 instrument sounds (Programs) to be played from the keyboard at once. A Multi has four Zones, each with its own keyboard range, Program, MIDI channel, and controller assignments. -
Page 57: Functions
The Operating Modes Functions Functions In addition to the four primary Modes, there are five Functions. Some Functions are available through dedicated buttons, others are available as Soft Buttons accessed via the buttons under the LCD screen. These Functions are not as complex as the primary Modes and are described below. -
Page 58: Midi Program Change Function
MIDI Program Change messages allow you to use the Artis to change presets on other MIDI equipment. Doing so will not affect the local sound (that is, it will not affect the currently selected Program on the... -
Page 59: Prog (Program)
PROG (Program) Use the Program page if you wish to send a program change message to another Artis, or to a sound module that has programs starting at Program 1 that are not organized into banks each numbered 1 - 128. -
Page 60: Demo Function
Pressing the 13 & 14 Program/Multi buttons simultaneously performs the Demo Function. Use the Demo Function to play built-in Demo Songs designed to demonstrate the capabilities of the Artis. While using the Demo Function, the top line of the display shows the text “Demo”, the Demo number, and the total number of available Demos. -
Page 61: Multi Edit Mode
The Operating Modes Multi Edit Mode Multi Edit Mode Multi Edit Mode allows you to edit pre-existing Multis. To enter Multi Edit Mode press the Edit Soft Button while in Multi Mode. For more detailed information on Multi Edit Mode, see Multi Edit Mode on page 5-7. - Page 62 The Operating Modes Multi Edit Mode...
-
Page 63: Program Mode
About Program Mode Program Mode is the default Mode of the Artis. It will always boot up in this Mode. To enter Program Mode from another Mode, press the Program Mode button. While you are in Program Mode, the Program button’s LED is illuminated. -
Page 64: Selecting Programs
Selecting Programs Selecting Programs The Artis features two Program Banks, one of which contains 256 factory Programs, and the other Bank is reserved for up to 256 User Programs. Both the factory and User Banks are split into 16 categories of 16 Programs each. -
Page 65: The Display
Program Mode Selecting Programs Press the Cancel soft button to exit Program Demo. If you try to use the Program Demo Function from any other Mode, the display shows the “Switch to Program Mode first” message. The Display In Program Mode, the top line of the display shows the current Mode, MIDI transposition, Category and MIDI Channel. -
Page 66: Pop Up Messages
Program Mode Selecting Programs Pop Up Messages Some actions cause the display to show pop up messages. After a short time the display returns to show the current Program. Alpha Wheel & Previous (–) and Next (+) Value Buttons Use the Alpha Wheel or the Previous (-) and Next (+) buttons, to the right of the display below the Alpha Wheel, to change the current Program. -
Page 67: Category & Program/Multi Buttons
Category. This will also work in reverse if you turn the Alpha Wheel counter-clockwise or press the Previous button. In this case when you reach the beginning of a Category, Artis automatically advances to the end of the previous Category. The 16 User Categories come... - Page 68 Program Mode Selecting Programs Choosing Category Default Programs You can choose a “Category default program” from each Category that will be recalled each time you press that Category’s button. To save a Category default program, first select a Program using any Program select method (Alpha wheel, Previous/Next buttons, Category buttons, Program/Multi buttons).
-
Page 69: Choosing Favorites
Program Mode Selecting Programs Choosing Favorites You can save ten Favorite Programs (or Multis) from any Category to the ten Favorite Buttons beneath the display. Once saved, these favorite Programs can be recalled from any Mode with a single button press. To save the currently selected Program to a Favorite Button, press and hold a Favorite Button until the display shows the message “Program saved to favorite button. -
Page 70: Transposition
MIDI notes sent to the USB and MIDI out ports. Press the Transpose - or + buttons to transpose the Artis keyboard down or up by one semitone. The top line of the display shows the current transposition value. Pressing both Transpose - and + simultaneously will reset the transposition to 0. - Page 71 Program Mode Parameter Assignments Parameter Assignments In Program Mode, each Program has factory set Program and Effect parameters assigned to physical controllers (Sliders, Switch buttons, Mod Wheel, and Pedals). A parameter assignment can modify an instrument sound during a performance to add variation or expression.
-
Page 72: The Split Function
Once you have saved your Split as a Multi, you can continue to add Split or Layer Zones to the Multi until you reach the maximum of four active Zones. The Artis will display a message if you have already reached the maximum of four active Zones (see Multi Mode on page 7-1, for more information on Multis). -
Page 73: Prog (Split Program)
Program Mode The Split Function There are four parameters (described below) that determine the behavior of the Split. Press one of the four soft buttons on the bottom left of the display to access each of the Split parameters. Prog (Split Program) Press the PROG soft button to change the Prog (Split Program) parameter. -
Page 74: Key (Split Key)
Program Mode The Split Function Key (Split Key) Press the KEY soft button to change the Key (Split Key) parameter. This parameter sets the keyboard key that will be the boundary between the left and right hand Programs on the keyboard. -
Page 75: The Layer Function
Once you have saved your Layer as a Multi, you can continue to add Layer or Split Zones in Multi Mode until you reach the maximum of four active Zones. The Artis will display a message when you have reached the maximum of four active Zones (see Multi Mode on... -
Page 76: Prog (Layer Program)
Program Mode The Layer Function There are three parameters (described below) that determine the behavior of the Layer. Press one of the three soft buttons on the bottom left of the display to access each of the Layer parameters. Prog (Layer Program) Press the PROG soft button to change the Prog (Layer Program) parameter. -
Page 77: Saving A Layer
Program Mode The Layer Function Saving a Layer After setting the Layer parameters, the Layer can be saved as a Multi so that it can easily be recalled in Multi Mode. Press the Save button to the left of the display to begin the saving process. -
Page 78: Changing The Transmit Midi Channel
Program Mode Changing the Transmit MIDI Channel Changing the Transmit MIDI Channel The current MIDI Transmit channel is shown on the right side of the top line of the display. Press the Param/Channel Up or Down buttons to change the MIDI Transmit channel. Pressing both Param/ Channel Up and Down at the same time will reset the current MIDI Transmit channel to 1. -
Page 79: Panic
Program Mode Panic Panic Pressing the 15 and 16 Program/Multi buttons simultaneously deactivates all sounding notes and resets controller values by sending an “All Notes Off ” message and a “Reset All Controllers” message on all 16 MIDI channels. 6-17... -
Page 80: Save & Delete User Programs
The display shows the first available ID number and the current Program name. You can save Programs with ID numbers from 257 to 512. When you initially press the Save button, the Artis always selects the next available unused ID number and displays the current Program name. -
Page 81: Naming A User Program
Program Mode Save & Delete User Programs To change the ID number press the ID soft button, turn the Alpha Wheel or use the Value buttons to select the new ID number. You can also use the Category and Program/Multi buttons to select an ID number, which is useful for organizing user Programs by Category. -
Page 82: Saving A User Program
Program Mode Save & Delete User Programs Saving a User Program Press the Save button or Save soft button to complete the saving process, or press the Cancel soft button to exit without saving. After successfully saving, the Program will be selected in Program Mode in the User Bank. -
Page 83: Deleting User Programs
Program Mode Save & Delete User Programs Deleting User Programs To delete a User Program, select the Program and press the DELETE soft button. Press the Yes button to delete the Program, or No to cancel and exit. 6-21... -
Page 84: Info
Program. This is a list of Program and effects parameters that are assigned to be controlled by the physical controllers of the Artis (Sliders, Pedals, Switches, Mod Wheel, etc.), or by MIDI continuous controller messages sent from external MIDI equipment. Use the Param/ Channel buttons to the left of the display to scroll through the list. -
Page 85: About Multi Mode
While you are in Multi Mode, the Multi button’s indicator LED is illuminated. When you enter Multi Mode after powering on the Artis, the Category Default Multi in the Piano1 Category will be selected, either Multi 1 (factory default) or a Multi you pick as a... -
Page 86: Selecting Multis
Multi Mode Selecting Multis Selecting Multis When you are in Multi Mode, there a few ways to select Multis. • To select any Multi in the current Category, press a Program/Multi Button. • To select a Multi in a different Category, press the Category Button of choice and then the Program/Multi Button to select from the 16 Multis in the Category. -
Page 87: Alpha Wheel & Previous (–) And Next (+) Value Buttons
Multi Mode Selecting Multis Alpha Wheel & Previous (–) and Next (+) Value Buttons Use the Alpha Wheel or the Value buttons, to the right of the display below the Alpha Wheel, to change the current Multi. Turning the Alpha Wheel counter-clockwise or pressing the Previous button will select the previous Multi and turning the Alpha Wheel clockwise or pressing the Next button will select the next Multi. -
Page 88: Choosing Category Default Multis
Multi Mode Selecting Multis Category & Program/Multi Buttons The Category buttons allow you to select Multis by instrument type simply by pressing a button. You can select one Category button at a time and the current Category button’s LED is lit. Each Category contains 16 Multis. -
Page 89: Choosing Favorites
Multi Mode Selecting Multis Choosing Favorites You can save ten Favorite Multis (or Programs) from any Category to the ten Favorite Buttons beneath the display. Once saved, these Favorite Multis can be recalled from any Mode with a single button press. To save the currently selected Multi to a Favorite Button, press and hold a Favorite Button until the display shows the message “Multi saved to favorite button.”... -
Page 90: About Zones
Multi Mode About Zones About Zones Zones are the independent regions of the keyboard that make up a Multi. A Multi has four Zones, each one having its own Program, controller assignments, and MIDI transmit channel. Zones can be mutually exclusive regions of the keyboard, or they can overlap. -
Page 91: Transposition
MIDI notes sent to the USB and MIDI out ports. Press the Transpose - or + buttons to transpose the Artis keyboard down or up by one semitone. The top line of the display shows the current transposition value. Pressing both Transpose - and + simultaneously will reset the transposition to 0. -
Page 92: The Split Function
Zone key ranges, Programs, and volumes. You can simply press the Split button, and the Artis automatically activates another Zone in the Multi for you. The previously active Zones are used in the right hand of the Split. After this you can choose a “Split Program” that will be used in the left hand of the Split as the Program for the newly activated Zone. -
Page 93: Vol (Split Volume)
Multi Mode The Layer Function Initially the last used Split Program will be selected, or the default Split Program (210 Motown Bass) if this is the first time using the Split Function since power-up. Choose a Split Program using the Category and Program/Multi buttons, the Alpha Wheel, or the Previous/ Next buttons. -
Page 94: The Layer Function
Zone key ranges, Programs, and volumes. You can simply press the Layer soft button, and the Artis automatically activates another Zone in the Multi to layer with the previously active Zones. After this you can choose a “Layer Program” that will be used as the Program for newly activated Zone. -
Page 95: Vol (Layer Volume)
Multi Mode The Layer Function Initially the last used Layer Program will be selected, or the default Layer Program (192 Add a Pad 2) if this is the first time using the Layer Function since power-up. Choose a Layer Program using the Category and Program/Multi buttons, the Alpha Wheel, or the Previous/ Next buttons.) Vol (Layer Volume) Press the VOLUME soft button to change the Vol (Layer Volume) parameter. -
Page 96: Save & Delete User Multis
Category, press the Save button once. You can save Multis with ID numbers from 257 to 512. When you initially press the Save button, Artis always selects the next available unused ID number and displays the current Multi name. In the Save Dialog, there are two parameters available which allow you to specify the ID number and rename the Multi. -
Page 97: Changing Id Numbers
Multi Mode Save & Delete User Multis Changing ID Numbers To change the ID number press the ID soft button, turn the Alpha Wheel or use the Value buttons to select the new ID number. You can also use the Category and Program/Multi buttons to select an ID number, which is useful for organizing user Multis by Category. -
Page 98: Naming A User Multi
Multi Mode Save & Delete User Multis Naming a User Multi To rename the Multi, first press the NAME soft button. You will see the naming screen in the display. The display shows the current Multi name. Multi names can total 16 characters in length. Use the letters and numbers printed on the Program/Multi buttons to enter the new Program name. -
Page 99: Saving A User Multi
Multi Mode Save & Delete User Multis Saving a User Multi Press the Save button or Save soft button to complete the saving process, or press the Cancel soft button to exit without saving. After successfully saving, the Multi will be selected in Multi Mode in the User Bank. -
Page 100: Deleting User Multis
Multi Mode Save & Delete User Multis Deleting User Multis To delete a User Multi, select the Multi and press the DELETE soft button. Press the Yes soft button to delete the Multi, or No to cancel and exit. 7-16... -
Page 101: Multi Edit Mode
Multi Edit Mode About Multi Edit Mode Chapter 8 Multi Edit Mode This chapter will help familiarize you with the features of Multi Edit Mode. About Multi Edit Mode NOTE : Before you read this chapter, be sure to read Multi Mode on page 7-1 for a full description of Multis. - Page 102 Multi Edit Mode About Multi Edit Mode To enter Multi Edit Mode, first press the Multi Mode button to enter Multi Mode, then press the EDIT soft button. Once you are in Multi Edit Mode, press the soft buttons at the bottom of the screen to navigate to each of the Multi Edit Mode pages.
-
Page 103: Selecting Parameters
Multi Edit Mode Selecting Parameters Selecting Parameters The Display In Multi Edit Mode, the top line of the display shows the current Mode, Page, Zone number, and parameter number as well as the total number of available parameters. Changing Zones Pressing the Zone soft button changes the currently selected Zone. -
Page 104: Param / Channel Buttons
Multi Edit Mode Selecting Parameters Param / Channel Buttons Use the Param / Channel buttons to scroll through the list of parameters on each page. Alpha Wheel & Previous (–) and Next (+) Value Buttons Use the Alpha Wheel or the Value buttons, to the right of the display below the Alpha Wheel, to change the selected parameter value. -
Page 105: Assign
Multi Edit Mode Selecting Parameters Assign Assign is the secondary function of the Enter button. The Assign symbol will be shown in the display next to parameters that can be selected with Assign. Pressing a key, switch, or moving a controller while holding down the Enter button will perform Assign in the following cases. -
Page 106: Zone Parameters
Program The Program parameter determines the Program to be loaded for the currently selected Zone. You can set this parameter to any Artis Program (1 – 512). The display shows the Program number and name. The Value Jump double button press (Previous and Next buttons) jumps to selecting the first Program of each Category, as well as the Category Default Program of each Category (if a Category Default Program has been set). -
Page 107: Midi Channel
Destination parameter is set to Local, and the other is set to MIDI. 1. Local When Destination is set to Local, MIDI data from the Zone is sent only to the Artis Program. MIDI data from this Zone is not sent to the MIDI Out and USB ports. - Page 108 If you want to use the Artis strictly as a MIDI controller for the other modules in your MIDI chain, then select MIDI. If you want to make use of the Artis’s sounds as well as use it as a MIDI controller, then select Local+MIDI.
-
Page 109: Status
Multi Edit Mode Zone Parameters Pressing both Previous & Next buttons simultaneously (Value Jump) will set this parameter to Local+MIDI. Status The Status parameter determines whether the currently selected Zone is active or muted. You can set this parameter to either of two states: Active or Muted. Pressing both Previous &... -
Page 110: Keys Page
Multi Edit Mode Zone Parameters KEYS Page Parameter Range Of Values Default Value Transpose -128 to 127 ST Low Key C-1 to G9 High Key C-1 to G9 Low Velocity 1 to 127 High Velocity 1 to 127 Note Map Off, Linear, Constant Linear Transpose... -
Page 111: Low Velocity
Pressing both Previous & Next buttons simultaneously will set this parameter to 127. Note Map Note Map lets you change the way notes are sent from the Artis. A setting of Off, no notes are sent but controllers and other non-note data are. If you set Note Map to Constant, all of the keys on the keyboard will play the same note. -
Page 112: Midi Page
Zone sends when the Multi is loaded. You can set this parameter to a MIDI Bank change message from 0 to 127. When using the Artis as a MIDI controller, sending a MIDI Bank change message (along with a MIDI Program change message) when a Multi is loaded ensures that the Program loaded on the other sound modules in your MIDI chain is the Program that you want. -
Page 113: Midi Program
Zone sends when the Multi is loaded. You can set this parameter to a MIDI Program change message from 0 to 127. When using the Artis as a MIDI controller, sending a MIDI Program change message (along with a MIDI bank change message) when a Multi is loaded ensures that the Program loaded on the other sound modules in your MIDI chain is the Program that you want. -
Page 114: Entry Program Change
MIDI controller numbers. Most have chosen 0, 32, or both. In the case of the Kurzweil K2600, it responds to controller 32, but is limited to 100 programs per bank. Pressing both Previous & Next buttons simultaneously will set this parameter to Ctl 0/32. -
Page 115: Ctrls Page
Press the CTRLS soft button to view pages where you can set parameters for each of the Artis physical controllers. Press the soft buttons at the bottom of the screen to navigate to the page for each controller type. See the Continuous Controller Parameters section and Switch Parameters section below for details on these parameters. -
Page 116: Slider Page
Multi Edit Mode Zone Parameters SLIDER page Parameter Range Of Values Default Value Slider A to I Destination Multi Destination Controller List (none) Slider A to I Entry Value 0 to 127 (none) Slider A to I Exit Value 0 to 127 (none) PEDAL page Parameter... -
Page 117: Switches Page
Multi Edit Mode Zone Parameters SWITCHES page Parameter Range Of Values Default Value Variation Mode Momentary, Toggled Toggled Variation Destination Multi Destination Controller List (none) Variation On Value None, 0 to 127 Variation Off Value None, 0 to 127 Variation Entry None, On, Off None Variation Exit... -
Page 118: The Switch Parameters
Multi Edit Mode Zone Parameters The Switch Parameters • Variation • Switch 1 through 5 • Pedal SW1a to SW2b • Variation button & Switch buttons 1 to 5 Assigning controllers to switches and buttons creates a Virtual Parameter in the same way as the continuous controllers. -
Page 119: Entry State
• Slider A through I • CC Pedal Dest (Destination) Use the Destination parameter to assign the Artis physical controllers (Sliders, Pedals, Switches, Mod Wheel, etc.) to control Program parameters or send MIDI continuous controller messages (CCs) to external MIDI gear. - Page 120 Default assignment for breath controller in compatible synths MIDI 03 MIDI Controller 3 Foot Default assignment for continuous foot controller in compatible synths Monophonic Artis Programs respond to this Controller if portamento is PortTim turned on. Data MIDI Controller 6...
- Page 121 Multi Edit Mode Zone Parameters Controller Controller Description Number Destination MIDI Bank change message MIDI Bank 33–63 MIDI 33–63 MIDI Controllers 33–63 Sustain Default destination for Sustain Pedal MIDI 65 Default destination for Sostenuto Pedal (Sustains notes that are currently Sostenuto down, but not notes played subsequently.) Lowers the volume by a preset amount and may soften the timbre as well.
-
Page 122: Entry Value
Multi Edit Mode COMMON Page Controller Controller Description Number Destination Triggers playback of notes by Key Number—e.g., C4 is 60. Send a velocity KeyNum first with Destination135, KeyVel. KeyVel Key Velocity ProgInc Program Increment—increments current Program number. ProgDec Program Decrement—decrements current Program number. ProgGoto Go to Program—selects Program. -
Page 123: Common Page
Multi Edit Mode COMMON Page COMMON Page In addition to the Zone-specific parameters described above, a Multi has parameters common to all of its Zones. Parameter Range Of Values Default Value AuxFX (List of Effects) none Aux FX Channel (Channels used in Multi) (Channel of Zone 1) KB3 Channel 1 to 16... -
Page 124: Kb3 Channel
Multi Edit Mode COMMON Page KB3 Channel In the event there are more than one KB3 Programs specified in a Multi, this parameter specifies which MIDI Channel has priority to load a KB3 Program. You can set this parameter to a value between 1 and 16. Pressing both Value buttons simultaneously will set this parameter to the channel in Zone 1. -
Page 125: About Auxiliary Effects
Multi Edit Mode About Auxiliary Effects About Auxiliary Effects Programs and Multis both have an auxiliary effect. An auxiliary effect is an effect that is not in the direct path of the sound, but rather, it “receives” and processes the sound applying the effect, which is mixed back with the original sound. -
Page 126: Save And Delete User Multis
Multi Edit Mode Save and Delete User Multis Save and Delete User Multis For details on saving and deleting user Multis, See the Save and Delete User Multis section on page 7-12 of the Multi Mode chapter. 8-26... -
Page 127: Global Mode
This chapter will help familiarize you with the features of Global Mode. About Global Mode Global Mode gives you access to the global parameters of the Artis. It allows you to edit the master settings of the unit. It also allows you to restore factory defaults on the unit by performing a Hard or Soft Reset. -
Page 128: Selecting And Editing Parameters
The MASTER page in Global Mode allows you to set up the feel and response of the keyboard to your playing style, how effects are applied, tuning and the way things are displayed on the Artis LCD display. Parameter Range of Values... -
Page 129: Tune
Pressing both Previous & Next buttons simultaneously will set this parameter to 0. Velocity Map The Velocity Map parameter determines the way the Artis generates MIDI velocity information. Different maps generate different MIDI velocity values for the same physical key strike velocity . -
Page 130: View
Programs, and entry values will not disrupt sustained notes when changing Programs in Program Mode. When controlling the Artis from an external sequencer in Program Mode, setting FX Select to Multitrack will minimize effect disruption. Pressing both Previous & Next buttons simultaneously will set this parameter to... -
Page 131: Auto Power Off
USB MIDI activity. Auto Power Off Time If the Auto Power Off parameter is set to Enable, then the Artis will power off after the time selected by the Auto Power Off Time parameter has elapsed. The Artis will display the following warnings before powering off. Press a key or move any Artis control to dismiss the warning message. -
Page 132: Pedal Noise
This parameter determines whether a reminder message is shown during boot up of the Artis, reminding you that the Artis will power off after a period of inactivity. By default this setting is set to Show, and the other option is to Skip. If Auto Power Off (page 9-5) is set to Disable, then this parameter has no effect, and no message is shown during the boot cycle. -
Page 133: Cc Pedal Override
Global Mode MASTER Page CC Pedal Override In a similar manner to Pedal Switch Overrides, the Continuous Control Pedal can be set to alternatives defaults. In this case the controllers that the CC Pedal can be set to are: Mod Wheel (MIDI CC 1), Foot/Wah (MIDI CC 4), Volume (MIDI CC7), Expression (MIDI CC11) and Pressure. -
Page 134: Midi Page
Global Mode MIDI Page MIDI Page The Artis can transmit and receive MIDI via its MIDI ports and USB. The MIDI page in Global Mode allows you to configure how this will be handled. Parameter Range of Values Default Value... -
Page 135: Bank Select (Bankselect)
If you want to use the Artis strictly as a MIDI controller for the other modules in your MIDI chain, then select MIDI. If you want to make use of the Artis’s sounds as well as use it as a MIDI controller, then select Local+MIDI. -
Page 136: Program Change
MIDI controller. Select a value of Off when you want to change Programs/Multis on the Artis but don’t want to send program change commands to the USB or MIDI out port. Pressing both Previous & Next buttons simultaneously will set this parameter to On. -
Page 137: Multi Mode
Global Mode MIDI Page You may find it more convenient to use the local keyboard channel. In this case, the Artis remaps incoming MIDI to the Artis’s current channel, so in Program Mode, you’ll always play the Program on the Artis’s current channel. Incoming MIDI also gets sent to the Artis’s MIDI Out and USB port. -
Page 138: Info Page
The INFO page contains the system information indicating what version of operating system and objects is currently installed in your Artis keyboard. Go to the Kurzweil website at http://www.kurzweil.com and make sure that you have the latest operating system available. -
Page 139: Load Page
If your User Programs/Multis are located on a USB flash drive, plug them into the Device USB port on the rear panel of Artis. It is important for you to be aware of what USB port you have plugged into on Artis, as it will ask you from which USB port to load sounds from. - Page 140 Selecting Cancel exits the loading screen without loading any sounds. If no USB connection is detected by the Artis, you will see the following screen. In this case you will need to now connect your USB cable to either the the computer/Tablet or Device USB slot.
-
Page 141: Selecting Pc
Tablet. The Artis will now create a temporary folder on your computer/Tablet. Drag and drop the User Programs/Multis into the temporary folder on your computer/ Tablet. You now have the option how the User Programs/Multis will be loaded into Artis. Selection is either FILL or OVWRTE. OPEN Selecting Open will open a selected folder. -
Page 142: Selecting Device
Press OK when the file has loaded. USB connection errors If no file is in the Artis temporary drive during the load or an error occurs during the load operation, then the display will show the error message, “Load Error” and a message specifying the reason for the error. -
Page 143: Store Page
If you are saving sounds to a USB flash drive, plug them into the Device USB port on the rear panel of the Artis. It is important for you to be aware of what USB port you have plugged into on the Artis, as it will ask you which USB port to store sounds to. -
Page 144: Pressing Store
Selecting Cancel exits the loading screen without loading any sounds. If no USB connection is detected by the Artis, you will see the following screen. In this case you will need to now connect your USB cable to either the the computer/Tablet or Device USB slot. - Page 145 STORE Page Use the alphanumeric function of the Program/Multi buttons to enter a file name (8 character limit) and press Save. Select Cancel if you do not wish save anything and exit. The Artis uses the file extension of ART. 9-19...
-
Page 146: Reset Page
Global Mode RESET Page RESET Page The RESET button allows you to reset the Artis back to varying default states. You can reset just the Global Mode parameters, or all user Programs and user Multis along with the Global parameters. - Page 147 Global Mode RESET Page Press CANCEL if you are unsure, or do not wish to proceed with the reset. Press “Yes” if you wish to perform the global settings reset. Press “Cancel” if you are unsure, or do not wish to proceed with the reset. 9-21...
-
Page 148: Reset Artis To Its Factory State (Hard Reset)
Reset Artis to its factory state (Hard Reset) If you want to want to restore the Artis back to its factory state then select “No”. The factory state means all your existing User Programs & User Multis will be permanantly erased. - Page 149 Global Mode RESET Page Press “Yes” if you wish to erase all the User Programs & User Multis and Global parameters. Press “Cancel” if you are unsure, or do not wish to proceed with the reset. 9-23...
- Page 150 9-24...
-
Page 151: System Mode
This chapter will help you familiarize yourself with the functions of System Mode. System Mode allows you manage and upgrade the OS software of your Artis as well as perform diagnostic tests of the instrument’s various internal systems and processes. Note that the functions that you have access to in System Mode govern the operation of your Artis, so only use System Mode when you must perform essential maintenance tasks. -
Page 152: Run Artis
Run Artis This is the first System Mode menu item. Pressing the “Run Artis” soft button will load the OS and the Artis will start up as if you just switched on the unit. If the Artis operating system fails to load up, you will see an error message with an error code. -
Page 153: System Update
System Update System Update System Update allows you to keep your Artis running the latest available OS (Operating System), which you can download from the Kurzweil website. The file that is used to install a new OS version with sounds is combined into one file called a KUF file (.KUF). - Page 154 System Mode System Update 4. In System Mode, select System Update. 5. Select USB Device as the storage type. 10-4...
- Page 155 System Mode System Update 6. If the system was able to read the USB flash drive that was plugged in, it will display a list of files and folders as shown above. You can use the Chan Up/Down or Alpha wheel to move up and down the list.
-
Page 156: Install Using A Computer/Tablet
1. Download the System Update file from the Kurzweil website or another reliable source and save it in a known folder or directory on your flash drive. 2. Connect the Artis (powered off) to the computer/tablet with the USB cable provided into the USB COMPUTER slot. - Page 157 System Mode System Update If the Artis cannot detect a connection to the computer it will display the message below. 7. If the connection was detected, you will be prompted with the above message. Copy the KUF file to the virtual drive that appears on the PC and press OK.
-
Page 158: Run Diagnostics
These operations are mostly used at the factory and service centers by technicians for troubleshooting hardware problems. But, in some cases you might be required to run these diagnostics for troubleshooting and diagnosing symptoms. In these cases, following the direction of Kurzweil Technical Support. 10-8... -
Page 159: System Reset
If you are not sure what you are about to do, select CANCEL. This will exit the System Reset process and take you back to the System Mode menu. If you select OK you are now erasing all the user objects (Programs & Multis) in the Artis and restoring the instrument back to a Factory State. - Page 160 Remember to save your User Programs and User Multis to your computer following the instructions in the Store Page on page 9-17. Once deleted, these files are completely removed from the Artis and there is no way to retrieve them. 10-10...
-
Page 161: System Utilities
System Mode System Utilities System Utilities System Utilities contains various utilities for system administration. Select “Back” if you wish to exit and return back to the System Mode menu. 10-11... -
Page 162: Format Flash
Objects. Do not do this unless you think it is necessary in order to improve the performance of your Artis. Should you decide to do so, be sure to back up all of your files and software. After you do this, System Mode will still be available, so you can run updates and get your Artis up-and-running again. - Page 163 System Mode System Utilities 3. Press Format Flash. 4. The next screen wants to make sure that formatting the flash and deleting everything is really what you want to do. Select OK to format the internal flash memory. Select CANCEL if you do not wish to proceed. 10-13...
- Page 164 System Mode System Utilities 5. When formatting of the internal flash memory is completed, the display will show the message “Done formatting flash.”. Press OK. 10-14...
-
Page 165: Update Module
This option allows the installation of individual files. You may be guided by Kurzweil Technical Support to use this option if needed. Restore Older If you have updated the Artis but wish to return to the earlier version, you can use the Restore Older option. 10-15... - Page 166 System Mode System Utilities 10-16...
-
Page 167: Troubleshooting
1. The display backlight turns on. 2. “Loading...” appears on the display for a few seconds. 3. The Artis enters Program Mode with Program 1 or the Category Default Program for the Piano1 category selected. If nothing at all happens when you turn the power switch on, check if one of the following... -
Page 168: Powers Up, Display Is Blank
Demo Song rather then intermittently pressing keys. This will prevent any unexpectedly loud volume changes. If there is no sound from your Artis, check if one of the following might be the issue: The volume slider is turned down. Slowly push the volume slider up. -
Page 169: Midi Data
Disconnect all MIDI cables, set the Destination parameter in Global Mode to Local or MIDI+Local, and reset the volume level on the Artis, by pressing Panic (see page 3-17). Finally, slowly turn up the volume level of the audio system or mixer. -
Page 170: Midi Problems
Obtain and securely connect a new MIDI cable. The MIDI transmit channel does not Change the channel on either the Artis or on match that of the receiving device. the device such that the channels match. If there are problems with the internal sound module receiving MIDI from an external... -
Page 171: Pedal Problems
Troubleshooting Pedal Problems Pedal Problems Before you consult this section, be sure to read Connecting Pedals page 2-7. Switch Pedal Problems If you are having problems with connecting or using a switch pedal, check if one of the following might be the issue: •... -
Page 172: If None Of The Above
A continuous control pedal should have an impedance between 5,000 and 100,000 ohms. An impedance less than 5,000 may overload the reference voltage source in the Artis and interfere with operation of other controls like the Master Volume slider or the other sliders. -
Page 173: Diagnostics
These operations are mostly used at the factory and service centers by engineers for troubleshooting hardware problems. But, in some cases you might be required to run these diagnostics for troubleshooting and diagnosing symptoms. In these cases, follow the direction of an authorized Kurzweil technician. 11-7... - Page 174 Troubleshooting If None of the Above... 11-8...
-
Page 175: Midi Implementation
MIDI Implementation Appendix A MIDI Implementation Function Transmitted Recognized Remarks Default Basic Channel Memorized Changed 1–16 1–16 Default Use Multi-track mode (see FX Select Mode Messages Mode 3 Mode 3 (FXSel) on page 9-4 for multitimbral applications Altered 0–127 Note Number True Voice 0–127 0–127... -
Page 177: Physical Specifications
Physical Specifications Appendix B Physical Specifications Keyboard: 88-key, fully-weighted hammer-action with velocity sensitive adjustable keys. 88-key model uses Fatar TP/100. Display: 240x64 pixel monochrome LCD with front-panel contrast adjust. Polyphony: 128 Voice Polyphony, dynamically allocated. Multitimbral: 16 parts (one per MIDI channel). Quick Split / Layer: Easy access with adjustable relative volume. - Page 178 Physical Specifications...
-
Page 179: Programs
Programs Appendix C Programs PROGRAM PROGRAM Concert Piano Power Pop Piano Rock Piano Big Rock Piano Recital Piano Upright Piano Bright Classical Blues Piano Parlor Piano Classic Rock Pno Jazz Piano Modern Rock Pno Stadium Pop Pno NOLA Piano Radio Pop Pno Stage Piano PROGRAM PROGRAM... - Page 180 Programs PROGRAM PROGRAM Stevie's Rhds WoodstockClunker Duke's Dyno Rhds Stage Mix Wurly Beaten in Rhds Supertramp Wurly Fagen Phaser FlydDarkside/Wah Hotrod Dyno Rhds What'd I SayWrly Sweet Loretta EP AustnCtyLmtsWrly Rhds/WahSW BrightDynamicWly XfadBelltoneRhds DeepFuzz Wurly PROGRAM PROGRAM FM EP 1 VideoKilledRadio FM EP 2 UK Pop CP70...
- Page 181 Programs PROGRAM PROGRAM All Stops 16' Viol AllStops AllVox LateNighter Pipe Stops Testify Chapel Organ The Ninth Bar Pipes & Voices Blues Harmonica 16' Open Flute ParisCmboAccordn 16' Ped Reed MellowAccordion 16' Reed A BrazilAccordion PROGRAM PROGRAM Black Cow Clav SailinShoes Clav Crisp Clav Shoobie Model C...
- Page 182 Programs PROGRAM PROGRAM Adagio Strings Full Pizzicato Big LA Strings Winds & Strings Fast Strings Gothic Climax Slow String Trem Yesesis Tron Str AdagioTutti 8ves 3Way Split Mltrn Adagio Octaves Solo Violin fast NashvilleStrings Solo Cello fast Poltergeist Pad Solo Harp PROGRAM PROGRAM Mixed Choir...
- Page 183 Programs PROGRAM PROGRAM Film Score Pad Evolving Pad MW S&H Filt Lush Pad Bladerunner ARP Deeper Water Majestic Pad Lush Rhythm Pad So Lush Pad Cosmic Sus Pedal Undercurrents Slo Syn Orch Fairlight Pad Add A Pad 1 Phase Shimmer Add a Pad 2 PROGRAM PROGRAM...
- Page 184 Programs PROGRAM PROGRAM Kit 1 Open Rock Kit 9 Big Buzz Kit 2 J Geils Kit 10 DeadRockr Kit 3 West Boxy Kit 11 Low Rock Kit 4 SquashRock Kit 12 GaddsLair Kit 5 Beatbox101 Kit 13 KirkeeB Kit 6 Full Room Kit 14 ModernRok Kit 7 Brush Kit 15 Drum&Bass...
-
Page 185: Kb3 Programs
KB3 Programs Introducing KB3 Programs Appendix D KB3 Programs Introducing KB3 Programs There’s nothing quite like the sound of the classic Hammond™ B-3 tone wheel organ, especially when played through a Leslie™ rotating speaker system. We’ve done extensive testing and analysis with several tone wheel organs, and created our own models to emulate the unique tone wheel sound. -
Page 186: Drawbars
Best of all, you can make radical changes to the tone dynamically as you play. The nine sliders of the Artis are set to control the drawbars, as listed in blue below the sliders. Pulling the slider towards the keyboard increases the amount of the drawbar that is heard. -
Page 187: Chorus/Vibrato Depth
The percussion effect is “single-triggered”, which means that once it’s triggered, it won’t trigger again until all keys go up. The KB3 engine in the Artis is capable of generating the Percussion effect without stealing any of the drawbars, and while not authentic, is occasionally used on Artis Programs. -
Page 188: Variation
KB3 Programs KB3 Mode Buttons Variation The variation button acts as a Fast/Slow switch for the Leslie rotary speaker effect. Using the Rotary S/F Override in the Global mode, any Pedal assigned to Sustain can also be used to control the rotary speed. If Rotary S/F Override is set to Off, then Pedals assigned to Sustain will act normally as a Sustain Pedal. -
Page 189: Index
Index Index Parameter Jump 3-15. Program Demo 3-16, 5-6, 6-2, 6-3. Reset Transposition 3-15. Value Jump 3-11, 3-14, 3-15, 6-4, 6-11, 6-12, 6-14, 7-3, 7-9, 7-11, 8-4, 8-6, 8-9, 9-2. Global 3-10. Multi 3-10, 5-2, 7-1, 8-2. Mute 3-18, 8-3, 8-5, D-2. Activating Zones 7-8, 7-10. - Page 190 Index DataDec 9-3, 9-6. Files 9-16, 10-5, 10-10, 10-12, 10-15, 11-6. DataInc 8-18, 9-3, 9-6. Delete All 10-9, 11-6. Default (Category) 3-14, 6-1, 6-4, 6-6, 7-1, 7-2, Load (Fill) 9-15, 9-16. 7-3, 7-4. Loading 3-10, 5-2, 8-12, 8-13, 8-19, 8-22, 8-24, Choosing 6-6, 7-4.
- Page 191 Index Global. See Global Mode. 9-8, 9-10, 9-11, 9-12, B-1, D-1, D-2. Key High. See High Key. Multi 2-8, 2-13, 3-1, 3-4, 3-5, 3-8, 3-10, 3-11, Key Low. See Low Key. 3-12, 3-13, 3-15, 4-1, 5-2, 5-3, 5-4, 5-7, 6-10, KEYS Page 8-4, 8-10.
- Page 192 Index Parameter Assignments 6-9, 8-20. Sliders 1-2, 2-13, 3-2, 3-4, 3-8, 4-1, 5-1, 6-9, 6-22, PC 2-13, 10-6, 10-7, B-1. 8-19, 9-11, 11-6, B-1, D-2. Soft Button. See Buttons: Soft. Pedal 1-2, 1-3, 2-4, 2-7, 2-8, 2-9, 2-10, 2-13, 3-1, 4-1, 5-1, 6-22, 8-16, 8-18, 11-5, 11-6, B-1, Soft Pedal 8-21, 9-6.
- Page 193 Index User Multis Deleting. See Deleting User Multis. Saving. See Multis: Saving. User Objects Deleting all. See Files: Delete All. User Programs Deleting. See Deleting User Programs. Saving. See Program: Saving. Variation Button 3-2, 3-6, 6-9, 8-17, 8-18, 8-20, B-1, D-4. Velocity 3-1, 3-10, 8-10, 8-11, 8-22, A-1, B-1.
- Page 194 Index...
- Page 195 ©2013 Young Chang Co., Ltd. All rights reserved. Kurzweil ® is a product line of Young Chang Co., Ltd. Kurzweil ®, Young Chang®, V. A. S. T. ®, and Artis™ are trademarks of Young Chang Co., Ltd. All other trademarks and copyrights are property of their respective companies.