Table of Contents
Advertisement
Quick Links
Advertisement
Table of Contents

Related Manuals for Kurzweil Artis SE


Summary of Contents for Kurzweil Artis SE
-
Page 1: Stage Piano
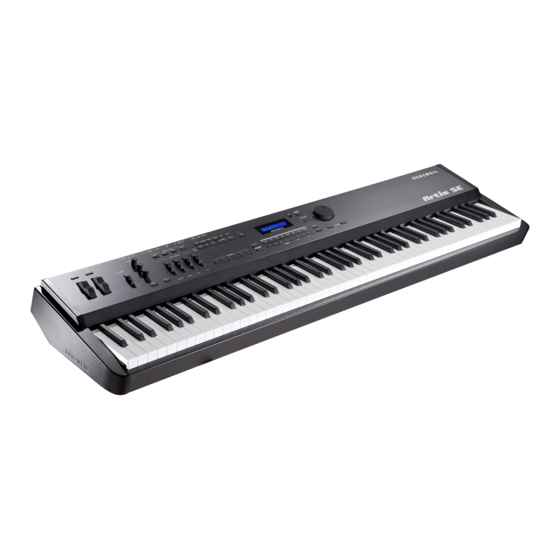
Artis SE ® STAGE PIANO ® Part Number 910570-001... -
Page 2: Radio And Television Interference
CAUTION The lightning flash with the arrowhead symbol, within an equilateral triangle is intended to alert the user to the presence of uninsulated RISK OF ELECTRIC SHOCK "dangerous voltage" within the product's enclosure that may be of sufficient magnitude to constitute a risk of electric shock to persons. DO NOT OPEN CAUTION: TO REDUCE THE RISK OF ELECTRIC SHOCK, The exclamation point within an equilateral triangle is intended... -
Page 3: Important Safety Instructions
AC receptacle. ©2014 Young Chang Co., Ltd. All rights reserved. Kurzweil® is a product line of Young Chang Co., Ltd. Kurzweil®, Young Chang®, V. A. S. T.®, and Artis SE™ are trademarks of Young Chang Co., Ltd. All other trademarks and copyrights are property of their respective companies. Product features and specifications are subject to change without notice. -
Page 4: Kurzweil International Contacts
Kurzweil International Contacts Contact the Kurzweil office listed below to locate your local Kurzweil representative. US Customers: Customers outside the US: American Music & Sound Young Chang Co., LTD. 22020 Clarendon Street, Suite 305 9th Floor, Bldg 102, I-Park, Woodland Hills, CA 91367... -
Page 5: Table Of Contents
Main Features ................1-1 Sound sources ................1-2 Keyboard and Controllers ............. 1-2 Pedals (Optional) ................1-2 Keeping the Artis SE up to date ........... 1-3 Do You Have Everything? ............. 1-3 Music Rack (Optional) ..............1-3 Getting Started ........... 2-1 Before You Start…... - Page 6 Contents Connecting to a Computer Sequencer ........2-12 Selecting Programs and Multis ..........2-13 Features of the Artis SE ......3-1 Powering Up Defaults ..............3-1 Parameters Reset To Defaults At Power-On ......... 3-1 Parameters Remembered After Power-On ........3-1 The Front Panel ................
- Page 7 Contents Double Button Presses ............... 3-13 Value Jump ................. 3-13 Parameter Jump ................3-13 Reset Transposition ..............3-13 Program Demo ................3-14 Demo ................... 3-14 Panic ................... 3-14 Assign ..................3-14 Assign + Zone (1–4) Button ............3-14 Assign + Controller ..............3-15 Assign + Keyboard key .............
- Page 8 Contents Split Transpose ................6-8 Saving a Split ................6-8 The Layer Function ............... 6-8 Layer Volume ................6-9 Layer Transpose ............... 6-10 Saving a Layer ................6-10 Changing the Transmit MIDI Channel ........6-10 Panic ..................... 6-11 Saving User Programs ..............6-11 Changing ID Numbers..............
- Page 9 Contents Multi Edit Mode ........... 8-1 About Multi Edit Mode ..............8-1 The Parameters List ..............8-2 Selecting Parameters ..............8-4 The Display ................... 8-4 Scrolling Messages..............8-4 Param/Channel Buttons ..............8-4 Alpha Wheel and Value buttons ............ 8-4 Value Jump Buttons ..............8-4 Param Jump Buttons..............
- Page 10 Contents On Value (OnVal) ..............8-14 Off Value (OffVal) ..............8-14 Entry State ................8-14 Exit State .................. 8-14 About Auxiliary Effects ............... 8-15 Common Parameters ..............8-15 Aux FX ..................8-15 Aux FX Channel (AuxFXCh) ............8-15 KB3 Channel ................8-16 Tempo ..................
- Page 11 Contents System Mode (Boot Loader) ....11-1 System Mode Buttons ..............11-2 Run Artis SE ................. 11-2 Update Software ................11-2 Update..................11-2 Restore ..................11-3 Run Diagnostics ................11-4 System Reset ................11-4 File Utilities .................. 11-4 Troubleshooting ........12-1 Maintenance ................. 12-1 Common Problems ..............
-
Page 12: Introducing Artis Se
Artis SE. Main Features The Artis SE Stage Piano is the beginning of the next generation of Kurzweil’s professional performance instruments. It boasts hundreds of excellent preset sounds (including the new German D Grand EXP set of piano sounds and the Enhanced Kore64 ROM) already on- board and ready to be played with 128 voice polyphony. -
Page 13: Sound Sources
• 1 jack for an optional continuous controller pedal Pedals (Optional) As described above, the Artis SE has three jacks on the rear panel for optional pedal controllers. Two jacks for switch pedals, which are typically used to control two-state (i.e., on / off) parameters such as sustain, sostenuto, and mute Zone. -
Page 14: Keeping The Artis Se Up To Date
• USB cable (Type-A-to-Type-B) • 4 self adhesive feet (see page 2-1) • Artis SE Getting Started Guide If you are missing any of these components, please contact your Kurzweil / Young Chang dealer to get them. Music Rack (Optional) The optional KMR2 Music Rack attachment is a holder for sheet music or a computer tablet device. -
Page 15: Getting Started
Don’t connect anything until you make sure the Artis SE is properly and safely situated. If your Artis SE keyboard has been out in the cold, give it time to warm up to room temperature before starting it, since condensation may have formed inside. -
Page 16: Using Artis Se
7. Make sure your sound system is at a safe volume level. Also make sure that the Artis SE MASTER VOLUME slider (on the far left side of the front panel) is all the way down. -
Page 17: Start Up Details: The Rear Panel
Use the provided DC power adapter to connect the Artis SE to a standard AC power source. The USB Ports Use the USB ports to connect the Artis SE to a computer/tablet in order to do the following: • Use the Artis SE as a MIDI controller to play software instruments on a computer. -
Page 18: The Midi (In And Out) Ports
(i.e., “on / off”) parameters, such as sustain, sostenuto, and Mute Zone. It is possible to connect up to 2 dual switch pedals having a single stereo plug (Kurzweil KFP-2S available separately) into the SW1 and SW2 jacks, (see Connecting a Dual Switch Pedal on page 2-8) or up to 2 half damper pedals having stereo jacks. -
Page 19: The Headphones Jack
PA system inputs, and connect the other end to the jacks marked Left (Mono) and Right on the rear panel of the Artis SE. If you have only one input available, use the Artis SE’s Left (Mono) output to get the full signal in mono. - Page 20 Getting Started Connecting Pedals Artis SE connected to powered speakers and headphones Artis SE connected to a mixer, powered speakers and headphones...
-
Page 21: Connecting Pedals
(CC) Pedals plug with the wiper connected to the tip. Pedals are all independently assignable within each Zone of every Multi. Here are the default control settings for the three pedals used by Artis SE: SW 1 Pedal Sustain (MIDI 64) -
Page 22: Connecting A Dual Switch Pedal
Artis SE. This ensures that the pedal will work properly (it might function in reverse—off when it’s down and on when it’s up—if you turn on your Artis SE before plugging in the pedal). Similarly, don’t press any of your switch pedals while powering up, as the Artis SE verifies each pedal’s orientation during power-up. -
Page 23: Connecting A Half Damper Pedal
SW1 and SW2 inputs on the rear panel. Some pedals have the wiper connected to the ring, and these pedals will require an adapter to work with the Artis SE. Half damper pedals can be used to control external software and sound modules via MIDI,... -
Page 24: Connecting A Continuous Control Pedal
A continuous control pedal can be very useful for controlling volume, wah, or other effects by foot. The Kurzweil CC-1 continuous control pedal will work best with the Artis SE, but it is also possible to use third-party continuous control pedals designed for synthesizers. -
Page 25: Connecting Midi
The reason is because the Artis SE does not include a Thru MIDI port; however, this simply means that the Artis SE must be at the start or at the end of the MIDI daisy chain. Using the Artis SE as the controller, connect the MIDI Out port to the MIDI In port of the first module, and then connect that module’s MIDI Thru port to the input of the next... -
Page 26: Connecting To A Computer Sequencer
Scenario 1: Artis SE as the MIDI controller Scenario 2: Artis SE as the last module in the MIDI chain Connecting to a Computer Sequencer To connect the Artis SE to a computer/tablet, simply connect Artis SE using the provided or compatible cable. 2-12... -
Page 27: Selecting Programs And Multis
If you wish to use your own cable, make sure that it is a Type-A-to-Type-B USB cable (the USB computer port of the Artis SE being Type B). By default, the Artis SE will act as a MIDI controller (rather than a hard drive) when connected to a computer. -
Page 28: Features Of The Artis Se
Chapter 3 Features of the Artis SE This chapter will help familiarize you with the features of the Artis SE. Many of these features have both general functions and mode-specific functions. For more in-depth descriptions of these features, refer to the chapters on the individual modes. -
Page 29: The Front Panel
Features of the Artis SE The Front Panel The Front Panel All the controls for Artis SE, both musical and navigational, are on its front panel BANK Button ZONE VOLUME Sliders Mode and Function Buttons FAVORITES buttons ZONE Mute Buttons... -
Page 30: Real Time Controls
Features of the Artis SE Real Time Controls Real Time Controls Pitch Wheel The Pitch Wheel is the left most of the two wheels. It is spring-loaded, such that its center position is restored when it is not being used. That is because the Pitch Wheel is used for pitch-bending notes—its “off”... -
Page 31: Foot Switches And Controllers
This controls the output level of the Headphone and Audio Out jacks on the rear panel. Audio In On the back panel of the Artis SE you will find a 1/8” sized stereo audio jack labelled AUDIO You can plug your MP3 player into the Artis SE and play along with the recorded music. -
Page 32: Sliders And Filter-Fx Button
Features of the Artis SE Audio Level Controls The HI & LOW EQ’s are shelving type filters, and the MID is a bell curve type filter centered around approximately 1.4 kHz. Frequency Gain ~6.6 kHz -24dB to +15dB ~1.4 kHz... -
Page 33: Zone On/Off Buttons
Pressing a Zone button will mute or unmute the Zone. An active/unmuted Zone button has a lit green LED. The LED of an inactive/muted Zone button is not lit. Mode Buttons The Mode buttons are located on the left side of the Artis SE front panel. -
Page 34: Multi Button
Storage Button Pressing the Storage button enters Storage Mode, allowing data to be loaded into or saved from, the Artis SE. Choices include the storage device connection (USB for flash drives, PC for computers or tablets). Edit Button (Multi Edit Mode) When in Multi Mode, the Edit button will initiate Multi Edit mode. -
Page 35: Save Button
The available options are LOCAL, MIDI, or LOCAL and MIDI. When LOCAL and MIDI are selected, MIDI notes will be sent to the local Artis SE sound engine, as well as the MIDI Out and USB Computer ports. When only LOCAL is selected, MIDI notes will only be sent to the local Artis SE sound engine. -
Page 36: Layer
Octave buttons are located at the left of the Artis SE display, just below the Mode buttons The Transpose buttons can be used to change the tuning of notes played on the Artis SE keyboard in semitones (ST), also known as half steps. This is a convenient way to change the key of a song without learning to play it in a different key. -
Page 37: Favorites
Multi buttons to select any of the sounds in that Category. CATEGORY button The Artis SE makes it easy to select sounds by instrument type. The 8 Category buttons can access 16 Categories, arranged in two rows. An LED indicates the currently active row, and the Category button will let you switch rows. -
Page 38: A/B Bank Button
Bank button has no effect unless you have saved User Multis. Navigation The navigation section of the Artis SE front panel includes the LCD display, (-) and (+) Value buttons, Param / Channel ▲ and ▼ buttons, and the Alpha Wheel. -
Page 39: And (+) Value Buttons
Features of the Artis SE Navigation In Global Mode, the top line of the display shows the current mode, the current parameter and the total number available. The bottom line shows the selected parameter name. (–) and (+) Value Buttons Use the (-) and (+) buttons to scroll through the list of values for the currently selected parameter. -
Page 40: Double Button Presses
Edit Mode, pressing and holding the Assign button allows you to to set the HiKey or LoKey parameter (when selected) for the current Zone by striking a key on the Artis SE keyboard. In Multi Edit Mode, pressing and holding the Assign button allows you to quickly select the Destination parameter for a controller of the current Zone by moving the desired controller. -
Page 41: Program Demo
Pressing the 5 & 6 Program/Multi buttons performs the Demo Function (described in further detail in Program and Song Demo Functions on page 5-3). With the Demo Function selected, you can hear a demonstration song that showcases many of the features of Artis SE. Panic Pressing the 7 &... -
Page 42: Assign + Controller
Features of the Artis SE Double Button Presses Assign + Controller In Multi Edit Mode, holding the Assign button and moving a controller (a Slider, Switch button, Mod Wheel or Pedal) will jump to selecting the destination parameter of that controller in the current Zone. -
Page 43: Terminology
Since there are no standard definitions for some of these terms, they are described here to avoid confusion. All of these terms appear with the first letter capitalized as proper nouns in this manual to make it easy to distinguish between the generic term and the Artis SE specific term. - Page 44 See The Operating Modes on page 5-1 for more information on Modes. Hard Reset A process that returns Artis SE back to a Factory state. All User Programs & User Multis are erased. All Global Mode parameters are reset back to their default settings as well.
- Page 45 Anything that can be named, saved, deleted, or edited (i.e., a Program or a Multi). KUF file KUF (Kurzweil Unified File) file is a special file that has the objects and operating system combined that is used to update the Artis SE.
-
Page 46: The Operating Modes
Split, Layer, Transpose and Demos) are described in this chapter in Functions on page 5-3. Multi Mode Multi Mode is the default Mode for the Artis SE. Multi Mode allows you to select and play Multis. A Multi allows up to 4 instrument sounds (Programs) to be played from the keyboard at once. -
Page 47: Program Mode
To enter Multi Edit Mode press the Edit Button while in Multi Mode. The Edit button does apply in Program Mode; however, hitting Split or Layer while in Program mode will also put the Artis SE into Multi Edit mode. See Multi Edit Mode on page 8-1 for more detail. -
Page 48: Functions
Functions Five Functions , also described in Function Buttons on page 3-8, have dedicated buttons. The Sound Function This controls the overall MIDI output of the Artis SE. Hitting Sound will step through three possible configurations: Local MIDI data is sent only to the Artis SE sound engine. MIDI OUT is disabled. -
Page 49: Program Mode
Program on the current MIDI Channel. Selecting Programs The Artis SE features two Program Banks, one of which contains 256 factory Programs, and the other Bank is reserved for up to 256 User Programs. Both the factory and User Banks are split into 16 categories of 16 Programs each. -
Page 50: Program Demo
Program Mode Selecting Programs • Choosing a Program in the user Categories, while in the factory Categories, or choosing a Program in a factory Category while in a user Category, requires pressing the User button, followed by a Category button and then a Program/Multi button. –... -
Page 51: Alpha Wheel & - And + Value Buttons
Program Mode Selecting Programs Alpha Wheel & – and + Value Buttons – Use the Alpha Wheel, or the buttons below the Alpha Wheel, to change the current – Program. Turning the Alpha Wheel counter-clockwise or pressing the button will select the previous Program and turning the Alpha Wheel clockwise or pressing the + button will select the next Program. -
Page 52: Category & Program/Multi Buttons
Category. This will also work in reverse if you turn the Alpha Wheel counter-clockwise or press the - button. In this case when you reach the beginning of a Category, the Artis SE automatically advances to the end of the previous Category. These controls will scroll through all of the categories in the current Bank, and the next Bank will be automatically selected when the end of the current Bank is reached. -
Page 53: Choosing Category Default Programs
Favorite button until the display shows the message “Saved to fav. button.” Transposition The Transpose buttons can be used to change the tuning of notes played on the Artis SE keyboard in semitones (ST), also known as half steps. This is a convenient way to change the key of a song without learning to play it in a different key. -
Page 54: Parameter Assignments
Once you have saved your Split as a User Multi, you can continue to add Split or Layer Zones to the Multi until you reach the maximum of four active Zones. The Artis SE will display a message if you have already reached the maximum of four active Zones (see Multi... - Page 55 Program Mode The Split Function There are four parameters (described below) that determine the behavior of the Split. These can be accessed by using the Param/Channel buttons. Split Program Move the Alpha Wheel or use a Category/Program button to select the Split Program.This determines the Program for the left-hand side of the Split keyboard.
-
Page 56: Split Key
Program Mode The Layer Function Split Key Press the Param/Channel ▲button again to select the Split Key parameter. This sets the keyboard key that will be the boundary between the left and right hand Programs on the keyboard. The selected key will be the highest note for the left-hand Split Program. All keys higher than the Split Key will play the right-hand Program. -
Page 57: Layer Volume
Once you have saved your Layer as a Multi, you can continue to add Layer or Split Zones in Multi Mode until you reach the maximum of four active Zones. The Artis SE will display a message when you have reached the maximum of four active Zones (see Multi Mode on page 7-1, for more information on Multis) There are three parameters (described below) that determine the behavior of the Layer. -
Page 58: Layer Transpose
Program Mode Changing the Transmit MIDI Channel Layer Transpose Press the Param/Channel ▲button again to select the Layer Transpose parameter. This parameter allows you to transpose the Layer Program in octaves so that it sounds octaves higher or lower than the other Program you are layering on top of. Use the Alpha Wheel or –... -
Page 59: Panic
Program Mode Panic If a MIDI Channel is disabled, the Program name is shown with parenthesis and the message “Channel disabled” on the line above. MIDI Channels are enabled/disabled in Global Mode, see Channel Enable (ChanEn) on page 9-6. Panic Pressing the 7 and 8 Program/Multi buttons (Panic) simultaneously deactivates all sounding notes and resets controller values by sending an “All Notes Off ”... -
Page 60: Changing Id Numbers
You can save Programs with ID numbers from 257 to 512. When you initially press the Save button, the Artis SE always selects the next available unused ID number and displays the current Program name. After specifying the Program ID number and name, press the Save button again to complete the saving process. -
Page 61: Multi Mode
While you are in Multi Mode, the Multi button’s indicator LED is illuminated. When you enter Multi Mode after powering on the Artis SE, the Category Default Multi in the Piano1 Category will be selected, either Multi 1 (factory default) or a Multi you pick as a Category Default Multi, see Choosing Category Default Multis on page 7-4. -
Page 62: Selecting Multis
Multi Mode Selecting Multis Muting Zones Pressing a Zone On/Off button will mute or unmute the Zone. An active/unmuted Zone button has a lit LED. The LED of an inactive/muted Zone button is not lit. Selecting Multis When you are in Multi Mode, there a few ways to select Multis. •... -
Page 63: Alpha Wheel And Value Buttons
Multi Mode Selecting Multis – Alpha Wheel and & Value Buttons Use the Alpha Wheel or the Value buttons, to the right of the display below the Alpha Wheel, to change the current Multi. Turning the Alpha Wheel counter-clockwise or –... -
Page 64: Choosing Category Default Multis
Favorite Button until the display shows the message “Multi saved to fav. button.” Transposition The Transpose buttons can be used to change the tuning of notes played on the Artis SE keyboard in semitones (ST), also known as half steps. This is a convenient way to change the key of a song without learning to play it in a different key. -
Page 65: The Split Function
Zone key ranges, Programs, and volumes. You can simply press the Split button, and the Artis SE automatically activates another Zone in the Multi for you. The previously active Zones are used in the right hand of the Split. After this you can choose a “Split Program”... -
Page 66: Split Volume
Multi Mode The Layer Function Split Volume This parameter determines the volumes of the left and right-hand Zones. By default, the Split Volume is set to 0, which results in all Zones having the same volume. When set to a positive number, the volume for the right hand Zone(s) is decreased. -
Page 67: Layer Program
Zone key ranges, Programs, and volumes. You can simply press the Layer button, and the Artis SE automatically activates another Zone in the Multi to layer with the previously active Zones. After this you can choose a “Layer Program” that will be used as the Program for newly activated Zone. -
Page 68: Saving A Layer
Category, press the Save button once. You can save Multis with ID numbers from 257 to 512. When you initially press the Save button, Artis SE always selects the next available unused ID number and displays the current Multi name. -
Page 69: Naming A User Multi
Multi Mode Saving User Multis Naming a User Multi To rename the new Multi press a Param/Channel button until you see “Rename Multi as:”. The current Multi name will appear with a cursor line under the first letter. Use the Alpha –... -
Page 70: Multi Edit Mode
Multi Edit Mode About Multi Edit Mode Chapter 8 Multi Edit Mode This chapter will help you familiarize yourself with the features of Multi Edit Mode. About Multi Edit Mode NOTE: Before you read this chapter, be sure to read Multi Mode on page 7-1 for a full description of Multis. -
Page 71: The Parameters List
Multi Edit Mode The Parameters List The Parameters List A Multi has 86 Zone-specific parameters for each of the four Zones, and four common parameters—altogether, the configurations of these multiple parameters determine the behavior of the Multi. As you scroll through the list of parameters using the Param/Channel Up ▲... - Page 72 Multi Edit Mode The Parameters List List Parameter Range of Values Default Value CC Pedal Destination Multi Destination Controller List (none) CC Pedal Entry Value 0 to 127 (none) CC Pedal Exit Value 0 to 127 (none) Pedal Switch1a Mode Momentary, Toggled Toggled Pedal Switch1a Destina-...
-
Page 73: Selecting Parameters
Multi Edit Mode Selecting Parameters Selecting Parameters The Display In Multi Edit Mode, the top line of the display shows the current Mode, Zone number and the current parameter number as well as the total the number of available parameters. The bottom line of the display shows the current parameter and value. -
Page 74: Assign
Local Program (Local Prog) The Local Program parameter determines the Program to be loaded for the currently selected Zone. You can set this parameter to any Artis SE Program (0 – 512). The display shows the Program number and name (usually scrolling text). -
Page 75: Channel
Artis SE strictly as a MIDI controller for the other modules in your MIDI chain, then select MIDI. If you want to make use of the Artis SE’s sounds as well as use it as a MIDI controller, then select Local+MIDI. -
Page 76: Entry Pan
Multi Edit Mode The Zone-specific Parameters Entry Pan The Entry Pan parameter determines the Pan MIDI message that the currently selected Zone sends when the Multi is loaded. You can set this parameter to any pan setting from None, 0 (full left pan) to 127 (full right pan). -
Page 77: Low Velocity (Lovel)
Zone sends when the Multi is loaded. You can set this parameter to a MIDI Bank change message from 0 to 127. When using the Artis SE as a MIDI controller, sending a MIDI Bank change message (along with a MIDI Program change message) when a Multi is loaded ensures that the Program loaded on the other sound modules in your MIDI chain is the Program that you want. -
Page 78: Midi Program
Zone sends when the Multi is loaded. You can set this parameter to a MIDI Program change message from 0 to 127. When using the Artis SE as a MIDI controller, sending a MIDI Program change message (along with a MIDI bank change message) when a Multi is loaded ensures that the Program loaded on the other sound modules in your MIDI chain is the Program that you want. -
Page 79: Entry Program Change (Entryprgchg)
MIDI controller numbers. Most have chosen 0, 32, or both. In the case of the Kurzweil K2600, it has its own unique controller number that it responds to. You can set this parameter to any of the five controller IDs listed below: None MIDI Bank change messages are disabled. -
Page 80: Continuous Controller Parameters
• Sliders 1 through 8 • CC Pedal Destination (Dest) Use the Destination parameter to assign the Artis SE physical controllers (Sliders, Pedals, Switches, Mod Wheel, etc.) to control Program parameters or send MIDI continuous controller messages (CCs) to external MIDI gear. - Page 81 Multi Edit Mode The Zone-specific Parameters Controller Controller Description Number Destination MIDI Bank MIDI Bank change message 33–63 MIDI 33–63 MIDI Controllers 33–63 Sustain Default destination for Sustain Pedal MIDI 65 MIDI Controller 65 Sostenut Default destination for Sostenuto Pedal (Sustains notes that are currently down, but not notes played subsequently.) Soft Lowers the volume by a preset amount and may soften the timbre as well.
-
Page 82: Controlling Program Parameter Assignments From Multi Mode
Multi Edit Mode The Zone-specific Parameters Controller Controller Description Number Destination ProgDec Program Decrement—decrements current Program number. ProgGoto Go to Program—selects Program. SetupInc Multi Increment—increments current Multi number. SetupDec Multi Decrement—increments current Multi number. SetupGoto Go to Multi—selects Multi. Start Stop Continue TransUp... -
Page 83: Mode
Multi Edit Mode The Zone-specific Parameters • SW2 Button The following are parameters that affect the behavior of the Pedal Switch and Sw button controllers. Mode The Mode parameter determines the switching action of the switch controllers. You can set this parameter either of three settings: Momentary A momentary switch is one that is only in the “on”... -
Page 84: About Auxiliary Effects
Multi Edit Mode About Auxiliary Effects About Auxiliary Effects Programs and Multis both have an auxiliary effect. An auxiliary effect is an effect that is not in the direct path of the sound, but rather, it “receives” the sound, and then outputs effect- altered sound, which is mixed back with the original sound. -
Page 85: Kb3 Channel
Multi Edit Mode Saving User Multis KB3 Channel In the event there are more than one KB3 Programs specified in a Multi, this parameter specifies which MIDI Channel has priority to load a KB3 Program. You can set this parameter to a value between 1 and 16. Tempo Some FX Chains that contain time based effects like delay or LFO can be synced to a tempo. -
Page 86: Global Mode
This chapter will help you familiarize yourself with the features of Global Mode. Global Mode gives you access to the global parameters of the Artis SE—that is, it allows you to edit the master settings of the unit. It also allows you to restore factory defaults on the unit by performing a Hard Reset. -
Page 87: Selecting And Editing Parameters
Global Mode Selecting and Editing Parameters Selecting and Editing Parameters To scroll through the parameters (and dialogs) of Global Mode, use the Param/Channel buttons. Parameter or Dialog Range of Values Default Value Tune -100 to 100 Cents 0 Cents Velocity Map Linear, Light 1, Light 2, Light 3, Linear Hard 1, Hard 2, Hard 3, Piano Touch,... -
Page 88: The Global Parameters
Global Mode The Global Parameters The Global Parameters The following are the global parameters of the Artis SE. The settings of these parameters are in effect regardless of what Program or Multi you have currently selected. Tune The Tune parameter allows you to fine-tune the unit in cents—one cent is one hundredth of a semitone (100 cents comprise a semitone). -
Page 89: Fx Select (Fxsel)
USB MIDI activity. Auto Power Off Time If the Auto Power Off parameter is set to Enable, then the Artis SE will power off after the time selected by the Auto Power Off Time parameter has elapsed. The Artis SE will display warning messages, counting down before powering off. -
Page 90: Hard Reset
Before performing a Hard Reset, be sure to save your work to external storage (see Chapter 10 “Storage Mode”). Once deleted, User Programs and User Multis are completely removed from the Artis SE and can only be retrieved from external storage. Press the... -
Page 91: Bank Select (Banksel)
None. The local keyboard channel enables the Artis SE to receive MIDI information on a single channel, then rechannelize that information so you can play and control all four Zones of a... -
Page 92: Program Mode
If you do have multiple Artis SEs receiving Sysex messages from a single source, make sure each Artis SE has a different Sysex ID. This will allow you to direct Sysex messages to the appropriate Artis SE by specifying which unit with the Sysex ID byte that’s included with every Sysex message. -
Page 93: Delete Objects
Global Mode The Global Parameters Go to the Kurzweil website at http://www.kurzweil.com and make sure that you have the latest operating system available. Delete Objects? Use the Delete function to delete unwanted User Programs or Multis. Deleted Program/ Multis can not be restored (see the Storage Mode chapter if you wish to store User Programs/ Multis to an external device before deleting). -
Page 94: Storage Mode
Use the Device option to select a device to store to or load from. Two connections are provided on the rear panel of the Artis SE. The Computer port is used to communicate with a computer or tablet; the Storage port will accept a USB storage device such as a thumb –... -
Page 95: Store
(or press Exit to cancel). The display will show the “ Saving… ” message then a confirmation. If you are storing to a PC, you must copy the saved file from the Artis SE virtual drive to your computer before continuing. Save Successful... -
Page 96: Load (Overwrite)
When loading new files the display shows , and when complete File loaded If no file is in the Artis SE temporary drive during the load or an error occurs during the load operation, then the display will show the error message, Load Error and a message specifying the reason for the error. -
Page 97: Load (Fill)
If USB was selected for the Device option, use the Param/Channel ▲ or ▼ buttons to select the file to load from the list of files on the Artis SE display. For either device, pressing the button will load the file, the display shows “... -
Page 98: System Mode (Boot Loader)
The functions that you have access to in System Mode govern the operation of your Artis SE, so use System Mode only when you must perform essential maintenance tasks. -
Page 99: System Mode Buttons
This is the first System Mode menu item. Pressing the button will load the OS and the Artis SE will start up as if you just switched on the unit (except for the message that happens when you first start up the unit). -
Page 100: Restore
Once copied, “Safely Remove” or “Unmount” the removable disk/drive from your computer. 6. Press the button on the Artis SE. If the .KUF file is valid, the Artis SE will display the message . This will take a minute or two. -
Page 101: Run Diagnostics
SE’s system flash memory and erase the OS software as well as all Objects. Do not do this unless you think it is necessary in order to improve the performance of your Artis SE. Should you decide to do so, be sure to back up all of your files and software. After you do this, System Mode will still be available, so you can run updates and get your Artis SE up-and- running again. - Page 102 2. Press Param/Channel Down ▼ button once. The display shows Press to select this operation. The unit display the message 3. Press the button to format the Artis SE. 4. Press the Exit button to cancel and return to the System Mode main menu. 11-5...
-
Page 103: Troubleshooting
1. The display backlight turns on. 2. “Loading...” appears on the display for a few seconds. 3. The Artis SE enters Program Mode with Program 1 or the Category Default Program for the Piano1 category selected. If nothing at all happens when you turn the power switch on, check if one of the following... -
Page 104: Powers Up, Display Is Blank
Demo Song rather then intermittently pressing keys. This will prevent any unexpectedly loud volume changes. If there is no sound from your Artis SE, check if one of the following might be the issue: Slowly push the volume slider up. - Page 105 MIDI. Obtain and securely connect an audio cable The audio cable is of an incorrect type. of the correct type. The Artis SE accepts both balanced (TRS) and unbalanced (TS) 1/4- inch audio cables. If you can hear sound but it is low or distorted, check if one of the following might be the...
-
Page 106: Midi Problems
The MIDI connections are wrong. To send MIDI, plug the MIDI cable into the Artis SE’ MIDI Out port and into the module’s MIDI In port. The MIDI cable is defective. Obtain and securely connect a new MIDI cable. -
Page 107: Pedal Problems
Troubleshooting Pedal Problems Pedal Problems Before you consult this section, be sure to read Connecting Pedals page 2-6. Switch Pedal Problems If you are having problems with connecting or using a switch pedal, check if one of the following might be the issue: •... -
Page 108: If None Of The Above
5,000 and 100,000 ohms. An impedance less than 5,000 may overload the reference voltage source in the Artis SE and interfere with operation of other controls like the Master Volume slider or the other sliders. -
Page 109: Diagnostics
These operations are mostly used at the factory and service centers by engineers for troubleshooting hardware problems. But, in some cases you might be required to run these diagnostics for troubleshooting and diagnosing symptoms. In these cases, follow the direction of an authorized Kurzweil technician. 12-7... -
Page 110: Midi Implementation
MIDI Implementation Appendix A MIDI Implementation Function Transmitted Recognized Remarks Default Basic Channel Memorized Changed 1–16 1–16 Default Use Multi-track mode (see FX Select (FXSel) on page 9-4 for Mode Messages Mode 3 Mode 3 multitimbral applications Altered 0–127 Note Number True Voice 0–127 0–127... -
Page 111: Physical Specifications
Physical Specifications Appendix B Physical Specifications Keyboard: 88-key, fully-weighted hammer-action with velocity sensitive keys. (Fatar TP/100). Display: 20 x 2 character LCD with front-panel contrast adjust. Polyphony: 128 Voice Polyphony, dynamically allocated. Multitimbral: 16 parts (one per MIDI channel). Quick Split / Layer: Easy access with adjustable relative volume (up to 4 zones). -
Page 112: Factory Programs
Factory Programs Appendix C Factory Programs BANK A BANK B Concert Piano R&B Keys Rock Piano Hip Hop Piano Recital Piano EDM Piano Bright Classical Soul Piano Parlor Piano Pub Piano Jazz Piano Indie Piano Stadium Pop Pno Seventies Piano Radio Pop Pno Piano &... - Page 113 Factory Programs BANK A BANK B Stevie's Rhds FM EP 1 Duke's Dyno Rhds FM EP 2 Beaten in Rhds Elec Grand Stack Fagen Phaser Rich EP+Pad Hotrod Dyno Rhds Crisp and Soft Sweet Loretta EP Tight Bright FM Rhds/WahSW Gabriel's Melt XfadBelltoneRhds CP80 Enhanced...
- Page 114 Factory Programs BANK A BANK B All Stops 16' Viol AllStops AllVox LateNighter Pipe Stops Testify Chapel Organ The Ninth Bar Pipes & Voices Blues Harmonica 16' Open Flute ParisCmboAccordn 16' Ped Reed MellowAccordion 16' Reed A BrazilAccordion BANK A BANK B Black Cow Clav SailinShoes Clav...
- Page 115 Factory Programs BANK A BANK B Adagio Strings Full Pizzicato Big LA Strings Winds & Strings Fast Strings Gothic Climax Slow String Trem Yesesis Tron Str AdagioTutti 8ves 3Way Split Mltrn Adagio Octaves Solo Violin fast NashvilleStrings Solo Cello fast Poltergeist Pad Solo Harp BANK A...
- Page 116 Factory Programs BANK A BANK B Film Score Pad Evolving Pad MW S&H Filt Lush Pad Bladerunner ARP Deeper Water Majestic Pad Lush Rhythm Pad So Lush Pad Cosmic Sus Pedal Undercurrents Slo Syn Orch Fairlight Pad Add A Pad 1 Phase Shimmer Add a Pad 2 BANK A...
- Page 117 Factory Programs BANK A BANK B Kit 1 Open Rock Kit 9 Big Buzz Kit 2 J Geils Kit 10 DeadRockr Kit 3 West Boxy Kit 11 Low Rock Kit 4 SquashRock Kit 12 GaddsLair Kit 5 Beatbox101 Kit 13 KirkeeB Kit 6 Full Room Kit 14 ModernRok Kit 7 Brush...
-
Page 118: Factory Multis
Factory Multis Appendix D Factory Multis MULTI MULTI Concert Piano SE Velociraver Rock Piano SE BendAway Bass Jazz Piano SE Chill Kit/Chords Pop Piano SE Futurebeats Upright Piano SE Electro Kit/Lead Bright Piano SE Lead Fifths R&B Piano SE Vibsey Pad Distant Piano SE Super Duper Saw MULTI... - Page 119 Factory Multis MULTI MULTI Synth & Strings CP70 & Harpsi Pizz & Glock Funked up Clav Lotsa Horns CP Pad & Choir Jungle Marimba Fusion Split ClavWithBenefits Vicious Organ Pad Organ Plucked B3 Organ and Rhodes Organ Strings The 9th Circle Organ Choir MULTI MULTI...
- Page 120 Factory Multis BANK A BANK B Hungry Lead Shimmer Fairytale Dulci & 12String Lost In Space Guitarmageddon Popstep Feel Electric Saw 5ths Mallet Palette Trill Singers Jungle Floor Vox n Bells Rock the Bells 3 Layer Stack Enchanted Forest BANK A BANK B Real+Tape Strngs Dark Pad w Bells...
-
Page 121: Index
Index Index Param/Channel 3-11, 3-12, 5-3, 6-10. Param Jump 8-4. Previous (-) 2-2, 3-2, 6-3, 6-5, 7-3, 9-3. Program 3-7, 5-2, 6-1. System Mode 11-2. Value 3-12, 6-3, 7-3. Value Jump 8-4. Zone 3-6, 7-2. Alpha Wheel 2-2, 3-11, 3-12, 6-2, 6-3, 7-2, 7-3, 7-8, 8-4. Assign 3-2, 3-14, 6-8, 7-6, 8-5. - Page 122 Index Half Damper Pedal 2-7. See Pedal: Half Damper. Hard Reset 3-7, 4-2, 5-2, 9-1. Edit Button 3-7, 5-2. Headphones 2-2, 2-5, 2-6, B-1. Editing Parameters 3-13, 3-15, 6-7, 6-9, 7-7, 9-2. High Key 8-7. Effects B-1. High Velocity 8-8. Aux 8-15.
- Page 123 Index Channel Transmit 3-12, 6-10, 7-1, 8-6, 12-4. Parameter 7-6. Connecting. See Connecting MIDI. List 3-12. Implementation Chart A-1. Parameter Assignments 6-6. Ports 2-4, 2-11. PC 2-13, B-1. Problems 12-4. Pedal 1-2, 1-3, 2-4, 2-7, 2-8, 2-9, 2-10, 2-13, 3-1, 4-1, 5-2, Program Change 8-9, A-1.
- Page 124 Index Specifications B-1. Value Jump Buttons 8-4. Split 4-2. Velocity 3-1, 3-7, A-1, B-1. Button 3-8, 6-6, 7-5. Velocity Maps 3-1, 9-3. Function 3-8, 4-2, 5-3, 6-6, 6-7, 6-8, 6-10, 7-5. Volume 6-7, 6-9, 7-6, 7-7, 12-6, B-1. Key 3-15, 6-8, 7-6. Slider 2-2, 3-2, 3-4.