
Related Manuals for Kurzweil KP140


Summary of Contents for Kurzweil KP140
- Page 1 Aw_A100_Manual_G07_170105...
- Page 2 INFORMATION FOR YOUR SAFETY! THE FCC REGULATION WARNING (for USA) PRECAUTIONS This equipment has been tested and found to comply with PLEASE READ CAREFULLY BEFORE PROCEEDING the limits for a Class B digital device, pursuant to Part 15 of the FCC Rules. Please keep this manual in a safe place for future reference.
-
Page 3: Table Of Contents
Contents Panel & Display Description Mixer ..............19 Front Panel...............4 Rear Panel..............4 Effect Related Settings LCD................5 Octave..............20 Touch..............20 Setup Metronome..............20 Power Supply............6 Sustain..............20 Setting a Music Stand..........6 Pitch Bend...............21 Modulation..............21 DSP.................21 Connections Transpose...............21 Connecting a pair of Headphones......7 Harmony..............21 Using Sustain Pedal..........7 Connecting a Computer..........7 Register Memory Registration Banks..........22... -
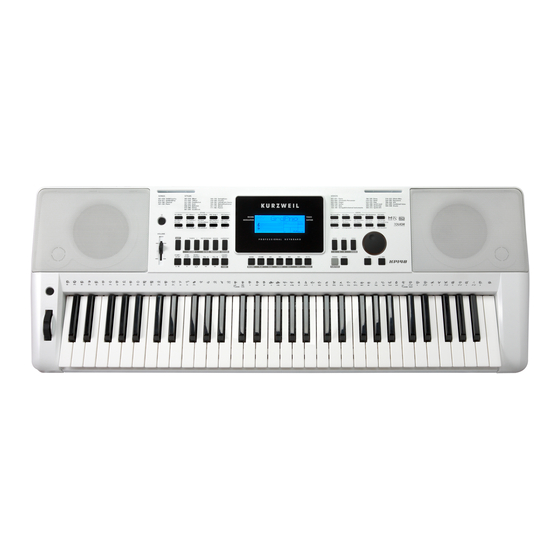
Page 4: Panel & Display Description
Panel & Display Description Front Panel When the [SHIFT] button pressed 5~6. [ACCOMP [ACCOMP -] button Adjust the ACCOMP volume. 7. [OCT AVE] button Turn the Octave setting on or off. 8. [TRANSPOSE] button Turn the Transpose setting on or off. 9. -
Page 5: Lcd
Panel & Display Description 23. LCD display When the [SHIFT] button When the [SHIFT] button Display important setting information. Pressed Released 25. [VOICE] button 25. [LEFT HAND] button Switch to Voice Mode. Choose the Left Hand in Lesson Mode. 24. VOICE DIRECT SELECT BUTT Select a direct Voice. -
Page 6: Setup
Setup This section contains information about setting up your instrument and preparing to play. Please go through this section carefully before turning the power on. Power Supply You can power the instrument either by batteries or by power adaptor. Before you switch your instrument on, turn down the volume of instrument and the connected audio equipment first. -
Page 7: Connections
Connections Connecting a pair of Headphones PHONES SUSTAIN A standard pair of stereo headphones can be connected to the PHONES jack for private practice or late-night playing. The internal stereo speaker system is automatically shut off when a pair of head phones is plugged into this jack. -
Page 8: Power/Master Volume
Power/Master Volume Turn the Power On/Off Firstly, please make sure you have correctly completed power connection. Press POWER SWITCH, the LCD screen is lit, and displays data information on the screen, it indicates the instrument is powered on. Note: Press the POWER SWITCH, if the LCD screen isn’t lit, please check VOLUME the power is connected correctly or not. -
Page 9: Playing Voices
Playing Voices VOICE Press the [VOICE] button. Enter the Voice Mode. The LCD displays the current default voice name and number. / NO / YES Select a Voice. Use the data dial or the [+/Yes]/ [-/No] button to select the voice you want to play. -
Page 10: Playing Songs
Playing Songs SONG This instrument has featured 120 preset songs, and each song can be practiced in LESSON mode. Press the [SONG] button. Enter the song selection mode. It will play all songs circularly. / NO / YES Select a song. Toccata Use the data dial or the [+/YES]/ [-/NO] button to select the song you want to play. -
Page 11: Voices
Voices The instrument features 508 build-in voices. In order to offer you a better performance experience, we programmed many useful effects which can be inserted while playing voices. Please refer to Function Menu. VOICE Select a Voice The default voice number is 001 when power on and the “VOICE R1” / NO / YES icon will be lightening up on the left-top corner of the LCD. -
Page 12: Styles
Styles The auto accompaniment feature puts a full backing band at your STYLE fingertips. To use it, all you have to do is to play the chords with your left hand using your selected accompaniment style, and then the accompaniment will automatically play along, instantly following the chords you play. -
Page 13: Playing Different Accompaniment Sections
Styles Playing Different Accompaniment STYLE Sections Press the [STYLE] button. / NO / YES Press the Style Direct Button, data dial or [+/YES]/ [-/NO] button to select a style. START / SYNC INTRO / CHORD Press [CHORD MODE] button to enter A.B.C. (auto bass chord) STOP START ENDING... -
Page 14: Chord Fingering
Styles Chord Fingering Fifth How the chords are played or indicated with your left hand (in the auto accompaniment section of the keyboard) is referred to as “fingering”. There are 2 types of fingerings as described below. Root Chord Basics Third A chord, in music, is any harmonic set of three or more notes that is heard as if sounding simultaneously. -
Page 15: Tempo
Styles Tempo TEMPO Each style of the instrument has been set with a default or standard tempo; however, this can be changed by using the [TEMPO +]/ [TEMPO -] button. ACCOMP Use the [TEMPO +]/ [TEMPO -] button to change the tempo. While the tempo data is flashing, use the data dial can also change the tempo. -
Page 16: Function Menu
Function Menu SHIFT PIANO Press and hold the [SHIFT] button and then press the [FUNCTION] button to enter function menu. The LCD displays the default “Tune” function menu option. Use [+/YES]/ [-/NO] button to set parameter of FUNCTION the current menu. The option and parameters are as follows: Content LCD display... -
Page 17: Beat Type
Function Menu Beat Type Press and hold the [SHIFT] button and then repeatedly press the SHIFT PIANO [FUNCTION] button to select beat type menu. The LCD displays “xxx Beat”. / NO / YES FUNCTION Use [+/YES]/ [-/NO] button or data dial to change beat type. The range of beat type: 0, 2~9. -
Page 18: Reverb Level
Function Menu Reverb Level Press and hold the [SHIFT] button and then repeatedly press the SHIFT PIANO [FUNCTION] button to select reverb level. The LCD displays “xxx Rev Lev”, adjustable range is: 0-32. / NO / YES FUNCTION Use the [+/YES]/ [-/NO] button or data dial to change reverb level, press the [+/YES] and [-/NO] buttons simultaneously to restore its default setting: 23. -
Page 19: Midi In/ Out
Function Menu MIDI IN/ OUT Press and hold the [SHIFT] button and then repeatedly press the SHIFT PIANO [FUNCTION] button to select MIDI in/ out menu. The LCD displays “xxx Midi In”/ “xxx Midi Out”. / NO / YES FUNCTION Use [+/YES]/ [-/NO] button or data dial to change MIDI in channel: 1~16, ALL. -
Page 20: Effect Related Settings
Effect Related Settings SHIFT METRONOME Octave Press and hold the [SHIFT] button and then press the [OCTAVE] button to select octave function menu. The LCD displays “xxx OCTAVE Octave”. Use [+/YES]/ [-/NO] button or data dial to change octave / NO / YES value, adjustable range is: -1~ +1. -
Page 21: Pitch Bend
Effect Related Settings Pitch Bend Use the pitch bend wheel to bend notes up (roll the wheel away from you) or down (roll the wheel toward you) while playing the keyboard. The pitch bend wheel is self-centering and will automatically return to normal pitch when released. -
Page 22: Register Memory
Register Memory The Registration Memory feature can make your performance more easily and efficiently. It allows you to save virtually all panel settings to a Registration Memory setting, and you can instantly recall custom panel settings by pressing a single button. Registration Banks BANK STORE... -
Page 23: Record
Record Use the powerful record function; you can record your own keyboard performance real time as a user song, just like using recording equipment, and can also playback it. Up to 5 user songs you can record in this instrument. SHIFT BANK Prepare for Recording... -
Page 24: Playback Recording
Record Playback Recording SHIFT STORE When recording is in process, holding down [SHIFT] button and then press the [PLAY] button to enter the selection interface. The PLAY LCD displays “XXX NoFile_X”, if you have selected a user song with no record data; or the LCD displays “XXX PlySongX”, if you PlySong1 have selected a user song with record data, for example, “001 PlySong1”. -
Page 25: Piano Mode
Piano Mode This function is to set the voice of the whole keyboard to piano PIANO instantly. Press the [PIANO] button can enter or exit piano mode. FUNCTION 2. In piano mode, the accompaniment control is the same to other Piano mode. -
Page 26: Lesson Mode
Song Lesson Mode SHIFT SONG This lesson mode is consisting of four combination buttons: [SHIFT] + [LESSON], [SHIFT] + [L], [SHIFT] + [R] and [SHIFT] + [L] + [R]. LESSON Enter the lesson mode While the song is stop playing, holding down the [SHIFT] button Toccata and press the [LESSON] button. -
Page 27: Chord Dictionary
Chord Dictionary SHIFT If you know the name of a chord but don't know how to play it, you can use the Chord Dictionary function. You can learn the chord and test in this features. Displaying the chord notes on LCD and helping DICT. -
Page 28: Pedal Function
Pedal Function Using pedal function can makes your performance more naturally and PHONES SUSTAIN with greater expressiveness. Multi-function Pedal You can refer to Pedal Type chapter for details. Sustain Pedal This pedal function performs the same function as the damper pedal on an acoustic piano, letting you sustain the sound of voices Ped Sust even after releasing the keys. -
Page 29: Midi
MIDI With the MIDI functions you can expand your musical possibilities. This section will let you know what MIDI is, and what it can do, as well as how you can use MIDI on your instrument. PHONES SUSTAIN What's MIDI? MIDI (short for Musical Instrument Digital Interface) allows a wide variety of electronic musical instruments, computers and other related devices to connect and communicate with one another. -
Page 30: Troubleshooting
Troubleshooting Problem Possible Cause and Solution The speakers produce a pop sound This is normal and is no cause for alarm. whenever the power is turned ON or OFF. No sound when the keyboard is played. The R1/R2/L voice volume (Mixer) settings could be set too low. Make sure the voice volumes are set at appropriate levels. -
Page 31: Voice List
Voice List NO. Name LCD Name Music Box Mbox Piano Vibraphone Vibra Vibraphone (wide) VibraW Acoustic Grand Piano GrdPno Marimba Marimba Acoustic Grand Piano 2 GrdPno 2 Marimba (wide) MarimbaW Acoustic Grand Piano (wide) GrdPnoW Acoustic Grand Piano (dark) Xylophone Xyloph GrdPnoD Bright Acoustic Piano... - Page 32 Voice List Tremolo Strings Electric Guitar (pedal steel) PedalGt TreStr Tremolo Strings 2 Electric Guitar (clean) CleaGt TreStr 2 Pizzicato Strings Electric Guitar (clean) 2 CleaGt 2 PizStr Electric Guitar (detuned clean) Orchestral Harp DetClGt Harp Mid Tone Guitar MidGt Yang Chin YangChin Electric Guitar (muted)
- Page 33 Voice List 268 Quint Quint Oboe Oboe Synth Pad 2 Oboe 2 Oboe Pad 1 (new age) NewAge English Horn EngHorn Pad 2 (warm) WarmPd 2 English Horn 2EngHorn Pad 2a (sine pad) Sine Pad Bassoon Bassoon Pad 3 (polysynth) PolySyn 2 Bassoon 2Bassoon...
- Page 34 Voice List BagPipe HiTimbal Bag Pipe High Timbale Fiddle LoTimba Fiddle Low Timbale Shanai Cabasa Shanai Cabasa Percussive Maracas Maracas TinkBe AnMarac Tinkle Bell Analog Maracas Agogo ShGuiro Agogo Short Guiro SteeDru Long Guiro LoGuiro Steel Drums WoodBlo Claves Claves Woodblock Castan Mute Cuica...
- Page 35 Voice List Screaming Scream Flute & Clarinet Fl& Cl Punch Punch Flute & Oboe Fl&Ob Heart Beat HeartBea Flute & Bassoon Fl& Bn Footsteps Footstep Flute & Oboe & Clarinet Fl&Ob&Cl Gunshot Gunshot Flute & Clarinet & Bassoon Fl&Cl&Bn Machine Gun MachiGun Flute &...
-
Page 36: Style List
Style List NO. Name NO. Name LCD Name LCD Name 8BEAT New Shuffle NewShufl Rock Hip Hop 8Beat Ballad 8BtBld RkHipHop 8Beat Piano 8BtPiano Rock&Roll 1 R'N'R1 8Beat 1 8Beat1 Rock Shuffle RockShfl GtPop1 Rock&Roll 2 Guitar Pop 1 R'N'R2 BALLROOM 8Beat Hip Hop 8BtHiHop... - Page 37 Style List NO. Name LCD Name NO. Name LCD Name Big Band BigBand Polka Polka Dixieland 1 Dixland1 6/8 March 6/8March Guitar Swing 1 GtSwing1 German Polka GerPolka Broadway Big Band BwayBand Party Polka PtyPolka Swing Swing Army March ArmMarch Latin Jazz 2 LatinJz2 March...
-
Page 38: Song List
Song List NO. Name LCD Name NO. Name LCD Name FOLK & COUNTRY Turkish March Turkish An Die Musik Musik Toccata Toccata Lieder Carry Me Back To Old Virginny CarMeBk Lieder Ohne Worte Op.62 No.6 El Condor Pasa ElCondor Red River Valley RedRiver Traumere Die Forelle... -
Page 39: Demo List
Song List NO. Name LCD Name PIANO Hanon Piano Fingering 1 Hanon 1 Hanon Piano Fingering 2 Hanon 2 Hanon Piano Fingering 3 Hanon 3 Hanon Piano Fingering 4 Hanon 4 Hanon Piano Fingering 5 Hanon 5 Basic Tutorial Beyer Piano12 Beyer 12 Beyer 13 Basic Tutorial Beyer Piano13... -
Page 40: Midi Implementation Chart
1-16ch 1-16ch 1-16ch A100_G07 Aw_A100_Manual_G07_170105 2017 10:48:24... - Page 41 NOTE...
- Page 42 NOTE...
- Page 43 NOTE...
- Page 44 Twitter @KurzweilMusic Facebook Http://www.facebook.com/kurzweilmusicsystems 196, Bongsu-daero, Seo-gu, Incheon, Korea...