Table of Contents

Related Manuals for Cisco VS-C6509E-S720-10G


Summary of Contents for Cisco VS-C6509E-S720-10G
- Page 1 Cisco 6500/7600 Series Manager User Guide Release 2.1 Corporate Headquarters Cisco Systems, Inc. 170 West Tasman Drive San Jose, CA 95134-1706 http://www.cisco.com Tel: 408 526-4000 800 553-NETS (6387) Fax: 408 526-4100 Customer Order Number:...
- Page 2 OR LIMITED WARRANTY, CONTACT YOUR CISCO REPRESENTATIVE FOR A COPY. The Cisco implementation of TCP header compression is an adaptation of a program developed by the University of California, Berkeley (UCB) as part of UCB’s public domain version of the UNIX operating system. All rights reserved. Copyright © 1981, Regents of the University of California.
-
Page 3: Table Of Contents
Cisco 7600 Series Overview Supported Hardware Supported Software 1-10 Basic Concepts C H A P T E R Cisco EMF and Cisco 6500/7600 Series Manager Software Element Management C65/76M Objects and Interfaces Physical Objects Logical Objects Cisco 6500/7600 Series Manager User Guide... - Page 4 Deploying C65/76M Objects Launching Object Management Dialogs 3-10 Deploying the C65/76M C H A P T E R Managing a Catalyst 6000 Family Switch or a Cisco 7600 Series Internet Router Deploying Objects Commissioning Objects Deployment and Commissioning Process IP Auto Discovery...
- Page 5 5-60 Details Tab 5-60 Additional Notes Tab 5-64 C6576M SLB Dialog Box 5-65 Details Tab 5-65 Client Side VLAN Tab 5-68 Server Side VLAN Tab 5-70 Server Farms Tab 5-72 Virtual Servers Tab 5-74 Cisco 6500/7600 Series Manager User Guide...
- Page 6 C6576M OSM Channelized SONET Interface Dialog Box 5-128 Status Tab 5-128 Configuration Tab 5-131 Performance Tab 5-135 Additional Notes Tab 5-137 C6576M OSM POS Interface Dialog Box 5-138 Status Tab 5-138 Configuration Tab 5-140 ATM/SONET Tab 5-141 Performance Tab 5-143 Cisco 6500/7600 Series Manager User Guide...
- Page 7 Cat OS Config File Tab 6-23 Additional Notes Tab 6-28 C6576M Syslog Dialog Box 6-29 IOS Tab 6-29 Catalyst OS Tab 6-31 Additional Notes Tab 6-33 C6576M VTP Dialog Box 6-34 Details Tab 6-34 Additional Notes Tab 6-36 Cisco 6500/7600 Series Manager User Guide...
- Page 8 6-87 Distribution List Tab 6-89 Additional Notes Tab 6-91 C6576M EIGRP Dialog Box 6-92 Details Tab 6-92 Redistribution Tab 6-95 Distribution List Tab 6-97 Additional Notes Tab 6-99 C6576M IS-IS Dialog Box 6-100 Cisco 6500/7600 Series Manager User Guide viii...
- Page 9 Creating a Network Element Profile Applying a Network Element Profile Syslog Profile Creating a Syslog Profile Applying a Syslog Profile Alarms and Alarm Management C H A P T E R Viewing C65/76M Alarms Event Browser Cisco 6500/7600 Series Manager User Guide...
- Page 10 Contents Full Event Description Dialog C65/76M Alarms SNMP Trap Alarms Object State Alarms Attribute Value Alarms 8-13 Cisco 6500/7600 Series Manager User Guide...
-
Page 11: About This Guide
About this Guide This preface describes who should read the Cisco 6500/7600 Series Manager User Guide, how it is organized, and its document conventions. Audience This guide is written as a technical resource for network managers, system administrators (the people responsible for managing the network), network analysts (those who configure the network), and operators. -
Page 12: Related Documentation
Describes the alarms that are raised Management in CEMF by the C65/76M. Related Documentation In addition to this guide, the following documents are available for the Cisco 6500/7600 Series Manager: • Cisco 6500/7600 Series Manager Installation Guide Release Notes for the Cisco 6500/7600 Series Manager •... -
Page 13: Conventions And Terminology
Means reader take note. Notes contain helpful suggestions or references to material not covered in the Note publication. The Cisco EMF software supports a three-button mouse. The buttons are configured as follows: Left button—Selects objects and activates controls. • Middle button—Adjusts a selected group of objects, adding to or deselecting part of the group. -
Page 14: Obtaining Documentation
The following sections explain how to obtain documentation from Cisco Systems. World Wide Web You can access the most current Cisco documentation on the World Wide Web at the following URL: http://www.cisco.com Translated documentation is available at the following URL: http://www.cisco.com/public/countries_languages.shtml... -
Page 15: Documentation Feedback
Obtaining Documentation These sections explain how to obtain documentation from Cisco Systems. World Wide Web You can access the most current Cisco documentation on the World Wide Web at this URL: http://www.cisco.com Translated documentation is available at this URL: http://www.cisco.com/public/countries_languages.shtml... -
Page 16: Ordering Documentation
We appreciate your comments. Obtaining Technical Assistance Cisco provides Cisco.com as a starting point for all technical assistance. Customers and partners can obtain online documentation, troubleshooting tips, and sample configurations from online tools by using the Cisco Technical Assistance Center (TAC) Web Site. Cisco.com registered users have complete access to the technical support resources on the Cisco TAC Web Site. -
Page 17: Technical Assistance Center
Cisco TAC Web Site You can use the Cisco TAC Web Site to resolve P3 and P4 issues yourself, saving both cost and time. The site provides around-the-clock access to online tools, knowledge bases, and software. To access the Cisco TAC Web Site, go to this URL: http://www.cisco.com/tac... - Page 18 The Cisco TAC Escalation Center addresses priority level 1 or priority level 2 issues. These classifications are assigned when severe network degradation significantly impacts business operations. When you contact the TAC Escalation Center with a P1 or P2 problem, a Cisco TAC engineer automatically opens a case.
-
Page 19: Chapter 1 Product Overview
Internet Routers by eliminating the need to have Simple Network Management Protocol (SNMP) and a detailed knowledge of the Cisco IOS or Catalyst OS required commands. The software also helps simplify the deployment process for the Catalyst 6000 family switches or Cisco 7600 series Internet Routers. -
Page 20: Software Features
• Access to fault, configuration, accounting, performance, and security (FCAPS) functionality (supported through SNMP and Cisco IOS or Catalyst OS software) through GUIs that you can operate without SNMP or Cisco IOS or Catalyst OS software expertise. Many operations can be performed to several Catalyst 6000 family switches or Cisco 7600 series •... - Page 21 Catalyst 6509-NEB Switch Switching modules STATUS assembly Supervisor engine Redundant supervisor engine Slots 1-9 (right to left) INPUT OUTPUT FAIL INPUT OUTPUT FAIL Power supply 2 Power supply 1 (redundant) ESD ground strap connection Cisco 6500/7600 Series Manager User Guide...
-
Page 22: Cisco 7600 Series Overview
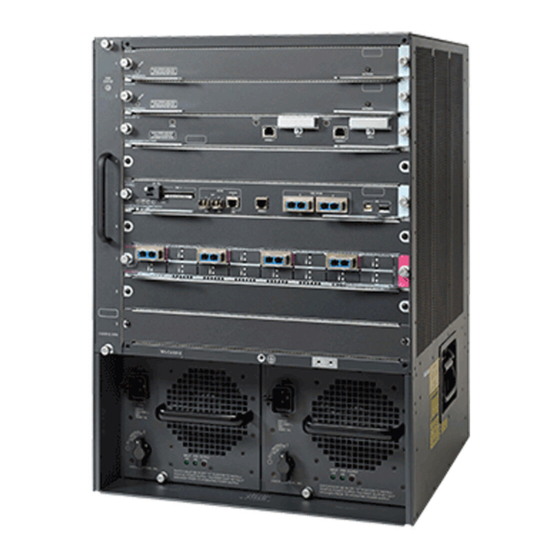
Chapter 1 Product Overview Cisco 7600 Series Overview Cisco 7600 Series Overview The Cisco 7600 series Internet Routers consist of the 3-slot 7603, the 6-slot 7606, and the vertical 9-slot 7609 (shown in Figure 1-2). The Cisco 7600 series Internet Routers deliver optical LAN, WAN, and MAN networking with a focus on line-rate delivery of high-touch IP services at the network edge. - Page 23 ESD ground strap connection For additional information about the Cisco 7600 series Internet Routers, refer to the Cisco 7603 and 7606 Internet Router Installation Guide and Cisco 7609 Internet Router Installation Guide. For a complete list of Cisco 7600 series Internet Router documentation, see the “Related Documentation”...
-
Page 24: Supported Hardware
13-slot Catalyst 6500 series chassis Cisco 7600 series chassis CISCO7603 3-slot Cisco 7600 series chassis CISCO7606 6-slot Cisco 7600 series chassis OSR-7609 Vertical 9-slot Cisco 7600 series chassis Catalyst 6000 family WS-CAC-1000W 1000W AC power supply power supplies WS-CAC-1300W 1300W AC power supply... - Page 25 48-port 10/100, RJ-21, upgradable to voice WS-X6348-RJ-21V 48-port 10/100, RJ-21, inline power WS-X6524-100FX-MM Fabric-enabled 100FX Fast Ethernet Module, multimode fiber, MT-RJ WS-X6548-RJ-21 Fabric-enabled 10/100 Fast Ethernet Modules, RJ-21 WS-X6548-RJ-45 Fabric-enabled 10/100 Fast Ethernet Modules, RJ-45 Cisco 6500/7600 Series Manager User Guide...
- Page 26 4-port OC-12/STM-4 SONET/SDH OSM, SM-LR, with 4 ports of Gigabit Ethernet OSM-1OC48-POS-SS 1-port OC-48/STM-16 SONET/SDH OSM, SM-SR, with 4 ports of Gigabit Ethernet OSM-1OC48-POS-SI 1-port OC-48/STM-16 SONET/SDH OSM, SM-IR, with 4 ports of Gigabit Ethernet Cisco 6500/7600 Series Manager User Guide...
- Page 27 4-port channelized OC-12 OSM, SI, with 4 ports of Gigabit Ethernet OSM-8CHOC12/T3-MM 8-port channelized OC-12 OSM, MM, with 4 ports of Gigabit Ethernet OSM-8CHOC12/T3-SI 8-port channelized OC-12 OSM, SI, with 4 ports of Gigabit Ethernet Cisco 6500/7600 Series Manager User Guide...
-
Page 28: Supported Software
Catalyst OS 7.1(2) and IOS 12.1(8)E Catalyst OS 7.1(2) and IOS 12.1(11)E • The Cisco 6500/7600 Series Manager does not support Catalyst 6000 family switches or Cisco 7600 Note series Internet Routers running only Catalyst software (no Multilayer Switch Feature Card installed). -
Page 29: Chapter 2 Basic Concepts
• Cisco EMF and Cisco 6500/7600 Series Manager Software The C65/76M is the carrier-class element manager for the Catalyst 6000 family switches and Cisco 7600 series Internet Routers, which “plugs into” CEMF. The C65/76M software adds additional windows and a back-end controller process that communicates with the hardware elements (using CEMF), as shown in the following figure. -
Page 30: Element Management
Chapter 2 Basic Concepts Cisco EMF and Cisco 6500/7600 Series Manager Software Figure 2-1 CEMF and C65/76M Processes Cisco EM controller Element Manager C65/76M Cisco EM Windows controller Database Cisco C65/76M Database CEMF Management Network Catalyst 6500 Element Management An Element Manager is an application that is responsible for providing fault, configuration, accounting, performance and security (FCAPS) management for a particular type of Network Element or family of Network Elements. -
Page 31: C65/76M Objects And Interfaces
Chassis—The hardware frame of the Catalyst 6000 family switch or the Cisco 7600 series Internet • Router Power supplies—The source of power for the Catalyst 6000 family switch or the Cisco 7600 series • Internet Router Supervisor Engine modules—Contain the route and switch processors •... -
Page 32: Logical Objects
EtherChannels—Creates, deletes, and modifies EtherChannels on the Catalyst 6000 family switch or Cisco 7600 series Internet Router • VLAN—Lists, creates, and deletes VLAN interfaces on the Catalyst 6000 family switch or Cisco 7600 series Internet Router • Loopback—Used to isolate the fault on an end-to-end circuit •... - Page 33 VLAN. • EIGRP—Creates, modifies, and deletes Enhanced Interior Gateway Routing Protocol (EIGRP) instances on the Catalyst 6000 family switch or Cisco 7600 series Internet Router • BGP—Creates and modifies Border Gateway Protocol (BGP) routing protocol •...
-
Page 34: Network Element Object
The Network Element object is a logical container representing the entire Catalyst 6000 family multilayer switch or Cisco 7600 series Internet Router managed through the supervisor and/or MSFC SNMP agents and Catalyst OS/IOS command-line interface. This class acts as a container for the physical and logical components of the device. -
Page 35: Containment Views
Physical tree. Note that previous versions of the EMS added three other containment views (Catalyst6000Manager, Catalyst6500Manager and Cisco7600Manager) - if these views are present the version 2.0 release of the Manager application is still installed. See the Cisco 6500/7600 Manager Installation Guide for instruction on removing the previous version of the Manager. -
Page 36: Physical View
The relationships defined in this view are physical containment relationships. For example, monitored objects physically located in the same room or location may be grouped together under the same site. Refer to the Cisco Element Management Framework User Guide for more information. -
Page 37: Normal State
If heartbeat polling determines that connectivity is lost or changes have been made to the object, the • transition is to the discovery state. Once dicovery is completed successfully, the object transitions back to the performance state. Cisco 6500/7600 Series Manager User Guide... -
Page 38: Perflostcomms State
For the Network Element object, the mismatched state indicates that there is a major difference between the CEMF information and the actual Catalyst 6000 family switch or a Cisco 7600 series Internet Router. This mismatch can be in the major switch series (e.g. 6000, 6500 or 7600), the specific model of the switch (e.g. -
Page 39: Chapter 3 Getting Started
C H A P T E R Getting Started This chapter describes the typical tasks to be completed when first using the Cisco 6500/7600 Series Manager, and consists of the following sections: Preparing to Use the C65/76M Software, page 3-1 •... -
Page 40: Using Cisco Emf
Cisco EMF user session. Note Before you can start a Cisco EMF user session, Cisco EMF has to be running. If a message is displayed indicating that Cisco EMF is not running, contact the system administrator. -
Page 41: Cisco Element Management Framework Launchpad Window
If a valid user name and password are not entered within three attempts, the login window closes. When a valid user name and the password are entered, the session starts and the Cisco EMF Launchpad window appears (see Figure 3-2). - Page 42 Network Elements into object groups. The Object Group Manager allows the creation, deletion, and modification of object groups. Object groups can be any combination of objects derived from the Cisco EMF managed object class. Objects can be added manually or on the basis of query criteria.
- Page 43 The Discovery icon provides access to the Cisco EMF Auto Discovery application, which examines the network for IP and SNMP devices and creates a managed object for each new device discovered. Auto Discovery can be opened from the Cisco EMF Launchpad window or from a pop-up menu available on a selected object.
-
Page 44: Quitting A Cisco Emf User Session
• Press Ctrl-Q. Step 2 A window appears, asking, Do you wish to quit the Cisco EMF Manager System? Click Yes to quit the session. All active applications are closed and the session terminates. Cisco 6500/7600 Series Manager User Guide... -
Page 45: Deploying C65/76M Objects
Deploying C65/76M Objects Deploying C65/76M Objects To manage a Catalyst 6000 family switch or Cisco 7600 series Internet Router using Cisco EMF, a C65/76M object must be deployed within Cisco EMF and commissioned. This section describes how to manually deploy the Network Element object in Cisco EMF. For a detailed description on other deployment options, refer to Chapter 4, “Deploying the C65/76M.”... - Page 46 OS Deploy Type If the specific OS installation type for the switch is known, it can be selected here. Leave the setting as autoDetect to let the EMS determine the OS deployment type. Cisco 6500/7600 Series Manager User Guide...
- Page 47 Click the Finish button to deploy the Network Element object. Step 4 This procedure deploys a decommissioned Catalyst 6500 Network Element object in Cisco EMF and automatically commissions it. Once the network element is commissioned and discovery is complete, the physical view will resemble Figure 3-5.
-
Page 48: Launching Object Management Dialogs
“C65/76M Objects and Interfaces” section on page 2-3 for descriptions of the object hierarchies. For example, to open the EtherChannel Dialog, right-click on the Software object and choose Open EtherChannel Dialog from the pop-up menu, as shown in Figure 3-6. Cisco 6500/7600 Series Manager User Guide 3-10... - Page 49 Figure 3-6 Launching an Object Management Dialog Box Chapter 5, “Physical Object Dialog Boxes,” Chapter 6, “Logical Object Dialog Boxes,” describe how to use the dialog boxes for the physical and logical objects, respectively. Cisco 6500/7600 Series Manager User Guide 3-11...
- Page 50 Chapter 3 Getting Started Launching Object Management Dialogs Cisco 6500/7600 Series Manager User Guide 3-12...
-
Page 51: Chapter 4 Deploying The C65/76M
Deployment and Commissioning Process, page 4-5 Managing a Catalyst 6000 Family Switch or a Cisco 7600 Series Internet Router Managing a Catalyst 6000 family switch or a Cisco 7600 series Internet Router using CEMF is a two-step process: Deploy objects that need to be managed. - Page 52 Chapter 4 Deploying the C65/76M Managing a Catalyst 6000 Family Switch or a Cisco 7600 Series Internet Router C65/76M Object Hierarchy A fully deployed C65/76M object in CEMF has the following object hierarchy: Network Element Chassis Power Supplies Supervisor Modules...
-
Page 53: Commissioning Objects
Chapter 4 Deploying the C65/76M Managing a Catalyst 6000 Family Switch or a Cisco 7600 Series Internet Router Commissioning Objects Commissioning is the action required to notify CEMF to start actively monitoring the object. Only the following C65/76M objects can be commissioned and decommissioned by the user: •... - Page 54 Chapter 4 Deploying the C65/76M Managing a Catalyst 6000 Family Switch or a Cisco 7600 Series Internet Router Figure 4-1 Hierarchical Structure of Deployed and Commissioned Objects Cisco 6500/7600 Series Manager User Guide...
-
Page 55: Deployment And Commissioning Process
This method should be used to deploy a large number of devices that are currently connected to the network. This method automatically deploys the Network Element and Software objects for each Catalyst 6000 family switch or Cisco 7600 series Internet Router discovered. •... - Page 56 Chapter 4 Deploying the C65/76M Deployment and Commissioning Process Figure 4-2 Launching the IP Discovery Window from the Map Viewer When first launched, the IP Discovery window will resemble Figure 4-3. Cisco 6500/7600 Series Manager User Guide...
-
Page 57: Deployment And Commissioning Process
Physical Location parameter. If one of the discovered devices is a Catalyst 6000 family switch or a Cisco 7600 series Internet Router, then a C65/76M Network Element object will also be added into the Network containers, Physical containers, and the appropriate Manager Views. - Page 58 Specifically, the Telnet and Enable passwords and the SNMP communities are required. To specify the passwords and SNMP communities, right-click on the Network Element object (192.168.12.105 in Figure 4-4) and choose Open Network Element Dialog from the pop-up menu, which will launch a window that resembles Figure 4-5. Cisco 6500/7600 Series Manager User Guide...
- Page 59 4-6, the read and read-write community strings are specified as public and private, respectively, because “private” was specified in the IP Discovery window (see Figure 4-3). The community string used in the IP Discovery window should be the read-write SNMP community. Cisco 6500/7600 Series Manager User Guide...
- Page 60 CEMF to start monitoring the switch or the router. Note Commissioning may take a few minutes. After the Network Element object is commissioned, the Physical view will resemble Figure 4-7. Figure 4-7 Fully IP-Discovered and Commissioned Catalyst 6513 Switch Cisco 6500/7600 Series Manager User Guide 4-10...
-
Page 61: Manual Deployment
IP address and type of device that is connected to the network is known. To manually deploy a Catalyst 6000 family switch or a Cisco 7600 series Internet Router, choose the pop-up menu item, Deployment >Deploy Manager, from the appropriate container. The following example describes how to manually deploy a Catalyst 6500 series switch. - Page 62 Choose the Catalyst 6500 Switch Network Element Only option and click the Forward button. The Object Parameters window, shown in Figure 4-10, is displayed. The Catalyst 6500 Switch Network Element and Chassis option is used for the predeployment processes (see the “Predeployment” section). Cisco 6500/7600 Series Manager User Guide 4-12...
- Page 63 Enter the number of Catalyst 6500 series switches or Cisco 7600 series Internet Routers that you want to deploy at the same time and click the Forward button. The remaining screens of this wizard are displayed for each switch or router to be deployed.
- Page 64 SNMP v1 write community used by the device. Community SNMP V2c Read SNMP v2c read community used by the device. Community SNMP V2c Write SNMP v2c write community used by the device. Community Cisco 6500/7600 Series Manager User Guide 4-14...
- Page 65 The Network Element object can be deployed and commissioned without the IOS Telnet or enable passwords being set. However, some of the attributes will have the value of “ERROR” because those values are retrieved using IOS commands. Cisco 6500/7600 Series Manager User Guide 4-15...
- Page 66 Physical containment where the new object should be added. You can use the Select button to specify the Physical containment (Figure 4-13). Click the Forward button when completed. Cisco 6500/7600 Series Manager User Guide 4-16...
- Page 67 Chapter 4 Deploying the C65/76M Deployment and Commissioning Process Figure 4-13 Physical Containment Selection Choose the Physical containment view and then click Apply button. The Summary window, shown in Figure 4-14, is displayed. Cisco 6500/7600 Series Manager User Guide 4-17...
- Page 68 To commission the Network Element object, right-click on the Network Element object and choose Open Network Element Dialog from the pop-up menu, which launches a window that resembles Figure 4-15. Cisco 6500/7600 Series Manager User Guide 4-18...
-
Page 69: Ip Auto Discovery
“IP Auto Discovery” section on page 4-5), no additional parameters need to be specified. These parameters were specified in the manual Deployment Wizard (Figure 4-11). After the object is commissioned, the Physical view will resemble Figure 4-16. Cisco 6500/7600 Series Manager User Guide 4-19... - Page 70 If this occurs, open the Network Element dialog box, decommission the Network Element object, go to the SNMP tab (Figure 4-6) and enter the correct SNMP read community, and then recommission the Network Element object. Cisco 6500/7600 Series Manager User Guide 4-20...
-
Page 71: Predeployment
Deployment and Commissioning Process Predeployment This deployment option is used to deploy the Catalyst 6000 family switch or Cisco 7600 series Internet Router into CEMF before it has been attached to the network. After an object has been predeployed, CEMF keeps the object in a decommissioned state until the device corresponding to the object is added to the network. - Page 72 Deployment and Commissioning Process Figure 4-17 Manually Deploying a C65/76M Object When you choose the Deployment > Deploy Catalyst 6500 Manager option, the Deployment Wizard—Templates window, shown in Figure 4-18, is displayed. Figure 4-18 Deployment Wizard—Templates Cisco 6500/7600 Series Manager User Guide 4-22...
- Page 73 The Catalyst 6500 Switch Network Element Only option is used for the manual deployment process (see “Manual Deployment” section). Figure 4-19 Deployment Wizard—Object Parameters Property Description Number of Catalyst The number of switches or routers that you want to 6500 Switch elements predeploy at the same time. Cisco 6500/7600 Series Manager User Guide 4-23...
- Page 74 Deploying the C65/76M Deployment and Commissioning Process Enter the number of Catalyst 6500 series switches or Cisco 7600 series Internet Routers that you want to predeploy at the same time and click the Forward button. The detailed Object Parameters window,...
- Page 75 Enter the details for the switch and then click the Forward button. The Views window may be displayed if the system requires a selection of the “location” of the network element within the physical hierarchy (see Figure 4-21). Cisco 6500/7600 Series Manager User Guide 4-25...
- Page 76 Physical containment view where the new object should be added. Click the Select button to select the Physical location parameter (see Figure 4-22). Click the Forward button when completed. Cisco 6500/7600 Series Manager User Guide 4-26...
- Page 77 Deploying the C65/76M Deployment and Commissioning Process Figure 4-22 Physical Location Selection Click the Apply button when the Physical containment has been selected. The Object Parameters window, shown in Figure 4-23, is displayed. Cisco 6500/7600 Series Manager User Guide 4-27...
- Page 78 • • wsc6509 • wsc6509NEB • wsc6513 If you are deploying a Catalyst 6000 series switch, the following chassis types will be displayed in the Note Chassis Type drop down menu. Cisco 6500/7600 Series Manager User Guide 4-28...
- Page 79 It is a drop-down list containing the chassis types in the chassis series: wsc6006 • • wsc6009 If you are deploying a Cisco 7600 series Internet Router, the following chassis types will be displayed Note in the Chassis Type drop down menu. Property Description Cisco 7600 Chassis...
- Page 80 Viewer. The chassis image that is displayed will depend on the value used for the Chassis Type. Figure 4-25 shows an example of a predeployed Catalyst 6509 chassis. Note that the chassis is empty and has cross hashes indicating that it is in the decommissioned state. Cisco 6500/7600 Series Manager User Guide 4-30...
-
Page 81: Predeploying Subchassis Modules
Figure 4-25 Predeployed Catalyst 6509 Chassis Object Predeploying Subchassis Modules The next step in predeploying a Catalyst 6000 family switch or a Cisco 7600 series Internet Router in CEMF is to deploy the modules within the chassis. The following subchassis objects can be predeployed: •... - Page 82 To predeploy a Supervisor Module, choose Deployment > Deploy Supervisor/Control Modules(s)from the pop-up menu of the Chassis object (see Figure 4-26). Figure 4-26 Predeploying Supervisor Modules The Supervisor Module Deployment Wizard—Object Parameters window, as shown in Figure 4-27, is displayed. Cisco 6500/7600 Series Manager User Guide 4-32...
- Page 83 The number of supervisor modules to deploy. Enter the number of supervisor modules to predeploy and click the Forward button. The Supervisor Module Deployment Wizard—Object Parameters Details window is displayed for each module to deploy (see Figure 4-28). Cisco 6500/7600 Series Manager User Guide 4-33...
- Page 84 MSFC2 Chassis Slot Number The slot in which the supervisor module is to be deployed. Note Use ws-x6k-s1a-msfc2 to deploy both the Supervisor Engine 1A with MSFC or Supervisor Engine 1A with MSFC2. Cisco 6500/7600 Series Manager User Guide 4-34...
- Page 85 You can either click the Cancel button to cancel the operation, or click the Finish button to create the object. If the Chassis Slot Number corresponds to an occupied slot, an error message will be displayed. The error message resembles the message shown in Figure 4-30. Cisco 6500/7600 Series Manager User Guide 4-35...
- Page 86 Ethernet Module To predeploy an Ethernet module (standard Ethernet, Fast Ethernet, or Gigabit Ethernet), choose the Deployment > Deploy Ethernet Module(s) option from the pop-up menu of the Chassis object (see Figure 4-31). Cisco 6500/7600 Series Manager User Guide 4-36...
- Page 87 Deploying the C65/76M Deployment and Commissioning Process Figure 4-31 Predeploying Ethernet Modules After you choose the Deploy Ethernet Module option, the window shown in Figure 4-32 is displayed. Figure 4-32 Ethernet Module Deployment Wizard—Object Parameters Cisco 6500/7600 Series Manager User Guide 4-37...
- Page 88 Enter the number of Ethernet module objects to be predeployed at the same time and click the Forward button. The window shown in Figure 4-33 is displayed. Figure 4-33 Ethernet Module Deployment Wizard—Object Parameters Details Cisco 6500/7600 Series Manager User Guide 4-38...
- Page 89 The slot in which the Ethernet Module is to be deployed. Enter the details for the Ethernet Module object and click the Forward button. The Ethernet Module Deployment Wizard—Summary window is displayed (see Figure 4-34). Cisco 6500/7600 Series Manager User Guide 4-39...
- Page 90 Figure 4-30. Switch Fabric Module To predeploy a Switch Fabric Module, choose the Deployment > Deploy Supervisor/Control Module(s) option in the pop-up menu from the Chassis object (see Figure 4-35). Cisco 6500/7600 Series Manager User Guide 4-40...
- Page 91 Figure 4-35 Predeploying Switch Fabric Modules After you choose the Deploy Switch Fabric Module(s) option, the Switch Fabric Module Deployment Wizard—Object Parameters window is displayed (see Figure 4-36). Figure 4-36 Switch Fabric Module Deployment Wizard—Object Parameters Cisco 6500/7600 Series Manager User Guide 4-41...
- Page 92 This is a drop-down list with the following values: • wsc6500sfm—Switch Fabric Module • wsc6500sfm2—Switch Fabric Module (for the Catalyst 6513 chassis) Chassis Slot Number The slot in which the Switch Fabric Module is to be deployed. Cisco 6500/7600 Series Manager User Guide 4-42...
- Page 93 You can either click the Cancel button to cancel the operation or click the Finish button to create the object. If the Chassis Slot Number corresponds to an occupied slot, an error message is displayed. The error message resembles the message shown in Figure 4-30. Cisco 6500/7600 Series Manager User Guide 4-43...
- Page 94 Chassis object (see Figure 4-39). Figure 4-39 Predeploying FlexWAN Modules After you choose the Deploy FlexWAN Module(s) option, the FlexWAN Module Deployment Wizard—Object Parameters window is displayed (see Figure 4-40). Cisco 6500/7600 Series Manager User Guide 4-44...
- Page 95 FlexWAN Module Deployment Wizard – Object Parameters Details window is displayed for each module to be deployed (see Figure 4-41). Note This value cannot be greater than 12. If it is, an error message will be displayed and the Forward button will not work. Cisco 6500/7600 Series Manager User Guide 4-45...
- Page 96 The FlexWAN Modules can be deployed on slots 2 through 13. Enter the details for the FlexWAN Module object and click the Forward button. The FlexWAN Module Deployment Wizard—Summary window is displayed (see Figure 4-42). Cisco 6500/7600 Series Manager User Guide 4-46...
- Page 97 You can either click the Cancel button to cancel the operation or click the Finish button to create the object. If the Chassis slot number corresponds to an occupied slot, an error message is displayed. The message resembles the message shown in Figure 4-30. Cisco 6500/7600 Series Manager User Guide 4-47...
- Page 98 4-44). Choose the Deployment > Deploy Port Adapter(s) option in the pop-up menu from the FlexWAN object (see Figure 4-43). Figure 4-43 Predeploying Port Adapters The Port Adapter Deployment Wizard—Object Parameters window is displayed (see Figure 4-44). Cisco 6500/7600 Series Manager User Guide 4-48...
- Page 99 Adapter Deployment Wizard – Object Parameters Details window is displayed for each module to be deployed (see Figure 4-45). Note This value cannot be greater than 2. If it is, an error message will be displayed and the Forward button will not work Cisco 6500/7600 Series Manager User Guide 4-49...
- Page 100 Chapter 4 Deploying the C65/76M Deployment and Commissioning Process Figure 4-45 Port Adapter Deployment Wizard—Object Parameters Details Cisco 6500/7600 Series Manager User Guide 4-50...
- Page 101 • pa-mct3 • pa-mc2t3 • pa-san-fc1 • FlexWAN Bay Number The FlexWAN bay in which the port adapter is to be deployed. The port adapter can be deployed in bays 0 and/or 1. Cisco 6500/7600 Series Manager User Guide 4-51...
- Page 102 You can either click the Cancel button to cancel the operation or click the Finish button to create the object. If the Chassis slot number corresponds to an occupied slot, an error message is displayed. The message resembles the message shown in Figure 4-30. Cisco 6500/7600 Series Manager User Guide 4-52...
- Page 103 Chassis object (see Figure 4-47). Figure 4-47 Predeploying Content Switching Modules After you choose the Deploy Supervisor/Control Module(s) option, the Deployment Wizard—Object Parameters window is displayed (see Figure 4-48). Cisco 6500/7600 Series Manager User Guide 4-53...
- Page 104 If multiple CSMs are deployed on a chassis, appropriate user access controls should be implemented in CEMF to prevent users from accidentally using the C65/76M manager to modify the CSM configurations. Refer to the Cisco Element Manager Framework User Guide for additional information about user access control.
- Page 105 The Content Switching Modules can be deployed on slots 2 through 13. Enter the details for the Content Switching Module object and click the Forward button. The Deployment Wizard—Summary window is displayed (see Figure 4-50). Cisco 6500/7600 Series Manager User Guide 4-55...
- Page 106 You can either click the Cancel button to cancel the operation or click the Finish button to create the object. If the Chassis slot number corresponds to an occupied slot, an error message is displayed. The message resembles the message shown in Figure 4-30. Cisco 6500/7600 Series Manager User Guide 4-56...
- Page 107 Chassis object (see Figure 4-51). Figure 4-51 Predeploying OSM Modules After you choose the Deploy OSM Module(s) option, the OSM Module Deployment Wizard—Object Parameters window is displayed (see Figure 4-52). Cisco 6500/7600 Series Manager User Guide 4-57...
- Page 108 Enter the number of OSMs to be deployed at the same time and click Forward button. The Deployment Wizard—Object Parameters Details window is displayed for each module to be deployed (see Figure 4-53). Cisco 6500/7600 Series Manager User Guide 4-58...
- Page 109 Chapter 4 Deploying the C65/76M Deployment and Commissioning Process Figure 4-53 OSM Module Deployment Wizard—Object Parameters Details Cisco 6500/7600 Series Manager User Guide 4-59...
- Page 110 SONET/SDH OSM, SM-LR, with 4 ports of Gigabit Ethernet • osm-16oc3-pos-mm—16-port OC-3/STM-1 SONET/SDH OSM, MM, with 4 ports of Gigabit Ethernet • osm-16oc3-pos-si—16-port OC-3/STM-1 SONET/SDH OSM, SM-IR, with 4 ports of Gigabit Ethernet Cisco 6500/7600 Series Manager User Guide 4-60...
- Page 111 Gigabit Ethernet osm-8oc3-pos-sl—8-port OC-3/STM-1 • SONET/SDH OSM, SM-LR, with 4 ports of Gigabit Ethernet osm-1choc48/t3-ss—1-port short reach OC48 • with 4 Gigabit Ethernet osm-1choc48/t3-si—1-port channelized • OC-48, SM-IR, with 4 ports of Gigabit Ethernet Cisco 6500/7600 Series Manager User Guide 4-61...
- Page 112 OSMs can be deployed on slots 2 through 13. Enter the details for the OSM object and click the Forward button. The Deployment Wizard—Summary window is displayed (see Figure 4-54). Figure 4-54 OSM Deployment Wizard—Summary Cisco 6500/7600 Series Manager User Guide 4-62...
- Page 113 If the coldStart trap is not received by the CEMF server when the switch is first brought on-line, then the predeployed Network Element object needs to be commissioned manually by opening the Network Element dialog box and selecting the Commission button (see Figure 4-15). Cisco 6500/7600 Series Manager User Guide 4-63...
- Page 114 Chapter 4 Deploying the C65/76M Deployment and Commissioning Process Cisco 6500/7600 Series Manager User Guide 4-64...
- Page 115 C H A P T E R Physical Object Dialog Boxes This chapter describes the Cisco 6500/7600 Series Manager dialog boxes for the physical objects. The following physical object dialog boxes are available in the C65/76M: C6576M Chassis Dialog Box, page 5-3 •...
- Page 116 Physical Object Dialog Boxes Table 5-1 Launch Points for the C65/76M Dialog Boxes Container Object Dialog Box Network Network Element All dialogs (under the Cisco 6500/7600 Series Manager menu entry) Physical Container (site, All dialogs (under the Cisco bay, shelf, etc.)
-
Page 117: Chapter 5 Physical Object Dialog Boxe
Only one Chassis object can be selected at a time from the Chassis object list on the left-hand side of the dialog box. Status Tab Figure 5-1 shows the Status tab of the C6576M Chassis dialog box. Figure 5-1 Status Tab of the C6576M Chassis Dialog Box Cisco 6500/7600 Series Manager User Guide... - Page 118 – Clock 1 In Use, Clock 2 In Use—Indicates which clock is in use. These attributes can have the • following values: in-use—Clock is in use. – – not-in-use—Clock is not in use. Cisco 6500/7600 Series Manager User Guide...
- Page 119 Note To collect some of the statistics in the Performance tab, the running configuration of the switch is modified to add the following command to each interface: rmon collection stats <n> owner monitor Cisco 6500/7600 Series Manager User Guide...
-
Page 120: Inventory Tab
• Backplane Type—Indicates the chassis backplane type. For a Catalyst 6500 series switch or Cisco 7600 series Internet Router chassis, this attribute has the value “giga16 – 16 Gigabit switch.” • Used Slots—Displays a comma-separated list indicating the slots that are occupied. - Page 121 The Module Inventory area of the C6576M Chassis dialog box provides a list of occupied slots, including the following information: Slot Number • Serial Number • Model number • Number of ports • • Hardware version • Firmware version • Software version Cisco 6500/7600 Series Manager User Guide...
- Page 122 Cisco6500Manager view hierarchy. If the object has not been deployed in the network model, a default name is used instead. The object name is delimited by the [ and ] characters. Cisco 6500/7600 Series Manager User Guide...
- Page 123 [Supervisor-1] 1,WS-X6K-SUP1A-2GE,2,7.0,,6.1(0.105)ORL 2000-06-15 06:07:10,SAD04510T8K [Ethernet-2] 2,WS-X6316-GE-TX,16,1.1,5.4(2) 2000-03-17 10:18:33,6.1(0.105)ORL 2000-06-15 06:44:56,SAD04440H0C [Ethernet-3] 3,WS-X6416-GBIC,16,1.2,5.4(2) 2000-03-17 10:18:33,6.1(0.105)ORL 2000-06-15 06:44:56,SAD04470EEK [Ethernet-4] 4,WS-X6324-100FX-SM,24,1.1,5.4(2) 2000-03-17 10:18:33,6.1(0.105)ORL 2000-06-15 06:43:57,SAD04320F4X [Ethernet-5] 5,WS-X6348-RJ-45,48,1.4,5.4(2) 2000-03-17 10:18:33,6.1(0.105)ORL 2000-06-15 06:43:57,SAD04310F9P [Ethernet-6] 6,WS-X6248A-TEL,48,1.0,5.4(2) 2000-03-17 10:23:19,6.1(0.105)ORL 2000-06-15 06:43:36,SAD043608EH Cisco 6500/7600 Series Manager User Guide...
-
Page 124: Performance Tab
This includes all chassis performance attributes, all supervisor performance attributes and all interface performance attributes. • Stop Performance Logging (All Chassis Elements) button—Turns performance data logging off for all the chassis elements. Cisco 6500/7600 Series Manager User Guide 5-10... -
Page 125: Additional Notes Tab
Physical Object Dialog Boxes C6576M Chassis Dialog Box Note The logged data is available to the user through the CEMF Performance Manager. Refer to the Cisco Element Management Framework User Guide for more information about the Performance Manager. Additional Notes Tab Figure 5-4 shows the Additional Notes tab of the C6576M Chassis dialog box. -
Page 126: C6576M Power Supply Dialog Box
You can select multiple Chassis and Power Supply objects at a time from the object list on the left side of the dialog box. Details Tab Figure 5-5 shows the Details tab of the C6576M Power Supply dialog box. Figure 5-5 Details Tab of the C6576M Power Supply Dialog Box Cisco 6500/7600 Series Manager User Guide 5-12... - Page 127 1 is used as the primary supply. If power supply 1 fails, power – supply 2 becomes the primary power supply. combined—Both power supplies are used to supply power to the modules. – Cisco 6500/7600 Series Manager User Guide 5-13...
-
Page 128: Additional Notes Tab
The Notes area is a text box that allows you to type in additional notes for the power supply configuration. For example, the note might include the reason why the power supply is in redundant mode. Cisco 6500/7600 Series Manager User Guide 5-14... -
Page 129: C6576M Supervisor Module Dialog Box
Operational Status—Displays the operational status of the supervisor engine module. The operation status can have one of the following values: – other—The status is unknown. – ok—The status is normal. minorFault—There is a minor fault. – majorFault—There is a major fault. – Cisco 6500/7600 Series Manager User Guide 5-15... - Page 130 Decommissioning the Supervisor Module will also decommission its Ethernet Interface objects. The decommission action is useful to allow a supervisor engine module to be removed and replaced without generating alarms. Cisco 6500/7600 Series Manager User Guide 5-16...
-
Page 131: Inventory Tab
Inventory Tab Figure 5-8 shows the Inventory tab of the C6576M Supervisor Module dialog box. Figure 5-8 Inventory Tab of the C6576M Supervisor Module Dialog Box Cisco 6500/7600 Series Manager User Guide 5-17... - Page 132 File System—Name used to refer to a partition by the system. • Size (Bytes)—Total size of Flash memory. • • Free Space (Bytes)—Amount of free space available in the device. File Count—Number of files on the device. • Cisco 6500/7600 Series Manager User Guide 5-18...
-
Page 133: Performance Tab
The Memory Usage area of the C6576M Supervisor Module dialog box provides the following information: • Total (Bytes)—Displays the total amount of processor memory. • Used (%)—Displays the current amount of processor memory used. Cisco 6500/7600 Series Manager User Guide 5-19... -
Page 134: Additional Notes Tab
Stop—Turns performance data logging off for the Supervisor object and its interfaces. • The logged data is available to you through the CEMF Performance Manager. Refer to the Cisco Element Note Management Framework User Guide for more information about the Performance Manager. - Page 135 Chapter 5 Physical Object Dialog Boxes C6576M Supervisor Module Dialog Box Notes Area The Notes area is text box that allows you to type in additional notes for the supervisor engine module. Cisco 6500/7600 Series Manager User Guide 5-21...
-
Page 136: C6576M Ethernet Module Dialog Box
You can select one chassis and more than one Ethernet module from the object list on the left side of the dialog box. Details Tab Figure 5-11 shows the Details tab of the C6576M Ethernet Module dialog box. Figure 5-11 Details Tab of the C6576M Ethernet Module Dialog Box Cisco 6500/7600 Series Manager User Guide 5-22... - Page 137 Model—Type of Ethernet module. This attribute can have one of the following values: • – WS-X6524-100FX-MM – WS-X6548-RJ-21 – WS-X6548-RJ-45 – WS-X6408-GBIC – WS-X6408A-GBIC WS-X6416-GBIC – WS-X6416-GE-MT – WS-X6516-GBIC – WS-X6816-GBIC – – WS-X6316-GE-TX – WS-X6501-10GEX4 – WS-X6224-100FX-MT Cisco 6500/7600 Series Manager User Guide 5-23...
- Page 138 The logged data is available to you through the CEMF Performance Manager. Refer to the Cisco Element Note Management Framework User Guide for more information about the Performance Manager.
- Page 139 Chapter 5 Physical Object Dialog Boxes C6576M Ethernet Module Dialog Box The decommission action is useful to allow a Ethernet module to be removed and replaced without generating alarms. Cisco 6500/7600 Series Manager User Guide 5-25...
-
Page 140: Additional Notes Tab
Figure 5-12 Additional Notes Tab of the C6576M Ethernet Module Dialog Box Notes Area The Notes area is a text box that allows you to type in additional notes for the Ethernet module. Cisco 6500/7600 Series Manager User Guide 5-26... -
Page 141: C6576M Ethernet Interface Dialog Box
Status Tab Figure 5-13 shows the Status tab of the C6576M Ethernet Interface dialog box. Figure 5-13 Status Tab of the C6576M Ethernet Interface Dialog Box Cisco 6500/7600 Series Manager User Guide 5-27... - Page 142 (typically hardware). – lowerLayerDown—The interface in the lower layer is down. • Administrative Status—Displays the administrative status of the interface. These are the values: up—The interface is up and operational. – Cisco 6500/7600 Series Manager User Guide 5-28...
- Page 143 • normallostcomms—CEMF has lost communication with the device from the normal state. • • perflostcomms—CEMF has lost communication with the device from the performance state. Cisco 6500/7600 Series Manager User Guide 5-29...
-
Page 144: Configuration Tab
If set to autoDetect, the Duplex attribute is set to auto, which forces the interface to determine the speed and duplex mode for the interface automatically. Note If an unsupported speed is selected, an error is reported. Cisco 6500/7600 Series Manager User Guide 5-30... - Page 145 Any input value less than 9216 bytes will be taken as 1500 bytes, and the jumbo frames will be disabled. Default VLAN—Displays the VLAN to which this interface belongs if it stops trunking. This is a • read-only attribute. Cisco 6500/7600 Series Manager User Guide 5-31...
- Page 146 Netmask—Subnet mask of the interface IP address. Enabled bits indicate the network addressing bits in the IP address. • Clear IP Address button— After receiving confirmation, will unset the IP address for this interface. Cisco 6500/7600 Series Manager User Guide 5-32...
-
Page 147: Performance Tab
• In Packets/Sec—Five-minute exponentially decayed moving average of input packets per second. In Bits/Sec—Five-minute exponentially decayed moving average of input bits per second. • Cisco 6500/7600 Series Manager User Guide 5-33... - Page 148 Out Discarded Pkts.—Number of outbound packets that were chosen to be discarded. • Out Dropped Pkts.—Number of events in which outbound packets were dropped. • Out Error Pkts.—Number of outbound packets that could not be transmitted because of errors. Cisco 6500/7600 Series Manager User Guide 5-34...
-
Page 149: Routing Protocol Tab
All attributes in the Performance tab are logged when the object is placed into the Performance state. Note The logged data is available to you through the CEMF Performance Manager. Refer to the Cisco Element Management Framework User Guide for more information about the Performance Manager. - Page 150 EIGRP autonomous system number. The hold time should be at least three times the hello interval. – Hello Interval (sec)—Frequency at which the device will send hello packets on the specified interface and EIGRP autonomous system number. Cisco 6500/7600 Series Manager User Guide 5-36...
- Page 151 To enable IS-IS on an interface, the user must specify an IS-IS routing process that is already deployed on the device. If the process does not exist, the action will fail. • Disable button—Disables IS-IS routing on the interface. Cisco 6500/7600 Series Manager User Guide 5-37...
-
Page 152: Stp Tab
This is a read-only attribute. Portfast can be configured on a trunking interface, but it only has an effect when the interface is in access mode. These are possible values: true – false – Cisco 6500/7600 Series Manager User Guide 5-38... - Page 153 STP VLAN configuration to the interface. The configuration will only have an effect if the interface is in trunking mode and the VLAN has an associated STP instance. The interface does not Cisco 6500/7600 Series Manager User Guide 5-39...
- Page 154 Remove button—Removes an explicit STP VLAN configuration to the interface. Figure 5-18 Add/Remove Per VLAN STP Setting Subdialog Box STP Status Area The STP Status area of the C6576M Ethernet Interface dialog box provides the following information: Cisco 6500/7600 Series Manager User Guide 5-40...
- Page 155 STP management domain. State—Describes the interface state in the STP instance. – Port Cost—Indicates the current calculated port path cost of the interface in the STP instance. – Cisco 6500/7600 Series Manager User Guide 5-41...
-
Page 156: Hsrp Tab
Preempt—If enabled, the current router attempts to overthrow a lower priority active router and attempt to become the active router. If disabled, this router becomes the active router only if there is no such router or the active router fails. – true—preempt enabled. – false—preempt disabled. Cisco 6500/7600 Series Manager User Guide 5-42... - Page 157 IP address from the active server using Hello messages. Figure 5-20 shows the subdialog box displayed when the Add/Remove button is pressed. Figure 5-20 HSRP Group Configure Subdialog Box Cisco 6500/7600 Series Manager User Guide 5-43...
- Page 158 This subdialog box is used to modify the following C6576M Ethernet Interface attributes of a given HSRP group: Secondary IP – – Virtual IP Preempt – – Delay Minimum – Priority – Hello Interval Hold Interval – Figure 5-21 HSRP Secondary IP Modify Subdialog Box Cisco 6500/7600 Series Manager User Guide 5-44...
-
Page 159: Qos Tab
Interface Trust State—The trust state of an interface determines how it marks, schedules, and classifies received L2 frames, and whether or not congestion avoidance is implemented. This attribute can have the following values: Cisco 6500/7600 Series Manager User Guide 5-45... - Page 160 Modify button—Attaches an input QoS policy map to the interface – Remove Policy button—Detaches an input QoS policy map from the interface. When you click the • Remove Policy button, a subdialog box is displayed prompting you to confirm the removal action. Cisco 6500/7600 Series Manager User Guide 5-46...
- Page 161 Chapter 5 Physical Object Dialog Boxes C6576M Ethernet Interface Dialog Box Figure 5-23 Select Policy Subdialog Box Cisco 6500/7600 Series Manager User Guide 5-47...
-
Page 162: Additional Notes Tab
Additional Notes tab of the C6576M Ethernet Interface dialog box. Figure 5-24 Additional Notes Tab on the C6576M Ethernet Interface Dialog Box Notes Area The Notes tab is a text box that allows you to type in additional notes for the interface. Cisco 6500/7600 Series Manager User Guide 5-48... -
Page 163: C6576M Switch Fabric Module Dialog Box
– minorFault—There is a minor problem. – majorFault—There is a major problem. If this attribute has a value other than ok, an alarm is generated. (See Chapter 8, “Alarms and Alarm Note Management.”) Cisco 6500/7600 Series Manager User Guide 5-49... - Page 164 As a result, data displayed in the configuration window is not guaranteed to be current. The decommission action allows a Switch Fabric Module to be removed and replaced without generating alarms. Cisco 6500/7600 Series Manager User Guide 5-50...
-
Page 165: Performance Tab
There is an entry in this table for each fabric-enabled module installed in the chassis. • Slot—Slot number of the fabric-enabled module. Channel—Fabric channel number. • InErrors—Total number of error packets received on the module through the fabric channel since • the entry was last initialized. Cisco 6500/7600 Series Manager User Guide 5-51... -
Page 166: Additional Notes Tab
Figure 5-27 Additional Notes Tab of the C6576M Switch Fabric Module Dialog Box Notes Area The Notes area is a text box that allows you to type in additional notes for the Switch Fabric Module. Cisco 6500/7600 Series Manager User Guide 5-52... -
Page 167: C6576M Flexwan Module Dialog Box
– minorFault—There is a minor problem. – majorFault—There is a major problem. If this attribute has a value other than ok, an alarm is generated. (See Chapter 8, “Alarms and Alarm Note Management.”) Cisco 6500/7600 Series Manager User Guide 5-53... - Page 168 Start—Turns on performance data logging. • Stop—Turns off performance data logging. The logged data is available to the user through the CEMF Performance Manager. Refer to the Cisco Note Element Management Framework User Guide for more information about the Performance Manager.
-
Page 169: Additional Notes Tab
Figure 5-29 Additional Notes Tab of the C6576M FlexWAN Module Dialog Box Notes Area The Notes area is a text box that allows you to type in additional notes for the FlexWAN module. Cisco 6500/7600 Series Manager User Guide 5-55... -
Page 170: C6576M Port Adapter Dialog Box
PA-2H—2-port HSSI port adapter – PA-2T3—2-port serial T3 port adapter PA-2T3+—Enhanced 2-port serial T3 port adapter – PA-4T+—Enhanced 4-port serial port adapter – PA-8T-232—8-port EIA/TIA-232 serial port adapter – PA-8T-V35—8-port V.35 serial port adapter – Cisco 6500/7600 Series Manager User Guide 5-56... - Page 171 Stop—Turns off performance data logging. Note The logged data is available to you through the CEMF Performance Manager. Refer to the Cisco Element Management Framework User Guide for more information about the Performance Manager. Cisco 6500/7600 Series Manager User Guide...
-
Page 172: Additional Notes Tab
Additional Notes Tab Figure 5-31 shows the Additional Notes tab of the C6576M Port Adapter dialog box. Figure 5-31 Additional Notes Tab of the C6576M Port Adapter Dialog Box Cisco 6500/7600 Series Manager User Guide 5-58... - Page 173 Chapter 5 Physical Object Dialog Boxes C6576M Port Adapter Dialog Box Notes Area The Notes area is a text box that allows you to type in additional notes for the port adapter. Cisco 6500/7600 Series Manager User Guide 5-59...
-
Page 174: C6576M Optical Services Modules Dialog Box
This dialog box describes the physical Gigabit Ethernet WAN OSM (OSM GE-WAN), Packet over Sonet OSM (OSM PoS), and channelized SONET OSM on a Cisco 7600 series Internet Router. This dialog box can be launched from a Chassis object or an OSM module object within the Physical view. - Page 175 OSM-1OC48-POS-SS—1-port OC-48/STM-16 SONET/SDH OSM, SM-SR, with 4 Gigabit – Ethernet ports OSM-1OC48-POS-SI—1-port OC-48/STM-16 SONET/SDH OSM, SM-IR, with 4 Gigabit – Ethernet ports OSM-1OC48-POS-SL—1-port OC-48/STM-16 SONET/SDH OSM, SM-LR, with 4 Gigabit – Ethernet ports Cisco 6500/7600 Series Manager User Guide 5-61...
- Page 176 4 Gigabit Ethernet ports Serial Number—The serial number of the module. • Hardware Version—The hardware version on the module. • Software Version—The software version on the module. • • Firmware Version—The firmware version on the module. Cisco 6500/7600 Series Manager User Guide 5-62...
- Page 177 Stop—Turns off performance data logging. • Note The logged data is available to you through the CEMF Performance Manager. Refer to the Cisco Element Management Framework User Guide for more information about the Performance Manager. Actions Area The Actions area of the C6576M OSM dialog box provides the following actions: Commission—This button is used to commission the object manually.
-
Page 178: Additional Notes Tab
Additional Notes tab of the C6576M OSM dialog box. Figure 5-33 Additional Notes Tab of the C6576M OSM Dialog Box Notes Area The Notes area is a text box that allows you to type in additional notes for the OSM. Cisco 6500/7600 Series Manager User Guide 5-64... -
Page 179: C6576M Slb Dialog Box
Operational Status—Displays the operational status of the CSM. This attribute has one of the following values. This is a read-only attribute. other—The status is unknown. – – ok—The status is normal. – minorFault—There is a minor problem. – majorFault—There is a major problem. Cisco 6500/7600 Series Manager User Guide 5-65... - Page 180 Forwarding Mode—The current SLB operating mode. This attribute has one of the following values. • This is a read-only attribute. csm(1) – rp(2) – Configured Mode—The current configured SLB mode. This attribute has one of the following • values: csm(1) – – rp(2) Cisco 6500/7600 Series Manager User Guide 5-66...
- Page 181 • perflostcomms—CEMF has lost communication with the device from the performance state. • mismatched—The type of Content Switching Module discovered does not match the predeployed Content Switching Module. Cisco 6500/7600 Series Manager User Guide 5-67...
-
Page 182: Client Side Vlan Tab
Client Side VLAN—Unique identifier of a client VLAN on the device. – Gateway—Default gateway of a client VLAN. A router to the client VLAN must have this – gateway address configured and real servers must point their gateways to this address. Cisco 6500/7600 Series Manager User Guide 5-68... - Page 183 Gateway Add button—Adds the default gateway specified by the Gateway field and the Client Side VLAN field. You need to specify a VLAN in the Client Side VLAN field and an IP address in the Gateway field for the action to take effect. Cisco 6500/7600 Series Manager User Guide 5-69...
-
Page 184: Server Side Vlan Tab
CSM. There may be multiple static routes configured for a server VLAN. The following attributes are displayed in the table: Cisco 6500/7600 Series Manager User Guide 5-70... - Page 185 Netmask, Gateway, and Server Side VLAN fields. For the Static Route Remove and Static Route Add button actions to take effect, you need to specify the static route using one of the following sets of attributes: Cisco 6500/7600 Series Manager User Guide 5-71...
-
Page 186: Server Farms Tab
An IP address in the Gateway field – Server Farms Tab Figure 5-37 shows the Server Farms tab of the C6576M SLB dialog box. Figure 5-37 Server Farms Tab of the C6576M SLB Dialog Box Cisco 6500/7600 Series Manager User Guide 5-72... - Page 187 Maximum Connections—Maximum number of active connections on the real server at any one – point. If the value is set to the maximum of 4294967295, it indicates that the maximum is infinite (not monitored). This value must be greater than the currently configured minimum connections. Cisco 6500/7600 Series Manager User Guide 5-73...
-
Page 188: Virtual Servers Tab
Real IP Address field, and a port number in the TCP Port field for the action to take effect. Virtual Servers Tab Figure 5-38 shows the Virtual Servers tab of the C6576M SLB dialog box. Figure 5-38 Virtual Servers Tab of the C6576M SLB Dialog Box Cisco 6500/7600 Series Manager User Guide 5-74... - Page 189 Current Connections—Number of current connections to the virtual server. – Operation Status—The operational status of the virtual server. This attribute can have the following values: • outOfService (1) • operational (2) • failed (3) Cisco 6500/7600 Series Manager User Guide 5-75...
- Page 190 Server Farm Name field, an IP address in the IP Address field, and a subnet mask in the Netmask field, and select a mode for the action to take effect. Client Remove button—Removes the client range to a virtual server definition. – Cisco 6500/7600 Series Manager User Guide 5-76...
-
Page 191: Additional Notes Tab
Additional Notes tab of the C6576M SLB dialog box. Figure 5-39 Additional Notes Tab of the C6576M SLB Dialog Box Notes Area The Notes area is a text box that allows you to type in additional notes for the SLB. Cisco 6500/7600 Series Manager User Guide 5-77... -
Page 192: C6576M Atm T3 Interface Dialog Box
This dialog box describes a physical and logical enhanced ATM T3 interface of the PA-A3-T3 port adapter on the Catalyst 6000 family switches or Cisco 7600 series Internet Routers. This dialog box is launched from the ATM port adapter or the ATM T3 interface object within the Physical view. - Page 193 The Performance Logging area of the C6576M ATM T3 Interface dialog box contains the buttons to enable data logging of all the interface attributes of the interface. Start—Turns on performance data logging. • Stop—Turns off performance data logging. • Cisco 6500/7600 Series Manager User Guide 5-79...
-
Page 194: Configuration Tab
Physical Object Dialog Boxes C6576M ATM T3 Interface Dialog Box Note The logged data is available to you through the CEMF Performance Manager. Refer to the Cisco Element Management Framework User Guide for more information about the Performance Manager. Status Field The display-only Status field located at the bottom of the window indicates the current state of the object. - Page 195 Netmask—Subnet mask of the interface IP address. Enabled bits indicate the network addressing • bits in the IP address. Clear IP Address - After receiving confirmation, will unset the IP address for this interface. • Cisco 6500/7600 Series Manager User Guide 5-81...
-
Page 196: Atm/T3 Tab
End-Station ID—End-station ID of node in ATM network. The NSAP address prefix is provided by • the switch to the router through ILMI. There must be a PVC configured for ILMI communication with the switch. This address is required if not implemented by ATM CM. Cisco 6500/7600 Series Manager User Guide 5-82... - Page 197 Scrambling—Indicates whether DS-3 scrambling is enabled on the interface. Scrambling assists • recovery of the clock by the receiver. Line Build-Out Length—Line build-out length. • short—0 to 50 feet – long—Greater than 50 feet – Cisco 6500/7600 Series Manager User Guide 5-83...
-
Page 198: Performance Tab
C6576M ATM T3 Interface Dialog Box Performance Tab Figure 5-43 shows the Performance tab of the C6576M ATM T3 Interface dialog box. Figure 5-43 Performance Tab of the C6576M ATM T3 Interface Dialog Box Cisco 6500/7600 Series Manager User Guide 5-84... - Page 199 The ATM/T3 area contains the following information: C-bit Errored Secs—C-bit errored seconds. • C-bit Severely Err Secs—C-bit severely errored seconds. • • C-bit Coding Violations—C-bit coding violations. • P-bit Errored Secs—P-bit errored seconds. Cisco 6500/7600 Series Manager User Guide 5-85...
- Page 200 C-bit Severely Err Secs—Far end C-bit severely errored seconds. • C-bit Coding Violations—Far end C-bit coding violations. • Elapsed Secs—Number of seconds which have elapsed since the beginning of the far end current error-measurement period. • Unavail Secs—Far end unavailable seconds. Cisco 6500/7600 Series Manager User Guide 5-86...
-
Page 201: Routing Protocol Tab
“simple”. This attribute is read-only. Hello Interval—Length of time between the hello packets sent on an OSPF interface. Must be • consistent between all routers on an attached network. This attribute is read-only. Cisco 6500/7600 Series Manager User Guide 5-87... - Page 202 DIS. In the case of equal priorities, the highest MAC address breaks the tie. Level 2 Hello Interval—Length of time between hello packets generated on the interface for level 2 • routing. Cisco 6500/7600 Series Manager User Guide 5-88...
-
Page 203: Additional Notes Tab
Figure 5-45 Additional Notes Tab of the C6576M ATM T3 Interface Dialog Box Notes Area The Notes area is a text box that allows you to type in additional notes for the ATM T3 Interface. Cisco 6500/7600 Series Manager User Guide 5-89... -
Page 204: C6576M Atm E3 Interface Dialog Box
This dialog box describes a physical and logical enhanced ATM E3 interface of the PA-A3-E3 FlexWAN port adapter on the Catalyst 6000 family switches or Cisco 7600 series Internet Routers. This dialog box can be launched from the ATM port adapter or the ATM T3 interface object within the Physical view. - Page 205 Start—Turns on performance data logging. • Stop—Turns off performance data logging. The logged data is available to the user through the CEMF Performance Manager. Refer to the Cisco Note Element Management Framework User Guide for more information about the Performance Manager.
-
Page 206: Configuration Tab
Configuration Tab Figure 5-47 shows the Configuration tab of the C6576M ATM E3 Interface dialog box. Figure 5-47 Configuration Tab of the C6576M ATM E3 Interface Dialog Box Cisco 6500/7600 Series Manager User Guide 5-92... - Page 207 Netmask—Subnet mask of the interface IP address. Enabled bits indicate the network addressing • bits in the IP address. Clear IP Address button— After receiving confirmation, will unset the IP address for this interface. • Cisco 6500/7600 Series Manager User Guide 5-93...
-
Page 208: Atm/E3 Tab
End-Station ID—End-station ID of node in ATM network. The NSAP address prefix is provided by • the switch to the router through ILMI. There must be a PVC configured for ILMI communication with the switch. This address is required if not implemented by ATM CM. Cisco 6500/7600 Series Manager User Guide 5-94... -
Page 209: Performance Tab
Figure 5-49 shows the Performance tab of the C6576M ATM E3 Interface dialog box. All attributes shown in this tab are read-only. Figure 5-49 Performance Tab of the C6576M ATM E3 Interface Dialog Box Cisco 6500/7600 Series Manager User Guide 5-95... - Page 210 The DX3 Current area contains the following information: C-bit Errored Secs—C-bit errored seconds. • C-bit Severely Err Secs—C-bit severely errored seconds. • • C-bit Coding Violations—C-bit coding violations. • P-bit Errored Secs—P-bit errored seconds. Cisco 6500/7600 Series Manager User Guide 5-96...
- Page 211 C-bit Severely Err Secs—Far end C-bit severely errored seconds. • C-bit Coding Violations—Far end C-bit coding violations. • Elapsed Secs—Number of seconds that have elapsed since the beginning of the far end current error-measurement period. • Unavail Secs—Far end unavailable seconds. Cisco 6500/7600 Series Manager User Guide 5-97...
-
Page 212: Routing Protocol Tab
Type is not “simple”. This attribute is read-only. • Hello Interval—Length of time between the hello packets sent on an OSPF interface. Must be consistent among all routers on an attached network. This attribute is read-only. Cisco 6500/7600 Series Manager User Guide 5-98... - Page 213 DIS. In the case of equal priorities, the highest MAC address breaks the tie. Level 2 Hello Interval—Length of time between hello packets generated on the interface for level 2 • routing. Cisco 6500/7600 Series Manager User Guide 5-99...
-
Page 214: Additional Notes Tab
Figure 5-51 Additional Notes Tab of the C6576M ATM E3 Interface Dialog Box Notes Area The Notes area is a text box that allows you to type in additional notes for the ATM E3 Interface. Cisco 6500/7600 Series Manager User Guide 5-100... -
Page 215: C6576M Atm Sonet Interface Dialog Box
This dialog box describes a physical and logical enhanced ATM OC-3 interface of a FlexWAN port adapter on the Catalyst 6000 family switches or Cisco 7600 series Internet Routers. This dialog box can be launched from the ATM Port Adapter or ATM Sonet interface object within the Physical view. - Page 216 – no—Cable is not connected to the interface. – unknown—Cannot determine if a cable is connected to the interface. Number of Resets—Number of times the interface internally reset. This attribute is read-only. • Cisco 6500/7600 Series Manager User Guide 5-102...
- Page 217 Stop—Turns off performance data logging. Note The logged data is available to you through the CEMF Performance Manager. Refer to the Cisco Element Management Framework User Guide for more information about the Performance Manager. Cisco 6500/7600 Series Manager User Guide...
-
Page 218: Configuration Tab
Configuration Tab Figure 5-53 shows the Configuration tab of the C6576M ATM SONET Interface dialog box. Figure 5-53 Configuration Tab of the C6576M ATM SONET Interface Dialog Box Cisco 6500/7600 Series Manager User Guide 5-104... - Page 219 Netmask—Subnet mask of the interface IP address. Enabled bits indicate the network addressing • bits in the IP address. Clear IP Address button - After receiving confirmation, will unset the IP address for this interface. • Cisco 6500/7600 Series Manager User Guide 5-105...
-
Page 220: Atm/Sonet Tab
Transport Signal level 3 concatenated is the SONET (N. American) format that specifies the frame structure for a 155.52-Mbps line. – stm-1—Synchronous Transport Module level 1 is the SDH (European) format that specifies the frame structure for a 155.52-Mbps line. Cisco 6500/7600 Series Manager User Guide 5-106... - Page 221 – – sonetMediumCMI—For electrical SONET/SDH signals (STS-1 and STS-3). – sonetMediumNRZ—Non-return to Zero, which is used for optical SONET/SDH signals. – sonetMediumRZ—Return to Zero, which is used for optical SONET/SDH signals. – sonetMediumOther—Other. Cisco 6500/7600 Series Manager User Guide 5-107...
-
Page 222: Performance Tab
• In Packets/Sec—Five-minute exponentially decayed moving average of input packets per second. Cisco 6500/7600 Series Manager User Guide 5-108... - Page 223 Coding Violations—Number of coding violations encountered by the SONET Section in the current • 15-minute interval. Severely Err Frm Secs—Number of severely errored framing seconds encountered by the SONET • Section in the current 15-minute interval. Cisco 6500/7600 Series Manager User Guide 5-109...
- Page 224 15-minute interval. Coding Violations—Number of coding violations encountered by the SONET Path in the current • 15-minute interval. Unavailable Secs—Number of unavailable seconds encountered by the SONET Path in the current • 15-minute interval. Cisco 6500/7600 Series Manager User Guide 5-110...
-
Page 225: Routing Protocol Tab
15-minute interval. Routing Protocol Tab Figure 5-56 shows the Routing Protocol tab of the C6576M ATM SONET Interface dialog box. Figure 5-56 Routing Protocol Tab of the C6576M ATM SONET Interface Dialog Box Cisco 6500/7600 Series Manager User Guide 5-111... - Page 226 Values greater than 100 percent may be configured; this can be useful if the bandwidth is set artificially low for other reasons Hello Interval (sec)—Frequency at which the device will send hello packets on the specified • interface and EIGRP autonomous system number. Cisco 6500/7600 Series Manager User Guide 5-112...
- Page 227 If the process does not exist, the action will fail. Disable button—Disables IS-IS routing on the interface. • Note By default, all interfaces are configured as IS-IS Circuit-type Level 1-2. Cisco 6500/7600 Series Manager User Guide 5-113...
-
Page 228: Additional Notes Tab
Figure 5-57 Additional Notes Tab of the C6576M ATM SONET Interface Dialog Box Notes Area The Notes area is a text box that allows you to type in additional notes for the ATM SONET Interface. Cisco 6500/7600 Series Manager User Guide 5-114... -
Page 229: C6576M Osm Ge-Wan Interface Dialog Box
Index—String index of the interface. This attribute is read-only. Type—Describes the physical interface type. This attribute is read-only. • Operational Status—The current operational state of the interface. This attribute is read-only. This • attribute has one of the following values: Cisco 6500/7600 Series Manager User Guide 5-115... - Page 230 • performance—Some attributes are collected periodically for trending purposes. • normallostcomms—CEMF has lost communication with the device from the normal state. perflostcomms—CEMF has lost communication with the device from the performance state. • Cisco 6500/7600 Series Manager User Guide 5-116...
-
Page 231: Configuration Tab
Link Up/Down Trap—Indicates if link up or link down traps are being generated. This list contains • the following values: enabled – disabled – Delay—Specifies the delay in tens of microseconds for an interface or network segment. • Cisco 6500/7600 Series Manager User Guide 5-117... -
Page 232: Performance Tab
Clear IP Address button—After receiving confirmation, will unset the IP address for this interface. • Performance Tab Figure 5-60 shows the Performance tab of the C6576M OSM GE-WAN Interface dialog box. All attributes in this area are read-only. Cisco 6500/7600 Series Manager User Guide 5-118... - Page 233 Out Bits/Sec—Five-minute exponentially decayed moving average of output bits per second. Error Statistics Area The Interface Error Statistics area contains the following information: CRC Error Pkts.—Number of input packets that had cyclic redundancy checksum errors. • Cisco 6500/7600 Series Manager User Guide 5-119...
- Page 234 In Error Pkts.—The number of inbound packets that contained errors preventing them from being deliverable to a higher-layer protocol. • Out Error Pkts.—Number of outbound packets that could not be transmitted because of errors. Cisco 6500/7600 Series Manager User Guide 5-120...
-
Page 235: Routing Protocol Tab
Stop—Turns off performance data logging. • Note The logged data is available to you through the CEMF Performance Manager. Refer to the Cisco Element Management Framework User Guide for more information about the Performance Manager. Routing Protocol Tab Figure 5-61 shows the Routing Protocol tab of the C6576M OSM GEWAN Interface dialog box. - Page 236 Hold Time (sec)—Hold time during which the device will wait for a hello packet to be received on • the specified interface and EIGRP autonomous system number. The hold time should be at least three times the hello interval. Cisco 6500/7600 Series Manager User Guide 5-122...
- Page 237 To enable IS-IS on an interface, the user must specify an IS-IS routing process that is already deployed on the device. If the process does not exist, the action will fail. • Disable button—Disable IS-IS routing on the interface. Cisco 6500/7600 Series Manager User Guide 5-123...
-
Page 238: Hsrp Tab
This subdialog box is used to modify the following C6576M OSM GE-WAN Interface attributes of a given HSRP group: Secondary IP – Virtual IP – – Preempt – Delay Minimum – Priority Hello Interval – Hold Interval – Cisco 6500/7600 Series Manager User Guide 5-124... - Page 239 Hello Interval—Hello interval in milliseconds. If this value is not configured, it can be learned from the active router. • Hold Interval—Hold interval in milliseconds. If this value is not configured, it can be learned from the active router. Cisco 6500/7600 Series Manager User Guide 5-125...
- Page 240 HSRP Secondary Address Table—Describes secondary IP addresses of HSRP groups deployed on the interface. Data is displayed in the following columns: – Group Number—Unique identifier of an HSRP group. – Secondary IP—Secondary IP address of HSRP group. Cisco 6500/7600 Series Manager User Guide 5-126...
-
Page 241: Additional Notes Tab
Figure 5-65 Additional Notes Tab of the C6576M OSM GE-WAN Interface Dialog Box Notes Area The Notes area is a text box that allows you to type in additional notes for the OSM GE-WAN Interface. Cisco 6500/7600 Series Manager User Guide 5-127... -
Page 242: C6576M Osm Channelized Sonet Interface Dialog Box
Description—Comment or a description to help you remember what is attached to this interface. The • description is only put in the configuration to help you remember what specific interfaces are used for. Type—Describes the type of allocated channel. This attribute is read-only. • Cisco 6500/7600 Series Manager User Guide 5-128... - Page 243 Loss Of Frame. – SONET Line Status—Status of the SONET Line. This status may indicate multiple simultaneous • defects. This attribute is read-only. This can have one of the following values: sonetLineNoDefect—No defect. – Cisco 6500/7600 Series Manager User Guide 5-129...
-
Page 244: Status Field
Start—Turns on performance data logging. Stop—Turns off performance data logging. • The logged data is available to you through the CEMF Performance Manager. Refer to the Cisco Element Note Management Framework User Guide for more information about the Performance Manager. -
Page 245: Configuration Tab
• – loopTiming—Indicates that the recovered receive clock is used as the transmit clock. – loopTimingPrimary—Indicates that loop timing is used and the SONET controller provides the first priority clock for internal circuitry. Cisco 6500/7600 Series Manager User Guide 5-131... - Page 246 SONET/SDH signals. – – sonetMediumOther—Other. DS-3/OC-3 Channel Table Area • DS-3/OC-3 Channel Table—Lists the DS3 and OC-3 channels that have been provisioned on the SONET interface. The following items are listed in the table: Cisco 6500/7600 Series Manager User Guide 5-132...
- Page 247 Free Channel button—Frees a provisioned DS3 or OC-3 channel from the SONET interface. – Provision Channel button—Provisions the interface. The provisioned sts-1 SPEs cannot be in use by any other channel on the interface. Note Cisco 6500/7600 Series Manager User Guide 5-133...
- Page 248 Chapter 5 Physical Object Dialog Boxes C6576M OSM Channelized SONET Interface Dialog Box Figure 5-68 Channel Provision Subdialog Box of the C6576M OSM Channelized SONET Interface Dialog Box Cisco 6500/7600 Series Manager User Guide 5-134...
-
Page 249: Performance Tab
Out Packets/Sec—Five-minute exponentially decayed moving average of output packets per • second. In Bits/Sec—Five-minute exponentially decayed moving average of input bits per second. • Out Bits/Sec—Five-minute exponentially decayed moving average of output bits per second. • Cisco 6500/7600 Series Manager User Guide 5-135... - Page 250 15-minute interval. • Coding Violations—Number of coding violations encountered by the SONET line in the current 15-minute interval. • Unavailable Secs—Number of unavailable seconds encountered by the SONET line in the current 15-minute interval. Cisco 6500/7600 Series Manager User Guide 5-136...
-
Page 251: Additional Notes Tab
Figure 5-70 Additional Notes Tab of the C6576M OSM Channelized SONET Interface Dialog Box Notes Area The Notes area is a text box that allows you to type in additional notes for the OSM Channelized SONET Interface. Cisco 6500/7600 Series Manager User Guide 5-137... -
Page 252: C6576M Osm Pos Interface Dialog Box
Index—String index of the interface. This attribute is read-only. • Type—Describes the physical interface type. This attribute is read-only. The possible values of this • attribute are: Cisco 6500/7600 Series Manager User Guide 5-138... - Page 253 • performance—Some attributes are collected periodically for trending purposes. • normallostcomms—CEMF has lost communication with the device from the normal state. perflostcomms—CEMF has lost communication with the device from the performance state. • Cisco 6500/7600 Series Manager User Guide 5-139...
-
Page 254: Configuration Tab
The Delay attribute is an informational parameter used only to communicate the current bandwidth to the higher-level protocols (such as IGRP and EIGRP); you cannot adjust the actual delay of an interface with this command. Bandwidth—Overwrites default bandwidth in kilobits per second. • Cisco 6500/7600 Series Manager User Guide 5-140... -
Page 255: Atm/Sonet Tab
Clear IP Address button—After receiving confirmation, will unset the IP address for this interface. ATM/SONET Tab Figure 5-73 shows the ATM/SONET tab of the C6576M OSM POS Interface dialog box. Figure 5-73 ATM/SONET Tab of the C6576M OSM POS Interface Dialog Box Cisco 6500/7600 Series Manager User Guide 5-141... - Page 256 Transmit Clock Source—Source of the transmit clock. • loopTiming—Indicates that the recovered receive clock is used as the transmit clock. – localTiming—Indicates that the transmit clock source is generated internally. – Cisco 6500/7600 Series Manager User Guide 5-142...
-
Page 257: Performance Tab
Figure 5-74 shows the Performance tab of the C6576M OSM POS Interface dialog box. All the attributes in this tab are read-only. Figure 5-74 Performance Tab of the C6576M OSM POS Interface Dialog Box Cisco 6500/7600 Series Manager User Guide 5-143... - Page 258 The Performance Logging area of the C6576M OSM POS Interface dialog box contains buttons to enable data logging of all the interface attributes of the interface: Start—Turns on performance data logging. • Stop—Turns off performance data logging. • Cisco 6500/7600 Series Manager User Guide 5-144...
-
Page 259: Routing Protocol Tab
Physical Object Dialog Boxes C6576M OSM POS Interface Dialog Box Note The logged data is available to you through the CEMF Performance Manager. Refer to the Cisco Element Management Framework User Guide for more information about the Performance Manager. Routing Protocol Tab Figure 5-75 shows the Routing Protocol tab of the C6576M OSM POS Interface dialog box. - Page 260 Area Tag—The IS-IS routing area in which the interface participates. If multiarea IS-IS is configured on the device, the IS-IS area must be named; otherwise, this value may be an implicit null tag. Cisco 6500/7600 Series Manager User Guide 5-146...
-
Page 261: Additional Notes Tab
By default, all interfaces are configured as IS-IS Circuit-type Level 1-2. Note Additional Notes Tab Figure 5-76 shows the Additional Notes tab of the C6576M OSM POS Interface dialog box. Figure 5-76 Additional Notes Tab of the C6576M OSM POS Interface Dialog Box Cisco 6500/7600 Series Manager User Guide 5-147... - Page 262 Chapter 5 Physical Object Dialog Boxes C6576M OSM POS Interface Dialog Box Notes Area The Notes area is a text box that allows you to type in additional notes for the OSM POS Interface. Cisco 6500/7600 Series Manager User Guide 5-148...
-
Page 263: C6576M Osm Serial Subinterface Dialog Box
SDH (E3) content formatting. The EMS will discover these interfaces but does not support any operations against them. Status Tab Figure 5-77 shows the Status tab of the C6576M OSM Serial Subinterface dialog box. Figure 5-77 Status Tab of the C6576M OSM Serial Subinterface Dialog Box Cisco 6500/7600 Series Manager User Guide 5-149... - Page 264 • • normallostcomms—CEMF has lost communication with the device from the normal state. • perflostcomms—CEMF has lost communication with the device from the performance state. Cisco 6500/7600 Series Manager User Guide 5-150...
-
Page 265: Interface Configuration Tab
Input Queue Length—Displays the input queue length in packets. • • Output Queue Length—Displays the output queue length in packets. • Link Up / Down Trap—Enables or disables linkUp and linkDown trap generation for the interface. Cisco 6500/7600 Series Manager User Guide 5-151... -
Page 266: Ds-3 Configuration Tab
Figure 5-79 DS-3 Configuration Tab of the C6576M OSM Serial Subinterface Dialog Box DS-3 Serial Interface Area The DS-3 Serial Interface area contains the following information: • Framing—Framing for optical digital transmission. SONET is the North American standard; SDH is the European standard. Cisco 6500/7600 Series Manager User Guide 5-152... - Page 267 SONET STS-SPE Higher Order VC. This attribute is read-only. These are possible values: 207 (0xCF) = PPP or HDLC with no payload scrambling – 22 (0x16) = PPP or HDLC with payload scrambling – Cisco 6500/7600 Series Manager User Guide 5-153...
- Page 268 Tx and Rx message sizes cannot be independently configured. If the received values are different, the J1 Path Overhead message size will be set to the larger of the two values. Cisco 6500/7600 Series Manager User Guide 5-154...
- Page 269 Chapter 5 Physical Object Dialog Boxes C6576M OSM Serial Subinterface Dialog Box Figure 5-80 SONET J1 Modify Subdialog Box of the C6576M OSM Serial Subinterface Dialog Box Cisco 6500/7600 Series Manager User Guide 5-155...
-
Page 270: Performance Tab
Out Packets/Sec—Five-minute exponentially decayed moving average of output packets per • second. In Bits/Sec—Five-minute exponentially decayed moving average of input bits per second. • Out Bits/Sec—Five-minute exponentially decayed moving average of output bits per second. • Cisco 6500/7600 Series Manager User Guide 5-156... - Page 271 Start—Turns on performance data logging. • Stop—Turns off performance data logging. The logged data is available to you through the CEMF Performance Manager. Refer to the Cisco Element Note Management Framework User Guide for more information about the Performance Manager.
-
Page 272: Ds-3 Statistics Tab
P-bit Severely Err Secs—P-bit severely errored seconds. • P-bit Coding Violations—P-bit coding violations. • Line Errored Secs—Line errored seconds. • Line Coding Violations—Line coding violations. • Unavail Secs—Unavailable seconds. Severely Err Frm Secs—Severely errored framing seconds. • Cisco 6500/7600 Series Manager User Guide 5-158... - Page 273 Coding Violations—Number of far end coding violations encountered by the SONET Path in the • current 15-minute interval. Unavailable Secs—Number of far end unavailable seconds encountered by the SONET Path in the • current 15-minute interval. Cisco 6500/7600 Series Manager User Guide 5-159...
-
Page 274: Routing Protocol Tab
OSPF simple password authentication. Ignored if Authentication Type is not “simple”. Hello Interval (sec)—Frequency at which the device will send hello packets on the specified • interface and EIGRP autonomous system number. Cisco 6500/7600 Series Manager User Guide 5-160... - Page 275 Level 2 Metric—Cost of the interface for IS-IS level 2 (inter-area) route calculation. Level 1 Priority—The priority is used to determine which router on a LAN will be the designated • router or designated intermediate system (DIS). Cisco 6500/7600 Series Manager User Guide 5-161...
-
Page 276: Additional Notes Tab
Figure 5-84 Additional Notes Tab of the C6576M OSM Serial Subinterface Dialog Box Notes Area The Notes area is a text box that allows you to type in additional notes for the OSM Serial Subinterface. Cisco 6500/7600 Series Manager User Guide 5-162... -
Page 277: C6576M Osm Pos Subinterface Dialog Box
Status Tab Figure 5-85 shows the Status tab of the C6576M OSM POS Subinterface dialog box. Figure 5-85 Status Tab of the C6576M OSM POS Subinterface Dialog Box Cisco 6500/7600 Series Manager User Guide 5-163... - Page 278 • performance—Some attributes are collected periodically for trending purposes. • normallostcomms—CEMF has lost communication with the device from the normal state. • Cisco 6500/7600 Series Manager User Guide 5-164...
-
Page 279: Interface Configuration Tab
Input Queue Length—Displays the input queue length in packets. • Output Queue Length—Displays the output queue length in packets. • • Link Up/Down Trap—Enables or disables linkUp and linkDown trap generation for the interface. Cisco 6500/7600 Series Manager User Guide 5-165... - Page 280 Modify IP button is selected. The subdialog box contain the following: IP Address—Primary IP address of interface. – Netmask—Subnet mask for the interface. – Modify IP button—Modify the IP address. – Figure 5-87 Modify IP Subdialog Box Cisco 6500/7600 Series Manager User Guide 5-166...
-
Page 281: Pos Tab
SONET STS-SPE Higher Order VC. This attribute is read-only. These are possible values: 207 (0xCF) = PPP or HDLC with no payload scrambling – 22 (0x16) = PPP or HDLC with payload scrambling – Cisco 6500/7600 Series Manager User Guide 5-167... - Page 282 Tx and Rx message sizes cannot be independently configured. If the received values are different, the J1 Path Overhead message size will be set to the larger of the two values. Cisco 6500/7600 Series Manager User Guide 5-168...
-
Page 283: Performance Tab
Figure 5-89 SONET J1 Modify Subdialog Box of the C6576M OSM POS Subinterface Dialog Box Performance Tab Figure 5-90 shows the Performance tab of the C6576M OSM POS Subinterface dialog box. All the attributes shown in this tab are read-only. Cisco 6500/7600 Series Manager User Guide 5-169... - Page 284 Out Bits/Sec—Five-minute exponentially decayed moving average of output bits per second. Interface Error Statistics Area The Interface Error Statistics area contains the following information: CRC Error Pkts.—Number of input packets that had cyclic redundancy checksum errors. • Cisco 6500/7600 Series Manager User Guide 5-170...
- Page 285 Start—Turns on performance data logging. Stop—Turns off performance data logging. • The logged data is available to you through the CEMF Performance Manager. Refer to the Cisco Element Note Management Framework User Guide for more information about the Performance Manager.
-
Page 286: Pos Statistics Tab
Errored Secs—Number of errored seconds encountered by the SONET Path in the current 15-minute • interval. • Severely Err Secs—Number of severely errored seconds encountered by the SONET Path in the current 15-minute interval. Cisco 6500/7600 Series Manager User Guide 5-172... -
Page 287: Routing Protocol Tab
15-minute interval. Routing Protocol Tab Figure 5-92 shows the Routing Protocol tab of the C6576M OSM POS Subinterface dialog box. Figure 5-92 Routing Protocol Tab on the C6576M OSM POS Subinterface Dialog Box Cisco 6500/7600 Series Manager User Guide 5-173... - Page 288 Hold Time (sec)—Hold time during that the device will wait for a hello packet to be received on the • specified interface and EIGRP autonomous system number. The hold time should be at least three times the hello interval. Cisco 6500/7600 Series Manager User Guide 5-174...
- Page 289 If the process does not exist, the action will fail. • Disable button—Disables IS-IS routing on the interface. By default, all interfaces are configured as IS-IS Circuit-type Level 1-2. Note Cisco 6500/7600 Series Manager User Guide 5-175...
-
Page 290: Additional Notes Tab
Figure 5-93 Additional Notes Tab of the C6576M OSM POS Subinterface Dialog Box Notes Area The Notes area is a text box that allows you to type in additional notes for the OSM POS Subinterface. Cisco 6500/7600 Series Manager User Guide 5-176... - Page 291 C6576M Loopback Dialog Box, page 6-117 • • C6576M QoS Dialog Box, page 6-119 C6576M QoS Policy Map Dialog Box, page 6-127 • Table 6-1 lists the pop-up menu launch points for all C65/76M dialog boxes. Cisco 6500/7600 Series Manager User Guide...
-
Page 292: Chapter 6 Logical Object Dialog Boxe
Table 6-1 Launch Points for the C65/76M Dialog Boxes Container Object Dialog Box Network Network All dialogs (under the Cisco 6500/7600 Element Series Manager menu entry) Physical Container All dialogs (under the Cisco 6500/7600 (site, bay, Series Manager menu entry) shelf, etc.) -
Page 293: C6576M Ne Config/Mgmt Dialog Box
The C6576M NE Config/Mgmt dialog box provides monitoring and management information for properties related to the Catalyst 6000 family switch or Cisco 7600 series Internet Router. These properties include the Telnet and Enable passwords, global performance logging, and SNMP properties for the entire switch. - Page 294 6-2). Only users with administrative privileges can use the Reset button. Note Any changes to the running configuration will be saved automatically when the switch or router is reset Note using the Reset button. Cisco 6500/7600 Series Manager User Guide...
- Page 295 • discovery—CEMF is trying to determine the contents and configuration of the switch/router. • normal—Presence polling is performed periodically. normallostcomms—CEMF has lost communication with the device from the normal state. • Cisco 6500/7600 Series Manager User Guide...
-
Page 296: System Information Tab
• System Description—A multiline text description of the switch/router. This attribute is read-only. • Cisco Contact Information—Details on how to contact Cisco Systems. This attribute is read-only. • Figure 6-3 System Information Tab of the C6576M Network Element Dialog Box... -
Page 297: Snmp Tab
– SNMPv1 – SNMPv2c SNMPv3—Not supported by the Catalyst 6000 family switches or the Cisco 7600 series – Internet Routers • SNMP v1 Read Community—The v1 community string used to read data from the agent. SNMP v2c Read Community—The v2c community string used to read data from the agent. -
Page 298: Snmp Trap Tab
SNMPv1 – SNMPv2c – SNMPv3—Not supported by the Catalyst 6000 family switches or the Cisco 7600 series – Internet Routers SNMP v1 Read Community—The v1 community string used to read data from the agent. • SNMP v2c Read Community—The v2c community string used to read data from the agent. - Page 299 SNMP Trap Client Address—The IP address to which SNMP traps are sent. – SNMP Trap Client Community String—The community string used within the SNMP trap. – Add Client button—Adds a client to the client list. – Remove Client button—Removes the client from the client list. Cisco 6500/7600 Series Manager User Guide...
- Page 300 Logical Object Dialog Boxes C6576M NE Config/Mgmt Dialog Box Note An error is reported if a nonexistent client is removed or if an existing client is added. Figure 6-6 Configure Trap Client List Popup Window Cisco 6500/7600 Series Manager User Guide 6-10...
- Page 301 Chapter 6 Logical Object Dialog Boxes C6576M NE Config/Mgmt Dialog Box Cisco 6500/7600 Series Manager User Guide 6-11...
-
Page 302: Additional Notes Tab
Additional Notes Tab of the C6576M Network Element Dialog Box Notes Area The Notes area is a text box that allows you to type in additional notes. For example, this information can include text indicating why global performance logging is turned on. Cisco 6500/7600 Series Manager User Guide 6-12... -
Page 303: C6576M Software Dialog Box
Version—Version of the currently executing IOS image. • • Index—Index of the Image Source Location item in the table. • Image Source Location—The list of files (in order) that are used to boot the switch or router. Cisco 6500/7600 Series Manager User Guide 6-13... - Page 304 – Date—The date when the restore will start. The format is MM/DD/YYYY. Hour—The hour when the restore will start. It is a 24-hour clock. – Minute—The minute when the restore will start. – Cisco 6500/7600 Series Manager User Guide 6-14...
- Page 305 Chassis object. • normal—Presence polling of the object. • normallostcomms—CEMF has lost communication with the device from the normal state. • discoverylostcomms—CEMF lost communication with the device during discovery. Cisco 6500/7600 Series Manager User Guide 6-15...
-
Page 306: Cat Os Image Tab
Backup Status—Status of the last image backup operation. The Backup Status has the following • values: Ok—The backup operation completed without errors. – Failed—The backup operation failed. – Not executed—A backup has not been executed. – Cisco 6500/7600 Series Manager User Guide 6-16... - Page 307 Date—The date when the restore will start. The format is MM/DD/YYYY. – Hour—The hour when the restore will start. It is a 24-hour clock. – Minute—The minute when the restore will start. – Figure 6-11 Scheduled Backup/Restore Cat OS Image Dialog Box Cisco 6500/7600 Series Manager User Guide 6-17...
-
Page 308: Ios Config File Tab
Figure 6-12 IOS Config File Tab of the C6576M Software Dialog Box The running configuration file can be edited by selecting the pop-up menu option of the network element object, shown in Figure 6-13. Cisco 6500/7600 Series Manager User Guide 6-18... - Page 309 Startup Location—The location of the startup configuration file that was used the last time the • system was booted up. This attribute is read-only. View Startup Configuration button—Displays the startup configuration in a text box (see • Figure 6-14). This attribute is read-only. Cisco 6500/7600 Series Manager User Guide 6-19...
- Page 310 View Running Configuration button—Displays the current running configuration in a text box (see Figure 6-15). • Save Config to NVRAM—Saves the current running configuration to the location specified by the Startup Location attribute (see Figure 6-15). Cisco 6500/7600 Series Manager User Guide 6-20...
- Page 311 Backup button—Backs up the current startup configuration to the TFTP server. The backup filename is specified by the Backup File attribute. • Restore Status—Status of the last restore action. This attribute (read-only) has the following values: – Ok—The restore operation completed successfully. Cisco 6500/7600 Series Manager User Guide 6-21...
- Page 312 The configuration Backup/Restore actions are used to upload the switch or router startup configuration to a server. The configuration can then be edited on the server and downloaded back to the switch or router. Cisco 6500/7600 Series Manager User Guide 6-22...
-
Page 313: Cat Os Config File Tab
Figure 6-17 Cat OS Config File Tab of the C6576M Software Dialog Box The running configuration file can be edited by selecting the pop-up menu option of the network element object, shown in Figure 6-18. Cisco 6500/7600 Series Manager User Guide 6-23... - Page 314 Text File Location—The location of the Cat OS text configuration file which can be either NVRAM • or a file in the FLASH file system. View Startup Configuration button—Displays the startup configuration in a text box (see • Figure 6-19). This attribute is read-only. Cisco 6500/7600 Series Manager User Guide 6-24...
- Page 315 View Running Configuration button—Displays the current running configuration in a text box (see • Figure 6-20). • Save Running Configuration button—Saves the current running configuration to the location specified by the Startup Location attribute (see Figure 6-20). Figure 6-20 Running Configuration Window Action Report Cisco 6500/7600 Series Manager User Guide 6-25...
- Page 316 Date—The date when the restore will start. The format is MM/DD/YYYY. • Hour—The hour when the restore will start. It is a 24-hour clock. • • Minute—The minute when the restore will start. Cisco 6500/7600 Series Manager User Guide 6-26...
- Page 317 The configuration Backup/Restore actions are used to upload the switch or router startup configuration to a server. The configuration can then be edited on the server and downloaded back to the switch or router. Cisco 6500/7600 Series Manager User Guide 6-27...
-
Page 318: Additional Notes Tab
Additional Notes tab of the C6576M Software dialog box. Figure 6-23 Additional Notes Tab of the C6576M Software Dialog Box Notes Area The Notes area is a text box that allows you to type in additional notes for the object. Cisco 6500/7600 Series Manager User Guide 6-28... -
Page 319: C6576M Syslog Dialog Box
Timestamp—The timestamp when the message was generated. • An alarm will be generated for each entry in this table. (See Chapter 8, “Alarms and Alarm Note Management.”) Figure 6-24 IOS Tab of the C6576M Syslog Dialog Box Cisco 6500/7600 Series Manager User Guide 6-29... - Page 320 This field has the following values: • decommissioned—CEMF is not actively monitoring the object attributes. • normal—Presence polling of the object. normallostcomms—CEMF has lost communication with the device from the normal state. • Cisco 6500/7600 Series Manager User Guide 6-30...
-
Page 321: Catalyst Os Tab
Timestamp—The timestamp when the message was generated. An alarm will be generated for each entry in this table. (See Chapter 8, “Alarms and Alarm Note Management.”) Figure 6-25 Catalyst OS Tab of the C6576M Syslog Dialog Box Cisco 6500/7600 Series Manager User Guide 6-31... - Page 322 (8), which is greater than the value of the Max. Syslog Severity attribute. • Enable Notifications—SNMP syslog notifications are sent whenever a new syslog message is generated and recorded. – true—Notifications enabled. • false—Notifications disabled. Cisco 6500/7600 Series Manager User Guide 6-32...
-
Page 323: Additional Notes Tab
Additional Notes tab of the C6576M Syslog dialog box. Figure 6-26 Additional Notes Tab of the C6576M Syslog Dialog Box Notes Area The Notes area is a text box that allows you to type in additional notes for the object. Cisco 6500/7600 Series Manager User Guide 6-33... -
Page 324: C6576M Vtp Dialog Box
Note It is not possible to configure VLANs on a device where Mode is equal to client. • Domain Name—The name of the management domain in which this switch or router is participating. Cisco 6500/7600 Series Manager User Guide 6-34... - Page 325 “Pruning” and “Version in Use” attributes are ignored (Figure 6-28). These values can only set when the Mode is set to server. Figure 6-28 Update Button Selected in Client Mode Message Cisco 6500/7600 Series Manager User Guide 6-35...
-
Page 326: Additional Notes Tab
Additional Notes tab of the C6576M VTP dialog box. Figure 6-29 Additional Notes Tab of the C6576M VTP Dialog Box Notes Area The Notes area is a text box that allows you to type in additional notes for the object. Cisco 6500/7600 Series Manager User Guide 6-36... -
Page 327: C6576M Vlan Dialog Box
Operational Status—The state of this VLAN. This attribute has one of the following values: operational – suspended – mtuTooBigForDevice—Indicates that this device cannot participate in this VLAN because the – VLAN’s MTU is larger than the device can support. Cisco 6500/7600 Series Manager User Guide 6-37... - Page 328 VLAN number specified. The newly added VLAN will not appear automatically in the VLAN object list (bottom left of Note Figure 6-30). To refresh the VLAN list, reselect the appropriate Software object. Cisco 6500/7600 Series Manager User Guide 6-38...
- Page 329 This field has the following values: • decommissioned—CEMF is not actively monitoring the object attributes. • normal—Presence polling of the object. • normallostcomms—CEMF has lost communication with the device from the normal state. Cisco 6500/7600 Series Manager User Guide 6-39...
-
Page 330: Configuration Tab
IP Address—Primary IP address of interface. Value is nil on a layer-2 interface. • Netmask—Subnet mask for the primary IP address. • • Clear IP Address ——After receiving confirmation, will unset the IP address for this interface. Cisco 6500/7600 Series Manager User Guide 6-40... -
Page 331: Vlan Membership Tab
Add/Remove Members button—Adds or removes a VLAN member. Launches the subdialog box, shown in Figure 6-35. Specify the slot and port number of the interface that you want to add to the VLAN or delete from the VLAN. Cisco 6500/7600 Series Manager User Guide 6-41... - Page 332 Chapter 6 Logical Object Dialog Boxes C6576M VLAN Dialog Box Figure 6-35 Add/Remove VLAN Members Subdialog Box Cisco 6500/7600 Series Manager User Guide 6-42...
-
Page 333: Global Tab
• Figure 6-37. A maximum of eight mappings are supported by the Catalyst 6000 family switch and the Cisco 7600 Note series Internet Router. Enter the 802.1Q VLAN and ISL VLAN numbers for which a mapping is to be added or removed. - Page 334 Add Mapping button—Adds mapping of 802.1Q and ISL VLANs specified by the 802.1Q VLAN Number and ISL VLAN Number fields. • Add/Remove Mapping button—Removes mapping of 802.1Q and ISL VLANs specified by the 802.1Q VLAN Number and ISL VLAN Number fields. Cisco 6500/7600 Series Manager User Guide 6-44...
-
Page 335: Stp Tab
Name field in the Interface dialog box corresponding to the root port (for example, “FastEthernet 2/5”). If the switch is currently the root or there is no spanning tree instance for the VLAN, the value is nil. This attribute is read-only. Cisco 6500/7600 Series Manager User Guide 6-45... - Page 336 If there is no spanning tree instance for the VLAN, the value is nil. If no diameter is specified, the switch will use the default duration of 20 seconds. Cisco 6500/7600 Series Manager User Guide 6-46...
-
Page 337: Qos Tab
Remove Policy button—Detaches an input QoS policy map from the VLAN interface. • Membership QoS Area The Membership QoS area allows you to enable or disable VLAN-based QoS on the VLAN’s member interfaces. Cisco 6500/7600 Series Manager User Guide 6-47... -
Page 338: Eompls Tab
Destination IP—Describes where packets are to be sent. A value of “0 0 0 0” will clear any • previously configured value. VC ID—Label applied to packets entering the tunnel. A value of “0” will clear any previously • configured value. Cisco 6500/7600 Series Manager User Guide 6-48... -
Page 339: Vlan Database Tab
• before switch reset. Restore Status—Status of the last VLAN configuration restore operation. The Restore Status has the • following values: – Ok—The restore operation completed without errors. Failed—The restore operation failed. – Cisco 6500/7600 Series Manager User Guide 6-49... - Page 340 An alarm is generated if the Backup Status and Restore Status attributes are set to Failed. (See Chapter 8, Note “Alarms and Alarm Management.”) VLAN Database Backup/Restore is not supported in VTP Client/Transparent mode as of IOS Note 12.1(8a)EX and later. Cisco 6500/7600 Series Manager User Guide 6-50...
-
Page 341: Additional Notes Tab
Additional Notes tab of the C6576M VLAN dialog box. Figure 6-43 Additional Notes Tab of the C6576M VLAN Dialog Box Notes Area The Notes area is a text box that allows you to type in additional notes for the object. Cisco 6500/7600 Series Manager User Guide 6-51... -
Page 342: C6576M Etherchannel Dialog Box
Administrative Status—The desired state of the EtherChannel interface. The status has the following values: testing (read-only)—Indicates that no operational packets can be passed. – – down – Note This is read-only in Hybrid OS. If the EtherChannel exists, the value is always up (1). Cisco 6500/7600 Series Manager User Guide 6-52... - Page 343 This field has the following values: decommissioned—CEMF is not actively monitoring the object attributes. • normal—Presence polling of the object. • normallostcomms—CEMF has lost communication with the device from the normal state. • Cisco 6500/7600 Series Manager User Guide 6-53...
-
Page 344: Configuration Tab
The Delay attribute is an informational parameter used only to communicate the current bandwidth to the higher-level protocols (such as IGRP, EIGRP); you cannot adjust the actual delay of an interface with this command. Cisco 6500/7600 Series Manager User Guide 6-54... - Page 345 IP address with all the network bits set to 1 and all the host bits set to 0. Clear IP Address —After receiving confirmation, will unset the IP address for the EtherChannel. • Cisco 6500/7600 Series Manager User Guide 6-55...
-
Page 346: Membership Tab
Setting the value to this selection with an admin group specified will immediately add the interface to the indicated EtherChannel in native IOS or to the admin group (from which an EtherChannel may form) in hybrid OS. Cisco 6500/7600 Series Manager User Guide 6-56... - Page 347 – – biDirectional—Interface has passed PAgP packets in both directions. – upPagp—Interface is aggregated by means of PAgP. – upMult—Interface is aggregated to an agport, but connects to more than one external device. Cisco 6500/7600 Series Manager User Guide 6-57...
-
Page 348: Routing Protocol Tab
Area Tag—The IS-IS routing area in which the interface participates. If mutli-area IS-IS is • configured on the device, the IS-IS area must be named. Otherwise, this value may be an implicit null tag. This attribute is read-only. Cisco 6500/7600 Series Manager User Guide 6-58... -
Page 349: Stp Tab
Figure 6-48 STP Tab for the C6576M EtherChannel Dialog Box The area at the top of the STP tab provides the following information: Guard Mode—Indicates whether or not STP guard mode is enabled on an interface. The possible • values are: Cisco 6500/7600 Series Manager User Guide 6-59... - Page 350 The default value is 128 in all versions of IOS, 32 in all versions of CatOS. The valid values are: Native IOS 12.1(6)E and earlier:Integer (0..248) [increments of 8] – Native IOS 12.1(8a)E and later:Integer (0..252) [increments of 4] – Cisco 6500/7600 Series Manager User Guide 6-60...
- Page 351 – Cost—Describes the STP VLAN path cost of this interface. – Add button—Adds an explicit STP VLAN configuration to the interface. – – Remove button—Removes an explicit STP VLAN configuration to the interface. Cisco 6500/7600 Series Manager User Guide 6-61...
- Page 352 Chapter 6 Logical Object Dialog Boxes C6576M EtherChannel Dialog Box Figure 6-49 Add / Remove Per VLAN STP Setting Subdialog Box Cisco 6500/7600 Series Manager User Guide 6-62...
-
Page 353: Hsrp Tab
Port Cost—Indicates the current calculated port path cost of the interface in the STP instance. – HSRP Tab Figure 6-50 shows the HSRP tab of the C6576M EtherChannel dialog box. Figure 6-50 HSRP Tab for the C6576M EtherChannel Dialog Box Cisco 6500/7600 Series Manager User Guide 6-63... - Page 354 The HSRP group may optionally be assigned a primary IP address. If no address is explicitly assigned, the device will attempt to discover the virtual IP address from the active server using hello messages. Figure 6-51 shows the subdialog box that is displayed when you click the button. Cisco 6500/7600 Series Manager User Guide 6-64...
- Page 355 Modify button is clicked. This subdialog box is used to modify the following C6576M Ethernet Interface attributes of a given HSRP group: Secondary IP – Virtual IP – Preempt – Delay Minimum – – Priority – Hello Interval Cisco 6500/7600 Series Manager User Guide 6-65...
- Page 356 Chapter 6 Logical Object Dialog Boxes C6576M EtherChannel Dialog Box – Hold Interval Figure 6-52 HSRP Secondary IP Modify Subdialog Box Cisco 6500/7600 Series Manager User Guide 6-66...
-
Page 357: Additional Notes Tab
Additional Notes tab of the C6576M EtherChannel dialog box. Figure 6-53 Additional Notes Tab of the C6576M EtherChannel Dialog Box Notes Area The Notes area is a text box that allows you to type in additional notes for the object. Cisco 6500/7600 Series Manager User Guide 6-67... -
Page 358: C6576M Bgp Dialog Box
To enable BGP on the switch or router, specify the BGP autonomous system number and then click Enable BGP. An error will be reported if BGP is already enabled on the switch or router. Disable button—Disables BGP on the switch or router. • Cisco 6500/7600 Series Manager User Guide 6-68... - Page 359 Border Router IP Address—Address of the border router that should be used for the destination • network. • Multiple Exit Point Discriminate Metric—Metric used to discriminate between multiple exit points to an adjacent autonomous system. A value of -1 indicates the absence of this attribute. Cisco 6500/7600 Series Manager User Guide 6-69...
- Page 360 This field has the following values: • decommissioned—CEMF is not actively monitoring the object attributes. • normal—Presence polling of the object. • normallostcomms—CEMF has lost communication with the device from the normal state. Cisco 6500/7600 Series Manager User Guide 6-70...
-
Page 361: Neighbor Tab
Add/Remove Neighbor Entry button—Adds or removes BGP neighbors from this table. Launches • the dialog box shown in Figure 6-58. Specify the neighbor IP address and remote AS number to add or remove the neighbor from the local BGP neighbor table. Cisco 6500/7600 Series Manager User Guide 6-71... - Page 362 Chapter 6 Logical Object Dialog Boxes C6576M BGP Dialog Box Figure 6-58 Add or Remove BGP Peers Dialog Box Cisco 6500/7600 Series Manager User Guide 6-72...
-
Page 363: Redistribution Tab
(default). – Metric—BGP metric used to weigh the redistributed route. If no value is specified for Default • Metric (in the BGP tab), this value defaults to 0. Cisco 6500/7600 Series Manager User Guide 6-73... - Page 364 Add button—Enables route redistribution from another IP routing process into the BGP routing domain. Routes may be learned from an IS-IS, EIGRP, or OSPF routing process. • Delete button—Disables route redistribution from another IP routing process into the BGP routing domain. Cisco 6500/7600 Series Manager User Guide 6-74...
-
Page 365: Distribution List Tab
For an outgoing filter, suppresses routes from being advertised on a particular interface; if not specified, route advertisements are suppressed on all interfaces. – Null 0 – FastEthernet <slot>/<port> (Native IOS only) – GigabitEthernet <slot>/<port> (Native IOS only) Cisco 6500/7600 Series Manager User Guide 6-75... - Page 366 Source ID—Identifies a specific routing process instance that redistributed routes are derived from. • Add button—Specifies a filter for suppressing or allowing distribution of network routes through • BGP. Delete button—Removes a filter for suppressing or allowing distribution of network routes through • BGP. Cisco 6500/7600 Series Manager User Guide 6-76...
-
Page 367: Additional Notes Tab
Additional Notes tab of the C6576M BGP dialog box. Figure 6-61 Additional Notes Tab of the C6576M BGP Dialog Box Notes Area The Notes area is a text box that allows you to type in additional notes for the object. Cisco 6500/7600 Series Manager User Guide 6-77... -
Page 368: C6576M Ospf Dialog Box
AS Border Router—Flag to note whether or not this router is configured as an autonomous system • border router. Add button—Adds an OSPF process to the switch or router. Launches the dialog box shown in • Figure 6-63. Cisco 6500/7600 Series Manager User Guide 6-78... - Page 369 C6576M OSPF Dialog Box Note The Catalyst 6000 family switches and the Cisco 7600 series Internet Routers support only three OSPF processes. Specify the OSPF Process ID (number only) and click Add to create the OSPF process on the switch or router.
-
Page 370: Area Tab
IP address. • Area Type—Type of area. The type has the following values: default—Not a stub or NSSA area. – stub—Information on external routes are not sent to stub areas. – Cisco 6500/7600 Series Manager User Guide 6-80... -
Page 371: Network Tab
The action can only be used on an area border router attached to a stub or NSSA area. Network Tab Figure 6-65 shows the Network tab of the C6576M OSPF dialog box. Figure 6-65 Network Tab of the C6576M OSPF Dialog Box Cisco 6500/7600 Series Manager User Guide 6-81... - Page 372 Figure 6-66. Specify the Network IP Address, Wildcard Mask, and the Area ID to be added or removed from the OSPF process. Figure 6-66 Add or Remove OSPF Networks Dialog Box Cisco 6500/7600 Series Manager User Guide 6-82...
-
Page 373: Global Tab
– – pointToMultipoint • Admin Status—OSPF interface’s administrative status. – enabled—Indicates that neighbor relationships can be formed on the interface, and the interface will be advertised as an internal route to some area. Cisco 6500/7600 Series Manager User Guide 6-83... - Page 374 Backup Designated Router—IP address of the backup designated router. • Authentication Key—Password to be used by neighboring OSPF routers on a network segment that • is using OSPF simple password authentication. Ignored if ospfAuthType is not “simple”. Cisco 6500/7600 Series Manager User Guide 6-84...
-
Page 375: Neighbor Tab
0 signifies that the neighbor is not eligible to become the designated router on this particular network. Neighbor State—The state of the relationship with this Neighbor. This column may have the • following values: – down attempt – init – twoWay – exchangeStart – Cisco 6500/7600 Series Manager User Guide 6-85... - Page 376 To remove a neighbor, choose the neighbor in the Neighbor Table and click the Remove button. The Neighbor IP Address and Cost are displayed for the neighbor selected. Figure 6-69 Add or Remove OSPF Neighbors Dialog Box Cisco 6500/7600 Series Manager User Guide 6-86...
-
Page 377: Redistribution Tab
Chapter 6 Logical Object Dialog Boxes C6576M OSPF Dialog Box Redistribution Tab Figure 6-70 shows the Redistribution tab of the C6576M OSPF dialog box. Figure 6-70 Redistribution Tab of the C6576M OSPF Dialog Box Cisco 6500/7600 Series Manager User Guide 6-87... - Page 378 Add button—Enables route redistribution from another IP routing process into the OSPF routing domain. Routes may be learned from an IS-IS, EIGRP, or BGP routing process. • Delete button—Disables route redistribution from another IP routing process into the BGP routing domain. Cisco 6500/7600 Series Manager User Guide 6-88...
-
Page 379: Distribution List Tab
For an outgoing filter, suppresses routes from being advertised on a particular interface; if not specified, route advertisements are suppressed on all interfaces. – Null 0 FastEthernet <slot>/<port> (Native IOS only) – Cisco 6500/7600 Series Manager User Guide 6-89... - Page 380 Add button—Specifies a filter for suppressing or allowing distribution of network routes through OSPF routing process. Delete button—Removes a filter for suppressing or allowing distribution of network routes through • OSPF routing process. Cisco 6500/7600 Series Manager User Guide 6-90...
-
Page 381: Additional Notes Tab
Additional Notes tab of the C6576M OSPF dialog box. Figure 6-72 Additional Notes Tab of the C6576M OSPF Dialog Box Notes Area The Notes area is a text box that allows you to type in additional notes for the object. Cisco 6500/7600 Series Manager User Guide 6-91... -
Page 382: C6576M Eigrp Dialog Box
Autonomous System—Autonomous system number for this EIGRP process. • Router Summarization—If true, subnet routes are summarized automatically into network-level • routes. Automatic summarization is performed when there are two or more networks associated with the EIGRP process. Cisco 6500/7600 Series Manager User Guide 6-92... - Page 383 Wildcard Mask—Mask to be used with the IP address. This field is optional. Figure 6-74 Add EIGRP Processes Dialog Box Note If no netmask is provided, the EIGRP routing process is only deployed on a single network. Cisco 6500/7600 Series Manager User Guide 6-93...
- Page 384 6-75. Specify the IP address and IP mask of the entry to be added or removed from the local network table. Figure 6-75 Add or Remove Networks to the EIGRP Process Dialog Box Cisco 6500/7600 Series Manager User Guide 6-94...
-
Page 385: Redistribution Tab
EIGRP routing domain. • Protocol—Source routing protocol from which routes are being distributed into EIGRP. – IS-IS EIGRP – – OSPF – static – Cisco 6500/7600 Series Manager User Guide 6-95... - Page 386 MTU—Maximum transmission unit of the path metric. This redistribution metric must be specified if the Default Metric is nil. Metric Default Area • Default Metric—Default metric used for route redistribution. This metric is used when and explicit metric is not given during route redistribution process. Cisco 6500/7600 Series Manager User Guide 6-96...
-
Page 387: Distribution List Tab
Routes may be learned from an IS-IS, OSPF, or BGP routing process. • Delete button—Disables route redistribution from another IP routing process into the EIGRP routing domain. Distribution List Tab Figure 6-77 shows the Distribution List tab of the C6576M EIGRP dialog box. Cisco 6500/7600 Series Manager User Guide 6-97... - Page 388 For an outgoing filter, suppresses routes from being advertised on a particular interface; if not specified, route advertisements are suppressed on all interfaces. Null 0 – FastEthernet <slot>/<port> (Native IOS only) – GigabitEthernet <slot>/<port> (Native IOS only) – – GE-WAN <slot>/<port> Cisco 6500/7600 Series Manager User Guide 6-98...
-
Page 389: Additional Notes Tab
• Delete button—Removes a filter for suppressing or allowing distribution of network routes through EIGRP routing process. Additional Notes Tab Figure 6-78 shows the Additional Notes tab of the C6576M EIGRP dialog box. Cisco 6500/7600 Series Manager User Guide 6-99... -
Page 390: C6576M Is-Is Dialog Box
The C6576M IS-IS dialog box provides information on the OSI Intermediate System to Intermediate System (IS-IS) routing process on a Catalyst 6000/6500 series switch or Cisco 7600 series Internet Router. This dialog box is launched from the Software object or IS-IS objects in the Physical view. - Page 391 IS-IS object in the element manager. New Area Tag—IS-IS routing process area tag. Mandatory if configuring multiarea IS-IS; • otherwise, it is optional. If no tag is specified, the default null tag is assumed. Cisco 6500/7600 Series Manager User Guide 6-101...
-
Page 392: Interfaces Tab
• • normal—Presence polling of the object. • normallostcomms—CEMF has lost communication with the device from the normal state. Interfaces Tab Figure 6-80 shows the Interfaces tab of the C6576M IS-IS dialog box. Cisco 6500/7600 Series Manager User Guide 6-102... - Page 393 This table will be empty if CLNS routing is not enabled on the managed device. The table contains one column: • Description—Identifies the supported interface. The interface may be an Ethernet, FastEthernet, or GigabitEthernet. The interface may also be an Ethernet portchannel group or virtual LAN. Cisco 6500/7600 Series Manager User Guide 6-103...
-
Page 394: Redistribution Tab
The Edit Redistribution Table area of the C6576M IS-IS dialog box allows you to enable or disable route redistribution from another IP routing process into the IS-IS area. The following parameters must be given: • Protocol • Source ID • Metric Cisco 6500/7600 Series Manager User Guide 6-104... -
Page 395: Additional Notes Tab
Additional Notes tab of the C6576M IS-IS dialog box. Figure 6-82 Additional Notes Tab of the C6576M IS-IS Dialog Box Notes Area The Notes area is a text box that allows you to type in additional notes for the object Cisco 6500/7600 Series Manager User Guide 6-105... -
Page 396: C6576M Nde Configuration Dialog Box
C6576M NDE Configuration Dialog Box The C6576M NDE Configuration dialog box provides information on the Netflow Data Export (NDE) configuration on a Catalyst 6000 family switch or a Cisco 7600 series Internet Router. There is only one instance of this class per managed device. - Page 397 Dest. IP—IP address of destination Netflow Collector where NDE packets are sent to. Dest. Port—UDP port number of destination Netflow Collector where NDE packets are delivered to. • The configuration attributes are modified by clicking the following buttons: Cisco 6500/7600 Series Manager User Guide 6-107...
-
Page 398: Nde Filters Tab
NDE Filters Tab Figure 6-84 shows the NDE Filters tab of the C6576M NDE Configuration dialog box. Figure 6-84 NDE Filters Tab of C6576M NDE Configuration Dialog Box Cisco 6500/7600 Series Manager User Guide 6-108... - Page 399 Source Port • Dest. IP • • Dest. Mask Dest. Port • • Filter Type—Choose from the drop-down menu: – include – exclude Protocol—Choose the flow filter protocol: • none – – – Cisco 6500/7600 Series Manager User Guide 6-109...
-
Page 400: Additional Notes Tab
Additional Notes tab of the C6576M NDE Configuration dialog box. Figure 6-85 Additional Notes Tab of the C6576M NDE Configuration Dialog Box Notes Area The Notes area is a text box that allows you to type in additional notes for the object Cisco 6500/7600 Series Manager User Guide 6-110... -
Page 401: C6576M Stp Dialog Box
The C6576M STP dialog box provides information on the global Spanning Tree Protocol configuration on a managed Catalyst 6000 family switch or Cisco 7600 series Internet Router. This dialog box is launched from the Software object or STP object in the Physical view. -
Page 402: Additional Notes Tab
Additional Notes tab of the C6576M STP dialog box. Figure 6-87 Additional Notes Tab of the C6576M STP Dialog Box Notes Area The Notes area is a text box that allows you to type in additional notes for the object. Cisco 6500/7600 Series Manager User Guide 6-112... -
Page 403: C6576M Acl Configuration Dialog Box
C6576M ACL Configuration Dialog Box The C6576M ACL dialog box describes a numbered or named access control list (ACL) on a Catalyst 6000/6500 series switch or Cisco 7600 series Internet Router. The C65/76M Controller supports standard and extended, named or numbered ACLs. - Page 404 Remove Permit/Deny Filter—Removes an entry from a named or numbered, standard or extended • ACL. The entry may be a permit or deny filter. Entries may be removed from the ACL in any order. Cisco 6500/7600 Series Manager User Guide 6-114...
- Page 405 This is an optional argument that is only applicable when creating extended ACL filters against TCP or UDP traffic. The following values are available: – none – lessThan equal – greaterThan – notEqual – range – Cisco 6500/7600 Series Manager User Guide 6-115...
-
Page 406: Additional Notes Tab
• Additional Notes Tab Figure 6-91 shows the Additional Notes tab of the C6576M ACL dialog box. Figure 6-91 Additional Notes Tab of the C6576M ACL Configure Dialog Box Cisco 6500/7600 Series Manager User Guide 6-116... -
Page 407: C6576M Loopback Dialog Box
C6576M Loopback Dialog Box The C6576M Loopback dialog box describes the deployment of all loopback interfaces on a Catalyst 6000/6500 series or Cisco 7600 series Internet Router. This dialog box is launched from the Software object or Loopback object in the Physical view. -
Page 408: Additional Notes Tab
Index field. The newly added loopback interface will be displayed in the Loopback Interface Table. Additional Notes Tab Figure 6-93 shows the Additional Notes tab of the C6576M Loopback dialog box. Figure 6-93 Additional Notes Tab of the C6576M Loopback Dialog Box Cisco 6500/7600 Series Manager User Guide 6-118... -
Page 409: C6576M Qos Dialog Box
The C6576M QoS dialog box describes the global quality of service (QoS) engine process on a Catalyst 6000/6500 series or Cisco 7600 series Internet Router. This dialog box is launched from the Software object or QoS objects in the Physical view. - Page 410 Policy Name—Unique identifier of the new policy map to be deployed on the device. – Add Policy button—Creates a policy map on the managed device. – Figure 6-95 Add Policy Map Subdialog Box of the C6576M QoS Dialog Box Cisco 6500/7600 Series Manager User Guide 6-120...
-
Page 411: Named Aggregate Tab
The Max. Burst feature is not supported in 12.1(8a)E and earlier. Note Conform Action Area The Conform Action area of the C6576M QoS dialog box describes the named aggregate policers defined globally on the device. This tab contains the following information: Cisco 6500/7600 Series Manager User Guide 6-121... - Page 412 The Violate Action feature is not supported in IOS 12.1(6)E and earlier. A PFC2 card is also required. Note • New Policer button—Launches a subdialog box, shown in Figure 6-97, to create an aggregrate policer on the managed device with the specified rate, burst, and max-burst values. Cisco 6500/7600 Series Manager User Guide 6-122...
- Page 413 C6576M QoS Dialog Box Figure 6-97 QoS Aggregate Add Subdialog Box of the C6576M QoS Dialog Box Remove button—Deletes one or more aggregrate policers on the managed device selected in the • Named Policers Table. Cisco 6500/7600 Series Manager User Guide 6-123...
-
Page 414: Class Maps Tab
If no values are specified, IP Precedence matching criteria is disabled. This attribute may only have a value if the Type attribute is ethernet (1) and both Match DSCP and Match ACL attributes are nil. Cisco 6500/7600 Series Manager User Guide 6-124... - Page 415 Figure 6-99 Add Class Map Subdialog Box of the C6576M QoS Dialog Box Remove button—Deletes from the managed device one or more class maps selected in the Class • Map Table. The C65/76M will only allow an Ethernet class map to be removed. Cisco 6500/7600 Series Manager User Guide 6-125...
-
Page 416: Additional Notes Tab
Additional Notes tab of the C6576M QoS dialog box. Figure 6-100 Additional Notes Tab of the C6576M QoS Dialog Box Notes Area The Notes area is a text box that allows you to type in additional notes for the object. Cisco 6500/7600 Series Manager User Guide 6-126... -
Page 417: C6576M Qos Policy Map Dialog Box
The C6576M QoS Policy Map dialog box describes a quality of service (QoS) policy map on a Catalyst 6000/6500 series or Cisco 7600 series Internet Router. A policy map consists of one or more traffic filters defined by class maps. This dialog box is launched from the Software object or QoS Policy Map objects in the Physical view. - Page 418 Chapter 6 Logical Object Dialog Boxes C6576M QoS Policy Map Dialog Box Figure 6-102 Policy Map Add Subdialog Box of C6576M QoS Policy Map Dialog Box Cisco 6500/7600 Series Manager User Guide 6-128...
-
Page 419: Policy Map Classes Tab
Add Class button—Launches the Policy Map Add subdialog box, shown in Figure 6-104, to create • a policy map class entry in the referenced policy maps and defines at least one policer for the entry. Cisco 6500/7600 Series Manager User Guide 6-129... - Page 420 Rate—Maximum transmission rate, in bits per second, to enforce against policed traffic. This value is mandatory when defining an explicit policer. A value of 0 is returned on read if an explicit policer is not defined for the policy map class. Cisco 6500/7600 Series Manager User Guide 6-130...
- Page 421 Burst—Normal burst size, in bytes, in bytes to enforce against policed traffic. This value is • mandatory when defining an explicit policer. A value of 0 is returned on read if an explicit policer is not defined for the policy map class. Cisco 6500/7600 Series Manager User Guide 6-131...
- Page 422 Policy Conform Action is Set Precedence. A value of 0 is returned on read if an explicit policer is not defined for the policy map class or the conform action is not Set Precedence. Microflow Policing Subarea This is supported in Native IOS only. Cisco 6500/7600 Series Manager User Guide 6-132...
- Page 423 Policy Conform Action is Set Precedence. A value of 0 is returned on read if an explicit policer is not defined for the policy map class or the conform action is not Set Precedence. Cisco 6500/7600 Series Manager User Guide 6-133...
-
Page 424: Additional Notes Tab
Figure 6-105 Additional Notes Tab of the C6576M QoS Policy Map Dialog Box Notes Area The Notes area is a text box that allows you to type in additional notes for the object. Cisco 6500/7600 Series Manager User Guide 6-134... -
Page 425: Chapter 7 Profiles
Step 1 Launch the Network Element Profile dialog box by choosing Open NE Config/Mgmt Profile from the pop-up menu of the Network Element object. The Network Element Profile dialog box is shown in Figure 7-1. Cisco 6500/7600 Series Manager User Guide... - Page 426 Click the Create Profile button. A window appears asking for a profile name. Step 2 Enter the name for the profile and click Ok. The newly created profile is displayed in the profile list on Step 3 the left-hand side. Cisco 6500/7600 Series Manager User Guide...
-
Page 427: Applying A Network Element Profile
Launch the Syslog Profile dialog box by choosing Open Syslog Profile from the pop-up menu of the Step 1 Syslog object or Software object. The Syslog Configuration Profile dialog box, shown in Figure 7-2, appears. Cisco 6500/7600 Series Manager User Guide... -
Page 428: Applying A Syslog Profile
Choose Edit > Apply Profile and the name of the profile you want to apply from the menu bar. The Step 2 profile is applied and the Syslog attributes are changed to match the profile attributes. Cisco 6500/7600 Series Manager User Guide... -
Page 429: Chapter 8 Alarms And Alarm Management
• • C65/76M Alarms, page 8-5 For more information on the CEMF Event Browser application, refer the Cisco Element Management Framework User Guide v3.2. Viewing C65/76M Alarms You can view all alarms generated by the C65/76M application by using the CEMF Event Browser application. -
Page 430: Event Browser
Yellow Informational White You can launch a dialog box to the object that caused the alarm by choosing the Open Dialog option in the pop-up menu of the alarm entry, shown in Figure 8-3. Cisco 6500/7600 Series Manager User Guide... - Page 431 Chapter 8 Alarms and Alarm Management Viewing C65/76M Alarms Figure 8-3 Launching the Dialog to the Affected Object From the Event Browser Cisco 6500/7600 Series Manager User Guide...
-
Page 432: Full Event Description Dialog
Event Description—Provides a brief description of the reported event. • Event State—Indicates whether the event is active or cleared. When the event has been cleared, the • Clearing Method, User Responsible for Clearing, and Clearing Time and Date sections become active. Cisco 6500/7600 Series Manager User Guide... -
Page 433: C65/76M Alarms
• Acknowledgement Comment—Displays acknowledgement comments. Click Close to exit the Full Event Description dialog. Click Close to exit the Event Browser dialog. Refer to the Cisco Element Management Framework User Guide for further information on Event Browser. C65/76M Alarms The C65/76M generates three types of alarms: SNMP Trap Alarms—CEMF alarms based on SNMP traps emitted by the Catalyst 6000 family... -
Page 434: Snmp Trap Alarms
Alarms and Alarm Management C65/76M Alarms SNMP Trap Alarms Table 8-2 lists the SNMP traps supported by a Catalyst 6000 family switch or a Cisco 7600 series Internet Router and the corresponding CEMF alarm. Table 8-2 CEMF Alarms Generated by SNMP Traps... - Page 435 N/A, see module section for details on module status alarm chassisAlarmOn N/A, see chassis section for details on chassis status alarm chassisAlarmOff N/A, see chassis section for details on chassis status alarm vlanTrunkPortDynamic StatChange Cisco 6500/7600 Series Manager User Guide...
- Page 436 Several C65/76M alarms are generated based on the clogMessageGenerated SNMP trap. This trap is generated by the CISCO-SYSLOG-MIB whenever a syslog message is recorded into the message table. The severity of the CEMF alarm is based on the clogHistSeverity varbind value in the trap.
-
Page 437: Object State Alarms
Catalyst 6500 switch.” normal “C6576M Network Element is in the Normal discovery normal state.” lostcomms lostcomms “C6576M Network Element is in the Critical normal lostcomms state. Network connectivity to the switch has been lost.” Cisco 6500/7600 Series Manager User Guide... -
Page 438: Object State Alarms
Alarms Cleared normal “C6576M Power Supply is in the normal Informational lostcomms state.” lostcomms “C6576M Power Supply is in the lostcomms Critical normal state. Network connectivity to the power supply has been lost.” Cisco 6500/7600 Series Manager User Guide 8-10... -
Page 439: All Modules
Because an Ethernet Interface object cannot enter the lostcomms state independent of the corresponding Ethernet module or supervisor engine module, no alarm is raised when the Ethernet Interface object enters the lostcomms state. Cisco 6500/7600 Series Manager User Guide 8-11... - Page 440 Because the Software object cannot enter the lostcomms state independently of the Network Element Note object, no alarm is raised when the Software object enters the lostcomms state. Cisco 6500/7600 Series Manager User Guide 8-12...
-
Page 441: Attribute Value Alarms
C65/76M Alarms Attribute Value Alarms Because the Catalyst 6000 family switches and the Cisco 7600 series Internet Router running IOS do not support SNMP traps for hardware component failures or changes, the C65/76M software polls certain object attributes to determine hardware status. If the polled value indicates a failure, the C65/76M software raises an appropriate alarm. - Page 442 There is a minor fault with the power majorFault supply. Operational “C6576M Power Supply Operational Critical Operational Status = Status = Status is majorFault.” other majorFault Operational Status = There is a major fault with the power minorFault supply. Cisco 6500/7600 Series Manager User Guide 8-14...
- Page 443 Port adapters do not support the operational status information, as a result the only attribute alarm raised by a port adapter is the final one - a serial number change has been detected. Cisco 6500/7600 Series Manager User Guide 8-15...
- Page 444 Port adapters do not support the operational status information, as a result the only attribute alarm raised by a port adapter is the final one - a serial number change has been detected. Cisco 6500/7600 Series Manager User Guide 8-16...
- Page 445 Status is ok. Startup configuration Status = Error restoration was successful.” Configuration “C6576M Software Configuration Restore Critical Restore Status = Status is Failed. Startup configuration Failed restoration failed.” Do not restart the switch/router. Cisco 6500/7600 Series Manager User Guide 8-17...
- Page 446 Chapter 8 Alarms and Alarm Management C65/76M Alarms Cisco 6500/7600 Series Manager User Guide 8-18...