Denon AVR-2807 Operating Instructions Manual
Denon avr-2807: operating instruction
Hide thumbs
Also See for AVR-2807:
- Service manual (130 pages) ,
- Operating instructions manual (88 pages) ,
- Control protocol (22 pages)
Table of Contents
Advertisement
Quick Links
Download this manual
See also:
Service Manual
Advertisement
Table of Contents

Related Manuals for Denon AVR-2807


Summary of Contents for Denon AVR-2807
- Page 1 AV SURROUND RECEIVER AVR-2807 OPERATING INSTRUCTIONS...
-
Page 2: Safety Instructions
SAFETY INSTRUCTIONS 2 SAFETY PRECAUTIONS Read Instructions – All the safety and operating instructions should be 13. Power-Cord Protection – Power-supply cords should be routed so that CAUTION read before the product is operated. they are not likely to be walked on or pinched by items placed upon or against them, paying particular attention to cords at plugs, Retain Instructions –... - Page 3 This product, when installed as indicated in the instructions contained in this manual, meets FCC requirements. Modification not expressly approved by DENON may void your authority, granted by the FCC, to • Do not let foreign objects into use the product.
- Page 4 We greatly appreciate your purchase of the AVR-2807. To be sure you take maximum advantage of all the features the AVR-2807 has to offer, read these instructions carefully and use the set properly. Be sure to keep this manual for future reference should any questions or problems arise.
-
Page 5: Table Of Contents
Selecting the play mode (PURE DIRECT / DIRECT / STEREO)····································25 Thank you for choosing the DENON AVR-2807 AV Surround Receiver. This remarkable component has been engineered to provide Selecting the Dolby Digital and DTS Surround mode superb surround sound listening with home theater sources such as DVD, as well as providing outstanding high fidelity reproduction (only with digital input) ···················································26, 27... -
Page 6: Advanced Setup - Part
Getting Started Getting Started Advanced Setup – Part 1 Operating the remote control unit Operating DENON audio components································62 System setup items and default values·····················43 ~ 45 Setting the preset memory function ··································62 Navigating through the System Setup Menu····················46 Operating a component stored in the preset memory·····63 About the display··································································46... -
Page 7: Cautions On Installation
23 feet/7 meters, at a horizontal angle of up to Before using 30° with respect to the sensor. In addition to controlling the AVR-2807, the attached remote control unit (RC-1030) can also be used to control the following Pay attention to the following before using this unit:... -
Page 8: Part Names And Functions
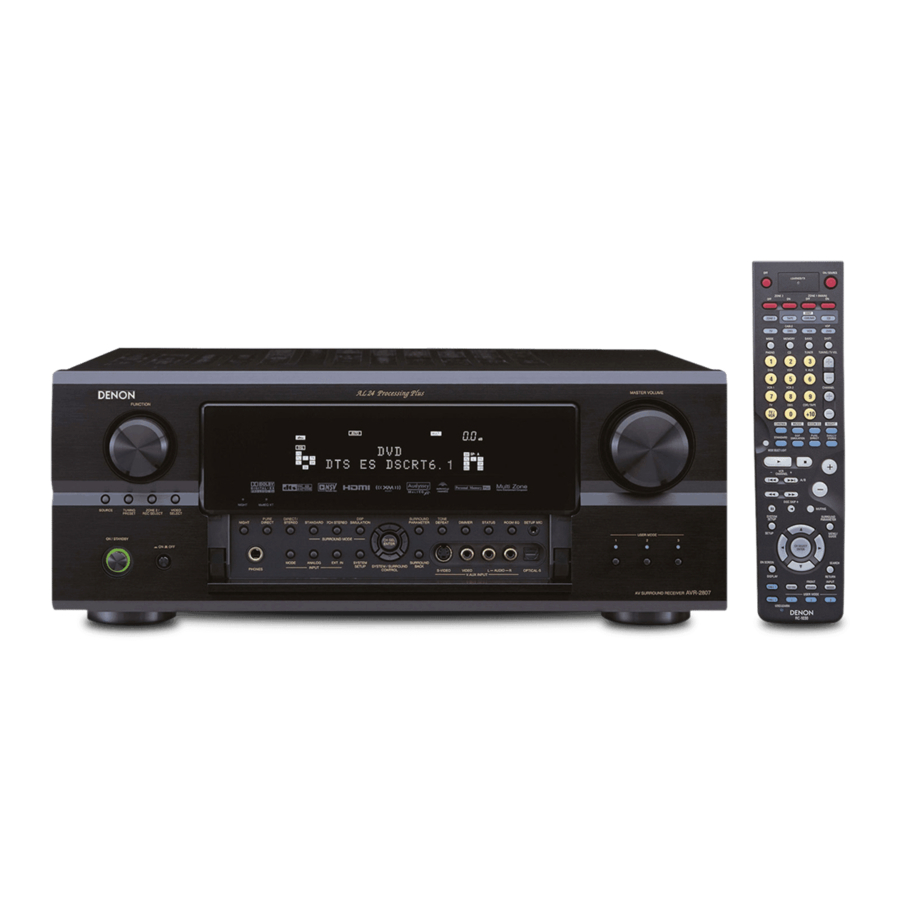
Getting Started Getting Started Part names and functions Display For details on the functions of these parts, refer to the pages given in parentheses ( ). Front panel !3 !2 !9 !9 @0 @0 @ 1 @1 @ 2 @2 @ 3 @3 @4 @4 @1 @ 2 @ 3 @4 @5 @5 @6 @6 @ 7 @7 @8 @8 @9 @9 #0 #0 @5 @6 @ 7 @8 @9 #0... -
Page 9: Rear Panel
Getting Started Getting Started Rear panel Remote control unit To operate the AVR-2807, use the mode selector buttons to select “TAPE” “CDR/MD” or “CD”, mode. Remote control signal transmitter···················(3) LEARNED/TX Indicator ····································(62) Power buttons ····································(10) ZONE2 buttons ZONE1 (MAIN) buttons ····································(41) -
Page 10: Easy Setup Procedure
Speaker layout [Basic layout] Easy Setup Procedure Example of basic layout with 8 speakers and a monitor. • This section contains the basic steps necessary to configure the AVR-2807 according to your Subwoofer Center speaker listening room environment and the source equipment and loudspeakers you are using. -
Page 11: Speaker Connections
Easy Setup Procedure 2 Connections Speaker connections • With the AVR-2807, up to 10 speakers can be connected for surround playback. Connect the speaker terminals with the 2 Speaker impedance • When making connections, also refer to the operating instructions of the other components. -
Page 12: Connecting A Dvd Player And Monitor
HDMI connection to your monitor. S-Video and composite video • To connect the video output from the DVD player to the AVR-2807, you only need to choose one outputs are also provided if your monitor does not have component video inputs. -
Page 13: Auto Setup/Room Equalizer (Room Eq) Functions
<POWER> ENTER <SETUP MIC> • The AVR-2807’s auto setup and room equalizer functions use 2 About the main listening position (*M) the attached microphone to measure the acoustic properties in The “main listening position” refers to either the center of the the room and automatically make the optimum settings. -
Page 14: Before Performing The Auto Setup Procedure
Easy Setup Procedure Easy Setup Procedure w Before performing the Auto Setup e Perform the Auto Setup procedure r Assigning power amplifiers procedure The surround back output can be assigned to the “Front” or SYSTEM SETUP Press “ZONE2” output. Turn on your subwoofer. D D H H Press to select “Power Amp Assign”, then press... -
Page 15: Preliminary Measurements
Easy Setup Procedure Easy Setup Procedure y Preliminary measurements Cautions during measurements: D D H H Press to select “Calculate”, then press • Loud test tones are output during the measurements. Be • The speaker is analyzed. This procedure is used to automatically determine the careful for example when small children are nearby. -
Page 16: Checking And Storing The Measurement Results
Please check the following matters, reset the pertinent items, and measure again. The measurement results displayed at “u Speaker measurements” Be sure to turn off the AVR-2807’s power before checking the speaker connections. can be checked and stored in the memory. -
Page 17: Connecting Other Sources
Connecting Other Sources Connecting Other Sources NOTE: • Do not plug in the power supply cord until all connections have been completed. • When making connections, also refer to the operating Cable indications instructions of the other components. • Be sure to connect the left and right channels properly (left The hookup diagrams on the subsequent pages assume the use of the following optional connection cables (not supplied). -
Page 18: The Video Conversion Function
Connecting Other Sources Connecting Other Sources The video conversion function Relationship between the video input signal and monitor output according to the video convert settings • Even if the formats of the video signals from the various players differ, the different formats can be converted and the signals Input signals MONITOR OUT output to the monitor from a single video output terminal. -
Page 19: The Analog Video To Hdmi Conversion Function
1080i or 720p; S-Video and composite video – 480i/576i) to the Not used – VIDEO HDMI monitor output terminal. – COMPONENT • On the AVR-2807, it is possible to convert 480i/576i component COMPONENT ✳1 – VIDEO video, S-Video and composite video input signals to 480p/576p COMPONENT ✳2 –... -
Page 20: Connecting Equipment With Hdmi Terminals
• When “OFF” is set at “i/p Convert” under “Setting the HDMI Out Setup”, use a monitor compatible with input resolutions of 480i/576i. • If your monitor is not equipped with an HDMI terminal, connect the AVR-2807 to the monitor S VIDEO using the component video, S-Video, or composite video terminals. -
Page 21: Connecting The External Inputs (Ext. In) Terminals
AUDIO OUT signals may not be output from the DVD player. In this case, connect the DVD player’s analog multi-channel output to the AVR-2807’s EXT. IN terminals for playback. Also refer to your DVD player’s operating instructions. Connecting a video camera or video game •... -
Page 22: Connecting A Dvd Recorder
AUDIO OUT • When recording to a VCR, it is necessary that the type of cable used with the playback source equipment be the same type that is connected to the AVR-2807 VCR-1 (to 2) OUTPUT terminal. Example: VCR-2 IN →... -
Page 23: Connecting A Cd Recorder Or Md Recorder
• To provide audio output from AVR-2807’s audio output terminal, select “Amp” at the “HDMI In and the monitor being used are not matched. In this case, change the setting of the resolution Assign”. -
Page 24: Connecting The Antenna Terminals
Connecting Other Sources Connecting the antenna terminals Connecting the XM terminal • AVR-2807 is the XM Ready® receiver. You can receive XM Satellite Radio® by connecting to the An FM antenna cable plug can be connected directly. XM Connect-and-Play (sold separately) and subscribing the XM service. -
Page 25: Connecting The Ipod
When using an iPod, you must connect the DENON original Control Dock for iPod and the DOCK CONTROL jack on the AVR-2807 with a mini-jack and assign the iPod to any AUDIO and/or S- Turn the DC 12 V voltage on and off for VIDEO terminal(s). -
Page 26: Zone2 Speaker Out Connections
Connecting Other Sources Connecting Other Sources ZONE2 speaker out connections Connecting the PRE OUT terminals • When the surround back’s power amplifier is assigned to the ZONE2 output channel at “Power • Use these terminals if you wish to connect external power amplifier(s) to increase the power of Amp Assign”... -
Page 27: Basic Operation
AUTO (All auto mode): • The “DIG.” indicator lights when digital signals are being input The type of input signal is detected and the AVR-2807’s properly. If the “DIG.” indicator does not light, check whether surround mode is switched automatically. Can be selected for the “Digital In Assign”... -
Page 28: Selecting The Room Equalizer Mode
Basic Operation Basic Operation Selecting the room equalizer mode Switching the front speakers <STATUS> PURE DIRECT <DIMMER> ROOM EQ The room equalizer function offers 3 correction curves: [SPEAKER] Press “Audyssey”, “Front” and “Flat”. These modes can be selected after performing the auto setup procedure. FRONT A FRONT B FRONT A+B... -
Page 29: Using The Surround Modes
Sources recorded in monaural (PURE DIRECT / DIRECT / STEREO) Types of surround modes and their features The AVR-2807 is equipped with 3 2-channel playback modes PURE DIRECT exclusively for music. Select the mode to suit your tastes. • Use this mode to play analog input music sources with The AVR-2807 is equipped with many surround modes. -
Page 30: Selecting The Dolby Digital And Dts Surround Mode (Only With Digital Input)
Basic Operation Basic Operation Selecting the Dolby Digital and DTS ENTER SURROUND <STATUS> TONE: Surround mode (only with digital input) STANDARD PARAMETER Adjust the tone control. Can be set in surround modes other than direct mode. Select an input source for which digital (COAXIAL, Can be set separately for the different surround modes. -
Page 31: Selecting The Dolby Pro Logic Ii X (Pro Logic Ii ) Mode
Basic Operation Basic Operation Selecting the Dolby Pro Logic x (Pro Logic When “MUSIC” is selected: AFDM (Auto Flag Detect Mode): mode D D H H F F G G • ON: Press to select the item, then press When software including Dolby Digital EX or DTS-ES 6.1- set. -
Page 32: Selecting The Dts Neo:6 Mode
• OSD-2: The monitor’s resolution is displayed when an HDMI monitor is About the button names in this explanation (When “MUSIC” is selected) connected to the AVR-2807. < > : Buttons on the main unit • OSD-4: : Buttons on the remote control unit This is displayed when the auto surround mode is set to “ON”... -
Page 33: Surround Modes And Parameters
Basic Operation Basic Operation Surround modes and parameters Signals and adjustability in the different modes Channel output Parameter (default values are shown in parentheses) NEO:6 Dolby PRO LOGIC x MUSIC MODE EXT. IN MUSIC Surround Mode SURROUND Digital only only FRONT SURROUND SUB-... - Page 34 Basic Operation Basic Operation 2 Differences in surround mode names depending on the input signals Button Input signals DOLBY DIGITAL DVD-AUDIO LINEAR DOLBY DIGITAL DOLBY DOLBY DOLBY DVD- Surround Mode Note ANALOG DTS ES DSCRT DTS ES MTRX DOLBY DIGITAL EX DVD-Audio 176.4/ DIGITAL...
- Page 35 Basic Operation Basic Operation Button Input signals DOLBY DIGITAL DVD-AUDIO LINEAR DOLBY DIGITAL DOLBY DOLBY DOLBY DVD- Surround Mode Note ANALOG DTS ES DSCRT DTS ES MTRX DOLBY DIGITAL EX DVD-Audio 176.4/ DIGITAL DIGITAL DIGITAL Audio (With Flag) (With Flag) (5.1ch) 96/24 (With Flag)
-
Page 36: Using The Denon Original Surround Modes
Using the DENON original surround modes The AVR-2807 is equipped with a high performance digital signal processor (DSP) that uses digital signal processing to recreate sound fields artificially. One of 10 surround modes can be selected according to the program source and parameters can be further adjusted to achieve even more realistic sound fields. -
Page 37: Selecting The Dsp Surround Simulation
Basic Operation Basic Operation Selecting the DSP surround simulation SURROUND EFFECT LEVEL: SIMULATION ENTER PARAMETER Adjust the strength of the surround effect. [DSP SIMULATION] Press DELAY TIME: (MATRIX mode only) Adjust the delay time between “0 ms” and “300 ms”. 7CH STEREO WIDE SCREEN SUPER STADIUM... -
Page 38: Setting The Tone Control
Basic Operation Basic Operation 2 When you do not want to adjust the tone Setting the tone control <FUNCTION> CH SEL/ SURROUND ENTER PARAMETER Adjust the bass and treble to suit your tastes. < TONE DEFEAT > Either press or set “Tone Defeat” to “ON”... -
Page 39: Using The Fader Function
Basic Operation Basic Operation Using the fader function Listening to the radio Preset memory With this function, the volume of all the front side speakers or all Check that the remote control unit is set to “AMP”. Use the “Auto tuning” or “Manual tuning” the rear side speakers can be adjusted (attenuated) at once. -
Page 40: Checking The Preset Stations
Basic Operation Checking the preset stations XM Satellite Radio <FUNCTION> <STATUS> AVR-2807 is the XM Ready® receiver. You can receive XM [ON SCREEN] Press repeatedly until the “Tuner Satellite Radio® by connecting to the XM Connect-and-Play Preset Stations” screen appears on the OSD. -
Page 41: Checking The Xm Signal Strength And Radio
Basic Operation Basic Operation Checking the XM signal strength and Radio ID Channel selection • “LOADING” is displayed while receiving the channel or < FUNCTION > < FUNCTION > [TUNER] [TUNER] Either turn or press information. Either turn or press •... -
Page 42: Advanced Operation
[ZONE2] User mode function [MODE] The AVR-2807 is equipped with a function for storing the Personal memory plus function [MEMORY] selected input source, the auto surround mode and input mode in the memory and selecting these settings when you want to The surround mode last selected and the input mode setting are use them. -
Page 43: Playing The Ipod
52). played by individuals for their personal use. Violating Press ENTER during playback. • With the AVR-2807 it is possible to display folder names and file copyrights is prohibited by law. Press again to resume. names on the screen like titles. The AVR-2807 can display up to... -
Page 44: Multi Zone Music Entertainment System
Input 2 When using the power amplifier as the MAIN ZONE output Programmable The AVR-2807 is equipped with ZONE2 output terminals for which the volume is fixed output level remote control unit RC-616 and composite video output terminals as the ZONE2 output terminals. -
Page 45: Outputting A Program Source To Amplifier, Etc., In The Zone2 Room (Zone2 Select Mode)
Advanced Operation Advanced Operation Outputting a program source to amplifier, Remote control unit operations during multi- etc., in the ZONE2 room source playback <FUNCTION> (ZONE2 SELECT mode) [ZONE2] Press to select “ZONE2”. < ZONE2/REC SELECT > Press to display the “ZONE2 SOURCE”... -
Page 46: Recording (Audio And/Or Video)
< ZONE2/REC SELECT > Press until “RECOUT” The various settings set when the AVR-2807’s power is switched appears on the display. to standby are stored in the memory. When the power is turned back on, the settings made when the power was switched to... -
Page 47: Advanced Setup - Part 1
Advanced Setup – Part 1 Advanced Setup – Part 1 System setup items and default values 1. Auto Setup/Room EQ Items Default settings Page This unit performs an analysis of the speaker system and 1 Auto Setup measures the acoustic characteristics of your room to permit –... - Page 48 EXT. IN subwoofer terminal. Level It is possible to assign the DENON original Dock’s audio iPod Function = OFF iPod Assign and/or video signals to any input terminals on the AVR-2807 and play them. CDR / TUNER PHONO VCR-1 VCR-2 V.AUX...
- Page 49 Trigger Out CDR / TUNER PHONO VCR-1 VCR-2 V.AUX TAPE Use the DC12V output of the AVR-2807’s Trigger Out two trigger out jacks in association with the ZONE = 2 various input sources and surround modes. Trigger Out CDR / TUNER...
-
Page 50: Navigating Through The System Setup Menu
In addition to the easily understandable on screen display, the SYSTEM SETUP Press AVR-2807 is also equipped with displays for checking the • The “System Setup Menu” appears. settings. Use this when making settings and operating. Below are some examples of typical displays. -
Page 51: Audio Input Setup
It is possible to assign the DENON original Dock’s audio and Setting the Digital In Assignment EXT. IN subwoofer terminal. video signals to any input terminals on the AVR-2807 and play them. This assigns the digital input terminals for the different input... -
Page 52: Setting The Input Function Level
Advanced Setup – Part 1 Advanced Setup – Part 1 Setting the Input Function Level Setting the Function Rename Setting the Tuner Presets The playback level is corrected individually for the different input The name of the input function that is displayed can be changed. 2 Auto Preset Memory sources. -
Page 53: Video Setup
H H . w Press D D H H to select “Default Yes”, then press F F . Output the speakers connected to the AVR-2807. Once all the characters have been input, press Output the TV connected to the AVR-2807. -
Page 54: Setting The Component In Assignment
• If a monitor is connected with an HDMI cable but the monitor is not compatible with HDMI audio signal playback, only the video signals are output to the monitor from the AVR-2807. • Audio signals input from the analog and digital terminals are not output to the TV. -
Page 55: Setting The Hdmi Out Setup
Advanced Setup – Part 1 Advanced Setup – Part 1 Setting the HDMI Out Setup Setting the Audio Delay Set whether or not to up-convert from analog video signals to Adjust the time delay between the video and audio signals. HDMI. -
Page 56: Setting The On Screen Display (Osd)
Advanced Setup – Part 1 Advanced Setup – Part 1 Setting the On Screen Display (OSD) Advanced Playback Set whether or not to display the on screen display for indications Setting the 2ch Direct/Stereo other than the menu screens. Make the 2-channel direct mode and stereo mode speaker D D H H Press to select “On Screen Display”, then... -
Page 57: Setting The Dolby Digital Downmix Option Setup
Advanced Setup – Part 1 Advanced Setup – Part 1 Setting the Dolby Digital Downmix Option Setting the Auto Surround Mode Setting the Manual Equalizer Setup Setup Set whether or not to store the surround mode last played for the Adjust the tone of the various speakers while listening to the input signal. -
Page 58: Option Setup
Dynamic sound with a range wider than that of full range systems can be played by connecting bi-amp compatible F F G G Press to set. speakers to the AVR-2807. Be sure to consult the owner’s manual of your bi-amp-capable speakers for further information before proceeding. S. Back: AVR-2807 The surround back speakers are used in MAIN ZONE. -
Page 59: Setting The Volume Control
The volume set when the AVR-2807 was last used is stored in the memory and set when the power is turned on. Use the DC12V output of the AVR-2807’s 2 trigger out jacks in • – – – (Mute) association with the various input sources and surround modes. -
Page 60: Setting The Setup Lock
Advanced Setup – Part 1 Setting the Setup Lock Advanced Setup – Part 2 This sets whether or not to lock the system setup settings so that they cannot be changed. Speaker Setup Setting the Speaker Configuration D D H H Press to select “Setup Lock”, then press Automatically set the output component and properties for the... -
Page 61: Setting The Subwoofer Setup
Advanced Setup – Part 2 Advanced Setup – Part 2 Setting the Subwoofer Setup Setting the Distance This parameter is for optimizing the timing with which the audio Select the method of playback of the subwoofer for playing the low bass signals. signals are produced from the speakers and subwoofer according to the listening position. -
Page 62: Setting The Channel Level
Advanced Setup – Part 2 Advanced Setup – Part 2 Setting the Channel Level D D H H F F G G Press to select the speaker, then press to set. Set the volume of the various speakers so that the sound output from the speakers and the subwoofer seems to have the same volume level. -
Page 63: Setting The Crossover Frequency
Advanced Setup – Part 2 Advanced Setup – Part 2 2 Adjusting the test tone using the remote 2 Setting the crossover frequency individually control unit for the different channels Adjustment of the test tones using the remote control unit is only possible in the “Auto”... -
Page 64: Others Setup
Advanced Setup – Part 2 Advanced Setup – Part 2 Others Setup Setting the Direct Mode Setup Set the ON/OFF setting of Room Equalizer, in the case of the Setting the Room Equalizer Setup surround mode is in “Direct” or “Pure Direct”. Set the Room Equalizer setting with “All”... -
Page 65: Setting The Mic Input Select
Advanced Setup – Part 2 Advanced Setup – Part 2 Setting the MIC Input Select Check the parameter • To reset: Sets whether the setup microphone is connected to the pin jack D D H H Press to select “Parameter Check”, then Press D D H H to select “Restore”... -
Page 66: Operating The Remote Control Unit
Operating the remote control unit Operating the remote control unit Operating DENON audio components [LEARNED/TX] • There may be several preset codes for some brands. If the [POWER OFF] [ON/SOURCE] [MODE SELECTOR] [MODE SELECT] Press remote control unit does not work properly with one code, try inputting another code. -
Page 67: Operating A Component Stored In The Preset Memory
When a new code is preset, the previous code is automatically – – – – – selection selection selection deleted. Default setting DENON DENON CDR DENON DENON DVD HITACHI ABC CABLE HITACHI Note that the function names of the DVD buttons on the remote – (preset code) (0000) (0000) (0000) -
Page 68: Setting The Learning Function
Press [CD] of [MODE SELECTOR]. Other buttons can be learnt by repeating steps 2 ~ 5. • If your AV device is a brand other than DENON or if operation is ↓ ↓ not possible using the preset memory function, the signals of a... -
Page 69: Setting The Punch Through Function
Operating the remote control unit Operating the remote control unit Setting the punch through function Resetting the remote control unit CD, CDR/MD, TAPE, DVD/VDP or VCR mode buttons can be Resetting the learning function assigned to unused TV and DBS/CABLE mode buttons. For example, when CD mode operations are assigned to TV mode buttons, the CD mode can be operated while in the TV [USE/LEARN]... -
Page 70: Additional Information
Additional Information Additional Information 2 Number of surround back speakers w When playing movies and musics About the speakers We recommend using 2 speakers. When using dipolar speakers in particular, be sure to use 2 [As seen from above] Surround back speakers speakers. - Page 71 DTS NEO:6 surround DTS Digital Surround is a digital surround format developed by The AVR-2807 is equipped with a digital signal processing circuit This is a matrix decoding technology for 6.1-channel surround that lets you play program sources in the surround mode to Digital Theater Systems of the United States.
- Page 72 Additional Information Additional Information Audyssey MultEQ XT AL24 Processing Plus Audyssey MultEQ XT is a technology designed to provide the AL24 Processing Plus is an analog waveform reproduction optimum listening environment for multiple listeners within the technology compatible with sampling frequencies of 192 kHz. listening area.
-
Page 73: Troubleshooting
13 ~ 22 equipments. equipments. not properly connected. • The AVR-2807 does not play HDMI • Set the HDMI audio playback • Monitor’s input setting is wrong. • Set the monitor’s input selector to — audio signals. -
Page 74: Specifications
Troubleshooting Specifications Symptom Cause Measures Page “NO SIGNAL” • The signal cannot be received. • Reposition your XM Connect-and- displayed in the XM Play antenna. mode. • The selected channel is not • Select the another channel. “OFF AIR” is displayed currently broadcasting. - Page 75 2 List of preset codes / Liste de codes préréglés 0001 Magnavox 0023, 0044 Quasar 0006 DMX Electronics 0023 Marantz 0006, 0023, 0030 0002, 0007, 0011, 0021, 0004 Denon 0000 Matsui 0023 0029, 0044, 0053, 0066 Acoustic Research 0048 Dual 0034, 0035 McIntosh 0042 Radiotone 0058, 0059...
- Page 76 3533 1000 Astro 3506 Eurostar 3529, 3564, 3565 Kathrein 3506, 3507, 3523, 3527 Condor 1000 Athena 3528 Expressvu 3543 Kreiselmeyer 3506 Denon 1111 Axiel 3528 3554 La Sat 3521 Denver 1003 3528, 3531 Fenner 3528 Lenco 3533 1015 Bestar 3510...
- Page 77 SM Electronic 3533 Neuhaus 3533 Toshiba 3539, 3544 Anam 3006, 3023, 3028, 3029, Saba 3531 Neusat 3533 Triax 3501 3030 Sabre 3516 Next Level 3555 Uniden 3535, 3537 Anam National 3023, 3028, 3036, 3050 Sagem 3548, 3572 Nikko 3533 Unisat 3507, 3510 Anitech 3017...
- Page 78 3010 Go Video 3035 Jensen 3009 3037, 3046, 3050, 3052 Decca 3000, 3018 GoldHand 3017 3006, 3030 Memphis 3017 Denon 3010 GoldStar 3006, 3007, 3027 3017 Metz 3006, 3023, 3025, 3036, Diamant 3006 Goodmans 3000, 3006, 3017, 3030 Kaisui 3017...
- Page 79 3011, 3012, 3021, 3024 Tech Line 3017 Proscan 3015, 3044 Sears 3000, 3005, 3006, 3010, Technics 3005, 3023, 3028 Prosonic 3030 3013, 3019 Teknika 3000, 3005, 3006 Denon 0000, 0001 Protec 3017 Seleco 3009 Teleavia 3009 0500 Pulsar 3008 Semp 3012 Telefunken...
- Page 80 Bell South 4030 Starcom 4001 Amstrad 4502, 4514, 4549, 4550, Boots 4564 Birmingham Cable Communications Supercable 4012 4579, 4581 Bradford 4553 4012 Tele+1 4017 Anam 4501, 4502, 4553, 4568 Brandt 4536, 4575 British Telecom 4001 Tocom 4004 Anam National 4522, 4568, 4605 Brinkmann 4512, 4582 Cable &...
- Page 81 4514, 4526 Firstline 4502, 4563, 4564, 4572, Graetz 4545 4590, 4592, 4593 Denko 4569 4607 Granada 4514, 4526, 4562, 4564 4579 Denon 4539 Fisher 4542, 4544, 4562, 4564, vrandin 4571, 4598 4545 Denver 4514 4578 Grundig 4514, 4525, 4560, 4588,...
- Page 82 Isukai 4565 Liesenkotter 4514, 4573 Minoka 4581 Optimus 4542, 4547, 4568, 4605 4521 Lifetec 4514, 4565, 4580 Minutz 4510 Optonica 4531, 4546 4500 Loewe 4592 Mitsubishi 4508, 4513, 4531, 4535, Orion 4514, 4550, 4552, 4567, 4513, 4520, 4532, 4557, Logik 4505 4540, 4551, 4592 4572, 4576, 4585...
- Page 83 Princeton 4616 Reflex 4514 Semivox 4553 Sunwood 4514 Prinz 4559 Revox 4514 Semp 4543 SuperTech 4563 Prism 4518 4545, 4561, 4569 Sencora 4502 Supra 4523 Profex 4502 Rhapsody 4554, 4563 Sentra 4565 Supre-Macy 4516 Profi 4502 Roadstar 4502, 4565, 4569, 4582 Serino 4598, 4563, 4584 Supreme...
- Page 84 2039 Uher 4561 Zonda 4501 Apex 2028, 2049 Samsung 2012 Ultravox 4514, 4563 Bush 2035 Sanyo 2027 Unic Line 4514 Denon 0000, 0001 Sharp 2019 United 4514 Aiwa 2507 Emerson 2014 Sherwood 2021 Universal 4511 Carver 2502, 2505, 2510 Fisher...
- Page 85 Carver 1502 DVD preset codes / Codes préréglés DVD Denon 0000 0000 (default / défaut) 0001 Fisher 1505 DVD-555 DVD-2900 DVD-800 DVD-1600 DVD-755 DVD-2910 Garrard 1527, 1529 DVD-900 DVD-3800 DVD-2000 Grundig 1502 DVD-2500 DVD-910 DVD-3910 DVD-955 DVD-5900 DVD-3000 Harman/Kardon 1502, 1514...
- Page 88 TOKYO, JAPAN www.denon.com Denon Brand Company, D&M Holdings Inc. Printed in Japan 00D 511 4435 100...