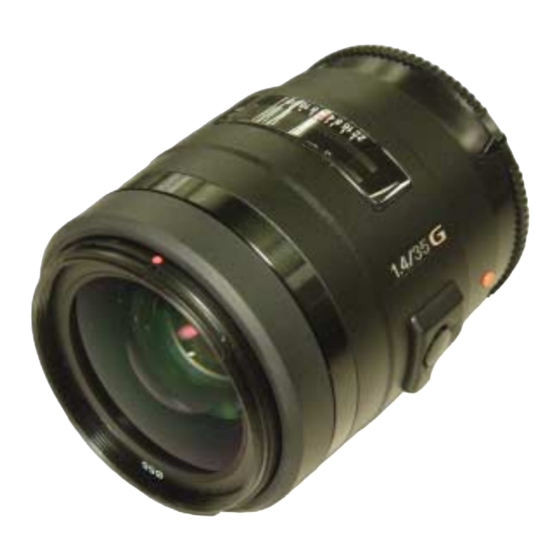
Sony SAL35F14G Service Manual
1.4/35g; 35mm f1.4g
Hide thumbs
Also See for SAL35F14G:
- Service manual (78 pages) ,
- Brochure & specs (48 pages) ,
- Specifications (35 pages)
Advertisement
Quick Links
SERVICE MANUAL
Ver. 1.4 2016.01
Revision History
Revision History
How to use
How to use
Acrobat Reader
Acrobat Reader
Revised-3
Replace the previously issued
SERVICE MANUAL 9-852-108-13
with this Manual.
Link
Link
SPECIFICATIONS
SERVICE NOTE
• About the Lens Test Projector and Finished Inspection JIG II
SAL35F14G (1.4/35G) (35mm F1.4G)
9-852-108-14
SAL35F14G
DISASSEMBLY
REPAIR PARTS LIST
Sony Corporation
(1.4/35G) (35mm F1.4G)
Canadian Model
Chinese Model
ADJUSTMENTS
LENS FOR DSLR CAMERA
Published by Sony Techno Create Corporation
US Model
AEP Model
2016A08-1
© 2016.01
Advertisement

Related Manuals for Sony SAL35F14G


Summary of Contents for Sony SAL35F14G
- Page 1 Link SPECIFICATIONS DISASSEMBLY ADJUSTMENTS SERVICE NOTE REPAIR PARTS LIST • About the Lens Test Projector and Finished Inspection JIG II LENS FOR DSLR CAMERA 2016A08-1 SAL35F14G (1.4/35G) (35mm F1.4G) © 2016.01 Sony Corporation 9-852-108-14 Published by Sony Techno Create Corporation...
- Page 2 Approx. 510 (18) Included items Lens (1), Front lens cap (1), Rear lens cap (1), Lens hood (1), Carrying case (1), Set of printed documentation Designs and specifications are subject to change without notice. SAL35F14G (1.4/35G) (35mm F1.4G) — 2 —...
- Page 3 IC pins, etc. • Be sure to control soldering iron tips used for unleaded solder and those for leaded solder so they are managed separately. Mixing unleaded solder and leaded solder will cause detachment phenomenon. SAL35F14G (1.4/35G) (35mm F1.4G)
- Page 4 CRITIQUES POUR LA SÉCURITÉ DE FONCTIONNEMENT. NE COMPONENTS WITH SONY PARTS WHOSE PART NUMBERS REMPLACER CES COMPOSANTS QUE PAR DES PIÈSES SONY APPEAR AS SHOWN IN THIS MANUAL OR IN SUPPLEMENTS DONT LES NUMÉROS SONT DONNÉS DANS CE MANUEL OU PUBLISHED BY SONY.
- Page 5 Perform the aperture Replace the defective part. diameter adjustment. Check operation of the preset ring, and replace Check operation the defective part. of the diaphragm control block. Replace the defective part. Perform the aperture diameter check. SAL35F14G (1.4/35G) (35mm F1.4G)
- Page 6 Clean the pattern of the main flexible block. Replace the defective part or apply the grease. Replace the main flexible block. Check the operation again. Check the foecusing operation again. SAL35F14G (1.4/35G) (35mm F1.4G)
- Page 7 Chip-A Fixed screw Notches Chip-B Chip Chip Fixed screw When top of tip does not reach holes or notches because the fixed Chip-B screw becomes obstructive, replace the fixed screw to below. Holes +B 3X5 7-682-546-09 SAL35F14G (1.4/35G) (35mm F1.4G)
- Page 8 2-1-1. DECORATION RING AND MIRROR BARREL TUBE BLOCK EXPLODED VIEW 1 Ornamental Ring Label HELP01 2 Decoration Ring 5 1 Group Lens Block HELP02 (See Page 2-7.) 3 G1 4 Mirror Barrel Tube Block (See Page 2-3.) HELP03 SAL35F14G (1.4/35G) (35mm F1.4G)
- Page 9 HELP06 ![ Cam Ring Support Plate Preset Ring Holding Plate !/ Connector of 6 Coupler and DV-FH Flexible Coupler Adjustment 4 Back Adjustment Washer Washer HELP09 FLANGE BACK (f’F) ADJUSTMENT 5 Ground Spring (See Page 2-4.) SAL35F14G (1.4/35G) (35mm F1.4G)
- Page 10 Aperture HELP13 Holding Ring Guide Pin HELP13 Guide Pin Guide Roller HELP13 Guide Pin Aperture Unit Holding Spring Guide Roller Guide Roller Guide Pin 4 2 Group Lens Block HELP13 (See Page 2-7.) (See Page 2-5.) SAL35F14G (1.4/35G) (35mm F1.4G)
- Page 11 Hold Ring Friction Tape A Float Ring 4 Focus Operating Ring and Focus Operating Ring Guide Pin Scissors HELP16 Lever Block Friction Sheet B HELP18 Torque Ring B 5 Torque Ring Block HELP17 1 Focus Ring Rubber SAL35F14G (1.4/35G) (35mm F1.4G)
- Page 12 2-1-5. G ORNAMENTAL RING BLOCK AND FOCUS HOLD BUTTON BASE EXPLODED VIEW DV-FH Flexible HELP19 HELP20 Mount Index Click Plate Focus Hold Button Base HELP21 FOCUS HOLD BUTTON CHECK Focus Hold Button Dust Proofing Tape Focus Scale Window Unit FHB Adhesion G Ornamental Ring Block SAL35F14G (1.4/35G) (35mm F1.4G)
- Page 13 2-1-6. 1 GROUP, 2 GROUP AND 3 GROUP LENS BLOCK EXPLODED VIEW HELP23 G10 Stopper G8 G9 G10 1 Group Lens Block 2 Group Lens Block 3 Group Lens Block HELP22 SAL35F14G (1.4/35G) (35mm F1.4G)
- Page 14 Align of ”/” of “1.4/35” of the ornamental ring label with distance index, and stick the ornamental ring label onto the decoration ring. Remove the masking tape of the ornamental ring label. Tolerance: ±2.5 = ±1 mm Note: Masking Tape Ornamental Ring Label Decoration Ring Distance Index SAL35F14G (1.4/35G) (35mm F1.4G) HELP...
- Page 15 Select the chip-A or chip-B for usage. After applying the adhesive bond (B-10) to the indicated portion, tighten the decoration ring with the universal wrench. Decoration Ring Apply the adhesive bond (B-10) in width 10mm. G1 Lens Mirror Barrel Tube Block SAL35F14G (1.4/35G) (35mm F1.4G) HELP...
- Page 16 Apply the adhesive bond (B-40) to 3 screws shown in figure and tighten the screws. Apply the adhesive bond (B-40) Apply the adhesive bond (B-40) Mirror Barrel Tube Block Ring Positioning Pin 1 Group Lens Block U Groove SAL35F14G (1.4/35G) (35mm F1.4G) HELP...
- Page 17 Apply the adhesive bond (LOCTITE 460) Stopper Screw Apply the grease (G-85) to 3 locations of indicated portion. Lens A Mount Apply the anti-diffusion agent (A-20) Apply the grease (G-85) (rear side) to all circumferences of indicated Portion. SAL35F14G (1.4/35G) (35mm F1.4G) HELP...
- Page 18 DV-FH flexible Connector G Decoration Ring Outer Barrel and G Decoration Ring DV-FH Flexible Mount Index Outer Barrel Apply the anti-diffusion agent (A-20) Apply the anti-diffusion agent (A-20) (inside) to all circumferences of indicated portions. SAL35F14G (1.4/35G) (35mm F1.4G) HELP...
- Page 19 Leave space 1mm between edge and adhesive sheet, affix the adhesive sheet to cam ring support plate. Fixed Barrel Block Adhesive Sheet Cam Ring Support Plate Adhesive Sheet 5 to10mm (Width of overlapping) Cam Ring Support Plate SAL35F14G (1.4/35G) (35mm F1.4G) HELP...
- Page 20 Apply grease (G-85). (gear portion) HELP10 Adhesive bond (B-40): J-6082-614-A Apply bond (B-40) to 4 screws shown in figure and tighten the screws. Apply the adhesive bond (B-40) Apply the adhesive bond (B-40) Outside Barrel SAL35F14G (1.4/35G) (35mm F1.4G) HELP...
- Page 21 Base Plate Main Flexible Unit Flexible Substrate Flexible Substrate Base Plate Setting Tape D Main Flexible Unit is turned in part A, put, and the adhesive bond (B-60) is spread on the instruction part in figure. SAL35F14G (1.4/35G) (35mm F1.4G) HELP...
- Page 22 Apply the grease (G-85) to all circumferences of gear of connect ring. Stopper pin Apply the adhesive bond (B-40) Stopper pin Apply the adhesive bond (B-40) Apply the grease (G-85) to the circumference of gear. Apply the adhesive bond (B-40) Connect Ring SAL35F14G (1.4/35G) (35mm F1.4G) HELP...
- Page 23 (B-40) Apply the adhesive bond (B-40) Guide Roller Guide Pin Guide Roller Apply the adhesive Guide Pin bond (B-40) Guide Roller Guide Pin Pin of aperture operation plate block Inner Barrel 2 Group Lens Block SAL35F14G (1.4/35G) (35mm F1.4G) HELP...
- Page 24 G8 G9 G10 3 Group Lens Block Inner Barrel Aperture Unit Holding Spring Apply the adhesive bond (B-10) Aperture Holding Ring Aperture Unit Holding Spring Apply the adhesive bond (B-10) (width of 10mm to 3 locations) SAL35F14G (1.4/35G) (35mm F1.4G) HELP...
- Page 25 Fixed Barrel Apply the adhesive bond (B-10) (circumference of 2 locations, width of 5 to 10mm) Apply the grease (G-35) Boss of float ring Apply the grease (G-35) (6 locations of cam groove) Focus Operating Ring SAL35F14G (1.4/35G) (35mm F1.4G) HELP...
- Page 26 (Screw hole part) Focus Operating Ring Focus Operating Ring Guide Pin Fixed Barrel Guide Pin Apply the grease (G-35) Focus Operating Ring Focus Operating Focus Operating Ring Ring Guide Pin Focus Operating Ring Guide Pin SAL35F14G (1.4/35G) (35mm F1.4G) HELP...
- Page 27 Apply the grease (G-115) Affix the friction Tape A to torque ring A shown in figure. Friction Tape A Affix to the edge side. Edge side Torque Ring A Friction Tape A Torque Ring A SAL35F14G (1.4/35G) (35mm F1.4G) HELP...
- Page 28 Do not protrude from the Standard position upper part. of taping Apply the anti-diffusion agent (A-20) Do not float, Do not peel off Apply the anti-diffusion agent (A-20) Focus Operating Ring Focus Operating Ring Apply the anti-diffusion agent (A-20) SAL35F14G (1.4/35G) (35mm F1.4G) HELP...
- Page 29 Flexble Substrate Setting Tape C Standard position Standard Flexble Substrate Setting Tape A position Affix the DV-FH flexible to outer barrel and G decoration ring shown in figure. DV-FH flexible Standard position Outer Barrel and G Decoration Ring SAL35F14G (1.4/35G) (35mm F1.4G) HELP...
- Page 30 Check the “Focus Hold Button Check (Focus Hold Button)” in section “4-7. FINISHED ADJUSTMENT/INSPECTION”. Apply the adhesive bond (B-10) Apply the adhesive bond (LOCTITE 460) Washer Focus Hold Button Base Focus Hold Button Dust Proofing Tape Click Plate SAL35F14G (1.4/35G) (35mm F1.4G) HELP...
- Page 31 After the optical axis adjustment (Refer to section “4-3-2. Optical Axis Adjustment”), apply the adhesive bond (B-10) to the indicated portion of G10 stopper. Apply the anti-diffusion agent (A-20) as shown in figure. Apply the adhesive bond (B-10) G10 Stopper G8 G9 G10 Apply the anti-diffusion agent (A-20) 3 Group Lens Block SAL35F14G (1.4/35G) (35mm F1.4G) HELP...
- Page 32 (See Page 3-2.) Ref. No. Part No. Description 2-684-732-01 RING (DECORATION RING) 2-887-838-01 LABEL, ORNAMENTAL RING 2-684-731-01 SCREW M1.6X3.5 2-684-730-01 WASHER A-1191-451-A BLOCK, MIRROR BARREL TUBE 2-684-737-01 NAME PLATE 3514 2-684-073-01 LENS NO. PLATE 2-695-837-01 LABEL, MODEL NAME SAL35F14G (1.4/35G) (35mm F1.4G)
- Page 33 2-684-234-01 PRESET RING HOLDING PLATE 2-684-773-01 PLATE (CAM RING SUPPORT PLATE) Selection Parts BACK ADJUSTMENT WASHER A-E (Note1) 2-684-784-01 COUPLER 2-687-690-01 SCREW M1.6X3.0 Selection Parts COUPLER ADJUSTMENT WASHER A-E (Note 1) 2-684-782-01 SEMIOVAL SCREW M1.6X3.5 2-684-735-01 GROUND SPRING SAL35F14G (1.4/35G) (35mm F1.4G)
- Page 34 2-684-815-01 APERTURE UNIT HOLDING SPRING 2-684-840-01 FLEXIBLE SUBSTRATE BASE PLATE 2-684-842-01 TAPE(FLEXIBLE SUBSTRATE SETTING) 9-913-210-03 POLYESTER TAPE (BLACK) 10mm (Note 2) 2-898-348-01 SCREW M1.6X3.0 2-684-779-01 STOPPER PIN 2-684-777-01 RING (CONNECT RING) 2-687-690-01 SCREW M1.6X3.0 2-684-749-01 GUIDE PIN SAL35F14G (1.4/35G) (35mm F1.4G)
- Page 35 2-684-811-01 RING (FOCUS OPERATING RING) 2-684-762-01 PHI3 HEAD SCREW M1.6X2.5 2-684-747-01 PIN(FOCUS OPERATING RING GUIDE) 2-684-803-01 TAPE (FRICTION TAPE A) 2-684-812-01 TAPE (FRICTION SHEET B) 2-684-804-01 RING (FLOAT RING) 2-684-741-01 RUBBER (FOCUS RING RUBBER) A-1191-440-A BLOCK, SCISSORS LEVER SAL35F14G (1.4/35G) (35mm F1.4G)
- Page 36 2-683-692-01 CHIP (MOUNT INDEX) 2-684-208-01 CLICK PLATE A-1191-448-A BLOCK, G ORNAMENTAL RING 2-689-275-01 DUST PROOFING TAPE A-1191-455-A UNIT (FOCUS SCALE WINDOW UNIT) 2-684-853-01 FOCUS HOLD BUTTON 2-684-846-01 TAPE, FHB ADHESION 2-684-852-01 FOCUS HOLD BUTTON BASE 2-684-849-01 FLEXIBLE, DV-FH SAL35F14G (1.4/35G) (35mm F1.4G)
- Page 37 2-684-875-01 LENS (G2) 2-684-877-01 LENS (G3) 2-684-878-01 G3 STOPPER 2-684-873-01 HOLDER (1ST LENS HOLDER) 2-684-759-01 2ND MOVING FRAME A-1191-452-A BLOCK, 2 GROUP LENS 2-684-813-01 INNER BARREL A-1191-453-A BLOCK, 3 GROUP LENS 2-684-872-01 WASHER (G10 STOPPER) 2-684-871-01 LENS (G10) SAL35F14G (1.4/35G) (35mm F1.4G)
- Page 38 2-684-753-01 GUIDE ROLLER D (D1=4.52mm, D2=4.03mm) 2-684-754-01 GUIDE ROLLER E (D1=4.52mm, D2=4.02mm) 2-684-755-01 GUIDE ROLLER F (D1=4.52mm, D2=4.01mm) 2-684-756-01 GUIDE ROLLER G (D1=4.51mm, D2=4.03mm) 2-684-757-01 GUIDE ROLLER H (D1=4.51mm, D2=4.02mm) 2-684-758-01 GUIDE ROLLER I (D1=4.51mm, D2=4.01mm) SAL35F14G (1.4/35G) (35mm F1.4G)
- Page 39 2-685-162-21 MANUAL, INSTRUCTION (PORTUGUESE, RUSSIAN, TRADITIONAL CHINESE, KOREAN) (AEP) 2-685-162-31 MANUAL, INSTRUCTION Front Lens Cap Lens Hood (SH0001) (SIMPLIFIED CHINESE, ARABIC) (AEP, CH) 2-683-616-01 2-687-324-01 Abbreviation • CH: chinese model Carrying Case Rear Lens Cap 2-683-615-01 2-694-833-01 SAL35F14G (1.4/35G) (35mm F1.4G)
- Page 40 JIG II J-6082-607-A J-6082-608-A J-6082-710-A (Note 4) J-10 J-11 J-12 Chip-A for M-BOX JIG Universal wrench universal wrench: J-6082-722-A J-6082-609-A J-6082-609-1 (Note 5) J-13 J-14 Chip-B for Chip-C for universal wrench: universal wrench: J-6082-609-2 J-6082-609-3 Fig. 4-1-1 SAL35F14G (1.4/35G) (35mm F1.4G)
- Page 41 Connect the variable transformer (Output voltage: AC 100 V) to the lens test projector. Note 4: The Finished Inspection Jig II is for 100 V - 240 V AC. Note 5: M-Box Jig is available in use for Finished Inspection Jig (J-6082-645-A). SAL35F14G (1.4/35G) (35mm F1.4G)
- Page 42 The lens assembly is replaced following; (1) First of all, replace the 1. (2) If not improved, replace the 2, then replace the 3. 2 Lens (G2) 3 Lens (G3) 1 3 Group Lens Block (2-684-875-01) (2-684-877-01) (A-1191-453-A) SAL35F14G (1.4/35G) (35mm F1.4G)
- Page 43 Equipment used • Personal Computer • Lens Adjustment Program (RomCheckerSVerXXX.zip) Note 1: Personal computer must have the condition that Windows Vista/7 runs normally and USB is connectable. Note 2: Acquire the Lens adjustment program from each HQ. SAL35F14G (1.4/35G) (35mm F1.4G)
- Page 44 D-sub 9 Pins: Female RS232C Cable USB to Serial Cable Fig. 4-1-3 2. Startup of Lens Adjustment Program Unzip the Lens Adjustment Program (RomCheckerSVerXXX.zip) and save it. Start up “RomCheckerSVerXXX.exe” from an arbitrary folder. Fig. 4-1-4 SAL35F14G (1.4/35G) (35mm F1.4G)
- Page 45 Click [Start[Ent]] from the start up window when you inspect the corresponding model as everything continues. The procedure for executing the inspection of each item one by one has been described in this manual. SAL35F14G (1.4/35G) (35mm F1.4G)
- Page 46 Note: Shoot the center of the luminance surface three times with the master lens and checking lens. Setting of Luminance box: Luminance: EV12 Setting of Lens: Focus: Infinity end Setting of Camera: ISO: Exposure Mode: Shutter Speed: 1/125 Aperture: F5.6 Focus Mode: Metering: Center weighted Preset white balance: Tungsten D-R: SAL35F14G (1.4/35G) (35mm F1.4G)
- Page 47 3) Set the Color Calculator 2 as follows. Measured value display (Display menu): RGB+L*a*b* Measuring method (Display menu): Center Single Area Fig. 4-2-4 Color space (Edit menu): sRGB Image Fig. 4-2-5 Area size for calculate (Edit menu → Option): 256×256 Pixels Fig. 4-2-6 SAL35F14G (1.4/35G) (35mm F1.4G)
- Page 48 Aperture error = Average “G” value of checking lens (b) - Average “G” value of master lens (a) Specification Aperture error = 0 ±12 When the aperture error is out of specification, perform “4-2-2. Aperture Diameter Adjustment”. SAL35F14G (1.4/35G) (35mm F1.4G)
- Page 49 Lens Mount Riveting Block Cam Ring & Fixed Barrel Fig. 4-2-8 3) Remove the adhesive bond fixing the aperture unit holding spring. Apply bond(B-10) (3 areas) Aperture Holding Ring Bond Bond Aperture Unit Holding Spring Fig. 4-2-9 SAL35F14G (1.4/35G) (35mm F1.4G) 4-10...
- Page 50 Affer apply the adhesive bond (B-10), please leave it for 8 hours or more. Assemble the lens in the state of near completion. Perform “4-2-1. Aperture Diameter Check”. Note: Repeat “4-2-2. Aperture Diameter Adjustment” and “4-2-1. Aperture Diameter Check” until the iris tolerance meets the specifica- tion. SAL35F14G (1.4/35G) (35mm F1.4G) 4-11...
- Page 51 Focusing knob Fig. 4-3-2 5) Turn the scale ring of the dial gauge until the long pointer indicates “0”. Note: This position is the flange back (f’F) = 43.50 mm. Memorize the position of short-pointer. SAL35F14G (1.4/35G) (35mm F1.4G) 4-12...
- Page 52 Fig. 4-3-5 (f)) is in focus, and then read the dial gauge value. <D> (6) Calculate the CB value (absolute difference between <C> and <D>) and ensure that it is within specifications. CB value = <C> - <D> SAL35F14G (1.4/35G) (35mm F1.4G) 4-13...
- Page 53 4-3-2. Optical Axis Adjustment 1) Turn the G10, or do the adjustment of looseness. Then align the axis. 2) Apply the adhesive bond (B-10) to the G10 retainer. (Refer to HELP 23). Tolerance: 0.02 mm or less SAL35F14G (1.4/35G) (35mm F1.4G) 4-14...
- Page 54 Fixed lever Lens Heat-absorbing filter Chart Chart Filament Filament f=18 to 35 mm f=100 to 200 mm Fixed lever Chart Chart Filament Filament f=35 to 100 mm f=200 to 300 mm Lens test projector Fig. 4-4-1 SAL35F14G (1.4/35G) (35mm F1.4G) 4-15...
- Page 55 1) Turn the focus ring of the checking lens until the chart image projected on the screen is the sharpest at the center (y’=0). 2) Read the number of the smallest pitched lines at the center (y’= 0). The number represents for lines per mm. Saggital (S) Meridional (M) Fig. 4-4-3 SAL35F14G (1.4/35G) (35mm F1.4G) 4-16...
- Page 56 If the specifications in the section “4-4-1 Projective Resolving Power Check” are not satisfied, replace the following parts and perform the “2. Checking Method” again. Part No. Description A-1191-453-A BLOCK, 3 GROUP LENS 2-684-875-01 LENS (G2) 2-684-877-01 LENS (G3) SAL35F14G (1.4/35G) (35mm F1.4G) 4-17...
- Page 57 (mm) f (mm) (Infinity position) 44.58 to 44.62 Table 4-5-1 2) When the flange back (f’F) of the checking lens is out of specification of the Table 4-5-1, perform “4-5-2. Flange Back (f’F) Adjustment”. SAL35F14G (1.4/35G) (35mm F1.4G) 4-18...
- Page 58 When the flange back (f’F) is out of specification of Table 4-5-2, repeat steps 2) to 6) again. Part No. Description 2-684-123-01 BACK ADJUSTMENT WASHER A (t=0.05mm) 2-684-124-01 BACK ADJUSTMENT WASHER B (t=0.07mm) 2-684-125-01 BACK ADJUSTMENT WASHER C (t=0.1mm) 2-684-126-01 BACK ADJUSTMENT WASHER D (t=0.2mm) 2-684-127-01 BACK ADJUSTMENT WASHER E (t=0.5mm) SAL35F14G (1.4/35G) (35mm F1.4G) 4-19...
- Page 59 Select the combination according to the Table 4-6-2 Guidelines table. Note 3: If the shooting distance using a 60 times chart cannot be ensured indoors, temporarily use a combination of 40 times chart or 20 times chart. SAL35F14G (1.4/35G) (35mm F1.4G) 4-20...
- Page 60 (Fixed at the center) Image Size Super SteadyShot : OFF Drive Mode : Self-timer Set the optical axis to the center of the AF assist chart. AF Assist Chart Shooting distance (60 Times/40 Times) Fig. 4-6-2 SAL35F14G (1.4/35G) (35mm F1.4G) 4-21...
- Page 61 If the error amount is out of the range, perform “4-7-4. Check/Write SB”. Reference value Focal length/ Distance (mm) 35 mm 0.7 m (20 times) 0 ± 9 1.4 m (40 times) 0 ± 37 2.1 m (60 times) 0 ± 83 Table 4-6-3 SAL35F14G (1.4/35G) (35mm F1.4G) 4-22...
- Page 62 Center of sharpest area Center of area with less color fogged - Front defocus area: Magenta fogged - Rear defocus area: Green fogged Example where peak position accidentally matches the AF Assist Chart position Fig. 4-6-4 SAL35F14G (1.4/35G) (35mm F1.4G) 4-23...
- Page 63 The lens to be tested has a tendency of backward defocusing compared to the AE master lens. The error amount is approx. 14 cm. Compare this error amount with the reference value and check whether the error amount is within the acceptable range. If the error amount is outside the acceptable range, perform “4-7-4. Check/Write SB”. SAL35F14G (1.4/35G) (35mm F1.4G) 4-24...
- Page 64 Focus Brush Position Check (Focus-Adj Point) Focus Pattern Check (Focus Pattern) Focus Hold Button Check (Focus Hold Button) Focus Hold Short Check (Focus Hold Short) Write Lens ROM Check (ROM Data) Focus Brush Position Check (Search Focus-Adj) SAL35F14G (1.4/35G) (35mm F1.4G) 4-25...
- Page 65 • Perform “4-7-3. Focus Brush Position Check (Search Focus Adjustment Point)” again. • Cleaning of flexible pattern or the brush. • Replaceing the brush. 3) Perform “2. Checking Method”again, repeat the inspection until “OK” appears on the pop-up window. SAL35F14G (1.4/35G) (35mm F1.4G) 4-26...
- Page 66 • Replaceing the brush. • Rotating operation error of the focus ring (rotation speed is not suitable at a regulated speed). Perform “2. Checking Method” again, repeat the inspection until “OK” appears on the pop-up window. SAL35F14G (1.4/35G) (35mm F1.4G) 4-27...
- Page 67 1) Set the focus position to infinity position. 2) Remove the hold sheet, confirm that can see the brush base plate. 3) Loosen two screws fixing the brush base plate. Screw Screw Brush Base Plate Fig. 4-7-6 4) Click the [Search Focus-Adj]. SAL35F14G (1.4/35G) (35mm F1.4G) 4-28...
- Page 68 Performs the “4-6. FOCUSING ERROR AMOUNT CHECK”, and check that the error amount is smaller than the reference value. If the error amount is larger than the reference value, perform [Write SB] again, and repeat steps 1) to 3) until the error amount becomes less than reference value. SAL35F14G (1.4/35G) (35mm F1.4G) 4-29...
- Page 69 [Description of main button functions on toolbar of the Adobe Acrobat Reader Ver5.0 (for Windows)] Toolbar Printing a text Reversing the screens displayed once • To reverse the previous screens (operation) one by one, click 1. Click the Print button 2.
- Page 70 • Change of specification of Flange Back (f’F) (Section 4-4) • Change of specification of Focus-Shift (Section 4-5) 2008.01 Revised-2 • Correction of Aperture Diameter Check (Page 4-13, 4-15) 2016.01 Revised-3 • Change of ADJUSTMENTS (Page 4-1) SAL35F14G (1.4/35G) (35mm F1.4G)