Pitney Bowes ADDRESSRIGHT DA300 Operator's Manual
Pitney bowes inc. printer user manual
Hide thumbs
Also See for ADDRESSRIGHT DA300:
- Quick setup instructions manual (6 pages) ,
- Operating manual (96 pages)
Table of Contents
Advertisement
Quick Links
Download this manual
See also:
Operating Manual
Advertisement
Chapters
Table of Contents
Troubleshooting

Related Manuals for Pitney Bowes ADDRESSRIGHT DA300


Summary of Contents for Pitney Bowes ADDRESSRIGHT DA300
- Page 2 Bowes Inc., and may not be lent, sold, hired out, or made available to others in any form, or be disposed of by way of trade in any form without the express written consent of Pitney Bowes, Inc. We have made every reasonable effort to insure the accuracy and usefulness of this manual, however we cannot assume responsibility for errors or omissions or liability for the misuse or misapplication of our products.
-
Page 4: Table Of Contents
Important Safety Notes ... 2-5 Assembling the DA300 ... 2-6 1. Attaching the Material Prop ... 2-7 2. Attach the Wireframe to the Printer ... 2-8 3. Install the Sliding Fence ... 2-9 4. Position the Output Stacker Tray ... 2-10 5. - Page 5 9. Print a Test Piece ... 3-15 Chapter 4 - Using DA300 With Your Computer Installing the Printer Software ... 4-2 Installing the Printer Driver/Ed Plus ... 4-2 Selecting Printer Properties ... 4-7 Using the Printer Properties Windows ... 4-8 Selecting the DA300 from a Windows Application...
- Page 6 9. Auto Envelope Eject ... A-28 10. ROM Revision Number ... A-29 Appendix B - DA300 Specifications Equipment Specifications ... B-2 Material Specifications ... B-8 Index Index to the Contents of this Manual ... i-1 DA300 Printer Operator Guide Table of Contents...
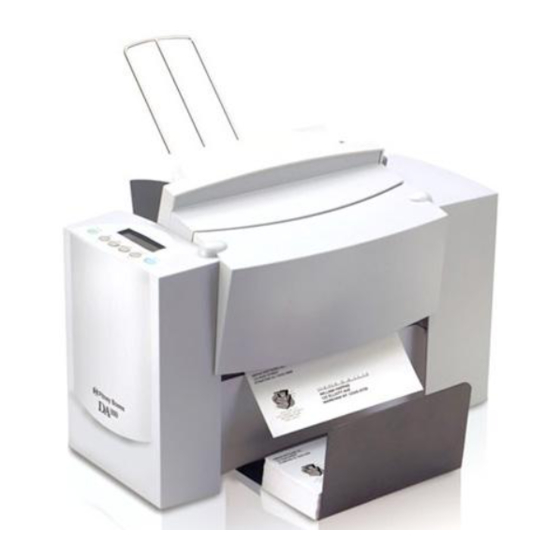
- Page 8 Chapter The DA300 Printer Overview The Pitney Bowes DA300 is a versatile, easy-to-use desktop printer designed for addressing applications. This chapter explains what's in this guide, and tells you how to order supplies and where to get more information about using your DA300.
-
Page 9: Welcome To The Da300
1 • DA300 Printer - Overview The Pitney Bowes DA300 ink jet printer is a desktop Welcome to printer used to print address and other information on a the DA300 wide range of material of various sizes, construction and composition. With the DA300 you can define the font, placement, print quality and bar code characteristics for your addresses. -
Page 10: System Requirements
*NOTE: Subject to change. Below is a table of the Microsoft operating systems currently supported and the dates Pitney Bowes expects to stop providing support for the drivers that run in those systems. Last Date Pitney Bowes will support... -
Page 11: Getting Help
Properties from Windows print dialog box. Then click on the Help button. If you're using Pitney Bowes programs such as Envelope Designer™ Plus or SmartMailer™, press the F1 key while you're using the program to display information about the open screen. -
Page 12: Printer Options
Printer Pitney Bowes offers several very useful options for your DA300: Options Ordering The World Wide Web We encourage you to visit our web site at: Supplies You'll have the ability to order all your DA300 printer supplies and options to enhance your printing needs. - Page 13 1 • DA300 Printer - Overview Pitney Bowes DA300 Operator Guide...
- Page 14 Attach the Material Prop ... 2-7 Attach the Wire Frame ... 2-8 Install the Sliding Fence ... 2-9 Position the Output Stacker 2-10 Connect the Printer Cable . 2-11 Connect the Power Cord... 2-12 Turn on Power ... 2-12 Install Ink Jet Cartridge ... 2-13...
-
Page 15: Chapter 2 - Setting Up The Da300 Printer
2 • Setting Up the DA300 Printer Unpacking the As you remove the DA300 contents from the box, check the parts against the list on the opposite page. Printer Pitney Bowes DA300 Operator Guide... -
Page 16: Package Contents
• Printer Driver Software • Ink Jet Cartridge • Quick Setup Instructions • Operator Training Guide • PostNet • Installation Quality Report • Operator Safety Tip Card Pitney Bowes DA300 Operator Guide Setting Up the DA300 Printer • 2 Certificate... -
Page 17: Setting Up The Da300
The assembled printer should look like the picture below. The parts you have to put together are identified. the DA300 Wireframe Input Stacker Refer to this picture as you set up your printer. Follow the steps on pages 2-7 through 2-14. Material Prop Sliding Feed and Lock Knob... -
Page 18: Choosing A Location For Your Printer
Location for Your Printer • Place the printer on a table or other stable, level • Allow for adequate space. The DA300 is 14.7 inches • Allow for adequate ventilation around the base and •... -
Page 19: Assembling The Da300
7. Install the ink jet cartridge (pages 2-13, 2-14). to enclose hazardous parts. If the machine has been dropped or has otherwise had the covers stressed in any way, report it to your Pitney Bowes Customer Service Representative. not attempt to disassemble this machine. If service is required, contact your Pitney Bowes Customer Service Representative. -
Page 20: Attaching The Material Prop
3. Push the threaded portion of the lock knob through 4. Position the plastic clamp and nut plate on the Pitney Bowes DA300 Operator Guide Setting Up the DA300 Printer • 2 side Place it on the wire frame so the grooves engage the bars of the frame and the hole for the lock knob is facing up. -
Page 21: Attach The Wireframe To The Printer
You can adjust both the height and side-to-side position of the wireframe to accommodate the size and type of the material you're running. We talk about this in the next chapter. Pitney Bowes DA300 Operator Guide Lock Lever Tabs Lock Knob... -
Page 22: Install The Sliding Fence
Slide the square edge of the sliding fence into the slots on the frame slide as shown below. The next chapter explains how to set the fence to the width of the material you're running. Pitney Bowes DA300 Operator Guide Setting Up the DA300 Printer • 2 Feed Fence in Position... -
Page 23: Position The Output Stacker Tray
DA300 Printed material is deposited in the output stacker tray. The tray can stack up to 150 #10 envelopes. Slide it into (continued) position under the back of the printer as shown below. 2-10 Stacker Tray Pitney Bowes DA300 Operator Guide... -
Page 24: Connect The Printer Cable
2. Parallel Cable - Secure the connector by snapping 3. Parallel Cable - Align the other end of the cable Pitney Bowes DA300 Operator Guide Setting Up the DA300 Printer • 2 labelled “Printer” with the parallel port on the printer's interface panel and push the cable connec- tor into the port. -
Page 25: Connect The Power Cord
2 • Setting Up the DA300 Printer 6. Connect the Power Cord Plugging the DA300 In 1. Connect the power cord to the printer at the inter- 2. Plug the power cord into a grounded outlet. Please Turning the 7. Turn On Power Once you've connected the cable, press the printer’s... -
Page 26: Install The Ink Jet Cartridge
To begin: Cartridge 1. With the printer on, press the On Line key until the 2. Open the back cover of the printer. 3. Press the + key on the control panel to move the 4. -
Page 27: Removing The Ink Jet Cartridge
When you need to remove or replace the ink jet cartridge, follow these steps: 1. With the printer on, press the On Line key until the 2. Open the back cover of the printer. 3. Press the Cartridge key on the control panel. - Page 28 Chapter DA300 Basics In this chapter you'll learn about key features of the DA300 printer and how to adjust it to meet the requirements of your print jobs. In this chapter: Printer Features ... 3-2 Setting Up a Job ... 3-4 Set the Separator Gap...
-
Page 29: Chapter 3 - Da300 Basics
Font Point Size: 4pt - 30pt Material Thickness: 0.003" to 1/16" Speed Printer speed refers to the number of pieces of mail that can be processed in an hour. The DA300 can process 4200 # 10 envelopes per hour, depending on the address content and configuration. - Page 30 Approved Media Types The printer can be used with the following types of material: All envelopes must be without windows, empty and unsealed. Any folded material needs to be tabbed on the leading edge.
-
Page 31: Setting Up A Job
A good setup minimizes misfeeds and jams. Also, your printer will perform at its best when you run material that falls within our published specifications. Please see Appendix B for complete material specifications. - Page 32 Use the control panel buttons to access printer menus, define print options, run the print job, posi- tion the print carriage and turn the printer on and off line. See Appendix A, Printer Menus, for detailed instructions. Selections can be viewed on the 20- character, dual line LCD display.
-
Page 33: Set The Separator Gap
NOTE: If the separator gap is not set properly, the printer will misfeed. If the gap is to big, the printer will feed doubles (two or more pieces at the same time). If the gap is too small, material will jam at the feed roller entrance. - Page 34 H-Block. (Before you do this, remove the sliding fence in order to fit the second envelope under the outer H-Block). Lock the separator in place. DA300 Printer Operator Guide DA300 Basics • 3 H-Block Separator Lock Knob...
-
Page 35: Center The Wireframe Under The Material
2. Push down on the wireframe lock lever to free the 3. Center the wireframe under your sample piece of 4. Pull up on the lock lever to secure the wireframe in Slide Lock Lever against the rear wall. wireframe slide. material. position. DA300 Printer Operator Guide... -
Page 36: Set The Feed Angle
1. Loosen the lock knob on the wireframe slide. 2. Move the wireframe up or down as required. 3. Tighten the lock knob to secure the wireframe. Wire Frame DA300 Printer Operator Guide angle) Lock Knob DA300 Basics • 3... -
Page 37: Position The Feed Fence
3 • DA300 Basics 4. Position the Feed Fence Setting Up A Your printer comes with two feed fences—a tall one and a short one. Use the tall fence for #10 envelopes and larger (continued) materials. Use the short fence for materials smaller than a #10 envelope. -
Page 38: Load Material
5. Load Material Setting Up A Once your printer is set up, you can load material and make a test print. (continued) To avoid misfeeds, follow these instructions 2. Take a manageable amount of material and while 3. Tamp the material on a flat surface, making sure that 4. -
Page 39: Adjust The Position Of The Material Prop
• Is the feed angle okay? • Is there a slight clearance between the feed fence and 3-12 stack or the top of the stack reaches the middle of the prop. position. the edge of the stack? Material Prop DA300 Printer Operator Guide... -
Page 40: Adjust The Media Thickness Lever
(continued) printhead and the material. Use it to compensate for different material thicknesses. The lever is located inside the printer under the top cover, as shown below. Media Thickness Lever Print a test piece (page 3-15) with the lever in the middle position. -
Page 41: Adjust The Exit Rollers
NOTE: As the stack approaches the 5" limit, there is a potential for stacking misfeed (pieces not neatly stacked one on top of the other). This can cause envelopes to stack out of ZIP Code sequence. 3-14 Exit Rollers DA300 Printer Operator Guide... -
Page 42: Print A Test Piece
9. Print a Test Piece 1. Make sure material is loaded properly. (Or you can (continued) 2. Turn the printer ON. The On/Off switch is located on 3. Press the On Line 4. Press the Test Env. button. A single envelope will feed 5. - Page 43 3 • DA300 Basics 3-16 DA300 Printer Operator Guide...
- Page 44 This chapter has instructions for installing and using the DA300 printer driver from a computer. It also briefly explains Envelope Designer Plus, the Pitney Bowes envelope design software that comes with the printer. In this chapter: Printer Software ... 4-2 Installing the Software ...
-
Page 45: Installing The Printer Software
Your printer works with the Pitney Bowes DA300 driver. If you have not previously installed the printer driver on your computer, do so now from the Envelope Designer™... - Page 46 Installing 2. Click OK at the "ADDRESSRight Printing System" Software (continued) 3. Click on the "ADDRESSRight Printer Driver" selec- DA300 Printer Operator Guide Using the DA300 With Your Computer • 4 screen. An "Installing" files window displays briefly. tion. If you will be using Envelope Designer™ Plus to create your envelope designs, click the "Envelope...
- Page 47 4 • Using the DA300 With Your Computer Installing 4. Click OK to accept the default destination directory. Software (continued) 5. Click OK to accept the default folder name of Pitney Bowes Printing. DA300 Printer Operator Guide...
- Page 48 MS Word, install the Envelope Printer Accelerator. Click Next to accept the target printer ("e.g., Pitney Bowes DA300") that the "PB Envelope Printer Accelerator" will replace when printing the envelope.
- Page 49 (continued) 9. An "Install" screen displays for creating a shortcut. 10. An "ADDRESSRight Printing System Setup" screen that acknowledges the creation of a virtual printer (for the accelerator). Click Yes if you want to create a shortcut to Envelope Designer™ Plus on the desktop for the customer.
-
Page 50: Selecting Printer Properties
1. Click the "Start" button in the task bar, then select 2. Click "Printers". The Printer window displays. 3. Right click the Pitney Bowes icon, then left click the The Properties window opens and displays seven tabs, each of which allows access to different printer options. - Page 51 Use the Location area to specify where the printer resides. You can use alphanumeric characters to desig- nate the site. For example, if your printer is in building 27 in area C, you could use 27/C as the Location entry.
- Page 52 Properties Window If this printer is shared, the comment entered in this area displays on the computers sharing this printer. NOTE: (continued) Sharing is not supported for the DA300 printer driver.
- Page 53 The window shown here is a standard Windows driver dialog, not developed by Pitney Bowes and not sup- ported by Pitney Bowes. The settings in this tab should not be changed as Pitney Bowes does not support networking of its envelope printers.
- Page 54 To delete a port, select the desired port and then click "Delete Port". To set the transmission retry value, click "Configure Port", enter the desired number of seconds, and then click "OK". DA300 Printer Operator Guide Using the DA300 With Your Computer • 4 4-11...
- Page 55 To configure the printer for limited availability, select the "Available from" option, and then enter the desired time frame. NOTE: If a document is sent to the printer while it is unavailable, the document will be held (spooled) until the printer is available.
- Page 56 Using the The name of the installed driver displays in the "Driver" area. This usually matches the name of the printer; how- Printer ever, for the DA300, you will see "Pitney Bowes W660" Properties instead. Window To install a new driver, click "New Driver" to launch the (continued) Add Printer Driver Wizard.
- Page 57 Spooling and Printing Options Using the Spooling is the process of storing the document on the Printer hard disk and then sending it to the printer. Right click Properties each option and read the 'What's This?" topic for more Window information.
- Page 58 To display the Security window, left click the Security Printer tab in the Properties window. Properties Window (continued) Pitney Bowes does not support Networking. Therefore, adding or removing permissions should not be used. DA300 Printer Operator Guide Using the DA300 With Your Computer • 4 4-15...
-
Page 59: Using The Printer Properties Windows
Device Settings tab in the Properties window. Properties Window (continued) Pitney Bowes recommends that you leave the manufac- turer-set default as it is in this window and refer to your envelope printing application to change envelope sizes. 4-16 DA300 Printer Operator Guide... -
Page 60: Windows Application
1. Start the software application that you use when 2. From the File menu, select Print. The Print dialog box 3. Click on the arrow in the printer Name box. When you 4. Click "OK" to send the job to the printer. -
Page 61: Envelope Designer Tm Plus
DA300. To access Envelope Designer 1. Click "Start" in the task bar. 2. Select Programs. 3. Select Pitney Bowes Printing, then left click Envelope 4-18 Plus, you can create and Plus virtually eliminates the need for Designer™... - Page 62 Chapter Printer Maintenance This chapter describes the main- tenance procedures you should perform on a regular basis to keep your printer running trouble- free. In this chapter: Preventive Maintenance ... 5-2 Cleaning ... 5-2 Print Quality Problems ... 5-2 Exit Rollers ... 5-3 Sensor ...
-
Page 63: Chapter 5 - Printer Maintenance
5 • Printer Maintenance Preventive The Pitney Bowes DA300 Ink Jet Printer is designed for trouble- free service with a minimal amount of care. You Maintenance should schedule regular cleaning of the Feed Rollers, Right Hand Slider, Left Hand Slider and Lower Guide. -
Page 64: Exit Rollers
Periodically wipe the top cover and floor assembly (feed Floor deck) with a soft cotton cloth, dampened with water only. Assembly and Top Cover DA300 Printer Operator Guide Printer Maintenance • 5 Sensor Location... - Page 65 5 • Printer Maintenance DA300 Printer Operator Guide...
-
Page 66: Troubleshooting
Chapter Troubleshooting This chapter lists some common printer problems and offers sug- gestions on how to fix them. In this chapter: Problems and Solutions ... 6-2 Feed Problems ... 6-2 Print Quality Problems ... 6-3 Interface Problems ... 6-4 Motor Problems ... 6-5 Barcode Problems ... -
Page 67: Chapter 6 - Troubleshooting
6 • Troubleshooting Problems and Before calling our Customer Support Center or your Pitney Bowes Customer Service Representative, look for Solutions your problem below. If you can solve the problem your- self, you will be able to resume printing sooner. Also, go to our website at www.pitneybowes.com/support for... -
Page 68: Print Quality Problems
Reason: Solution: Problem Reason: Solution: Problem Reason: Solution: DA300 Printer Operator Guide Troubleshooting • 6 No Print Ink cartridge problem. Purge ink cartridge. Clean cartridge with soft cotton cloth and water. Change to a new cartridge. Gray or Light Print Ink supply is low. -
Page 69: Interface Problems
Turn off bolding in software and/or turn bold selection in printer menu OFF. See Appendix A for instructions. If problem still exists, call Pitney Bowes for service. Addresses "Walking" Incorrect Address Setup. Count carriage returns and line feeds and adjust Lines Per Address to the same number. -
Page 70: Motor Problems
DA300 Printer Operator Guide Troubleshooting • 6 Motor Turning but no Feed Roller Movement Mechanical problem. Call Pitney Bowes for Service. Barcode (Lower Right) is not Printing Barcode not enabled Turn barcode ON using Envelope Designer™, or the DA300 print driver or the printer’s control panel menus. -
Page 71: Other Problems
H-Block separators not adjusted correctly. Adjust the H-Blocks to the thickness of the material you're running (see page 3-6). Paper jam obstructing paper path. Clear obstructed path. Dirty paper feed sensor. Clean sensor with compressed air (see page 5-3). DA300 Printer Operator Guide... - Page 72 Memory Card Error The card was removed while the printer was reading it. Do not remove the card while the printer is in use. If the card has been removed, insert the card, turn the printer off, then turn the printer on again.
- Page 73 6 • Troubleshooting DA300 Printer Operator Guide...
-
Page 74: Using The Control Panel
Appendix Using the Control Panel Menus The control panel menus can be used to control how your printed material looks. This chapter describes each menu and its options. In this Appendix: Using the Control Panel ... A-2 Using the Menus ... A-3 Main Menu ... -
Page 75: Appendix A - Control Panel Menus
Use the buttons on the control panel to get to the printer menus, define the print options, run a print job, Control Panel position the print carriage and turn the printer on line and off line. If you’ve installed the DA300 printer driver on your computer, you’ll normally perform these actions from... -
Page 76: Using The Menus
•The Main Menu controls how your printed material looks. •The Setup Menu is used to configure your printer so it will function correctly with your computer. NOTE: The printer must be OFFLINE in order to ac- cess the menu options. - Page 77 (*) in front of it, it means that option is presently selected. Upon receipt of the printer from the factory, the asterisk is typically the default setting. When you press the Enter button to define a new option, an asterisk will appear before the selected option.
-
Page 78: Using The Main Menu
The Main Menu options are: Address Layout Print Quality Font Barcode Address Recovery Clear Counter Job Settings IMPORTANT: The settings you define in a software application such as SmartMailer™ or Envelope De- signer™ Plus override the corresponding settings you choose in the printer menus. -
Page 79: Main Menu Diagram
Appendix A • Control Panel Menus Using the Main Menu (continued) NOTE: An asterisk (*) displays next to the chosen setting when you scroll through the menu options DA300 Printer Operator Guide Main Menu 1. ADDRESS LAYOUT 2. PRINT QUALITY 3. FONT 4. BARCODE 5. -
Page 80: Address Layout
1. Address Layout DA300 Printer Operator Guide Appendix A • Control Panel Menus Use the Address Layout option to set up the way an address appears on the printed material. The printable width is limited to 9.4” from the right side of the mail piece. - Page 81 The Inverted option tells the printer that the top edge of the material feeds first. Select this option if, for example, you need to feed envelopes flap first.
- Page 82 7. Press the + or - buttons to scroll through the choices associated with each option. 8. When you’ve finished making selections, press the menu button several times to back out of the menu until the printer displays OFF LINE. Then press the On Line button to enable the printer.
-
Page 83: Print Quality
Quality options, until the desired option (Executive, Letter or Draft) is displayed on the LCD panel. button several times to back out of the Menu until the printer displays OFF LINE. Then, press the On Line button to enable the printer. A-10... -
Page 84: Font Selection
The options on this menu are Name, Size, Width, Bold, Italic, and Outline. A. Name The printer has five internal fonts: Courier, Sans Serif , Roman, OCR-A, and OCR-B B. Size The font size can range from 4 pt to 30 pt. -
Page 85: Barcode
(A, B, C, D, E, or F ). choices associated with each option. button several times to back out of the Menu until the printer displays OFF LINE. Then, press the On Line button to enable the printer. A-12... - Page 86 + or – to select the option (Lower Right Corner, Above Address, Below Address or Off). Menu button several times to back out of the menu until the printer displays OFF LINE. Then, press the On Line button to enable the printer. A-13...
-
Page 87: Address Recovery
A. Get Addresses Select Get Addresses after a jam is cleared and you want to restart printing at the point where the printer left off just before the jam occurred. To retrieve any address in the data buffer, press the Enter button. The first 16 characters of the first line of the address will be dis- played on the LCD. -
Page 88: Clear Counter
Use this option to save the current envelope setup (address position, barcode position, number of lines per inch, and so on). The printer saves the setup as a job number (1 - 8). You must keep a record of these setups and the number you assigned. - Page 89 Appendix A • Control Panel Menus 7. Job Settings To use this option to direct the printer to Load or Save the Job Setting as a certain number: (continued) 1. Press the + or – buttons to scroll through the Main 2.
-
Page 90: Using The Setup Menu
To access the Setup Menu, the printer must be OFF LINE. (The LCD display toggles between ON LINE and OFF LINE). If the printer is ON LINE, press the On Line button once so the LCD displays OFF LINE. Then, press and hold the Menu button for four seconds to display the Setup Menu. - Page 91 Appendix A • Control Panel Menus Using the Setup Menu (continued) DA300 Printer Operator Guide Setup Menu 1. HEAVY MEDIA MODE 2. TEST PRINT HEAD 3. PURGE PRINT HEAD 4. LINES PER ADDRESS 5. COMMUNICATIONS 6. HEX DUMP MODE 7. LANGUAGE 8.
-
Page 92: Heavy Media Mode
Menu, until the printer displays OFF LINE. Then, press the On Line button to enable the printer. Before you select this option, make sure that the material is loaded in the printer input area so you can print a test pattern. To use this option: 1. -
Page 93: Purge Print Head
No to cancel. If you press +, “Please wait...Test pattern is printing” displays. The printer prints a diagonal line across the material. If a gap is present within the diagonal line, the nozzle may be blocked and need to be cleaned. -
Page 94: Lines Per Address
3 and 8 lines. 4. Press the Menu button to back out of the menu until the printer displays OFF LINE. Then, press the On Line Button to enable the printer. Transmitting data from the computer to the DA300 is by way of the parallel interface or the serial interface. - Page 95 3. Press the + or – buttons to scroll through the Setup 4. Press the Enter button to select the options you 5. Press the Menu button to back out of the menu until 6. Press the On Line button to enable the printer. DA300 Printer Operator Guide LINE.
-
Page 96: Hex Dump Mode
The information provided here is for those of our customers who are technically inclined. The Hex Dump Mode option causes the printer to print all commands and data it receives from the computer in a hexadecimal format. Use this feature to check the integrity of your data. - Page 97 (MSB) and locate the HEX number 4. Then look to the left side of the chart (LSB) and locate the HEX number 1. Therefore the HEX number is MSB=4 and LSB 1= 41. DA300 Printer Operator Guide 96 112 "...
- Page 98 (form feed) FF [0C]. When you’re finished using this option, use the Menu button to back out of the menu until the printer dis- plays OFF LINE. Then press the On Line button and send addresses to the printer.
-
Page 99: Language
Inch / Millimeter, C. Menu Language. A. Symbol Set The symbol set contains the International Standards Organization (ISO) character set substitution tables. They include the following: DA300 Printer Operator Guide ISO 6 ANSI ASCII ISO 69 FRENCH ISO 21 GERMAN ISO 4 UK... - Page 100 Press Enter to select an option. 5. When you’ve finished making selections, press the Menu button to back out of the menu until the printer displays OFF LINE. Then, press the On Line Button to enable the printer. A-27...
-
Page 101: Envelope Feed Delay
The time delay (0.0 to 30.0 seconds, in tenth second increments) can be adjusted by pressing the + button (MORE) or – button (LESS). Menu button to back out of the menu until the printer displays OFF LINE. Then, press the On Line Button to enable the printer. -
Page 102: Rom Revision Number
This option is extremely useful whenever it is neces- sary to verify the Firmware Revision installed in the printer. It is also useful to determine if your printer requires an upgrade. The Maintenance Count, which is the total number of print cycles accumulated, is also displayed. - Page 103 Appendix A • Control Panel Menus DA300 Printer Operator Guide A-30...
-
Page 104: Appendix B - Da300 Specifications
Appendix DA300 Specifications This Appendix contains detailed hardware and material specifica- tions for the DA300 printer. In this chapter: Equipment Specifications ... B-2 Material Specifications ... B-8... -
Page 105: Equipment Specifications
Appendix B • Specifications 4 • Operating the Printer Equipment Physical Dimensions 14.7" high; 16.2" wide; 21.7" deep (without wireform). Specifications Weight 40 lbs., including print cartridge and catch bin. Shipping weight: 45 lbs. Electrical Domestic (W655): 120VAC, 60Hz, 1A, 127 watts International (W656): 220-240VAC, 50Hz, 0.5A, 127 watts... - Page 106 NOTE: The printer may not work when this line is held low. The printer sends a low logic level to the host to indicate that it is in an error state; self test failed or carriage position lost.
- Page 107 Appendix B • Specifications 4 • Operating the Printer Equipment Fonts Resident (Internal) Fonts Specifications (continued) Resident (Internal) Font Enhancements Downloadable Fonts Supports bitmapped, downloadable fonts as well as bitmapped graphics (logos) which are downloaded as picture fonts. Also supports PCL raster graphics. Ap- proximate memory available for downloading is 30K (includes space for macros).
- Page 108 The printer is capable of printing an approved FIM bar code to the defined standards. FIM is used to “face” first class mail with certain types of IBI (information-based indicia) mail. NOTE: Pitney Bowes Envelope Designer Plus software does not support the creation of FIM barcode.
- Page 109 Appendix B • Specifications 4 • Operating the Printer Throughput Equipment Up to 4,200 pieces per hour, depending on print mode, Specifications media size, number of address lines, and barcode (continued) imprinting. The following throughput specifications are typical for #10 envelopes:...
- Page 110 Maximum Wet Bulb Temperature: 80°F (27°C) Storage Conditions Shipment Conditions: Recommended Usage Pitney Bowes has tested this machine under many different conditions and recommends that you do not exceed the usage levels specified below: NOTE: Usage beyond these recommended cycles is not covered under your Equipment Maintenance Agreement.
-
Page 111: Material Specifications
Material The paper types listed below are approved for use with Specifications the DA300 Printer. Please note that the dimensional limits above apply in all cases, and that all media (flats, envelopes, postcards, catalog envelopes, etc.) must be without windows, unstuffed and unsealed. - Page 112 Appendix B • Specifications Material Notes Envelopes have a flap along the long edge and are processed by the printer non-flap edge first. Enve- lopes may have either a diagonal or straight edge along the envelope flap. Booklets are defined as media having physical dimen- sions 6 x 9"...
- Page 113 Appendix B • Specifications 4 • Operating the Printer Name Style #6-1/4 #6-1/2 Square #6-3/4 Commercial #8-1/2 Square Baronial Baronial #5-1/2 Baronial Baronial #7-3/4 Official Official #8-5/8 Official Official Official Official Official Official Monarch DIN C4 DIN C5 DIN C6...
- Page 114 Index...
- Page 115 Barcode Printing B-4 Barcode Problems 6-5 Bold Type Unwanted 6-4 Cartridge Fonts B-4 Centronics Parallel Pin Assignments B-3 Choosing a Location for Your Printer 2-5 Cleaning Exit Rollers 5-3 Floor Assembly and Top Cover 5-3 Precautions 5-2 Preventive Maintenance 5-2...
- Page 116 Ink Jet Cartridge 2-3 Installing 2-13 Removing 2-14 Input Area 3-4 Installation Quality Report 2-3 Installing Ink Jet Cartridge 2-13 Installing the Printer Driver/Ed Plus 4-2 Interface Centronics Parallel B-2 Serial B-2 DA300 Printer Operator Guide Interface Panel 3-4 Interface Problems 6-4...
- Page 117 Print Quality 3-13, A-10, Setting with Menu A-10 Print Quality Problems 5-2, 6-3 Print Window 4-17 Illustration 4-3 Printer Does Not Respond 6-4 Printer Driver Software 2-3, 4-2 Printer Features 3-3 Printer Operating Guide 2-3 Printer Properties (Software) 4-7 Selecting Printer Properties 4-7...
- Page 118 Resident Fonts Listing B-4 ROM Revision Number A-29 Using Menu to View A-29 Selecting the DA300 Printer From a Win- dows Application 4-3 Serial Port, Connecting 2-11 Sensor Cleaning 5-3 Setting Up the DA300 2-4 Setup Adjustments Exit Rollers 3-14...
- Page 119 Intermittent Feed 6-2 Memory Card Error 6-7 Motor Turning but no Feed Roller Move- ment 6-5 Multifeed (Feeds Doubles) 6-2 No Communications; Printer Does Not Respond 6-4 No Print 6-3 Out of Memory 6-7 Paper Out or Paper Jam 6-6...