
Related Manuals for Pitney Bowes DA30S, DA50S, DA55S


Summary of Contents for Pitney Bowes DA30S, DA50S, DA55S
-
Page 1: Operator Guide
AddressRight DA Series Printer ™ DA30S, DA50S, DA55S Operator Guide US/International English Version... - Page 2 NOTICE The use of this information by the recipient or others for purposes other than the repair, adjustment or operation of Pitney Bowes equipment may constitute an infringement of patent and/or other intellectual property rights of Pitney Bowes or others. Pitney Bowes assumes no responsibility for any such use of the information.
- Page 3 Conforms to the Following: FCC Rules NOTE: This equipment has been tested and found to comply with the limits for a Class A digital device, pursuant to part 15 of the FCC Rules. These limits are designed to provide reasonable protection against interference when the equipment is operated in a commercial environment.
- Page 4 This page was put in as a placeholder so you can print this entire guide in a duplex (double-sided) mode while keeping the proper page positions.
-
Page 5: Table Of Contents
Table of Contents Contact Information List USA Contacts ...............iii Canada Contacts ..............iii Other Country Contacts ............iv Chapter 1 - Introduction Welcome to the DA30S/DA50S/DA55S Ink Jet Printer ..1-2 Using This Guide ...............1-2 System Requirements ............1-2 Getting Help ...............1-3 Online Help ..............1-3 Printer Options ..............1-3 Important Safety Notes ............1-4 Other Informational Cautions ........ - Page 6 Table of Contents Chapter 3 - Printer Maintenance Preventive Maintenance ............3-2 Print Quality Problems ............3-2 Cleaning the Exit Rollers ...........3-3 Cleaning the Sensor ............3-3 Cleaning the Floor Assembly and Top Cover ....3-3 Purging the Printhead ............3-3 Installing and Removing the Ink Jet Cartridges ....3-4 Installing the Ink Jet Cartridges (Color &...
-
Page 7: Contact Information List
Contact Information List USA Contacts Product Name - DA30S, DA50S or DA55S • For frequently asked questions, go to: www.pb.com and click on Customer Support. • To place requests for service or training, go to: www.pb.com and click on My Account. •... -
Page 8: Other Country Contacts
Contact Information List Other Country Contacts Contact information is given in a separate publication supplied with the product. SV62381 Rev. B... - Page 9 1 • Introduction The DA30S/DA50S/DA55S is a versatile, easy-to-use desktop printer designed for addressing applications. This chapter explains what's in this guide, and tells you how to order supplies and where to get more information about using your printer. Welcome to the DA30S/DA50S/DA55S Ink Jet Printer ..1-2 Using This Guide ..............1-2 System Requirements ............1-2 Getting Help................1-3...
-
Page 10: Welcome To The Da30S/Da50S/Da55S Ink Jet Printer
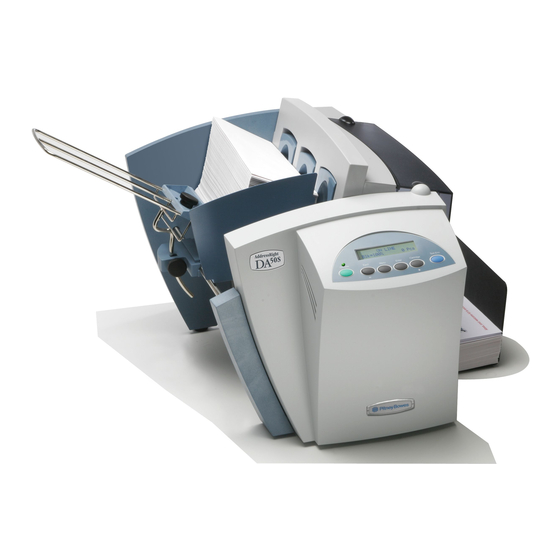
1 • Introduction Welcome to the DA30S/DA50S/DA55S Ink Jet Printer The DA30S/DA50S/DA55S ink jet printer is a desktop printer used to print addresses, graphics and other information, in color (DA55S), on a wide range of material of various sizes, construction and composition. -
Page 11: Getting Help
Introduction • 1 Getting Help As you use your printer, there may be times when you need help to solve a specific application problem, or you may want additional information about printer operation. Refer to the Contact Information List at the front of this guide for more information or in the separate contact sheet supplied with your machine. -
Page 12: Important Safety Notes
Important Safety Notes Follow the normal safety precautions for all office equipment: • It is recommended that you use only Pitney Bowes approved supplies, in particular aerosol dusters. Improper storage and use of aerosol dusters or flammable aerosol dusters, can cause an explosive-like condition that could result in a personal injury and/or property damage. -
Page 13: Other Informational Cautions
Introduction • 1 • Be certain the area in front of the wall receptacle into which the machine is plugged is free from obstruction. • Before clearing a jam, be sure machine mechanisms come to a stop. • When removing jammed material, avoid using too much force to protect against minor personal injury and damaging equipment. -
Page 14: Important Safety Notes For The Eu Only
1 • Introduction Important Safety Notes for the EU Only In some countries the equipment is supplied with a moulded mains lead and plug. In other countries, or if the supplied lead is not used, the following information applies: 1. An approved mains lead for the country concerned must be used. -
Page 15: Printer Parts And Locations
Introduction • 1 Printer Parts and Locations The figure below calls out key machine components, each of which is briefly described in the text that follows. Refer to the figure below for component location. H-Block Separators - Adjust to the thickness of your material. The gap between the H-Block separator fingers and the feed rollers should be just enough to allow a single piece to feed through the printer. - Page 16 1 • Introduction Input Guide - Supports the material stack. Adjust the feed angle to accommodate the weight of the material you're running. Adjust its side-to-side position so it's centered under the stack. ON/OFF Switch - Powers the printer on and off. Input Guide Slide Block - Slides the input guide side to side.
- Page 17 Introduction • 1 Power Receptacle Printer Interface Panel Ethernet Cable Cable connects connects here here USB/Ethernet Connectors Exit Rollers Transport Door (Open) and Exit Rollers SV62381 Rev. B...
- Page 18 1 • Introduction This page is intentionally blank. 1-10 SV62381 Rev. B...
- Page 19 2 • Printer Basics In this chapter you'll learn about key printer features and how to adjust it to meet the requirements of your print jobs. Printer Features Overview ..........2-2 Setting Up a Job ..............2-3 1. Setting the Separator Gap ........2-3 2.
-
Page 20: Printer Features Overview
2 • Printer Basics Printer Features Overview This section provides a brief overview of the printer features. Refer to Appendix A, Specifications, for detailed specifications for the printer, including specific requirements for using each type of material. Speed (pieces per hour) Printer speed refers to the number of pieces of mail that can be processed in an hour. -
Page 21: Setting Up A Job
Printer Basics • 2 Setting Up a Job Setting up a print job means adjusting the printer to accommodate the width, height, thickness and weight of your material. There are two things that determine how reliably your printer feeds: the setup adjustments and the quality of your material. A good setup minimizes misfeeds and jams. -
Page 22: Centering The Input Guide Under The Material
2 • Printer Basics Setup Example Using #10 or DL Envelopes Perform preceding steps A-E for setting the feed gap using #10 or DL envelopes. Notice that only two of the H-Block Assemblies completely rest on the envelope. The third H-Block has one separator finger on the envelope and one on the feed roller. - Page 23 Printer Basics • 2 2. Centering the Input Guide under the Material A. Place a sample piece of material in the feed area, up against the support plate. B. Push down on the input guide lock lever to free the input guide slide.
-
Page 24: Positioning The Side Guide
2 • Printer Basics 4. Positioning the Side Guide Your printer comes with two side guides—a long one and a short one. Use the long side guide for #10 or DL envelopes and larger materials. Use the short side guide for materials smaller than a #10 or DL envelope. -
Page 25: Loading Material
Printer Basics • 2 5. Loading Material Once your printer is set up, you can load material and make a test print. Avoid misfeeds by following these precautions: A. Make sure the input area is free of dust and other matter. B. -
Page 26: Adjusting The Position Of The Feed Ramp
2 • Printer Basics 6. Adjusting the Position of the Feed Ramp With a stack of material loaded: A. Loosen the lock knob that holds the feed ramp in position. B. Lower the feed ramp until the top of the bottom piece of the stack reaches the middle of the feed ramp. -
Page 27: Adjusting The Media Thickness Lever
Printer Basics • 2 7. Adjusting the Media Thickness Lever The media thickness lever sets the distance between the printhead and the material. Use it to compensate for different material thicknesses. The lever is located inside the printer under the transport door, as shown below. Media Thickness Lever 1. -
Page 28: Adjusting The Upper Exit Rollers
2 • Printer Basics 8. Adjusting the Upper Exit Rollers Adjust the upper exit rollers so the outside edge of the rollers overlap the left and right edges of the material by 1/4" (6mm). Slide the rollers from side to side to make the adjustment. IMPORTANT: Make sure the rollers do not touch any printed area of the material. -
Page 29: Printing A Test Piece
1. Click the Start button in the task bar, then select Settings. 2. Click Printers. The Printer window displays. 3. Right click the Pitney Bowes printer icon, then left click the Properties option. The Properties window opens and displays seven tabs, each of which allows access to different printer options. -
Page 30: Using The Control Panel
2 • Printer Basics Using the Control Panel Use the buttons on the control panel to get to the printer menus, define the print options, run a print job, position the print carriage and turn the printer ON LINE and OFF LINE. You’ll normally perform these actions from within the application you’re using to set up your envelope layout. -
Page 31: Using The Menus
Printer Basics • 2 This Button... Does This... Press to select the currently displayed Enter menu option. With the printer OFF LINE, press to move Cartridge/+(plus) the ink cartridge holder to the center of the printer. This makes it easy to remove the cartridge. -
Page 32: Using The Main Menu
2 • Printer Basics Using the Main Menu The Main Menu options are: MAIN MENU MENU OPTIONS ADDRESS LAYOUT A. DISTANCE TO RIGHT B. DISTANCE TO BOTTOM C. LINE SPACING D. INVERTED PRINTING ORIENTATION ORIENTATION CONTROL PRINT QUALITY A. QUALITY B. -
Page 33: Using The Setup Menu
Printer Basics • 2 Using the Setup Menu The Setup Menu Options are: SETUP MENU MENU OPTIONS HEAVY MEDIA MODE TEST PRINT HEAD PURGE PRINT HEAD LINES PER ADDRESS COMMUNICATIONS A. TCP/IP B. LINE TERMINATION HEX DUMP MODE LANGUAGE A. SYMBOL SET B. - Page 34 2 • Printer Basics This page is intentionally blank. 2-16 SV62381 Rev. B...
-
Page 35: Cleaning The Exit Rollers
3 • Printer Maintenance This chapter describes the maintenance procedures you should perform on a regular basis to keep your printer running trouble-free. Preventive Maintenance .............3-2 Print Quality Problems ............3-2 Cleaning the Exit Rollers ............3-3 Cleaning the Sensor ............3-3 Cleaning the Floor Assembly and Top Cover .....3-3 Purging the Printhead ............3-3 Installing and Removing the Ink Jet Cartridges ....3-4 Installing the Ink Jet Cartridges (Color &... -
Page 36: Preventive Maintenance
3 • Printer Maintenance Preventive Maintenance The printer is designed for trouble-free service with a minimal amount of care. You should schedule regular cleaning of the Feed Rollers, Exit Rollers and Lower Guide. CAUTION: • Clean print head, cartridge, ink surfaces and covers with plain water only. -
Page 37: Cleaning The Exit Rollers
Printer Maintenance • 3 Cleaning the Exit Rollers If the right and left exit rollers are misaligned, that is, contact printed surfaces, they can become contaminated with ink. Use water to dampen a soft cloth and remove the ink from the rollers. Cleaning the Sensor A film and/or dust can build up on the sensors and cause misfeeds of the material. -
Page 38: Installing And Removing The Ink Jet Cartridges
3 • Printer Maintenance Installing and Removing the Ink Jet Cartridges Installing the Ink Jet Cartridges (Color & Black) The printer uses Ink Jet Cartridges for printing. You must install a black only cartridge (DA30S and DA50S), or a black and a color cartridge (DA55S), before you can print. - Page 39 Printer Maintenance • 3 8. Push the cartridge forward (away from you) until it snaps in place. 9. Close the Transport Door. 10. The prompt asks about resetting the ink level. Select "YES" if you have installed a new cartridge. Otherwise, select "NO". 11.
-
Page 40: Removing The Ink Jet Cartridges
3 • Printer Maintenance Removing the Ink Jet Cartridges To remove or replace the ink jet cartridges, follow these steps: 1. With the printer on, press the ON LINE button until the printer displays "OFF LINE". 2. Open the Transport Door of the printer. 3. -
Page 41: Cmyk Printing Alignment (Da55S Only)
Printer Maintenance • 3 CMYK Printing Alignment (DA55S ONLY) Your DA55S printer allows black (K) to print with color (CMY) at the same time (known as CMYK printing). To ensure proper printing, the black (K) and color cartridges (CMY) need to be correctly aligned. The alignment procedure should be done whenever you replace any of your cartridges. - Page 42 3 • Printer Maintenance 8. Press the (+) or (-) buttons to scroll through the selections and choose the number that represents the best horizontal alignment of the upper and lower lines (for the color and black cartridges, respectively). 9. Insert an envelope into the printer and press Enter. The horizontal adjustment prompt displays and the sample shown below prints on the envelope.
- Page 43 Printer Maintenance • 3 1 2 3 4 5 6 7 8 9 10 11 12 13 14 15 Color Cartridge Black Cartridge Line on Top Line on Top Black Cartridge Color Cartridge Line on Bottom Line on Bottom Not Aligned Aligned Not Aligned 13.
- Page 44 3 • Printer Maintenance Number Selected Highlighted When correct pattern is is s s elected all lines should be str traight 1 2 3 4 5 6 7 8 9 10 11 12 13 14 15 Both Black and Color Cartridge Lines Together Aligned Aligned...
-
Page 45: Motor Problems
4 • Troubleshooting This chapter lists some common printer problems and offers suggestions on how to fix them. Problems and Solutions............4-2 Feed Problems ..............4-2 Print Quality Problems ............4-3 Interface Problems .............4-4 Motor Problems ..............4-4 Barcode Problems ..............4-4 Other Problems ..............4-5 SV62381 Rev. -
Page 46: Problems And Solutions
4 • Troubleshooting Problems and Solutions Before calling for service, look for your problem below. If you can solve the problem yourself, you will be able to resume printing sooner. Feed Problems Problem Reason Solution Feed Ramp not used. The feed ramp adds a gentle Intermittent slope to the stack and helps Feed... -
Page 47: Print Quality Problems
Troubleshooting • 4 Print Quality Problems Problem Reason Solution Ink cartridge Purge ink cartridge. See No Print problem. Chapter 5, Printer Maintenance for more information. Clean cartridge jets with soft cotton cloth and water. Change to a new cartridge(s) Ink supply is low. Check adjustment of the media Grey or Light thick ness lever. -
Page 48: Interface Problems
4 • Troubleshooting Interface Problems Problem Reason Solution Incorrect printer Use appropriate printer driver; Printer Not driver, bad USB or replace USB or Ethernet cable. Responding Ethernet connection, Make sure cable connections bad printer controller are tight. If the problem still board. -
Page 49: Other Problems
Troubleshooting • 4 Other Problems Problem Reason Solution Input area is empty. Refill the input area. Paper Out or Paper Jam H-Block separators Adjust the H-Blocks to the not adjusted thickness of the material you’re correctly. running. See page Chapter 2, Printer Basics for more information. - Page 50 4 • Troubleshooting This page is intentionally blank. SV62381 Rev. B...
-
Page 51: Appendix A - Specifications
Appendix A • Specifications This Appendix contains detailed hardware and material specifications for the printer. Equipment Specifications ..........A-2 Material Specifications............A-8 SV62381 Rev. B... -
Page 52: Equipment Specifications
Appendix A • Specifications Equipment Specifications Physical Dimensions 14.7” (37.3 cm) high; 16.2” (41.2 cm) wide; 21.7” (55.1 cm) deep (without input guide). Weight 44.11 lbs. (20 kg), including print cartridges (B & C) and catch bin. Electrical 100-240 Vac, 50/60 Hz., 5.0 A Agency Approvals cTUVus/TUV Rheinland-GS - Refer to the FCC and CE statements at the front of this guide for more information. - Page 53 Specifications • Appendix A Print Quality: With Light Mode With Light Mode set to "ON": set to "OFF": Executive 600 x 300 DPI 600 x 600 DPI Letter 300 x 300 DPI 300 x 600 DPI Draft 150 x 300 DPI 150 x 600 DPI Fonts Resident Fonts...
- Page 54 Appendix A • Specifications Barcode Printing Position The printer can print a barcode in one of three positions: • lower right of the envelope • above the address block • below the address block. Barcode Printing Types The printer can print the following barcodes: 1-Dimensional •...
- Page 55 Specifications • Appendix A Special Note on FIM Barcode (U.S. Only) FIM (Face Identifi cation Marking) barcode was developed by the USPS as part of their POSTNET barcoding system. It is normally used by high-volume mailers to put on return envelopes for their customers’...
- Page 56 Appendix A • Specifications Effective Print Area The printable width is 9.4" (24cm) measured from the right side of the piece of mail. The printable height is 15" (38cm) measured from the bottom edge of the piece of mail. See the figure below. Flap on Opposite Trailing Edge (Top)
- Page 57 Specifications • Appendix A Print Position Accuracy For a #10 or DL envelope (Acclaim #10 WW Commercial,Regular): • Horizontal: within +/- 1.5 mm • Vertical: within +/- 1.5 mm • Skew: within +/- 1 degree For other media: • Horizontal: within +/- 3.0 mm •...
-
Page 58: Material Specifications
Appendix A • Specifications Recommended Usage This printer has been tested under many different conditions. We recommend that you do not exceed the usage levels specified below: • Monthly usage is 77,000 pieces NOTE: Usage beyond these recommended cycles is not covered under your Equipment Maintenance Agreement. - Page 59 Specifications • Appendix A Material Notes • Envelopes have a flap along the long edge and are processed by the printer non-flap edge first. Envelopes may have either a diagonal or straight edge along the envelope flap. • Booklets are defined as media having physical dimensions 6 x 9” (15.25 x 23cm) or larger.
- Page 60 Appendix A • Specifications Envelope Sizes Paper Name Displayed in List Size Size (Width) (Height) US/Canada Envelope/Paper Sizes ENV_9 Envelope #9 8⅞" 3⅞" ENV_10 Envelope #10 9½" 4⅛" ENV_11 Envelope #11 10⅜" 4½" ENV_12 Envelope #12 11" 4¾" PPR_Booklet_9_12 Booklet 9 x 12 12"...
- Page 61 Specifications • Appendix A Paper Name Displayed in List Size Size (Width) (Height) Asian Envelope/Paper Sizes Envelope 12JE 140mm 265mm Envelope 9JE 190mm 265mm Envelope 6JE 215mm 305mm Envelope ZL 230mm 120mm [China] Chou #3 Yoko 120mm 235mm Chou #4 Tate 90mm 205mm Hagaki...
- Page 62 Appendix A • Specifications This page is intentionally blank. A-12 SV62381 Rev. B...
-
Page 63: Glossary
Appendix B • Glossary This Appendix contains a glossary of terms related to your Address Printer and Computer. SV62381 Rev. B... - Page 64 Appendix B • Glossary Cable Wires that carry the information between the computer and the printer. Character A printable letter or symbol. Character height The height of a uppercase letter. A character height is measured in points. Characters per inch The number of characters printed in a horizontal inch.
- Page 65 Glossary • Appendix B Double feeding A condition in which two or more pieces of media feed at the same time or without separation. See dots per inch. Draft quality A lower print resolution which saves ink and allows faster printing of a document.
- Page 66 Appendix B • Glossary Hex dump A printer option that allows all the information and commands sent to the printer as base 16 digits. Internal test address message The preprogrammed Address that is printed when the Test button is pressed. Interface cable The cable that connects the printer or other device to the computer.
- Page 67 Glossary • Appendix B Parity An error checking method used when communicating between the computer and a peripheral device. PCL commands A standard printer language of commands to access printer features or options. Point size A measurement standard for the height of a printed character. One point equals one seventy-second of an inch.
- Page 68 Appendix B • Glossary Subdirectory A directory within a directory (or a folder within a folder). Troubleshooting The process of isolating and correcting a problem. Universal Serial Bus (USB) A communications protocol for connecting printers and other peripheral devices to a computer. This protocol supports automatic device detection for "plug and play"...
-
Page 69: Index
Index SV62381 Rev. B... - Page 70 Index Addresses "Walking" 4-3 Feed Angle 2-5 Address High 4-4 Feed Ramp 1-7 Address Recovery Font Size 2-2 Specifi cation A-2 Fuzzy Printing 4-3 Address Smudging 4-3 Agency Approvals A-2 Approved Media A-8 Getting Help 1-3 Approved Media Types 2-2 Glossary B-2,B-3,B-4,B-5,B-6 Glossy Material Print Quality 2-9...
- Page 71 Index Material Notes A-9 Recommended Usage A-8 Material Safety Data Sheets iii Recycled Material Media Size 2-2 Print Quality 2-9 Media Thickness Lever 2-9,3-2 Resident Font Enhancements Resident Fonts Listing A-3 Noise Level A-7 No Print 4-3 Separator Gap 2-3 Setup Adjustments Operating System Exit Rollers 2-10...
- Page 72 Index Physical Dimensions A-2 Printhead/InkJet Cartridge A-7 Unwanted Bolding 4-3 Print Modes (Print Resolution) USB Port Cable Length 1-2 Print Position Accuracy A-7 Using This Guide 1-2 Recommended Usage A-8 Resident Font Enhancements Resident Fonts A-3 Weight A-2 Weight A-2 Speed Printer 2-2 Stacker Tray 1-8...
- Page 73 1 Elmcroft Road 5500 Explorer Drive Stamford, Connecticut 06926-0700 Mississauga, Ontario L4W 5C7 www.pb.com www.pitneybowes.ca Elizabeth Way Harlow, Essex CM19 5BD United Kingdom PB Form SV62381 Rev. B 6/10 *SV62381REVB*...