Intermec EasyCoder F4 Installation & Operation Manual
Ipl version bar code label printer
Hide thumbs
Also See for EasyCoder F4:
- Installation & operation manual (127 pages) ,
- User manual (33 pages) ,
- Installation instructions manual (8 pages)

Related Manuals for Intermec EasyCoder F4


Summary of Contents for Intermec EasyCoder F4
- Page 1 Installation & Operation, IPL Version P/N 1-960490-00 Edition 1 September 2000 EasyCoder F4 Bar Code Label Printer...
-
Page 2: Table Of Contents
Setup Parameters:................36 EasyCoder F4 • Serial Communication: ..............36 Installation & Operation - Baud Rate ...................36 IPL Version - Data Bits..................36 Edition 1, September 2000 - Parity...................36 Part No. 1-960490-00 Intermec EasyCoder F4 – Installation & Operation IPL Version, Ed. 1... - Page 3 External Cleaning................53 Cleaning the Media Guides ..............54 Printhead Replacement ..............55 11. Adjustments Narrow Media Adjustment ...............58 Label Stop Sensor Position ...............59 Printhead Pressure................60 Ribbon Break Shaft Adjustment ............61 Intermec EasyCoder F4 – Installation & Operation IPL Version, Ed. 1...
-
Page 4: Copyright Information
© Copyright Intermec Printer AB, 2000. All rights reserved. Published in Sweden. EasyCoder, EasyLAN, Fingerprint, and LabelShop are registered trademarks of Intermec Technologies Corp. The word Intermec, the Intermec logo, PrintSet, and Duratherm are trademarks of Intermec Technologies Corp. Kimdura is a registered trademark of Kimberly Clark. -
Page 5: Fcc Notice (U.s.a.)
This is a Class A ITE product. In a domestic environment this product may cause radio interference in which case the user may be required to take adequate measures. Intermec EasyCoder F4 – Installation & Operation IPL Version, Ed. 1... -
Page 6: Declaration Of Conformity (Ce)
Mats Gunnarsson President /. Intermec assumes no responsibility regarding the CE Directive if the printer is handled, modifi ed, or installed in other manners than those described in Intermec’s manuals. Intermec EasyCoder F4 – Installation & Operation IPL Version, Ed. 1... -
Page 7: Introduction
Intermec Fingerprint fi rmware card in the memory card slot. In most aspects, the EasyCoder F4 IPL version is compatible with other IPL printers from Intermec. Please refer to Appendix 4 for a list of supported IPL commands. -
Page 8: Safety Precautions
The machine label is attached to the printer’s rear plate and contains Product Labeling information on type, model, and serial number as well as AC input voltage range. It also contains various signs of approval. Intermec EasyCoder F4 – Installation & Operation IPL Version, Ed. 1... -
Page 9: Installation Unpacking
If the delivery is incorrect or any parts are missing, report it ted completely, depending on immediately to the distributor. area of distribution. Intermec EasyCoder F4 – Installation & Operation IPL Version, Ed. 1... -
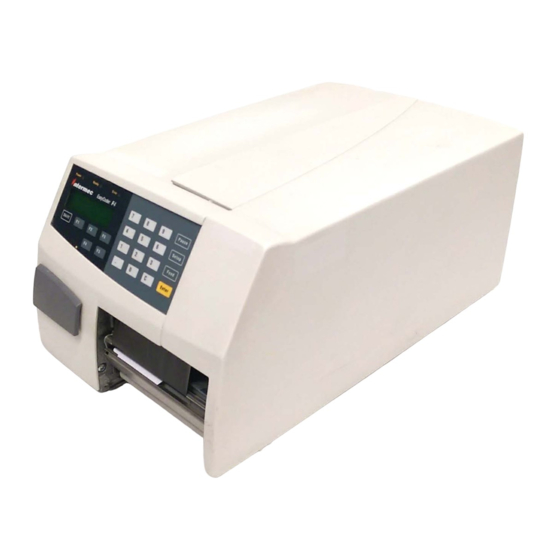
Page 10: Front View
The printed labels, tickets, or tags are presented at the front of the print mechanism. Control Lamps Display Window Keyboard Print Mechanism Side Door Intermec EasyCoder F4 – Installation & Operation IPL Version, Ed. 1... -
Page 11: Rear View
Provision for one IEEE1284 Parallel Inter- face Board On/Off Switch AC Power Cord Receptacle RS-232 Serial Interface Socket Memory Card Slot (for fi rmware upgrade) (not used) Machine Label Intermec EasyCoder F4 – Installation & Operation IPL Version, Ed. 1... -
Page 12: Media Compartment
Chapter 8 “Options.” Thermal Transfer Mechanism (optional) Media Supply Roll Post w. Guide Optional Integral Liner Print Mechanism Takeup with Guide Shaft Long Side Door Intermec EasyCoder F4 – Installation & Operation IPL Version, Ed. 1... - Page 13 Chapter 2 Installation Since the EasyCoder F4 has a modular design, it uses a media supply Media Compart- roll post that can be fi tted in three different positions inside the ment, cont. media compartment. The position depends on the type of side door (long, short, or Megatop) and whether or not the printer is fi...
- Page 14 • Position 4 is reserved for possible future development. The printer can also use an external media supply located behind the printer, unless it has an optional 8-inch Megatop. Pos. 3 Pos. 2 Pos. 1 (Pos. 4) Intermec EasyCoder F4 – Installation & Operation IPL Version, Ed. 1...
-
Page 15: Print Mechanism
The thermal transfer ribbon mechanism is omitted in dedicated direct thermal printing models. Ribbon Supply Hub Ribbon Rewind Hub Thermal Printhead Tear Bar Platen Roller Pressure Arm Printhead Lift Lever Edge Guide Intermec EasyCoder F4 – Installation & Operation IPL Version, Ed. 1... -
Page 16: Connections
3 Connect the power cord between the receptacle on the rear plate and an electrical outlet (>90 - <264 VAC). The EasyCoder F4 is fi tted with one 25pin D-style subminiature Computer (DB25) socket for the RS-232 serial interface port (see Appendix •... -
Page 17: Controls And Indicators
The display window contains an LCD (Liquid Crystal Display) Display with background illumination and two lines of text, each with 16 characters. It guides the operator through upgrading, startup, and setup. Intermec EasyCoder F4 – Installation & Operation IPL Version, Ed. 1... -
Page 18: Keyboard
“Feed” means advancing the media one form, whereas “Reload” means notifying the hardware when certain confi guration commands have been entered. Beeper The beeper notifi es the operator that a key has been pressed. Intermec EasyCoder F4 – Installation & Operation IPL Version, Ed. 1... -
Page 19: Starting Up
• Wait until the following message appears in the display window on the printer’s front panel: IPL-F2/4 V 1.00 READY • Switch off the power and remove the card. Intermec EasyCoder F4 – Installation & Operation IPL Version, Ed. 1... -
Page 20: Switching On
The upper line indicates the present serial communication setup, whereas the lower line either shows “Ready” or an error message: - Paused - Printhead Up - Press Feed - Paper Out - Ribbon Out - Printhead Hot Intermec EasyCoder F4 – Installation & Operation IPL Version, Ed. 1... -
Page 21: Media Load
Chapter 4 Media Load Tear-Off The EasyCoder F4 can print on labels, tickets, tags, and continuous stock in various forms. This chapter describes the case when the (Straight-through) media is to be torn off manually against the printer’s tear bar. This method is also known as “straight-through printing”. - Page 22 Route the media through the print mechanism. Then push it inwards as far as it will go. This diagram shows the media path. Intermec EasyCoder F4 – Installation & Operation IPL Version, Ed. 1...
- Page 23 Press the Feed key to advance the media and Close the side door. adjust the media feed. Intermec EasyCoder F4 – Installation & Operation IPL Version, Ed. 1...
- Page 24 Chapter 4 Media Load Tear-Off, cont. To tear off the media, grab the outer edge and pull downwards. Intermec EasyCoder F4 – Installation & Operation IPL Version, Ed. 1...
-
Page 25: Tear-Off (Straight-Through) With Quick-Load
Fit a new roll of media on the supply post and Remove any empty core from the media supply adjust the edge guide so the roll becomes fl ush roll post. with the center section. Intermec EasyCoder F4 – Installation & Operation IPL Version, Ed. 1... - Page 26 fi t the width of the media. Keep pushing the media forward while To tear off the media, grab the outer edge and pressing the Feed key. pull downwards. Intermec EasyCoder F4 – Installation & Operation IPL Version, Ed. 1...
-
Page 27: Peel-Off (Self-Strip)
Chapter 4 Media Load The EasyCoder F4 can print on labels, tickets, tags, and continuous Peel-Off stock in various forms. This chapter describes the case when (Self-strip) self-adhesive labels are separated from the liner immediately after printing. The liner is then wound up on an integral liner takeup hub. - Page 28 Remove labels from the fi rst 50 cm (20 inches) adjust the edge guide so the roll becomes fl ush of the liner. Route the liner through the print with the center section. mechanism and push it inwards. Intermec EasyCoder F4 – Installation & Operation IPL Version, Ed. 1...
- Page 29 Turn the printhead lift lever counterclockwise This diagram shows the media and liner paths. to engage the printhead Intermec EasyCoder F4 – Installation & Operation IPL Version, Ed. 1...
- Page 30 Adjust the position of the green edge guide so the media is guided with a minimum of play. Close the side door. Press the Feed key to advance the media and adjust the media feed. Intermec EasyCoder F4 – Installation & Operation IPL Version, Ed. 1...
-
Page 31: External Supply (Fanfold)
Chapter 4 Media Load The EasyCoder F4 can print on labels, tickets, tags, and continuous External Supply stock in various forms. This chapter describes the case when the media supply is placed behind the printer, usually in the form of fan folded tickets or tags. -
Page 32: Thermal Transfer Printing
Chapter 5 Thermal Transfer Printing Ribbon Load The EasyCoder F4 can print on labels, tickets, tags, and continuous stock using either direct thermal printing on special heat-sensitive paper or thermal transfer printing using a special ink-coated ribbon. For thermal transfer printing, the printer is fi tted with a transfer ribbon mechanism. - Page 33 Route the ribbon through the print mechanism ink-coated side faces down when the ribbon is and pull out approximately 20 cm (8 inches) routed through the print mechanism. of ribbon. Intermec EasyCoder F4 – Installation & Operation IPL Version, Ed. 1...
- Page 34 Manually advance the ribbon until all of the transparent leader has passed the printhead Turn the printhead lift lever clockwise to raise the printhead and release the ribbon. and the ribbon becomes tight. Intermec EasyCoder F4 – Installation & Operation IPL Version, Ed. 1...
- Page 35 Chapter 5 Ribbon Load Ribbon Load, cont. Turn the printhead lift knob counterclockwise Close the side door. to engage the printhead. Intermec EasyCoder F4 – Installation & Operation IPL Version, Ed. 1...
-
Page 36: Setting Up The Printer
Data dump: Memory reset: n.a. Label rest dots: Form adj dots X: Form adj dots Y: Media Media type: Paper type: Label length: 1200 dots Media grade: Media contrast: Intermec EasyCoder F4 – Installation & Operation IPL Version, Ed. 1... -
Page 37: Setup Parameters
Stop Bits The number of stop bits specifi es how many bits will defi ne the end of a character. There are two options: • 1 (default) • 2 Intermec EasyCoder F4 – Installation & Operation IPL Version, Ed. 1... -
Page 38: Protocol
15 characters from the host. Condition Character Buffer already full Ribbon fault No label stock Buffer now full Printhead hot Label at strip pin Label skipping Printing Intermec EasyCoder F4 – Installation & Operation IPL Version, Ed. 1... - Page 39 RTS goes low when the input buffer is fi lled. Pin 20 (DTR) will be held high as long as the printer is powered on. Intermec EasyCoder F4 – Installation & Operation IPL Version, Ed. 1...
-
Page 40: Test/Service
Select between printing a single specifi ed page or labels for all the pages stored in the printer’s memory. Intermec EasyCoder F4 – Installation & Operation IPL Version, Ed. 1... -
Page 41: Data Dump
Specifi es where the Y-position of the origin should be placed on the label. Allowed range is -30 (closest to the center section) to 30 (furthest from the center section). Default is 0. Intermec EasyCoder F4 – Installation & Operation IPL Version, Ed. 1... -
Page 42: Media
2) which is used to specify the media grade. The media sensitivity number can also be changed using PrintSet, third-party software, or an IPL command (<SI>gn[,m]). Default is 420 for direct thermal printing and 567 for thermal transfer printing. Intermec EasyCoder F4 – Installation & Operation IPL Version, Ed. 1... -
Page 43: Contrast
The value can be setwithin the range -10 to 10% where -10 is the lightest and 10 is the darkest. Default value is 0%. Intermec EasyCoder F4 – Installation & Operation IPL Version, Ed. 1... -
Page 44: Entering The Setup Mode
Print test labels in the Testprint menus. Exit the Setup Mode. (Can be used anywhere in the Setup Mode.) /. Left, right, up, and down refer to the overviews later in this chapter. Intermec EasyCoder F4 – Installation & Operation IPL Version, Ed. 1... -
Page 45: Setup Mode Overviews
115200 1200 2400 4800 COMMUNICATION: DATA BITS: DATA BITS COMMUNICATION: PARITY: PARITY NONE EVEN SPACE COMMUNICATION: STOP BITS: STOP BITS COMMUNICATION: PROTOCOL: PROTOCOL XON/XOFF STANDARD Continued on next page Intermec EasyCoder F4 – Installation & Operation IPL Version, Ed. 1... - Page 46 MEDIA: MEDIA TYPE: MEDIA MEDIA TYPE MARK CONTINUOUS MEDIA: PAPER TYPE: PAPER TYPE MEDIA: LABEL LENGTH: LABEL LENGTH [1200]: MEDIA: MEDIA GRADE: MEDIA GRADE [420]: MEDIA: CONTRAST: CONTRAST [0]: Intermec EasyCoder F4 – Installation & Operation IPL Version, Ed. 1...
-
Page 47: Introduction
Chapter 8 Options Introduction The EasyCoder F4 is designed to provide a high degree of fl exibility because it has a modular design. By adding options to the basic printer, the EasyCoder F4 can be adapted for a variety of applications. -
Page 48: Dtp Model
In the dedicated direct thermal printing (DTP) model, the thermal DTP Model transfer ribbon mechanism is omitted. The EasyCoder F4 comes with either a short side door, which only Side Doors and covers the print mechanism or with one of two types of long side Megatop doors, which encloses the entire media compartment. -
Page 49: Quick-Load Guides
A number of different interface boards are available for use with the Interface Boards EasyCoder F4. The interface boards are either factory fi tted or can easily be fi tted by an authorized service technician. The EasyCoder F4 can accommodate one interface board. -
Page 50: Troubleshooting List
Wrong label rest dots parameter Check/change Chapter 6 Wrong sensor position Check/change Chapter 11 Dirty or blocked sensors Clean media guides Chapter 10 ¤ Call Service Faulty sensors Replace Intermec EasyCoder F4 – Installation & Operation IPL Version, Ed. 1... -
Page 51: Printhead Cleaning
Isopropyl alcohol [(CH CHOH; CAS 67-63-0] is a highly fl ammable, moderately toxic, and mildly irritating substance. Turn the printhead lift lever clockwise to raise Open the side door. the printhead. Intermec EasyCoder F4 – Installation & Operation IPL Version, Ed. 1... - Page 52 Read the warning text. Pull out the cleaning card (1) and raise the Insert most of the cleaning card under the printhead (2). printhead (1). Engage the printhead (2). Intermec EasyCoder F4 – Installation & Operation IPL Version, Ed. 1...
- Page 53 fl uid to dissolve the residue. Allow the cleaned parts to dry before loading Pull out the cleaning card. If necessary, repeat any media and ribbon. the process with a fresh cleaning card. Intermec EasyCoder F4 – Installation & Operation IPL Version, Ed. 1...
-
Page 54: External Cleaning
Never use any sharp tools for removing stuck Never spray the printer. Protect it from water labels. The printhead and rollers are delicate. when cleaning the premises. Intermec EasyCoder F4 – Installation & Operation IPL Version, Ed. 1... -
Page 55: Cleaning The Media Guides
Tilt the upper guide upwards and clean the pull it outwards,disengaging it from the lower areas marked with grey. After cleaning, reas- guide. Take care not to damage the cable. semble in reverse order. Intermec EasyCoder F4 – Installation & Operation IPL Version, Ed. 1... -
Page 56: Printhead Replacement
Caution! While replacing the printhead, the power should be off. Turn the printhead lift lever clockwise to raise Open the side door. the printhead. Intermec EasyCoder F4 – Installation & Operation IPL Version, Ed. 1... - Page 57 Pull at the out the printhead as far as the cables allow. connectors–not the cables! Intermec EasyCoder F4 – Installation & Operation IPL Version, Ed. 1...
- Page 58 Load a new supply of media and ribbon, as Turn the printhead lift lever counterclockwise described earlier in this manual. so the magnet engages the printhead bracket. Intermec EasyCoder F4 – Installation & Operation IPL Version, Ed. 1...
-
Page 59: Narrow Media Adjustment
• After having centred the arm, lock it by tightening the screw. Screw Pressure Arm Center of Media Note! In order to provide a better view, the illustraton depicts a dedi- cated direct thermal printer. Intermec EasyCoder F4 – Installation & Operation IPL Version, Ed. 1... -
Page 60: Label Stop Sensor Position
Five clicks out 20 mm .787 inches Upper part of LSS One Diode + One Sensor Lower part of LSS Print Mechanism (printhead and headlift shaft omitted for improved visibility) Intermec EasyCoder F4 – Installation & Operation IPL Version, Ed. 1... -
Page 61: Printhead Pressure
(-) six full turns. Caution! Do not use a higher printhead pressure than necessary because it may increase the wear of the printhead and shorten its life. Adjustment Screw Intermec EasyCoder F4 – Installation & Operation IPL Version, Ed. 1... -
Page 62: Ribbon Break Shaft Adjustment
Important! Before readjusting the break shaft, make sure that there is no other cause for the wrinkling of the ribbon (See Chapter 9, “Troubleshooting.”) Adjustment Screw Ribbon Break Shaft Intermec EasyCoder F4 – Installation & Operation IPL Version, Ed. 1... -
Page 63: Appendix 1 Technical Data
On-board DRAM SIMM Std. 4 MB Power Supply Mains Voltage >90 to <264 VAC, 45 to 65 Hz PFC Regulation IEC 61000-3-2 Maximum Power Consumption Continuous 140W; Peek 300W Intermec EasyCoder F4 – Installation & Operation IPL Version, Ed. 1... - Page 64 Firmware update only /. The max. print length is also restricted by the amount of free DRAM memory. /. Type of door fi tted at delivery depends on model. Intermec EasyCoder F4 – Installation & Operation IPL Version, Ed. 1...
-
Page 65: Appendix 2 Media Specifi Cations
- Polyethylene Gloss - Kimdura Tag - Syntran • Polyesters give high resistance to chemicals, heat, and mechanical abrasion with HR/Super Premium ribbons. Examples: - Polyester Gloss - Polyester Intermec EasyCoder F4 – Installation & Operation IPL Version, Ed. 1... -
Page 66: Media Roll Size
Media rolls to be loaded inside the printer should be wound with the printable side facing outwards. The media supply must not be exposed to dust, sand, grit, etc. Any hard particles, however small, can damage the printhead. Intermec EasyCoder F4 – Installation & Operation IPL Version, Ed. 1... -
Page 67: Media
Minimum (standard): 25.0 mm (1.00 inches) Minimum (narrow Quick-Load): 40.0 mm (1.57 inches) Minimum (wide Quick-Load): 80.0 mm (3.15 inches) Media Type Setup: • Continuous • Var length strip Intermec EasyCoder F4 – Installation & Operation IPL Version, Ed. 1... -
Page 68: Self-Adhesive Strip
⇐ c ⇒ Media Width (excluding liner): Maximum: 112.7 mm (4.43 inches) Minimum: 23.8 mm (0.94 inches) Media Type Setup: • Continuous Intermec EasyCoder F4 – Installation & Operation IPL Version, Ed. 1... -
Page 69: Self-Adhesive Labels
LABELS printing is used, and that no pull back of the paper is performed. Intermec does not guarantee that such short labels will work, but it is up to the user to test this in his unique application. ⇐ e ⇒ Label Gap: Maximum: 21.3 mm... -
Page 70: Tickets With Gap
Media Type Setup: • Gap Do not allow any perforation to break the edge of the media as this may cause the media to split and jam the printer. Intermec EasyCoder F4 – Installation & Operation IPL Version, Ed. 1... -
Page 71: Tickets With Black Mark
The black mark should be non-refl ective carbon black on a whitish background. Do not allow any perforations to break the edge of the media as this may cause the media to split and jam the printer. Intermec EasyCoder F4 – Installation & Operation IPL Version, Ed. 1... -
Page 72: Transfer Ribbons
Custom-made setup options adapted for special applications can also be created. Consult your Intermec distributor. Intermec EasyCoder F4 – Installation & Operation IPL Version, Ed. 1... -
Page 73: Setting The Media Sensitivity Number
For help on how to set the media sensitivity number using the printer command set, see the DOS example on the following page. Intermec EasyCoder F4 – Installation & Operation IPL Version, Ed. 1... -
Page 74: Setting The Media
1. At the DOS prompt, type the following command and press Enter: MODE COM1 96,E,7,1,N 2. Type the following command lines and press Enter: COPY CON COM1 <STX><SI>g1,567<ETX>^Z where: <SI>g1,567 sets the media sensitivity number to 567. Intermec EasyCoder F4 – Installation & Operation IPL Version, Ed. 1... - Page 75 European Polyethylene/Premium Duratran Kimdura/Premium-3/6/7 European Duratran Kimdura/Premium 500 Series Medium Sensitivity (Paper) 567 Duratran II-1/Premium-3/6/7 Duratran II Tag-7mil/Premium-3/6/7 European Coated/Premium 300 Series Low Sensitivity (Plastic) Super Prem. Poly./Super Prem.-7 Intermec EasyCoder F4 – Installation & Operation IPL Version, Ed. 1...
-
Page 76: Appendix 3 Interfaces
DB-9 DB-25 Signal DB-25 DB-25 Signal shield Signal GND + 5V /. The external +5V is limited to 200 mA and is automatically switched off at overload. RS-232 Port Intermec EasyCoder F4 – Installation & Operation IPL Version, Ed. 1... -
Page 77: Ieee 1284 Parallel Interface Board (Option)
Appendix 3 Interfaces The EasyCoder F4 can optionally be fi tted with an IEEE 1284-I IEEE 1284 compatible parallel interface board Parallel Interface Interface Cable Connectors Board Computer end: Depends on type of host computer. Printer end: 36-pin female IEEE 1284B Centronics... -
Page 78: Appendix 4 Supported Ipl-3 Commands
Direct Graphics Mode, Select ..............<ESC>g Emulation Mode, Enter ................<ESC>c Emulation or Advanced Mode on Power-Up ........<SI>C End-of-Print Skip Distance, Set ............<SI>D Error Code, Request ................<BEL> Factory Defaults, Reset ................D Intermec EasyCoder F4 – Installation & Operation IPL Version, Ed. 1... - Page 79 Label Retract, Enable or Disable ............<SI>R Label Retract Distance, Set ..............<SI>r Label Stock Type, Select ..............<SI>T Label Taken Sensor Value, Transmit ..........T Length of Line or Box Field, Defi ne ...........l Intermec EasyCoder F4 – Installation & Operation IPL Version, Ed. 1...
- Page 80 Self-Strip, Enable or Disable ..............<SI>t Software Confi guration Label, Print ...........s Start and Stop Codes (Code 39), Print ..........<ESC><SP> Status Dump ..................<VT> Status Enquiry ..................<ENQ> Test and Service Mode, Enter ..............<ESC>T Intermec EasyCoder F4 – Installation & Operation IPL Version, Ed. 1...
- Page 81 User-Defi ned Characters, Transmit .............<ESC>u User-Defi ned Font Character, Create ..........t User-Defi ned Fonts, Print ..............t Warm Boot ....................<BS> Width of Line, Box, Bar, or Character, Defi ne ........w Intermec EasyCoder F4 – Installation & Operation IPL Version, Ed. 1...