Table of Contents
Advertisement
Quick Links
Download this manual
See also:
Manual
Advertisement
Table of Contents

Related Manuals for Benefon TRACK PRO 1.1


Summary of Contents for Benefon TRACK PRO 1.1
- Page 1 BENEFON TRACK PRO 1.1 Owner´s Manual All rights reserved. © Benefon Oyj, 2002. Publication number: YZ2630-1...
- Page 2 H ä r m e d f ö r k l a r a r B e n e f o n O y j a t t d e n n a m o b i l t e l e f o n , t y p Benefon Oyj T G P 7 9 E E , ö...
-
Page 3: Quick Guide
QUICK GUIDE pressing •Call directly to the number last dialled by POWER ON: pressing twice or •Press the top side key for a few sec- •Quick dial the phone number by selecting onds. the memory slot number between 2 and 9 and pressing the corresponding numeric POWER OFF: key for a few seconds or... - Page 4 •You can turn the alarm off by pressing TURNING THE KEYLOCK ON/OFF: QUIET. •In stand-by mode, enter the quick menu by pressing once, lock the keypad by ADJUSTING EARPIECE VOLUME: pressing Display shows LOCK. •You can adjust the earpiece volume can only answer a call by pressing during a call by pressing the side keys •Open the keylock by pressing...
- Page 5 3. Press to return to the previous 3. Press QUIT READ menu level. You can return directly to EMPTYING THE SHORT MESSAGE stand-by mode from all menu levels by MEMORY: pressing A flashing envelope ( ) in the display is During a call, menus function the same a sign of error in receiving the latest way as described above.
- Page 6 C l e a r i n g a p o s t p o n e d m e s s a g e : If you do not want to send anything, do as follows: You have several ways to get rid of a post- poned message.
-
Page 7: Table Of Contents
CONTENTS Network code........20 Phone code ........21 Security code........21 INTRODUCTION......7 Service center.......21 BENEFON TRACK PRO 1.1....7 Network operator......22 SOME KEY FEATURES ......7 Service provider ......22 About the T9 text input technology........8 OPERATION ......... 23 Display .......... 9 WHAT TO DO FIRST ......23... - Page 8 ENDING A CALL .........31 SEND POSITION......... 44 EMERGENCY CALLS......32 ENVIRONMENT ........45 OPTIONS DURING A CALL....45 BENEGUARD-BUTTON ....33 Call management ......46 SOS MESSAGES AND NEW CALL ..........47 PICK UP A WAITING CALL......47 SOS CALLS .........33 SELECT CALL ..........48 ABOUT THE SOS PROCEDURE ....
- Page 9 PROCESSING THE CALL INFORMATION 63 SENDING AND SAVING THE MESSAGE ......... 88 Call counters ........ 63 Broadcast messages ....92 LAST CALL..........63 RECEIVING A NEW BROADCAST TOTAL CALLS..........63 MESSAGE ........... 92 ALARM CLOCK ........64 READING A BROADCAST MESSAGE ..93 EDITING ALARM SETTINGS .....
- Page 10 TELEMATICS MENU TREE....109 CAR KIT ENVIRONMENT ......126 NEW ENVIRONMENT ......... 126 TELEMATICS ........110 Power..........127 WHAT TO DO FIRST ........110 POWER ON ..........127 Tracking ........111 POWER OFF ..........127 TURNING THE TRACKING ON OR OFF ... 111 Phone settings......
- Page 11 Security code request....147 MAX. COST ..........158 COST UNIT..........159 Change PIN code ......147 MONEY LEFT ..........160 Change PIN2 code ....... 148 Network selection......161 Change phone code..... 148 GPS............162 Change network code ....148 Positioning the GPS antenna ..162 Change security code....
- Page 12 APPENDIX........181 CHARGING ..........172 Charging times ......173 CARE AND MAINTENANCE....181 CARE AND MAINTENANCE ....174 PROBLEMS YOU CAN SOLVE ..181 DISPOSAL ...........174 If the phone will not turn on..181 Blocked SIM card......182 ACCESSORIES ......175 If you lose your SIM card .... 182 MAINS CHARGER If your phone gets lost ....
-
Page 13: Introduction
1.1 in all countries •up to 12 hours talk time (with 1200 mAh where the GSM network operators have a Li-Ion battery) roaming contract with your network opera- tor. •size: 129 x 49 x 23 mm INTRODUCTION: BENEFON TRACK PRO 1.1... -
Page 14: About The T9 Text Input Technology
The high quality Benefon Track Pro 1.1 is which word you are writing. developed and manufactured by Benefon Oyj. Benefon is a company operating world- If there is more than one word possible for wide and specializing in mobile phones. -
Page 15: Display
•Select the quick menu by pressing the arrow keys MEMO MENU After the menu is chosen, you may select one of its sub-menus with . Enter the de- sired sub-menu by pressing SELECT. Right soft key Left soft key INTRODUCTION: BENEFON TRACK PRO 1.1... - Page 16 Phone book moving direc- tion, which in Recent calls this case is horizontal Alarm clock > In stand-by mode main menu contains Calendar these sub-menus: Calculator Telematics Messages Settings Special services (SIM toolkit) Security Network services INTRODUCTION: BENEFON TRACK PRO 1.1...
-
Page 17: Display Symbols
SELECT QUIT cannot receive new messages or store messages of your own until deleting Mute some old ones. Hands free (HF) mode INTRODUCTION: BENEFON TRACK PRO 1.1... - Page 18 Battery and bar. When the battery is beep sounds when receiving a call. nearly empty the battery symbol will INTRODUCTION: BENEFON TRACK PRO 1.1...
- Page 19 Condition check timer is turned on. mail service. The type of service will depend on your network operator. The power on timer is turned on. The phone will turn on automatically, at the set time. INTRODUCTION: BENEFON TRACK PRO 1.1...
-
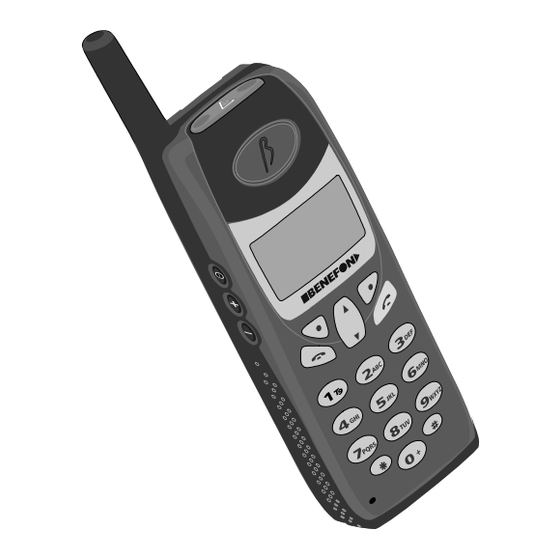
Page 20: Keypad
Soft keys. The function of the soft located on the top of the phone keys depends on the guiding texts on (please see the previous picture). the bottom line of the display. Pressing the SOS button starts the INTRODUCTION: BENEFON TRACK PRO 1.1... - Page 21 If you wish to make a direct call to an ISDN the voice messages left for you in your an- sub-number or store the sub-number in swering machine at home. The answering your phone book, key in the string as fol- INTRODUCTION: BENEFON TRACK PRO 1.1...
-
Page 22: Safety And Precautions
lows: Key in the main phone number, press •External alert: The use of the alert § -key three times, (the letter S will be device to operate a vehicle´s lights or displayed) and key in the sub-number. horn on public roads is not permitted. •Children: Keep the phone and its acces- sories away from small children to avoid SAFETY AND PRECAUTIONS... -
Page 23: Radio Frequency (Rf) Energy
netic cards, such as bank and credit cards. •Medical devices: Remember that any We recommend that you would keep your personal medical devices (such as hearing mobile phone away from magnetic cards. aids or pacemakers) may be affected by RF energy if they are not adequately Radio frequency (RF) energy shielded. -
Page 24: Gps
Telematics protocol near such equipment keep a distance of about one meter. MPTP (Mobile Phone Telematic Protocol) •Body parts: When the phone is in opera- allows, among other things, tracking of the tion do not touch the antenna with eyes, phone over the SMS communication. -
Page 25: Vocabulary
VOCABULARY PIN code is normally supplied with the SIM card. This vocabulary consists of terms associated Your phone prompts you to enter your PIN with the use of a mobile phone. code when you turn on the phone. You can disable the PIN code request in the security menu, but it is recommended you keep the SIM card... -
Page 26: Puk Code
IMEI code abled. You then must use your PUK2 code to enable the PIN2 code and the SIM card. An IMEI (International Mobile Equipment Identity) code is used to identify the mobile phone. You will find your 15-digit IMEI PUK code code easily from the type label of the The PUK code is used to open the disabled phone. -
Page 27: Phone Code
Phone code phone prompts you to enter the security code when you enter these functions or set- The phone code (4 - 8 digits) is used to pre- tings. vent the unauthorized use of the phone. If you wish, you can also turn the security The phone code is a security code, which is code request off as well as change the secu- associated with the phone itself, not with... -
Page 28: Network Operator
Network operator An organization which maintains a mobile network providing telecommunication con- nections and services. Service provider The service provider is an organization which provides telecommunication services to the users. The service provider can also be a network operator. INTRODUCTION: VOCABULARY... -
Page 29: Operation
OPERATION WHAT TO DO FIRST Inserting the SIM card 2. Insert the card into the holder. Check 1. Slide the SIM card holder to the right. that the cut corner is at the lower left Lift the holder into an upright position. side of the holder. -
Page 30: Fitting The Battery
Fitting the battery 3. Close the holder by pushing it towards 1. Place the bottom of the battery into the the phone. Slide the holder back to the corners at the bottom of the phone. left until it locks. 2. Push the battery into the phone until it locks into place. -
Page 31: Removing The Battery
Removing the battery Inserting the rubber seal Rubber tab Please note that the phone is water resistant only when the rubber seal is inserted cor- rectly in the phone. Push the release catch downwards and pull the battery carefully away from the rear of Remove the battery. -
Page 32: Initializing The Phone
Initializing the phone When you start using the phone for the first time, you should charge the battery first. Please note that the battery will reach its full capacity only after two or three charg- ing times. The standard time (UTC) comes to your Bottom cover phone from a satellite and setting the time requires searching for position (by turning... -
Page 33: Turning The Phone On
Turning the phone on 4. The abbreviations of the country and network operator are displayed imme- diately or after the message Searching for networks..Time, date and other symbols may also be displayed if the op- tions are activated in the menu. If you are outside the network’s coverage area the message No service... -
Page 34: Changing The Language
Changing the language MAKING A CALL When the menu language is set to Automat- You have several ways to choose the num- , the language is chosen according to your ber, you wish to call. SIM card´s language preference. In case the •You can enter the phone number. -
Page 35: Redialling
2. Enter the country code, the area code (without the first number), and the 14:12 Hessu phone number. 12:02 Bill 11.08 Jackie 3. Press Delete all QUIT SELECT If the network operator does not imple- ment this function and you try to make a call by using the + character, a message Ille- 1. -
Page 36: Quick Dialling
QUICK DIALLING 5. If you wish to remove all the numbers in the redial memory at once, select the option Delete all . Confirm your choice by pressing DELETE. Calling 6. By pressing you enter to the SELECT 987654321 sub-menu where you can make a call to the number, delete or store the num- ber. -
Page 37: Receiving A Call
RECEIVING A CALL ANSWERING A CALL •To answer, press . If the Anykey answer When your phone receives a call, it will is set on in the menu, under Settings ring, and the text is shown. Call is coming Call settings , you can also answer by §... -
Page 38: Emergency Calls
EMERGENCY CALLS Making an emergency call when the SIM card is inserted ö ö Make an emergency call as a normal phone Emergency call: call: Key in the local emergency number Insert SIM card press OK or dial number and press QUIT MENU Making an emergency call when the key-... -
Page 39: Beneguard-Button
BENEGUARD-BUTTON The SOS procedure can always be started, regardless of the state of the phone: in case a call is in progress and you start the emer- The BeneGuard (i.e. SOS) button gency call, the currently active call will be put on hold. - Page 40 the emergency center numbers can be two quick presses or one long press. short message numbers, call numbers For further information, please see the chapters Main menu, Settings, or both. The decision affects the SOS Telematics settings, Emergency set- procedure. For further information, please see the chapter Main menu, tings, SOS activation.
-
Page 41: Sos Procedure When Only Sending Short Message
SOS PROCEDURE WHEN ONLY ling time is e.g. 2 seconds, you have two seconds to press the key to SENDING SHORT MESSAGE < cancel the entire SOS procedure, in- 1. Press the SOS button ( ) on the top cluding sending of the short message. of the phone. -
Page 42: Sos Procedure When Only Making Call
SOS PROCEDURE WHEN ONLY 2. At the same time when sending the mes- MAKING CALL sage, the phone sends the position in- < formation. current position 1. Press the SOS button ( ) on the top coordinates are not available, previous of the phone. -
Page 43: Status Messages
STATUS MESSAGES If the security code request is turned on, status messages can only be modified by an In order to send status messages, you need authorized person, who knows the code. to configure the phone to be a status The status messages are sent to the pre-de- phone. -
Page 44: Sending Status Messages
2. The service center number, to which the status messages will be sent, has Please note that if there are missing service center numbers, false SOS presses, busy telephone lines, been stored correctly in the phone. battery out-of-charge incidents, message transmis- sion errors or poor network coverage, the status mes- - For further information, please see sage might not be sent. - Page 45 sponding numeric key (1 - 9) for a few seconds: sending takes place immedi- ately. SENDING STATUS MESSAGES NUMBERED 10-999 The rest of the status messages (numbered 10 - 999) are number codes with no fixed-form text. < Advanced usage: Sending status messag- 1.
-
Page 46: Mobile Group Calls
MOBILE GROUP CALLS members are pre-defined and the group call is operated via the service center. In order to make mobile group calls, you During the mobile group call the callers need to configure the phone to be a mo- talk in turns. -
Page 47: Receiving A Mobile Group Call
- For further information, please see MAKING A MOBILE GROUP CALL the chapter Main menu, Settings, Telematics settings, Mobile group 1: Football team An example numbers. of a mobile Family group menu +358123456789 Please note that if there are missing mobile group num- bers, false SOS presses, busy telephone lines, battery out-of-charge incidents, or poor network coverage, the CALL... -
Page 48: Quick Menu
QUICK MENU automatically by turning on the option tomatic keylock in the menu, under Settings Phone settings . When the automatic FI NETWORK keylock is in use, the keypad will be locked in approximately 20 seconds if no key is pressed during that time. -
Page 49: Position Refresh
3. After locking the keypad, you will re- If you press the left soft key or during turn to stand-by mode automatically. these 10 seconds, the lights will remain on The symbol will be displayed. for another 10 seconds. The lights will turn off 10 seconds after the last key is pressed. -
Page 50: Send Position
1. Press to open the quick menu and position before the sending. For further in- find the Position refresh menu. formation, please see the chapter Quick menu, Position refresh. 2. Press to refresh the position. SELECT 1. Press to enter the Send posi- SELECT 3. -
Page 51: Environment
ENVIRONMENT OPTIONS DURING A CALL An environment is a combination of tone During a call, there are several functions and lights settings made suitable for partic- available, depending on the keys pressed. ular situations. For further information Please note that some of these functions de- about editing the environment settings, pend on the services your network operator please see the instructions in chapter Menu,... -
Page 52: Call Management
Call management Using functions associated with phone book, messages, recent calls and call If you have a call in progress and you wish costs: to make another call or conference call, an- Press and enter the MENU MEMO swer a call while talking to someone, or desired sub-menu with SELECT. -
Page 53: New Call
NEW CALL Easiest way to pick up a waiting call is by pressing Use this function to make another call dur- ing an active call. The currently active call will be put on hold. Another way to pick up a waiting call: 1. -
Page 54: Select Call
SELECT CALL If you have received a call, there are two ex- ceptions when the number of the caller will Use this function if you wish to switch from not be displayed: if the caller has the CLIR an active call to the held call. (Call Line Identification Restriction) feature in use, or if your network operator does not supply the CLIP (Call Line Identification... -
Page 55: End Call
END CALL 3. Scroll through the call list with Use this function to end a call or calls. 4. Select the call you want to end by press- • Easiest way to drop a single call from two calls or a conference call is by keying in and the number in the front of the telephone number and pressing... -
Page 56: Memo
MEMO ALPHA KEYS You need the alpha keys for storing and re- calling the information. MEMO •In the traditional spelling mode you get • In stand-by mode, open memo by pressing the first letter of the key when pressing . Use to scroll MEMO PHONE BOOK... - Page 57 •When upper case letters are in use the symbol is displayed, in the upper row and when lower case letters are in use the symbol is displayed. The symbol is especially made for writing sen- tences (so that you do not need to switch between the upper case and lower case letters).
- Page 58 Characters available: Å å Ä ä Æ æ à ß Ç D d E e É é è H h I i Ì Mm N n O o 6 Ñ ñ Ö ö ò Ø ø Q q R r U u V v Ü...
-
Page 59: Phone Book
PHONE BOOK ENTER MEMORY ENTER NUMBER ADD NEW PHONE BOOK ENTER NAME: ENTER NAME SLOT NAME LIST: ANNA EDIT ENTER NUMBER ANNA +358123456789 JAKE ENTER NAME DELETE ENTER MEMORY CONFIRM DELETE? SLOT You can store phone numbers in the Phone Press to cancel the operation and QUIT... -
Page 60: Recalling A Phone Number
You can NAME LIST also add names in the phone book. The phone book entries are organized in al- +35877400... Add new phabetical order. Benefon Benefon Jagger Jagger You have two ways to enter the name list: Lewis SELECT... -
Page 61: Editing A Phone Book Entry
PIN2 code and press slot numbers in the first line. 3. In case you have pressed READ Benefon rectly in the previous menu, the first +3580401234567 line offers you the option Add new [010] 4. -
Page 62: Deleting A Phone Book Entry
Editing number served. As a result of that, both memory slots will be reserved: one with the original 1. Add numbers by pressing the numeric information and another with the recently keys and remove numbers by pressing stored and possibly modified information. Please note that a long CLEAR empties the whole display. -
Page 63: Storing A Phone Number
Storing a phone number KEYING IN A NEW PHONE NUMBER You have several ways to store phone num- bers into the phone book. Enter name: ö You can: 040123456 040123456_ •key in the desired number (please see the NEXT CLEAR SAVE QUIT following instructions) -
Page 64: Adding A New Number In The Name List
The phone accepts only free memory slots, so you cannot overwrite any old number in the phone book by mistake. Add new Enter PIN2 code Benefon 4. Press to store all the new infor- Jagger SAVE mation in the phone book. - Page 65 Enter name: Enter memory slot: +3589876543 +3589876543 JULIA JUL_ [020] CLEAR QUIT NEXT SAVE 8. If the phone number just entered is al- ready stored in the phone book, the phone will offer you that name, the number is associated with. If desired, you may edit the name.
-
Page 66: Recent Calls
RECENT CALLS RECENT CALLS UNANSWERED 14:12 JAKE CALL CALLS ENTER NAME 10:08 +358123456789 SAVE 30.09. MONICA RECEIVED CALLS DELETE ENTER MEMORY SLOT DELETE ALL LAST CALL CALL COUNTERS TOTAL CALLS Unanswered calls This function allows you to keep track of unanswered and received calls. -
Page 67: List Of Unanswered Calls
Unanswered calls are detected only when In two cases neither the number nor the the phone is turned on and in the network name of the caller will be displayed: if the coverage area. caller has the CLIR (Call Line Identification Restriction) feature in use, or if your net- work operator does not supply the CLIP LIST OF UNANSWERED CALLS... -
Page 68: Processing The Call Information
PROCESSING THE CALL LIST OF RECEIVED CALLS INFORMATION Received calls 14:12 Jake 14:12 Jake Call 12:02 +35898765431 Save 12:02 +35898765431 11.08 Unknown Delete 11.08 Unknown Delete all Delete all QUIT SELECT QUIT SELECT SELECT QUIT SELECT QUIT This received call list contains all the re- By selecting the desired number you will ceived calls. -
Page 69: Processing The Call Information
Call counters in these cases your phone counts and dis- plays only one call, which is the last one you Enter the Call counters menu through have received. cent calls menu and press . Scroll SELECT If you wish to delete all the calls displayed the sub-menus by pressing in this list, select the option Delete all... -
Page 70: Alarm Clock
ALARM CLOCK ALARM CLOCK SWITCHED OFF ENTER TIME: ALARM: TIME 00:00 DAILY MONDAY ONCE REPEAT DAILY M - F TUESDAY REPEAT SELECTED DAYS WEDNESDAY THURSDAY SNOOZE FRIDAY 5 MIN SATURDAY 10 MIN SUNDAY 30 MIN SAVE CHANGES When the phone is in stand-by mode, open EDITING ALARM SETTINGS by pressing MEMO... - Page 71 Selecting repeat alarm By selecting Repeat you can determine, Switched Time 11:22 whether the phone alerts you e.g. every day Repeat Once at the same time. Snooze Switched [On] First select either Once Repeat with QUIT SELECT Press the right soft key If you choose Repeat , you are also able to...
- Page 72 When ready, scroll down the list and point Save changes . Press Selecting snooze By selecting Snooze you can determine, whether the phone alerts you repeatedly, e.g. in every 10 minutes. Select one of these: 5 min 10 min . Press .
-
Page 73: Calendar
CALENDAR This is a simplified menu tree of the calendar menu. The obliqued words in the picture show the entered path. CALENDAR SELECT DAY: VIEW A SINGLE EDIT ADD NEW [24.10.02] CALENDAR ENTRY DELETE SUN 23.10.02 VIEW DAY DAY´S SCHEDULE [13:15.00] MON 24.10.02* ADD NEW ENTRY... -
Page 74: Calendar Options
Press to cancel the operation and You are also able to add new calendar en- QUIT return to previous menu level. tries for the chosen day or delete unneces- sary entries. Press to return to stand-by mode. This can be done at any menu level. Thu. -
Page 75: Day´s Schedule
DAY´S SCHEDULE ADDING NEW ENTRIES View day The date Wed. 6th 10. 2002 Add new entry and its Add new Go to date schedule 11:00 Meeting... View all entries 12:30 Lunch... 15:20 Special br... QUIT SELECT Delete all SELECT QUIT By selecting Add new entry , you can add... - Page 76 3. Event: write down the desired text and press . You have space for about NEXT Monday 32 characters, i.e. one and a half lines Set repeat Tuesday Once of text. Wednesday Daily Save changes Selected days QUIT SELECT QUIT SELECT Set repeat Once...
-
Page 77: Editing Or Deletinga Calendar Entry
EDITING OR DELETING A CALENDAR ENTRY Set alarm: No alarm On time Wed. 6th 10. 2002 Edit 5 min before hh:mm -5 min 10 min before Delete Meeting with Mr. Bean at the movies. 60 min before QUIT QUIT SELECT QUIT SELECT 5. - Page 78 Changing repeat When changing repeat you have several op- dd.mm.yyyy Enter date: tions to choose from: you can use repeat hh:mm once, daily, Monday to Friday or on select- Meeting with Mr... Once ed days. dd.mm.yyyy -5 min QUIT QUIT SELECT If you select Selected days...
-
Page 79: Entering The Date To View
D e l e t i n g o n e c a l e n d a r e n t r y ENTERING THE DATE TO VIEW By selecting Delete you can delete a calen- dar entry. View day Add new entry Confirm your choice by pressing DELETE... -
Page 80: List Of All Calendar Entries
LIST OF ALL CALENDAR ENTRIES Please note that if the entry is today, the list item starts with the time. If the entry is not today, list item starts with date. In a case View day like this you need to press to see SELECT Add new entry... -
Page 81: Calculator
CALCULATOR The maximum size of a number is 8 digits. When using a decimal point, the amount of In the menu you can perform Calculator digits will be 7 plus the decimal point (for simple mathematical operations, such as example: 123456.7). addition, subtraction, multiplication, and In case you try to key in an illegal mathe- division. - Page 82 A n e x a m p l e o f a p e r c e n t In case you prefer using these keys for cal- c a l c u l a t i o n 5 0 + 5 0 - 6 % = 9 4 culating, please check the following table: 1.
-
Page 83: Messages
MESSAGES READ REPLY 12:17 JULIA MESSAGES INCOMING MESSAGES CALL NUMBER 01.10. JAKE FORWARD DELETE ALL PICK NUMBER DELETE Press SELECT A MESSAGE TEXT... OWN MESSAGES READ to enter the Mes- ANOTHER MESSAGE.. EDIT FORWARD sages menu. DELETE ALL PICK NUMBER DELETE Scroll through the sub-menus and... -
Page 84: Incoming Messages
Incoming messages RECEIVING A NEW MESSAGE In this menu you can read or edit the mes- sage or make a call to the sender. You can Incoming messages also send the message back to the sender or [MM] NN New forward it to someone else. -
Page 85: Recalling Incoming Messages
RECALLING INCOMING If you wish to delete all the messages dis- MESSAGES played in this list, select the option Delete with and press DELETE. 14:12 Jake 14:12 Jake Confirm your choice by pressing DELETE 12:02 Bill 12:02 Bill 14:12 Jackie 12:02 Jackie again or cancel the operation by pressing Delete all... -
Page 86: Reading Or Processing An Old Message
2. After reading the message, when press- Incoming message processing list ing the right soft key, you are able to save the message or delete it immediate- Read ly. Select the desired option with Reply Call number press Forward Pick number 3. -
Page 87: Sending And Saving The Message
R e p l y SENDING AND SAVING THE MESSAGE Use this option, if you wish to send the mes- sage back to its sender. This way you do not need to key in the phone number or recall Send and save Send only it from phone book. - Page 88 return to previous menu level. The message will not be sent either. In this case you may FORWARDING THE MESSAGE delete some old messages to make some If you wish to send the message to someone else, you are assumed to change the destination number. free memory space or select the Send only 1.
- Page 89 C a l l Send only Use this option, if you wish to call the send- By selecting end only , you can send the er of the message. With this option you can message without saving it. The original also call the number mentioned within the message sent to you is still stored as an in- message (assuming the number in question...
- Page 90 F o r w a r d P i c k n u m b e r Use this option if you wish to send the se- With this option you can take the phone lected message to a new receiver. Forward- number of the sender and save it in your ed messages are not stored as extra copies phone book or make a call to the number in...
- Page 91 3. To save the number in the phone book, D e l e t e select the desired option with In this menu you can delete the chosen press SELECT. message from your SIM card. Confirm your choice by pressing Save in phone book LETE.
-
Page 92: Own Messages
Own messages RECALLING OWN MESSAGES In this menu you can read, edit and send 1st message starts... 1st message starts... (i.e. forward) your own, saved messages. 2nd message starts... 2nd message starts... You can also pick the phone number of the 3rd message starts... -
Page 93: Reading Or Processing Own Messages
READING OR PROCESSING R e a d OWN MESSAGES Use this option if you wish to read a mes- sage. 1. Select one of the messages with By pressing , you are able to read the 2. Press The message process- SELECT. -
Page 94: Sending And Saving The Message
SENDING AND SAVING You may also modify the text with the T9 (for further information about using the T9 THE MESSAGE text input, please see the instructions in Send and save chapter Write message). Send Send with position In case you wish to edit or shorten the mes- Postpone sage, press shortly to remove let-... - Page 95 2. (Key in the name or its initials and) Send with position press READ. By selecting Send with position , you can send a message to the operator with a re- 3. Scroll through the numbers with , if quest for position information (in this case needed.
- Page 96 F o r w a r d P i c k n u m b e r Use this option if you wish to send the se- With this option you can pick the phone lected message to a new receiver. Forward- number of the sender and save it in your ed messages are not stored as extra copies phone book or make a call to the number in...
- Page 97 3. To save the chosen number in the also key it in. Only free memory slots phone book, use and press are available. Press SAVE. LECT. D e l e t e Save in phone book In this menu you can delete chosen mes- sage from your SIM card.
-
Page 98: Broadcast Messages
Broadcast messages RECEIVING A NEW BROADCAST MESSAGE Cell broadcasts are general messages, which are broadcast to all receivers within a particular region. They may contain adver- Broadcast messages tisements, local weather reports and infor- [MM] NN New mation about road traffic, stock exchange SELECT QUIT and sport results. -
Page 99: Reading A Broadcast Message
READING A BROADCAST Message setup MESSAGE Press to enter the Message setup SELECT menu. Scroll through the sub-menus with type number type number type number In this menu you can store and change the number of your voicemail service and the QUIT READ number of the SMS service. -
Page 100: Message Type
The number must be set correctly, other- Even though the SMS service number is wise sending short messages is not possi- available on the SIM, it is possible to select ble. the option Other and store the SMS number into the phone memory. This way you can The currently active setting is shown inside speed up sending SMS messages when turn- the brackets. -
Page 101: Message Validity
MESSAGE VALIDITY VOICEMAIL NUMBER In this sub-menu you can select the length You need the voicemail number to listen to of validity for normal SMS messages, i.e. for the voice messages left for you. The same how long the SMS messages are stored in number is also used in connection with the the server of the operator. -
Page 102: Broadcast Message Setup
Broadcast message setup base station is displayed as the phone is in stand-by mode. However, all the networks Press to enter the Broadcast mes- SELECT do not use the sign. sage setup menu. Scroll through the sub- Please note that using the base station id menus with might increase the power consumption. -
Page 103: Broadcast Message Languages
D e l e t i n g m e s s a g e t y p e BROADCAST MESSAGE LANGUAGES With you can select the numbers of types, which you do not want to accept. Press the By pressing you can choose, in SELECT right soft key... -
Page 104: Call Voicemail
D e l e t i n g m e s s a g e l a n g u a g e Call voicemail English English Suomi Suomi Call voicemail Svenska Svenska Calling.. Save changes Save changes QUIT QUIT QUIT CALL In case you have already marked a language... -
Page 105: Writing Messages
Writing messages ber the indicator shows. When there is no space left, it shows 0. In this menu you can: However, please note that if you write a •write new messages long message (over 160 characters), the •edit a postponed message. message will be send in several packages (i.e. -
Page 106: Recalling Postponed Message
WRITING MESSAGES WITH T9 If you do not have a postponed message, the display is empty and you can start writ- MODE ing a new message immediately. If there is a postponed message, the selec- S e l e c t i n g l a n g u a g e tion list will be displayed. - Page 107 S w i t c h i n g c h a r a c t e r f o r m s letter. The maximum amount of characters in one word is 32. § A single word takes its form only after you have entered the whole word.
- Page 108 L o o k i n g f o r a l t e r n a t i v e w o r d s S a v i n g n e w w o r d s The T9 has an automatic saving system, which means it will learn the most frequent XXXXXx...
- Page 109 A d d i n g s p e c i a l c h a r a c t e r s XXX XX QUIT QUIT QUIT QUIT QUIT For example, when you wish to add an & - By pressing for a few seconds, a wide character into text, first press...
-
Page 110: Writing Messages With Spelling Mode
M a k i n g f i n a l c o r r e c t i o n s You can also switch into the spelling mode (by pressing XXX XXXXX XXXX WRITING MESSAGES WITH Xz_ XXXXXXXX SPELLING MODE XX XXXXXX Turn the T9 mode off by pressing... -
Page 111: Sending And Saving The Written Message
SENDING AND SAVING THE WRITTEN MESSAGE Enter number: Enter number: When the message is ready, press Bill LECT +358989999_ +35898765431_ SEARCH QUIT CLEAR SEND Send and save Send only As the display is empty, key in the receiv- Send with position er´s phone number. - Page 112 5. Press ordinates). You can save the message with SEND your own messages as well. If there is SMS transmission failure, the text Error in sending will be displayed. In this For further information about sending case, make sure the receiver´s phone num- messages, please see the instructions in the ber (including prefix) and message box previous chapter Send and save.
-
Page 113: Special Services (Sim Toolkit)
SPECIAL SERVICES •Press to cancel the operation and QUIT return to the previous menu level. (SIM TOOLKIT) •Press to return to stand-by mode. This The services offered through this menu may happen at any menu level. item are often informative, such as default language, weather forecasts, stock quotes, ticket reservations etc. -
Page 114: Main Menu
MAIN MENU The menu symbols are displayed on the up- per row. Use to scroll through the menus. To choose one of these menus, press the MENU right soft key, e.g. , and you will TELEMATICS SELECT enter the sub-menus of this menu. SETTINGS to scroll through the sub-menus. -
Page 115: Telematics Menu Tree
TELEMATICS MENU TREE ACTIVITY TELEMATICS DURATION CONTINUOUS ACTIVATE INTERVAL 0 MIN CLEAR ENTER AMOUNT OF TRACKING ACTIVITY MESSAGES: CONTINUOUS DURATION CONTINUOUS SET AMOUNT OF MSGS ENTER DURATION SET DURATION (DD-HH:MM): SET END TIME INTERVAL 0 MIN ENTER END TIME: ENTER INTERVAL IN MINUTES: ACTIVATE CLEAR... -
Page 116: Telematics
TELEMATICS All trackings cannot be turned on at the same time. E.g. if you use Tracking , you can- Telematics is a kind of electric data transfer not use Area tracking at the same time. technique, which can also be used in a wire- Please note that if the phone is temporarily less phone networks. -
Page 117: Tracking
Tracking Telematics (functions), Telematics set- tings GPS settings can be secured by a When the tracking function is turned on, security code. If the security code is re- the information of your current position is quired for accessing the menu, key in the regularly sent to the service center. -
Page 118: Selecting Duration
SELECTING DURATION As a sign of tracking turned on, the sym- bol is displayed in stand-by mode. You can select, for how long or on what terms tracking will be turned on. After that, the tracking will be turned off automatical- Turning the tracking on 1. -
Page 119: Selecting Interval
- End time: The tracking will be on un- Area tracking til the end time is reached. Key in the When the area tracking function is turned date and time, the tracking should be on, the information of your current posi- turned off. -
Page 120: Turning The Area Tracking On Or Off
TURNING THE AREA TRACKING 3. As a sign of deactivation, the service ON OR OFF center will send you a confirmation. Before you can activate the area tracking, you need to complete the other area track- SELECTING INTERVAL ing settings, such as interval, center point, 1. -
Page 121: Selecting Radius
SELECTING RADIUS tools are also available (for further in- formation about the T9, please see the 1. Select Radius with and press chapter Memo, Messages, Writing mes- CHANGE. sages). Press NEXT. 2. Key in the desired radius in 10 meters. E.g. -
Page 122: Condition Check
Condition check TURNING THE CONDITION CHECK ON OR OFF Condition check is a kind of timer, which Before you can activate the condition check provides a periodic check of your activity. If timer, you need to complete the other con- you do not respond to a check request by dition check settings, such as duration, in- the way you are supposed to respond to it,... -
Page 123: Selecting Duration
- Amount of messages (notifications): Turning the timer off The timer will be on until you have 1. Select Activity and press CHANGE. confirmed a certain amount of mes- sages (notifications). The confirma- 2. Find Clear with and press tion notifications are sent to you by 3. -
Page 124: Selecting Interval
SELECTING INTERVAL 2. Select the desired option with press The given interval, e.g. 60 minutes, indi- cates that the phone will send you confir- - Always: Confirm check request by mation notifications at intervals of 60 pressing . The confirmation will minutes. -
Page 125: Route Settings
Route settings Turning the route on 1. Select Activity and press You can request the service center to create CHANGE. a route for you. 2. Select Activate and press Route cannot be created from the phone. 3. As a sign of activation, the service center will send you a confirmation. -
Page 126: Allowing Tracking In Route Points
ALLOWING TRACKING IN ROUTE Login and logout messages POINTS By using login and logout messages you can 1. Select Tracking with and press identify yourself to the service center. The CHANGE. function is especially useful when the phone has several users. 2. -
Page 127: Settings
SETTINGS SETTINGS INCOMING CALL NORMAL DISCREET ALARM CALENDAR MESSAGES SILENT CAR KIT VIBRATION ENVIRONMENTS POWER ON TELEMATICS MSGS HANDS FREE NOISY POWER NOTIFICATIONS POWER OFF KEY TONES LIGHTS LANGUAGE PHONE SETTINGS CHANGE NAME DELETE FONT SIZE ANYKEY ANSWER CALL SETTINGS DISPLAY CONTRAST REDIAL MEMORY DATE AND TIME... -
Page 128: Environments
Settings are divided into several sub-catego- in the chapter Operation, Quick menu, En- ries: environments, power settings, phone vironments. settings, call settings, telematics settings Environments have default settings, so you and reset default settings. may use them as they are. However, adjust- •Press to enter the Settings... -
Page 129: Normal Environment
NORMAL ENVIRONMENT S o u n d s e t t i n g s f o r i n c o m i n g c a l l , a l a r m , c a l e n d a r , s h o r t In this menu you can adjust settings for nor- m e s s a g e s a n d t e l e m a t i c s mal sound environment. - Page 130 S e l e c t i n g v i b r a t i n g a l e r t Although names of the tones are sorted in groups, selecting any tone for calls, messag- Vibration can be used along with these es, the calendar and alarm is possible.
- Page 131 S o u n d s e t t i n g s f o r n o t i f i c a t i o n s •By selecting Automatic , the lights will be turned on automatically when keys are a n d k e y t o n e s pressed or important notifications are The volume has several levels to choose...
-
Page 132: Silent Environment
SILENT ENVIRONMENT CAR KIT ENVIRONMENT In this menu you can adjust settings for the In this menu you can adjust settings for the silent environment. As a sign of phone be- car kit environment. For further informa- ing totally silent, the symbol shows in tion, please see the instructions in the pre- vious chapter Normal environment. -
Page 133: Power
Power Enter time: 23:10 •Press to enter the Power SELECT menu. Scroll through the sub-menus with 11:10pm SELECT QUIT QUIT •Press to cancel the operation and QUIT return to previous menu level. Press to change the time. Key in •Press to return to stand-by mode. -
Page 134: Phone Settings
Phone settings tion is not available, English will be set as the default menu language. •Press to enter the Phone set- SELECT If the current menu language is not the one tings menu. Scroll through the sub-menus you wish to use, select the desired language with with and press... -
Page 135: Display Contrast
DISPLAY CONTRAST Please note that when setting the date and time initially, the GPS needs to be turned In this menu you can adjust display con- on and the position needs to be read from trast. a satellite. For further information about Press . -
Page 136: Automatic Keylock
AUTOMATIC KEYLOCK Please note that if the daylight-saving time is in use in your country, you need to The keypad lock is used to prevent acciden- change the time zone manually each time, tal key strokes. when shifting from winter time to summer time and vice versa. -
Page 137: Call Settings
Call settings REDIAL MEMORY If redial memory is turned on, the last di- •Press to enter the Call settings SELECT alled numbers are stored in memory. menu. Scroll through the sub-menus with In this menu you can turn the redial memo- •Press to cancel the operation and ry on or off. -
Page 138: Dialling Prefix
answer possible also without an external To turn the option off, select the item HF kit. How hands free works in automatic Press answer depends on the selected environ- Dialling prefix does not affect the emergen- ment and its hands free setting. For further cy call setup routine. -
Page 139: Telematics Settings
Telematics settings •As a SOS phone. - You can only make SOS calls and •Press to enter the Telematics SELECT send SOS messages, status messages settings menu. Scroll through the sub- cannot be sent and mobile group calls menus with cannot be made. -
Page 140: Emergency Settings
S O S a c t i v a t i o n 1. Press to enter the menu. CHANGE If the emergency button is primarily used 2. Find the desired option with for SOS calls/messages, you can determine press the way the SOS call/message will be start- Please note that in order to send status mes- sages and make mobile group calls, you... - Page 141 E m e r g e n c y c e n t e r n u m b e r s You can have two numbers (phone number and SMS) associated with each emergency This menu includes a list of emergency num- center number.
- Page 142 When storing a call number in the list of When storing an SMS number in the list emergency numbers proceed as follows: of emergency numbers proceed as fol- lows: 1. Select the option Call . Press CHANGE 1. Select the option with .
- Page 143 E m e r g e n c y c a l l n a m e •Select Wait and press Select CHANGE the waiting time with . Press You can name the emergency call. Enter the menu by pressing .
- Page 144 C a n c e l l i n g t i m e o f ples of tones. Confirm your choice by pressing e m e r g e n c y - By selecting Volume, you can adjust After pressing the emergency (SOS) button the volume, which will be used along in order to start an emergency call, the...
-
Page 145: Status Messages
STATUS MESSAGES ther information about the T9 writing mode, please see the chapter Memo, In this menu, you can view, edit and create Messages, Writing messages. status messages. The maximum amount of characters depends on the protocol deter- 4. Write the text and press SAVE. -
Page 146: Service Center Number
2. Scroll the list of mobile groups with For further information about using the mobile group function, please see the chap- 3. Highlight a line and press CHANGE ter BeneGuard button, Mobile group calls. twice. 4. Key in a new number or edit an old SERVICE CENTER NUMBER number. -
Page 147: Authorized Numbers
AUTHORIZED NUMBERS stored the number in the phone book, you can also recall it from there by The phone is allowed to send protocol mes- pressing SEARCH. sages to the authorized numbers automat- ically. Authorized numbers 3. You can scroll the list with numbers added here in this list and the 4. -
Page 148: Protocol Settings
PROTOCOL SETTINGS - If the setting is Disabled, the sender of a protocol message can be anyone, •Press to enter the Protocol set- SELECT e.g. the message can be sent from the tings menu. Scroll through the sub-menus Internet or the number can be blank. with If the service center number is set, re- ply is always sent to the service cen-... - Page 149 3. To cancel the operation and return to Select the new option with and confirm previous menu level, press your choice by pressing QUIT If you do not want to change the message M e s s a g e v a l i d i t y validity, press to return to previous QUIT...
-
Page 150: Reset Telematics Settings
RESET TELEMATICS SETTINGS Use this option if you wish to restore all telematics settings to factory default set- tings. Press . Confirm your choice by press- again. Reset default settings Use this option if you wish to restore all other settings except telematics settings to factory default settings. -
Page 151: Security
SECURITY ENTER PIN CODE: SECURITY PIN CODE REQUEST ENTER PHONE CODE: PHONE CODE REQUEST TELEMATICS ENTER SECURITY SECURITY CODE REQUEST TELEMATICS SETTINGS CODE: GPS SETTINGS SAVE CHANGES REPEAT NEW PIN ENTER PIN CODE: ENTER NEW PIN CODE: CODE: CHANGE PIN CODE REPEAT NEW PIN2 ENTER PIN2 CODE: ENTER NEW PIN2... -
Page 152: Pin Code Request
In the Security menu you can change the se- Key in the PIN code. In case of misspelling, curity codes. You can also determine, press to delete the digits left of CLEAR whether your phone requests a code or not the cursor. -
Page 153: Security Code Request
Security code request Key in the security code. In case of misspell- ing, press to delete the digits left CLEAR The security code is a security code for of the cursor. Press telematics functions and settings and GPS settings. The code is associated with the phone, not with the SIM card. -
Page 154: Change Pin2 Code
Change PIN2 code Change network code You need the PIN2 code for setting and re- The network code is a code you need for setting functions in the Call cost menu and Call barring and some other functions gov- also for using most of the FDN phone book erned by the operator. -
Page 155: Fixed Dialling Numbers (Fdn)
Fixed Dialling Numbers (FDN) allowed is otherwise the same as the num- ber stored, except for the wild characters, FDN (Fixed Dialling Numbers) is a specific which can be replaced by any number. The phone book, in which you can store only wild character alias ?-character will be dis- few numbers. -
Page 156: Network Services
NETWORK SERVICES NETWORK SERVICES CALL DIVERSIONS DIVERT ALL CALLS TO NUMBER TO VOICE MAIL CHECK DIVERT IF BUSY CLEAR DIVERT IF NO ANSWER BAR ALL OUTGOING CALLS CHECK DIVERT IF NOT CLEAR REACHABLE BAR OUTGOING INT´L CALLS CLEAR ALL BAR INT´L DIVERSIONS OUTGOING CALLS, CALL BARRINGS... -
Page 157: Call Diversions
DIVERT ALL CALLS •Press to enter the Network ser- SELECT vices menu. Scroll through the sub- menus with Divert all calls To number •Press to cancel the operation and To voice mail QUIT Check return to previous menu level. Clear QUIT •Press to return to stand-by mode. - Page 158 (e.g. in this case: Service active to Benefon As a sign of diverting all calls, an arrow ), will be displayed in the upper part of the display when the phone returns to stand-by mode.
-
Page 159: Divert If Busy
DIVERT IF BUSY Call barrings The call will be diverted when the phone is In this menu you can bar outgoing and in- busy. This menu functions as the Divert all coming calls. Please note that call barring calls menu. also affects call diversion. -
Page 160: Bar Outgoing International Calls
4. When the barring is turned on properly, the text Barring of all outgoing calls ac- Bar all outgoing calls tive will be displayed. Check Clear BAR OUTGOING INTERNATIONAL CALLS QUIT SELECT QUIT SELECT With this option you will bar all outgoing international calls. -
Page 161: Bar All Incoming Calls
BAR ALL INCOMING CALLS Call waiting With this option you can only make calls If a call is in progress and you have an in- not receive them. coming call, the network will notify you. This menu functions as the Bar all outgoing •Press to enter the... -
Page 162: Call Cost
Call cost This menu contains information on the call Last call Call cost charges. It also provides options for reset- Total calls ting the charge counter and setting a charge Maximum cost Cost unit limit for calls. These options are useful, es- Money left pecially when the user is not the subscriber. -
Page 163: Last Call Cost
LAST CALL COST TOTAL CALLS COST Use this option if you wish to check the cost Use this option if you wish to check the cost of the last call. of all preceding calls including the last call. Counter value for total calls is displayed in currency if you have determined currency and set value for unit price in the Cost unit... -
Page 164: Max. Cost
4. If you do not want to reset the counter, press the left soft key until you re- Maximum cost Enter PIN2 code turn to the previous menu level 500.00 MAX. COST QUIT QUIT CHANGE Use this option if you wish to view, set or change the credit limit for total calls. -
Page 165: Cost Unit
COST UNIT Charging information is calculated and Max units: stored as charging units. Units are indepen- Maximum call cost limit changed dent of any currency. 600_ Use this option if you wish to read and set CLEAR price for unit. After completing the setting, the call cost information will be displayed in currency instead of units. -
Page 166: Money Left
tion. Press Confirm your choice. Enter unit price: Enter currency: Converting the unit of currency may cause minor inaccuracies in the result displayed. 1.000_ FIM_ However, rounding the number does not CLEAR NEXT CLEAR affect counter values, which are stored in units. -
Page 167: Network Selection
Network selection work is not available, the list of available networks will be displayed. Select the desired option with and press Network . The phone will register with the cho- Automatic selection Network 1 sen network. Network 2 * Network N Automatic The * indicates that use of the operator is QUIT... -
Page 168: Gps
Press SELECT GPS OPERATING enter the GPS menu. GPS SETTINGS MODE Scroll through the ASSISTED GPS RESET POSITION sub-menus with Press to can- QUIT NMEA OUTPUT NAVIGATION cel the operation and AND ROUTE return to the previous CLEAR POSITION menu level. Press to return to VIEW... -
Page 169: Gps Settings
The external GPS antenna accessory can be return to previous menu level. used to receive GPS signals even when the •Press to return to stand-by mode. This phone's own GPS antenna is unable to see can be done at any menu level. satellites. -
Page 170: Assisted Gps (Agps)
• Full power : You can turn the GPS on to - If the GPS is turned off and you try to send position or send an emergency search for satellites (calculate position) message, the position sent is your old, frequently. -
Page 171: Nmea Output
When ready, press - By selecting a transferring speed you SAVE. will turn the NMEA output on. • Number of satellites : Press CHANGE When the NMEA output is turned on, the select with the number of satellites. phone will consume slightly more power. However, please note that the more satel- lites selected, the better the accuracy but the higher the charge. -
Page 172: Reset Position
Reset position Navigation and route In this menu you can reset the position in- In this menu you can view route points with formation stored in the phone. Resetting is details in navigation displays. useful if the GPS has trouble reading and Press to enter the Navigation and... -
Page 173: The Navigation Displays
THE NAVIGATION DISPLAYS CURRENT DESTINATION (NEXT POINT ON ROUTE) The compass (direction of your movement) Current destination My targ 66,45km Distance to destination Estimated time of arrival 00:32:26 Speed Course to destination 123km/h QUIT PREVIOUS/LATTER ROUTE POINT The compass (direction of your movement) Previous/Latter route point My prev 6,45km... -
Page 174: Route Point List
Route point list Press to cancel the operation and QUIT return to the previous menu level. If you have an existing route in your phone and it is activated, all route points will be displayed in this list. Coordinates 1. Press to enter the Route point SELECT... -
Page 175: Satellite Status
Satellite status Press to enter the satellite status SELECT The satellite symbol menu. The satellites displayed in this menu indicates the accura- cy of the position, i.e indicate the amount and status of individu- the more bars the al satellites. better position. -
Page 176: Battery
BATTERY FITTING THE BATTERY REMOVING THE BATTERY Release catch 1. Place the bottom of the battery into the corners at the bottom of the phone. 2. Push the battery into the phone until it Push the release catch downwards and pull locks into place. -
Page 177: Battery Types And Sizes
BATTERY TYPES AND SIZES safety. After cooling off, the phone will function properly. The batteries available for this phone are: Li-Ion At room temperature (+20°C) the •Li-Ion 900 mAh battery loses more than 15% of its capacity in a month. During the first two days the •Li-Ion 1200 mAh. -
Page 178: Mains Charger
The ideal temperature range for charging is sortment of Benefon accessories. +10°...+30°C. If charging the battery above Other charger types are introduced in the or below these temperatures the life of bat- chapter Accessories. -
Page 179: Charging Times
Charging times An empty battery Charging time depends on what kind of a charger and a battery you have in use. E.g. Charging in progress Li-Ion when charging the batteries with the A fully charged quick charger, about 70% of the battery ca- battery pacity will be charged quickly, but charging the remaining 30% takes relatively more... -
Page 180: Care And Maintenance
• Only allow service personnel authorised by turn on immediately after you have fitted Benefon to service your phone. the battery. Wait and the phone will turn on DISPOSAL after a few moments. -
Page 181: Accessories
FMC70. sories available for this phone. You may The mains charger should only be used in- also check www.benefon.com for a com- doors. Make sure that the voltage in the plete list of accessories. country which you are staying corresponds to the voltage (230 V) of the charger. -
Page 182: Cigarette Lighter Charger Ccs-71-12
CIGARETTE LIGHTER PORTABLE HANDS FREE CHARGER CCS-71-12 EHE70 The portable hands free kit is designed to make the use of the phone easier in various You can charge the phone battery with the working situations. cigarette lighter charger using your vehi- cle’s cigarette lighter. -
Page 183: Plug-In Hands Free Gma70
PLUG-IN HANDS FREE Make sure the microphone is placed in an audible position. GMA70 With the plug-in hands free car kit you can also charge the battery of your phone by us- ing your vehicle’s cigarette lighter. LIGHT HOLDER KGC77 The light holder holds your phone steadily in place when you are driving. -
Page 184: Benewin (Nmea)
BENEWIN (NMEA) The BeneWin Pro also includes some addi- tional functions, such as settings for maps, routes, and waypoints as well as settings for telematics. It depends on your phone mod- el whether you can use these functions or not. With the data adapter you can connect the phone to a computer and transfer BeneWin- based data between a PC and your phone. -
Page 185: External Gps Antenna
EXTERNAL GPS ANTENNA na can be attached to a backbag strap, as well. Important: using other than Benefon´s own external antenna break phone´s own GPS antenna or connector. CROSS-COUNTRY ANTENNA The cross-country (power) antenna can be used to replace the regular GSM antenna. It is useful in areas where the GSM network signal strength is weak. -
Page 186: Bicycle Holder
BICYCLE HOLDER BELT BAG The belt bag can be used for carrying the phone. The belt bag also protects the phone from impacts. The belt bag can be fastened to e.g. a belt or a backbag for easy carrying. The bicycle holder holds your phone steadi- ly in place on the handlebar of your bicycle so your phone can easily be viewed while riding. -
Page 187: Appendix
APPENDIX •Keep the phone dry. Liquids contain min- erals which could corrode electronic cir- cuits. If the phone gets wet, turn it off CARE AND MAINTENANCE and dry the phone and the battery imme- diately. Put the phone into an upright •Dust and dirt may damage the moving position and let it dry. -
Page 188: Blocked Sim Card
Blocked SIM card If your phone gets lost If the PIN code has been entered incorrectly Contact your network operator immediate- three times in a row, the PIN code will be ly and let them know the IMEI code to pre- locked. -
Page 189: If You Cannot Read, Store Or Modify Information In Phone Book
"Searching..." •the SIM card is correctly inserted and it is not damaged The message Searching... is displayed. You •the SIM card has not been invalidated. are outside the network operator’s cover- age area. You are in a "shadow area" where signal strength is too weak for radio com- If you cannot read, store or munication. -
Page 190: If You Have Trouble Getting The Position
For further information, please see the chapters Main menu, GPS and Quick menu, Position refresh. In any unclear situation, you are always welcome to contact your dealer, an au- thorized Benefon service centre or the network operator. APPENDIX: PROBLEMS YOU CAN SOLVE... -
Page 191: Other Character Sets
This guide includes some additional infor- be mixed in one word or message. mation and specifications applying to the Benefon Track Pro 1.1 phone model sold in Other character sets can be used whenever some market areas. alpha keys are normally available, with... - Page 192 Scroll through the selection with and press the corresponding key when the desired character is displayed. § For further information, please see the chapter Latin Memo, Alpha keys in the Benefon Track Pro 1.1 Own- er‘s Manual. Hebrew Cyrlllic Greek QUIT Press and hold for 1-2 sec.
- Page 193 CYRILLIC CHARACTERS Á á Â â Ã ã ¥ ´ Ä ä Å å ¨ ¸ Æ æ Ç ç ª º È è É é Ê ê Ë ë ² ³ ¯ ¿ Ì ì Í í Î î Ï...