Sign In
Upload
Manuals
Brands
Yamaha Manuals
Motorcycle
TW125 1999
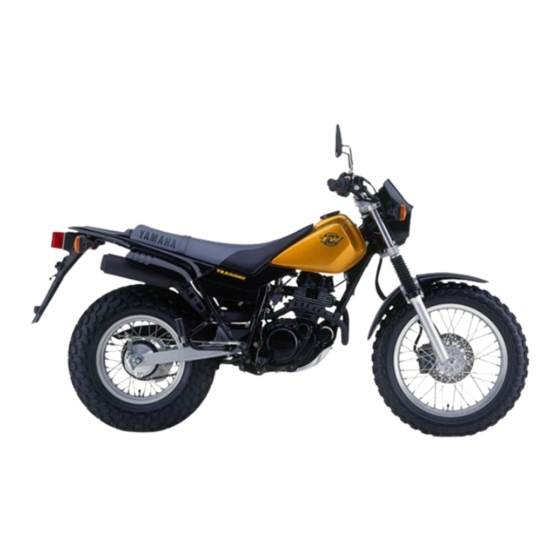
User Manuals: Yamaha TW125 1999 Lightweight Motorcycle
Manuals and User Guides for Yamaha TW125 1999 Lightweight Motorcycle. We have
1
Yamaha TW125 1999 Lightweight Motorcycle manual available for free PDF download: Service Manual
Yamaha TW125 1999 Service Manual (283 pages)
Brand:
Yamaha
| Category:
Motorcycle
| Size: 4 MB
Table of Contents
Chapter 1. General Information
10
How to Use this Manual
5
Table of Contents
10
General Information
12
Motorcycle Identification
12
Vehicle Identification Number
12
Model Code
12
Important Information
13
Preparation for Removal and Disassembly
13
Replacement Parts
13
Gaskets, Oil Seals and O-Rings
13
Lock Washers/Plates and Cotter Pins
14
Bearings and Oil Seals
14
Circlips
14
Checking the Connections
15
Special Tools
16
Chapter 2. Specifications
21
Specifications
21
General Specifications
23
Maintenance Specifications
26
Engine
26
Chassis
31
Electrical
34
Conversion Table
36
General Torque Specifications
36
Lubrication Point and Grade of Lubricant
37
Engine
37
Chassis
38
Lubrication Diagram
39
Cable Routing
41
Chapter 3. Periodic Inspections and Adjustments
48
Introduction
50
Periodic Inspections and Adjustments
50
Periodic Maintenance/Lubrication Intervals
50
Seat, Fuel Tank and Side Cover
52
Engine
53
Adjusting the Valve Clearance
53
Adjusting the Engine Idling Speed
55
Adjusting the Throttle Cable Free Play
56
Checking the Spark Plug
57
Checking the Ignition Timing
58
Measuring the Compression Pressure
59
Checking the Engine Oil Level
60
Changing the Engine Oil
61
Adjusting the Clutch Cable Free Play
63
Cleaning the Air Filter Element
64
Checking the Carburetor Joint and Intake Manifold
65
Checking the Fuel Hoses
65
Checking the Crankcase Breather Hose
66
Checking the Exhaust System
66
Chassis
68
Adjusting the Front Brake
68
Adjusting the Rear Brake
68
Checking the Brake Fluid Level
70
Checking the Brake Pads
71
Checking the Brake Shoes
71
Adjusting the Rear Brake Light Switch
71
Checking the Brake Hose
72
Bleeding the Hydraulic Brake System
72
Adjusting the Drive Chain Slack
73
Lubricating the Drive Chain
75
Checking and Adjusting the Steering Head
75
Checking the Front Fork
77
Checking the Tires
77
Checking and Tightening the Spokes
80
Checking and Lubricating the Cables
80
Lubricating the Levers and Pedals
81
Lubricating the Sidestand
81
Lubricating the Rear Suspension
81
Electrical System
82
Checking the Battery
82
Checking the Fuse
85
Replacing the Headlight Bulb
86
Adjusting the Headlight Beam
87
Overhauling the Engine Chapter 4.
91
Chapter 4. Overhauling the Engine
95
Engine
95
Lead and Exhaust Pipe
95
Carburetor and Drive Sprocket
96
Engine
97
Installing the Engine
98
Cylinder Head
99
Camshaft Sprocket Cover
99
Cylinder Head
100
Removing the Cylinder Head
101
Checking the Cylinder Head
102
Checking the Timing Chain Tensioner
103
Checking the Tappet Covers and Camshaft Sprocket Cover
103
Installing the Cylinder Head
103
Installing the Camshaft Sprocket
104
Camshaft
106
Removing the Rocker Arms and Camshaft
107
Checking the Camshafts
107
Checking the Rocker Arms and Rocker Arm Shafts
108
Installing the Camshaft and Rocker Arms
109
Valves and Valve Springs
111
Removing the Valves
112
Checking the Valves and Valve Guides
113
Checking the Valve Seats
114
Checking the Valve Springs
116
Installing the Valves
117
Cylinder and Piston
118
Removing the Piston and Piston Rings
119
Checking the Cylinder and Piston
119
Checking the Piston Rings
120
Checking the Piston Pin
121
Installing the Piston and Cylinder
122
Clutch
124
Clutch Cover
124
Clutch
125
Removing the Clutch
127
Checking the Friction Plates
127
Checking the Clutch Plates
127
Checking the Clutch Springs
128
Checking the Clutch Housing
128
Checking the Clutch Boss
128
Installing the Clutch
129
Shift Shaft and Stopper Lever
132
Checking the Shift Shaft
134
Checking the Stopper Lever
134
Installing the Segment
134
Installing the Shift Shaft
135
Oil Pump
136
Checking the Oil Pump
138
Assembling the Oil Pump
139
Installing the Oil Pump
139
Installing the Primary Drive Gear
140
Balancer Gear
141
Removing the Balancer Driven Gear
141
Checking the Balancer Drive Gear
142
Assembling the Balancer Drive Gear
142
Installing the Balancer Driven Gear
143
Starter Clutch and Generator
144
Generator Cover
144
Stator Coil
145
Starter Clutch and Generator
145
Removing the Generator Rotor
147
Checking the Starter Clutch
147
Installing the Starter Clutch
148
Installing the Generator Rotor
149
Crankshaft Crankcase
150
Crankshaft and Balancer Weight
152
Disassembling the Crankcase
153
Removing the Plunger Seal
153
Checking the Crankshaft and Connecting Rod
154
Checking the Bearings and Oil Seals
155
Checking the Timing Chain, Camshaft Sprocket, and Timing Chain Guides
155
Installing the Plunger Seal
155
Installing the Crankshaft
156
Assembling the Crankcase
156
Transmission
157
Transmission, Shift Drum Assembly and Shift Forks
157
Drive Axle and Main Axle
158
Removing the Transmission
159
Checking the Shift Forks
159
Checking the Shift Drum Assembly
159
Chapter 6. Chassis
175
Front Wheel and Brake Disc
177
Removing the Front Wheel
179
Checking the Front Wheel
179
Checking the Brake Disc
182
Installing the Front Wheel
183
Adjusting the Front Wheel Static Balance
184
Rear Wheel and Rear Brake
186
Rear Wheel
186
Rear Brake and Rear Wheel Sprocket
188
Removing the Rear Wheel
191
Checking the Rear Wheel
191
Checking and Replacing the Rear Wheel Sprocket
192
Checking the Brake
192
Assembling the Brake Shoe Plate
193
Installing the Rear Wheel
194
Adjusting the Rear Wheel Static Balance
194
Front Brake
195
Front Brake Pads
195
Replacing the Front Brake Pads
196
Front Brake Master Cylinder
199
Disassembling the Front Brake Master Cylinder
201
Checking the Front Brake Master Cylinder
201
Master Cylinder
202
Front Brake Caliper
204
Disassembling the Front Brake Caliper
206
Checking the Front Brake Caliper
206
Assembling and Installing the Front Brake
207
Caliper
207
Front Fork
210
Removing the Front Fork Legs
212
Disassembling the Front Fork Legs
212
Checking the Front Fork Legs
213
Assembling the Front Fork Legs
214
Installing the Front Fork Legs
217
Handlebar
218
Removing the Handlebar
220
Checking the Handlebar
220
Installing the Handlebar
221
Steering Head
223
Removing the Lower Bracket
225
Checking the Steering Head
225
Installing the Steering Head
226
Rear Shock Absorber and Swingarm
227
Handling the Rear Shock Absorber
228
Disposing of a Rear Shock Absorber
228
Removing the Rear Shock Absorber Assembly
229
Removing the Drive Chain
229
Removing the Swingarm
230
Checking the Rear Shock Absorber Assembly
231
Checking the Swingarm
231
Checking the Drive Chain
232
Installing the Rear Shock Absorber Assembly
233
Installing the Swingarm
234
Installing the Drive Chain
234
Rear Shock Absorber and Swingarm
235
Chapter 7. Electrical
238
Electrical Components
240
Switches
241
Checking Switch Continuity
241
Switch Continuity Inspection
242
Checking the Bulbs and Bulb Sockets
243
Types of Bulbs
243
Checking the Condition of the Bulbs
243
Checking the Condition of the Bulb Sockets
245
Ignition System
246
Circuit Diagram
246
Troubleshooting
247
Electric Starting System
251
Circuit Diagram
251
Starting Circuit Cutoff System Operation
252
Troubleshooting
253
Starter Motor
256
Charging System
259
Circuit Diagram
259
Troubleshooting
260
Lighting System
262
Circuit Diagram
262
Troubleshooting
263
Checking the Lighting System
264
Signal System
267
Circuit Diagram
267
Troubleshooting
268
Checking the Signaling System
269
Faulty Gear Shifting
278
Poor Braking Performance
280
Unstable Handling
280
Advertisement
Advertisement
Related Products
YAMAHA TW125
Yamaha TW125 2003
Yamaha TW200C
YAMAHA TW200
YAMAHA TW200E
Yamaha TW200L1C
Yamaha TW200N 2000
Yamaha TW200R1 2024
Yamaha TW2000G1 2015
Yamaha TW200F1C
Yamaha Categories
Motorcycle
Musical Instrument
Electronic Keyboard
Receiver
Amplifier
More Yamaha Manuals
Login
Sign In
OR
Sign in with Facebook
Sign in with Google
Upload manual
Upload from disk
Upload from URL