Sign In
Upload
Manuals
Brands
VADDIO Manuals
Security Camera
RoboSHOT USB Series
VADDIO RoboSHOT USB Series Manuals
Manuals and User Guides for VADDIO RoboSHOT USB Series. We have
5
VADDIO RoboSHOT USB Series manuals available for free PDF download: Complete Manual, Installation And User Manual, Installation Manual
VADDIO RoboSHOT USB Series Complete Manual (139 pages)
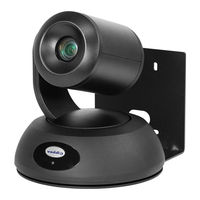
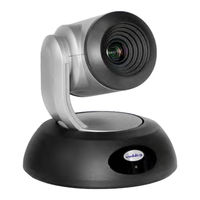
CAT-5 Professional PTZ Camera Systems
Brand:
VADDIO
| Category:
Security Camera
| Size: 4 MB
Table of Contents
Table of Contents
2
Overview
7
What's in this Guide
8
Camera Features
8
Quick-Connect Features
9
Quick-Connect Universal CCU (QCCU)
9
Quick-Connect USB (QUSB)
9
Quick-Connect USB Mini (Qmini)
10
Quick-Connect DVI/HDMI-SR (QDVI)
10
Quick-Connect SR (QSR)
10
Unpacking the Camera System
11
A Quick Look at the Camera
21
Front of the Camera
21
Back of the Camera - Roboshot 12 and Roboshot 30
22
Back of the Camera - Roboshot 12E CAT-5 and Roboshot 30E CAT-5
23
A (Quick) Look at the Quick-Connect Devices
24
Quick-Connect Universal CCU Interface
25
Quick-Connect USB Interface
27
Quick-Connect USB Mini Interface
28
Quick-Connect DVI/HDMI-SR Interface
29
Quick-Connect SR Interface
30
Installing the Camera and Quick-Connect Device
31
Don't Void Your Warranty
31
Before You Start
32
Installing the Wall Mount
32
About Ceiling-Mounted Cameras
32
Video Resolution Setting
33
Camera Behavior Settings - Roboshot 12 and Roboshot 30
34
Switch Settings for the Universal CCU
35
Switch Settings for the Quick-Connect USB
35
RS-232 Serial Communication Settings
36
RS-232 Connector Pin-Out
36
Cabling Notes
37
Connecting the Camera
37
Basic Connections: Roboshot QCCU System
38
Basic Connections: Roboshot QUSB System
39
Basic Connections: Roboshot Qmini System
40
Basic Connections: Roboshot QDVI System
41
Basic Connections: Roboshot QSR System
42
Basic Connections: Roboshot AVBMP
42
Installing the Camera
43
Installing the Quick-Connect Device
44
Powering up the Camera
44
Status Light
44
Using the IR Remote
45
IR Remote Cheat Sheet
45
IR Remote Details
46
Storing a Preset Using the Remote
46
Clearing a Preset Using the Remote
46
Web Interface
47
Getting the Camera's IP Address
47
Accessing the Web Interface
47
Browser Support
47
User Access
48
Administrative Access
49
Compact Menu View
49
Working with the Quick-Connect Device's Web Interface
50
Getting the Quick-Connect Device's IP Address
50
Quick-Connect USB Mini: Video Mode Vs. Control Mode
50
Accessing the Web Interface for the Quick-Connect USB or Quick-Connect USB Mini
51
Web Interface Cheat Sheet
52
System Administration
54
For Non-DHCP Environments: Configuring the Device with a Static IP Address for Initial Installation
55
Configuring the Quick-Connect USB Device with a Static IP Address
57
Changing the Camera's Hostname
59
Changing the Quick-Connect Device's Hostname
59
Optional for DHCP Environments: Changing from a DHCP Address to a Static IP Address
60
Specifying Time Zone and NTP Server
61
Managing Access and Passwords
62
Disabling Telnet Access
62
Enabling or Requiring HTTPS
63
Changing the Admin Password on the Quick-Connect Device
64
Adding Room Information to the Camera's Web Interface
65
Adding Room Information to the Quick-Connect Device's Web Interface
65
Saving (Exporting) or Restoring (Importing) a Camera Configuration
66
Installing a Camera Firmware Update
67
Installing a Quick-Connect USB or Quick-Connect USB Mini Firmware Update
68
Installing a Firmware Update on the Universal CCU
69
Rebooting the Camera
70
Rebooting the Quick-Connect Device
70
Contacting Vaddio Technical Support
71
Accessing the Diagnostic Logs
71
Configuring Camera Behavior
72
Setting the Custom Home Position and Other Preset Shots
72
Renaming Presets and Custom CCU Scenes
73
Initial Lighting and Color Settings
74
Lighting Adjustments
75
Fine-Tuning Image Quality and Color
75
Lighting and Image Quality Cheat Sheet
76
Color Adjustment Cheat Sheet
77
Saving Color and Lighting Settings
77
Adjusting the Focus
78
Speed Adjustments
78
About Tri-Synchronous Motion
78
Setting the Speed for Manual Movements
79
Setting the Speed of Movements to Presets
79
Adjusting Tri-Synchronous Motion Speed
80
Setting the Direction for Camera Movements
81
Reading the Camera's Switches
82
Basic Camera Settings for Roboshot 12E CAT-5 and Roboshot 30E CAT-5
83
Additional Camera Behavior Settings
84
Configuring Streaming (Quick-Connect USB or Quick-Connect USB Mini)
84
Managing Lighting and Color Adjustments with the Universal CCU
87
A Quick Look at the Menu Controls
87
Adjusting Color
89
Setting the Default Lighting Adjustments
89
Adjusting Light Level and Detail
89
Working with Custom Scenes
90
Adjusting for Cable Length
90
Adjusting the Front Panel Display
91
Operating the Camera from the Web Interface
92
Switching the Camera off or on (Standby)
92
Stop or Resume Sending Video (Mute)
92
Moving the Camera
93
Zooming in or out
93
Moving the Camera to a Preset Position
93
Adjusting the Color and Lighting
93
Telnet Command Reference
94
Camera Home
95
Camera Pan
95
Camera Tilt
96
Camera Zoom
97
Camera Focus
98
Camera Preset
99
Camera Ccu Get
100
Camera Ccu Set
101
Camera Ccu Scene
102
Camera Led
102
Camera Standby
103
Network Settings Get
103
Network Ping
104
System Reboot
104
System Factory-Reset
105
Version
105
History
106
Help
106
Exit
106
RS-232 Serial Command Reference
107
Camera Movement, Zoom, and Focus Commands
107
Movement, Zoom, and Focus Inquiry Commands
109
Color and Light Management Commands
110
Shutter Speed Values (Cam_Shutter)
112
Color and Light Management Inquiry Commands
114
CCU Scene Commands for the Universal CCU
114
Other Commands
115
Other Inquiry Commands
115
Specifications
116
Cameras
116
Quick-Connect Devices
117
Troubleshooting and Care
119
Check the Status Light First
119
Check the Cables Next
119
Power/Responsiveness Issues
120
Video Issues
121
Camera Control and Other Issues
122
Status Light
122
Restoring Factory Settings from the Web Interface
123
Restoring Factory Default Settings Via Hardware
123
Operation, Storage, and Care
124
Compliance and Conformity Statements
125
FCC Part 15 Compliance
125
Advertisement
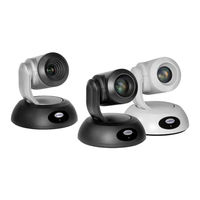
VADDIO RoboSHOT USB Series Complete Manual (105 pages)
USB Enterprise-Class PTZ Conferencing Cameras
Brand:
VADDIO
| Category:
Security Camera
| Size: 2 MB
Table of Contents
Table of Contents
2
Overview
6
What's in this Guide
6
Features
7
Unpacking the Camera
8
A Quick Look at the Camera
10
Front of the Camera
10
Back of the Camera - Roboshot 12 USB
11
Back of the Camera - Roboshot 12E USB and Roboshot 30E USB
12
Installation
13
Don't Void Your Warranty
13
Before You Install the Camera
13
Installing the Wall Mount
14
About Ceiling-Mounted Cameras
14
Video Resolution Setting
15
Camera Behavior Settings - Roboshot 12 USB
16
RS-232 Serial Communication Settings
17
RS-232 Connector Pin-Out
17
Cabling Notes
18
Connecting the Camera
19
Basic Connections - Roboshot 12 USB
19
Basic Connections - Roboshot 12E USB or Roboshot 30E USB
20
Installing the Camera
21
Powering up the Camera
22
Status Light
22
Using the Remote Control
23
Quick Reference
23
IR Remote Details
24
Storing a Preset Using the Remote
24
Clearing a Preset Using the Remote
24
Web Interface
25
Getting the Camera's IP Address
25
Accessing the Web Interface
25
Browser Support
25
User Access
26
Administrative Access
27
Compact Menu View
27
Web Interface Quick Reference
28
System Administration
29
For Non-DHCP Environments: Configuring the Device with a Static IP Address for Initial Installation
29
Changing the Camera's Hostname
32
Optional for DHCP Environments: Changing from a DHCP Address to a Static IP Address
32
Specifying Time Zone and NTP Server
33
Managing Access and Passwords
34
Disabling Telnet Access
34
Enabling or Requiring HTTPS
35
Adding Room Information to the Screen
36
Saving (Exporting) or Restoring (Importing) a Configuration
37
Installing a Firmware Update
38
Rebooting the Camera
39
Contacting Vaddio Technical Support
40
Viewing Diagnostic Logs
40
Configuring Camera Behavior
41
Setting the Custom Home Position and Other Preset Shots
41
Renaming Presets and Custom CCU Scenes
42
Initial Lighting and Color Settings
42
Lighting Adjustments
43
Adjusting the Color and Image Quality Settings
43
Lighting and Image Quality Quick Reference
44
Color Adjustment Quick Reference
45
Saving Color and Lighting Settings
45
Adjusting the Focus
46
Speed Adjustments
47
About Tri-Synchronous Motion
47
Setting the Speeds for Manual Movements
47
Setting the Speeds of Movements to Presets
48
Adjusting Tri-Synchronous Motion Speed
48
Setting the Direction for Camera Movements
49
Configuring Streaming
50
About Streaming
50
Enabling or Disabling Streaming
50
Configuring USB Streaming
51
Setting up IP Streaming in Easy Mode
52
Setting up IP Streaming in Custom Mode
53
RTSP Streaming Protocol and URL
53
Configuring RTMP Streaming
54
Advanced: Changing MTU
55
Reading the Camera's Switches
56
Basic Camera Settings - Roboshot 12E USB and Roboshot 30E USB
57
Software-Controlled Video Output Resolution Setting
58
Additional Camera Settings
59
Operating the Camera
61
Switching the Camera off or on (Standby)
61
Stopping or Resuming Video
61
Managing the Camera Ready State
61
Moving the Camera
62
Zooming in or out
62
Moving the Camera to a Preset Position
62
Telnet Serial Command API
63
Camera Home
64
Camera Pan
64
Camera Tilt
65
Camera Zoom
66
Camera Focus
67
Camera Preset
68
Camera Ccu Get
69
Camera Ccu Set
70
Camera Ccu Scene
71
Camera Led
71
Camera Standby
72
Streaming Ip Enable
72
Streaming Settings Get
73
Network Settings Get
74
Network Ping
74
System Reboot
75
System Factory-Reset
75
History
76
Version
76
Help
76
Exit
77
RS-232 Control
78
Camera Movement, Zoom, and Focus Commands
78
Movement, Zoom, and Focus Inquiry Commands
80
Color and Light Management Commands
81
Shutter Speed Values (Cam_Shutter)
83
Color and Light Management Inquiry Commands
85
Other Commands
86
Other Inquiry Commands
86
Specifications
88
Troubleshooting and Care
89
Status Light
90
Restoring Default Camera Settings
90
Operation, Storage, and Care
91
Compliance and Conformity Statements - Roboshot 12E USB and Roboshot 30E USB
92
FCC Part 15 Compliance
92
ICES-003 Compliance
92
European Compliance
93
Compliance and Conformity Statements - Roboshot 12 USB
94
FCC Part 15 Compliance
94
ICES-003 Compliance
94
European Compliance
95
Warranty and Return Policy
96
Photo Credits
100
Index
101
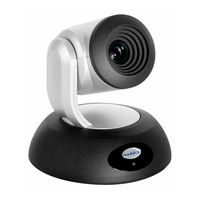
VADDIO RoboSHOT USB Series Complete Manual (103 pages)
Enterprise-Class PTZ Conferencing Cameras
Brand:
VADDIO
| Category:
Security Camera
| Size: 1 MB
Table of Contents
Table of Contents
2
Overview
6
What's in this Guide
6
Features
7
Unpacking the Camera
8
A Quick Look at the Camera
10
Front of the Camera
10
Back of the Camera - Roboshot 12 USB
11
Back of the Camera - Roboshot 12E USB and Roboshot 30E USB
12
Installation
13
Don't Void Your Warranty
13
Before You Install the Camera
13
Installing the Wall Mount
14
About Ceiling-Mounted Cameras
14
Video Resolution Setting
15
Camera Behavior Settings - Roboshot 12 USB
16
RS-232 Serial Communication Settings
17
RS-232 Connector Pin-Out
17
Cabling Notes
18
Connecting the Camera
19
Basic Connections - Roboshot 12 USB
19
Basic Connections - Roboshot 12E USB or Roboshot 30E USB
20
Installing the Camera
21
Powering up the Camera
22
Status Light
22
Using the Remote Control
23
Quick Reference
23
IR Remote Details
24
Storing a Preset Using the Remote
24
Clearing a Preset Using the Remote
24
Web Interface
25
Getting the Camera's IP Address
25
Accessing the Web Interface
25
Browser Support
25
User Access
26
Administrative Access
27
Compact Menu View
27
Web Interface Quick Reference
28
System Administration
29
For Non-DHCP Environments: Configuring the Device with a Static IP Address for Initial Installation
29
Changing the Camera's Hostname
32
Optional for DHCP Environments: Changing from a DHCP Address to a Static IP Address
32
Specifying Time Zone and NTP Server
33
Managing Access and Passwords
34
Disabling Telnet Access
34
Enabling or Requiring HTTPS
35
Adding Room Information to the Screen
36
Saving (Exporting) or Restoring (Importing) a Configuration
37
Installing a Firmware Update
38
Rebooting the Camera
39
Contacting Vaddio Technical Support
40
Viewing Diagnostic Logs
40
Configuring Camera Behavior
41
Setting the Custom Home Position and Other Preset Shots
41
Renaming Presets and Custom CCU Scenes
42
Initial Lighting and Color Settings
42
Lighting Adjustments
43
Adjusting the Color and Image Quality Settings
43
Lighting and Image Quality Quick Reference
44
Color Adjustment Quick Reference
45
Saving Color and Lighting Settings
45
Adjusting the Focus
46
Speed Adjustments
47
About Tri-Synchronous Motion
47
Setting the Speeds for Manual Movements
47
Setting the Speeds of Movements to Presets
48
Adjusting Tri-Synchronous Motion Speed
48
Setting the Direction for Camera Movements
49
Configuring Streaming
50
About Streaming
50
Enabling or Disabling Streaming
50
Configuring USB Streaming
51
Setting up IP Streaming in Easy Mode
52
Setting up IP Streaming in Custom Mode
53
RTSP Streaming Protocol and URL
53
Configuring RTMP Streaming
54
Advanced: Changing MTU
55
Reading the Camera's Switches
56
Basic Camera Settings - Roboshot 12E USB and Roboshot 30E USB
57
Additional Camera Settings
58
Operating the Camera
59
Switching the Camera off or on (Standby)
59
Stopping or Resuming Video
59
Managing the Camera Ready State
59
Moving the Camera
60
Zooming in or out
60
Moving the Camera to a Preset Position
60
Telnet Serial Command API
61
Camera Home
62
Camera Pan
62
Camera Tilt
63
Camera Zoom
64
Camera Focus
65
Camera Preset
66
Camera Ccu Get
67
Camera Ccu Set
68
Camera Ccu Scene
69
Camera Led
69
Camera Standby
70
Streaming Ip Enable
70
Streaming Settings Get
71
Network Settings Get
72
Network Ping
72
System Reboot
73
System Factory-Reset
73
History
74
Version
74
Help
74
Exit
75
RS-232 Control
76
Camera Movement, Zoom, and Focus Commands
76
Movement, Zoom, and Focus Inquiry Commands
78
Color and Light Management Commands
79
Shutter Speed Values (Cam_Shutter)
81
Iris Gain and Gain Limit Values (Cam_Gain)
83
Color and Light Management Inquiry Commands
83
Other Commands
84
Other Inquiry Commands
84
Specifications
86
Troubleshooting and Care
87
Status Light
88
Restoring Default Camera Settings
88
Operation, Storage, and Care
89
Compliance and Conformity Statements - Roboshot 12E USB and Roboshot 30E USB
90
FCC Part 15 Compliance
90
ICES-003 Compliance
90
European Compliance
91
Compliance and Conformity Statements - Roboshot 12 USB
92
FCC Part 15 Compliance
92
ICES-003 Compliance
92
European Compliance
93
Warranty and Return Policy
94
Photo Credits
98
Index
99
Advertisement
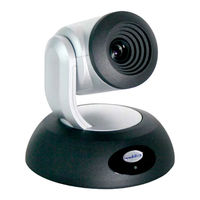
VADDIO RoboSHOT USB Series Installation And User Manual (44 pages)
HD Robotic PTZ Camera Systems featuring the Quick-Connect DVI/HDMI SR Interface
Brand:
VADDIO
| Category:
Security Camera
| Size: 1 MB
Table of Contents
Table of Contents
3
Overview
4
Unpacking the Camera Systems
6
Image: Roboshot 12 HD PTZ Camera
7
Image: Roboshot 30 HD PTZ Camera
8
Image: Roboshot 12 and 30 Rear Panel Connections
9
Quick-Connect DVI/HDMI SR Interface
10
Image: Rear Panel Connectors and Features
10
Image: Quick-Connect DVI/HDMI SR Interface Front Panel
10
System Configuration Example
11
Diagram: Basic Connectivity Example of the Roboshot and the Quick Connect SR
11
Pre-Installation
11
Setting the Roboshot Camera HD Resolution
12
Drawing: Dip Switch and Resolution Label on the Bottom of the Roboshot
12
Setting the Roboshot Switch Gear
12
Dip Switch Settings Further Explained (DSSFE)
12
Installation Basics
13
Controlling the Camera
14
IR Remote Commander
14
Telnet Control
14
The Screen Shot Tour
15
Compatible Web Browsers
15
DHCP IP Set-Up (Dynamic Host Configuration Protocol)
15
Static IP Set-Up
15
Screen Shot: Login
15
Screen Shot: Camera Control Page
16
Screen Shot: Storing Presets
17
Screen Shot: Admin Login from the Camera Control Page
18
Screen Shot: Admin Menu - Camera Settings
19
Screen Shot: Admin Menu - Room Labels
20
Screen Shot: Admin Menu - DHCP Network Configuration
21
Screen SHOT: Admin Menu - Static IP Configuration
21
Screen SHOT: Admin Menu - Security
22
Screen Shot: Admin Menu - Diagnostics
22
Screen Shot: Admin Menu - System
23
Screen Shot: Admin Menu - Update Confirmation
24
Screen Shot: Admin Menu - Update in Progress
24
Screen Shot - Admin Menu - Help
25
General Specifications
26
Communication Specification
27
Roboshot Command List
27
Telnet Serial Command API
32
Telnet Command List
32
Compliance and CE Declaration of Conformity - Roboshot HD PTZ Cameras
41
Compliance and CE Declaration of Conformity - Quick-Connect DVI/HDMI SR Interface
42
Warranty Information
43
VADDIO RoboSHOT USB Series Installation Manual (30 pages)
USB Enterprise-Class PTZ Conferencing Cameras
Brand:
VADDIO
| Category:
Security Camera
| Size: 0 MB
Table of Contents
Table of Contents
2
Overview
3
What's in this Guide
3
Features
3
Unpacking the Camera
4
A Quick Look at the Camera
6
Front of the Camera
6
Back of the Camera - Roboshot 12 USB
7
Back of the Camera - Roboshot 12E USB and Roboshot 30E USB
8
Installation
9
Don't Void Your Warranty
9
Before You Install the Camera
9
Installing the Wall Mount
10
About Ceiling-Mounted Cameras
10
Video Resolution Setting
11
Camera Behavior Settings - Roboshot 12 USB
12
RS-232 Serial Communication Settings
13
RS-232 Connector Pin-Out
13
Cabling Notes
14
Connecting the Camera
15
Basic Connections - Roboshot 12 USB
15
Basic Connections - Roboshot 12E USB or Roboshot 30E USB
16
Installing the Camera
17
Powering up the Camera
18
Status Light
18
Next Steps
18
Operation, Storage, and Care
18
Compliance and Conformity Statements - Roboshot 12E USB and Roboshot 30E USB
19
FCC Part 15 Compliance
19
ICES-003 Compliance
19
European Compliance
20
Compliance and Conformity Statements - Roboshot 12 USB
21
FCC Part 15 Compliance
21
ICES-003 Compliance
21
European Compliance
22
Warranty and Return Policy
23
Photo Credits
27
Index
28
Advertisement
Related Products
VADDIO RoboSHOT SDI Professional Series
VADDIO RoboSHOT HDBT Series
VADDIO RoboSHOT HDMI Series
VADDIO RoboSHOT 12E HDMI
VADDIO RoboSHOT QDVI
VADDIO RoboSHOT 30 Series
VADDIO ROBOSHOT12
VADDIO ROBOSHOT30
VADDIO RoboSHOT 12 Series
VADDIO RoboSHOT QSR
VADDIO Categories
Security Camera
Conference System
IP Camera
Camera Accessories
Security System
More VADDIO Manuals
Login
Sign In
OR
Sign in with Facebook
Sign in with Google
Upload manual
Upload from disk
Upload from URL