Sign In
Upload
Manuals
Brands
Toshiba Manuals
Laptop
1105
Toshiba 1105 Manuals
Manuals and User Guides for Toshiba 1105. We have
2
Toshiba 1105 manuals available for free PDF download: User Manual, Operating Instructions Manual
Toshiba 1105 User Manual (242 pages)
1105 User's Guide
Brand:
Toshiba
| Category:
Laptop
| Size: 3.95 MB
Table of Contents
3
Fcc Notice
4
Telephone Company Procedures
4
Type of Service
5
Fax Branding
5
If Problems Arise
11
Table of Contents
19
Introduction
19
This Guide
20
Safety Icons
21
Other Icons Used
21
Other Documentation
22
Service Options
23
Chapter 1: Finding Your Way Around
23
Making Sure You Have Everything
24
Front with the Display Closed
25
Back
26
Right Side
27
Left Side
28
Front with the Display Open
29
Indicator Lights
30
System Indicator Panel
31
Underside
33
Chapter 2: Getting Started
33
Selecting a Place to Work
33
Creating a Computer-Friendly Environment
34
Keeping Yourself Comfortable
37
Precautions
39
Setting Up Your Computer
39
Setting Up Your Software
40
Registering Your Computer with Toshiba
41
Adding External Devices
42
Connecting the AC Adapter
43
Charging the Main Battery
44
Using the Computer for the First Time
44
Opening the Display Panel
44
Turning On the Power
45
Using the Touchpad
46
Control Buttons
46
Disabling or Enabling the Touchpad
47
Installing Additional Memory (Optional)
51
Removing a Memory Module
51
Connecting a Mouse
52
Connecting a Printer
53
Setting Up a Printer
56
Turning Off the Computer
57
Caring for Your Computer
57
Cleaning the Computer
57
Moving the Computer
58
Using a Computer Lock
59
Chapter 3: Learning the Basics
59
Computing Tips
60
Using the Keyboard
61
Character Keys
61
Ctrl, Fn, and Alt Keys
61
Function Keys
62
Windows Special Keys
62
Overlay Keys
64
Starting a Program
64
Saving Your Work
65
Printing Your Work
66
Using Diskettes
66
Inserting and Removing Diskettes
66
Caring for Diskettes
67
Backing Up Your Files
68
Using Your DVD Drive
69
DVD-ROM Drive Components
70
Inserting a Disc
72
Playing an Audio CD
73
Playing a DVD
73
Viewing the Contents of a CD or DVD
73
Removing a Disc with the Computer On
74
Removing a Disc with the Computer Off
74
Caring for Cds and Dvds
75
Setting Up for Communications
75
Connecting the Modem to a Phone Line
76
Connecting Your Computer to a Network
76
Powering Down the Computer
77
Turn Off Command
77
Hibernation Command
78
Standby Command
79
Using Turn Off
79
Turning Off More Quickly
80
Starting Again After Turn Off
80
Using Hibernation
82
Starting Again From Hibernation Mode
82
Using Standby
83
Going Into Standby Mode More Quickly
84
Starting Again From Standby
84
Toshiba's Online Resources
85
Chapter 4: Mobile Computing
85
Toshiba's Energy-Saver Design
86
Running the Computer On Battery Power
86
Power Management
87
Charging the Battery
88
Charging the RTC Battery
88
Monitoring Battery Power
89
Determining Remaining Battery Power
90
Conserving Battery Power
91
What to Do When the Battery Runs Low
91
Setting Battery Alarms
92
Changing the Main Battery
92
Removing the Battery From the Computer
93
Taking Care of Your Battery
94
Maximizing Battery Life
95
Disposing of Used Batteries Safely
96
Traveling Tips
97
Chapter 5: Getting to Know the Windows
97
XP Operating System
98
Lesson 1: Exploring the Desktop
98
Finding Your Way Around the Desktop
100
Windows ® XP File System
101
Lesson 2: Using the Touchpad and Control Buttons Together
104
Lesson 3: Learning about the Internet
105
Lesson 4: Creating a New Document
106
Lesson 5: Creating a New Folder
107
Lesson 6: Starting Programs
109
Lesson 7: Resizing, Repositioning, and Hiding Windows
110
Using the Taskbar
110
Minimizing and Maximizing Windows
111
Resizing and Moving Windows
113
Lesson 8: Closing Programs
114
Lesson 9: Creating Shortcuts
114
Creating a Shortcut to the Calculator
115
Creating a Shortcut to the Character Map
117
Lesson 10: Changing the Screen Saver
119
Lesson 11: Setting the Date and Time
120
Lesson 12: Removing Objects From the Desktop
122
Lesson 13: Using System Restore
123
Lesson 14: if I Am Lost, What Do I Do
123
Windows ® XP Help and Support Center
125
Using the Online Tours and Tutorials
126
Lesson 15: Turning Off Your Computer
127
Chapter 6: Exploring Your Options
127
Windows XP Special Features
128
Personalizing Your Desktop
128
Customizing the Taskbar
129
Bringing the World to Your Desktop
130
Changing Desktop and Browsing Style
131
Personalizing Individual Windows
132
Customizing Window Toolbars
133
Displaying Information about Each Folder
134
Using Your Computer at the Office
135
Setting Up for Communications
136
Connecting the Modem to a Telephone Line
136
Setting Up a Dial-Up Connection
137
Exchanging Data with Another Computer
137
Transferring Files Using a Parallel Port Connection
138
Getting Help Transferring Files
138
Connecting to the Internet
139
An Overview of Using the Internet
139
The Internet
140
The World Wide Web
140
Internet Service Providers
140
Signing Up with an Internet Service Provider
141
Surfing the Internet
141
Internet Features
142
Uploading and Downloading Files On the Internet
142
Exploring Video Features
143
Display Settings Hot Key
144
Exploring Audio Features
144
Recording Sounds
144
Using a Microphone
145
Adjusting Recording Settings
146
Using External Speakers or Headphones
146
Connecting a Monitor, Keyboard and Mouse
147
Changing the Display Properties Setting
148
Using PC Cards
148
PC Card Supporting Software
148
Inserting PC Cards
149
Removing PC Cards
150
Hot Swapping
151
Chapter 7: Windvd
151
Playing Dvds
153
Using the Windvd Toolbar
153
Using the Windvd Status Bar
154
Using the Windvd Control Panel
155
Using the Control Panel Playback Buttons
158
Maximizing the Video Window
158
Using Playlists
159
Creating Playlists
160
Loading and Playing Playlists
160
Resuming Normal Playback After Using Playlists
160
Customizing Windvd
161
Setting General Properties
163
Setting Audio Properties
164
Setting Display Properties
165
Customizing the Control Panel
167
Using Windvd Advanced Features
172
Zooming in
173
Panning
173
Zooming Out
173
Adjusting the Color Balance
174
Launching an Internet Browser From Windvd
174
Getting Help
174
Exiting Windvd
175
Chapter 8: if Something Goes Wrong
178
Problems When You Turn On the Computer
179
The Windows ® Operating System Is Not Working
179
Using Startup Options to Fix Problems
180
Internet Problems
181
The Windows XP Operating System Can Help You
181
Resolving a Hardware Conflict
182
A Plan of Action
182
Resolving Hardware Conflicts On Your Own
184
Fixing a Problem with Device Manager
186
Memory Card Problems
186
Power and the Batteries
188
Keyboard Problems
188
Display Problems
190
Disk Drive Problems
192
DVD-ROM Drive Problems
201
Sound System Problems
201
PC Card Problems
204
Printer Problems
205
Modem Problems
206
Develop Good Computing Habits
207
If You Need Further Assistance
207
Before You Call
208
Contacting Toshiba
209
Other Toshiba Internet Web Sites
210
Toshiba's Worldwide Offices
213
Appendix A: Hot Keys
213
Instant Password Security
214
Sound
214
Display Modes
214
Keyboard Hot Keys
215
Appendix B: Power Cable Connectors
217
Glossary
233
Index
Advertisement
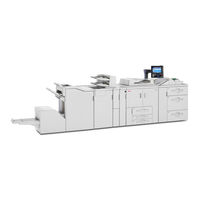
Toshiba 1105 Operating Instructions Manual (224 pages)
Toshiba E-studio 905/1105/1355
Brand:
Toshiba
| Category:
All in One Printer
| Size: 9.34 MB
Table of Contents
1
About This Machine
3
Documentation for This Machine
4
Table of Contents
10
Manuals for This Machine
12
Manuals List
13
What You Can Do with This Machine
13
Using This Machine As a Copier
14
Using This Machine As a Printer
14
Utilizing Stored Documents
15
Connecting Two Machines for Copying
16
Using the Scanner in a Network Environment
16
Administrating the Machine/Protecting Documents (Security Functions)
17
Monitoring the Machine Via Computer
17
Preventing an Unauthorized Copy
19
Disclaimer Notice
20
Notice
20
Important
21
How to Read This Manual
21
Symbols
21
Machine Types
22
Names of Major Items
22
Notes
23
Safety Information
23
Safety During Operation
23
Safety Precautions to Be Followed
25
Handling the Main Machine
26
Handling the Machine's Interior
27
Handling the Machine's Supplies
29
Safety Labels of This Machine
29
Positions of WARNING and CAUTION Labels
43
Power Switch Symbols
44
ENERGY STAR Program
45
Energy Saving Functions
48
Laws and Regulations
48
Legal Prohibition
48
Laser Safety
48
FCC Rules and IC Rules
49
Notes to Users in the United States of America
51
1 Simple Search
51
Searching By What You Want to Do
51
I Want to Change the Default Settings to Reflect the Settings I Use Most
52
I Want to Convert Documents to Electronic Formats Easily
52
I Want to Operate the Machine More Effectively
54
Searching By Keyword
54
Paper
54
Register/Change/Delete
54
Saddle Stitch/Punch/Covers
55
Check
55
Install
57
2 Getting Started
57
Guide to Components
59
Guide to Components of the Ring Binder
60
Guide to Components of the Perfect Binder
62
Guide to Components of the Stacker
64
Stacker Control Panel
66
Options
66
External Options
68
Internal Options
69
Control Panel
70
Interrupt Key
71
Adjusting the Angle of the Control Panel
73
Display Panel
73
Simplified Display
74
Changing the Display Language
76
When the Authentication Screen Is Displayed
76
User Code Authentication (Using the Control Panel)
77
User Code Authentication (Using a Printer Driver)
77
Login (Using the Control Panel)
78
Logout (Using the Control Panel)
79
Login (Using a Printer Driver)
79
Login (Using Web Image Monitor)
79
Logout (Using Web Image Monitor)
80
Changing Modes
81
System Reset
82
Turning On/Off the Power
82
Turning On the Main Power
83
Turning On the Power
83
Turning Off the Power
84
Turning Off the Main Power
84
Saving Energy
87
3 Adding Paper
87
Loading Paper
87
Loading Paper Into Tray 1 (Tandem Tray)
89
Loading Paper Into the A3/11 × 17 Tray Unit
90
Loading Paper Into Tray 2 and 3
91
Loading Paper Into the Large Capacity Tray
92
Loading Paper Into the Wide Large Capacity Tray
94
Fanning the Paper
95
Loading Paper Into the Multi Bypass Tray (Tray 7)
97
Loading Paper in the Interposer
99
Loading Cover Sheets Into the Perfect Binder Interposer
100
Loading Cover Sheets
102
Orientation-Fixed Paper or Two-Sided Paper
104
Paper Grain
105
Changing the Paper Size
105
Changing the Paper Size in Tray 2 and 3
107
Changing the Paper Size in the Large Capacity Tray
110
Changing the Paper Size in the Wide Large Capacity Tray
113
Changing to a Size That Is Not Automatically Detected
116
Recommended Paper Sizes and Types
127
Thick Paper
128
Unusable Paper
130
Paper Storage
131
4 Adding Toner, Staples, Ring Combs and Glue
131
Adding Toner
132
Inserting Toner
133
Sending Scanned Documents When Toner Has Run Out
134
Used Toner
135
Adding Staples
135
Finisher SR5000
136
Booklet Finisher SR5020
136
Booklet Finisher SR 5020 (Saddle Stitch)
138
Replacing Ring Combs
139
Changing the Type of Ring Combs in the Ring Comb Cartridge
141
Filling the Glue Container
143
5 Entering Text
143
Available Characters
143
Keys
144
How to Enter Text
144
Entering Letters
144
Entering Numbers
147
6 Operating Instructions
147
Installing Operating Instructions
147
PDF Manuals
149
How to Use the Operating Instructions
149
Opening From the Icon
149
Opening From the [Start] Menu
150
Opening From the CD-ROM
151
7 Handling the Ring Binder, Perfect Binder and Stacker
151
Changing the Ring Binding Settings
151
Ring Binding Types That Can Be Specified
153
Changing the Perfect Binding Settings
154
Inserting Pages Into an Existing Ring Bound Booklet
157
Removing Bound Booklets From the Ring Binder Tray
158
Removing Paper From the Stacker
161
Connecting and Using a Second Stacker
162
Locking the Stacker Front Cover
163
8 Remarks
163
Dos and Don'ts
165
Where to Put Your Machine
165
Machine Environment
166
Optimum Environmental Conditions
166
Environments to Avoid
167
Power Connection
169
Maintaining Your Machine
169
Cleaning the Exposure Glass
169
Cleaning the Auto Document Feeder
170
Cleaning the Power Cable Plug
171
Counter
171
Displaying the Total Counter
172
Inquiry
174
Checking the Earth Leakage Breaker
177
9 Appendix
177
Software and Utilities Included On the CD-ROM
177
Viewing the Contents of the CD-ROM
177
Printer Drivers for This Machine
179
TWAIN Driver
179
Desktopbinder Lite
180
Smartdevicemonitor for Admin
181
Desktopbinder-Smartdevicemonitor for Client
183
Specifications for the Main Unit
188
Document Server
188
Auto Document Feeder
190
Specifications for Decurl Unit DU5000 (Optional)
191
Specifications for Finisher SR5000 (Optional)
191
Finisher Upper Tray
192
Finisher Shift Tray
195
Specifications for Booklet Finisher SR5020 (Optional)
195
Finisher Upper Tray
196
Finisher Shift Tray
198
Finisher Booklet Tray
199
Specifications for Punch Unit PU5000 (Optional)
200
Specifications for Punch Unit PU5020 (Optional)
201
Specifications for Multi-Folding Unit FD5000 (Optional)
203
Specifications for Interposer (Optional)
204
Specifications for Large Capacity Tray (Optional)
205
Specifications for Wide Large Capacity Tray (Optional)
206
Specifications for Multi Bypass Tray (Optional)
207
Specifications for Ring Binder (Optional)
208
Specifications for Perfect Binder GB5000 (Optional)
210
Specifications for Trimmer Unit TR5020 (Optional)
211
Specifications for High Capacity Stacker SK5010 (Optional)
211
Stacker Upper Tray
211
Stacker Tray
213
Specifications for Gigabit Ethernet (Optional)
214
Specifications for Other Options
215
Trademarks
217
Index
Share and save
Advertisement
Related Products
Toshiba 1100-S101
Toshiba Satellite 1100
Toshiba Satellite 110 Series
Toshiba 1135-S1553 - Satellite - Celeron M 2.4 GHz
Toshiba 1135-S125
Toshiba 1135-S1552
Toshiba 1115-S123
Toshiba Satellite 1135
Toshiba Satellite 1115
Toshiba Satellite Radius 11 L10W-B
Toshiba Categories
Laptop
Air Conditioner
TV
LCD TV
All in One Printer
More Toshiba Manuals
Login
Sign In
OR
Sign in with Facebook
Sign in with Google
Upload manual
Upload from disk
Upload from URL