Sign In
Upload
Manuals
Brands
Sharp Manuals
All in One Printer
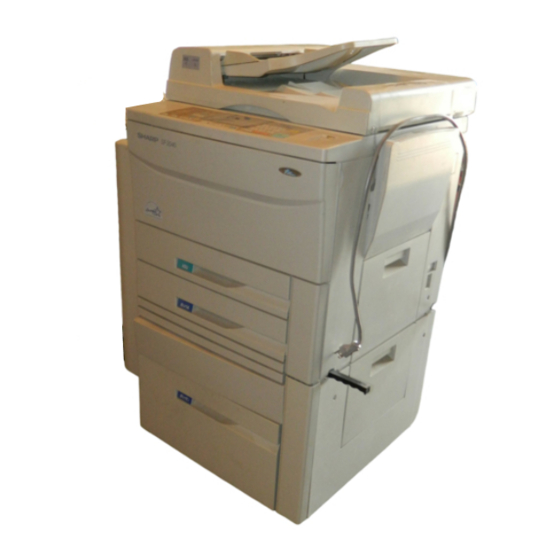
SF-2040
Sharp SF-2040 Manuals
Manuals and User Guides for Sharp SF-2040. We have
1
Sharp SF-2040 manual available for free PDF download: Service Manual
Sharp SF-2040 Service Manual (131 pages)
Brand:
Sharp
| Category:
All in One Printer
| Size: 5.77 MB
Table of Contents
Service Manual
1
Table of Contents
2
1 ] Product Outline
8
General Description
8
Target Users
8
Major Features
8
Compact Body
8
Serviceability and Functionality
8
High Copy Performance
8
Options
8
System Outline
8
2 ] Product Specifications
9
Basic Specification
9
Type
9
Copy Method
9
Kinds of Originals
9
Copy Speed
9
First Copy Time
9
Warmup Time
9
Multicopy
9
Magnification Ratio
10
Exposure
10
Paper Feed
10
Developing Method
11
Charge Method
11
Transfer Method
11
Separation Method
11
Fusing Method
11
Cleaning Method
11
Light Source
11
Blanking Areas
11
Automatic Duplex
11
Paper Receiving Tray and Finishing
11
Additional Features
12
Power Supply
12
Power Consumption
12
Appearance
12
Accessories
13
Consumables
13
Environmental Requirements
15
Sf-A55
16
Sf-S15
16
Sf-S53
16
Options Specifications
16
Sf-D23
17
Other Counters
17
External View
18
Operation Panel
20
Internal View
21
Clutches, Solenoids
22
Sensors
23
Motors
24
Board List
25
Duplex Copy Tray
26
Desk Unit (SF-D23)
27
5 ] Installation
29
Installing Conditions
29
Installation Procedure
30
Releasing Optical Locks
30
A Removing the #2/3 Mirror Unit Lock
30
B Releasing the Lens and #4/5 Mirror Unit Lock
30
Fuser Unit Set up
30
A Removing the Fuser Unit
30
B Tensioning the Heat Roller
30
C Installing the Cleaning Roller
30
D Installing the Fusing Unit
31
Cleaning Corona Units
31
A Clean the Main Corona Unit
31
B Clean the Transfer/Separation Corona Wires
32
Installing Accessories
32
A Install the Copy Receive Tray
32
Setting up the Upper Paper Cassette
33
A Remove the Packing Screw of the Cassette
33
B Removing the Cassette
33
C Change the Size Using the Side Plates F and R
33
D Insert the Rear Plate
33
E Set the Size Detect Spacer
33
F Change the Paper Size Indication Plate
33
G Set the Cassette
34
H Load Paper
34
Set up the Lower Paper Cassette
34
B Change the Size Using the Side Plates F and R
34
C Change the Size of the Rear Plate
34
D Set the Size Detect Spacer
34
E Change the Paper Size Indication Plate
35
Lens Lock Release
35
A Removing the Lens and Releasing the Lens Lock
35
Setting Developing Unit
36
A Supplying Developer
36
Toner Density Sensor Level Adjustment
36
A Developing Unit Level Adjustment
36
Toner Supply
36
A Toner Supply
36
Label Attachment
37
A Label Attachment
37
Sf-A55
38
Mount the ADF Onto the Copier
38
Adjust the Angle of ADF Connector
38
Connect the ADF Tray Connector
39
Attach the Tray
39
Set the Mode
39
Adjust the Center of the Copy
39
Original Lead Edge Position Adjustment
40
Sf-S53
40
Model
41
Mounting of the Staple Sorter Onto the Copier
42
Staple Sorter Operation Check
45
SF-S15 (20-Bin Sorter)
47
Install the Support Guide
47
Mount the Sorter Seat to the Desk
47
Remove the Front Panel of the Sorter
47
Place the Sorter on the Sorter Seat
48
Remove the Rear Cabinet Panel from the Copier and Cut out the Notch in the Cabinet Panel
48
Connect the Sorter Connectors
48
Reattach the Rear Cabinet Panel
48
Reattach the Front Panel of the Sorter
48
Adjust the Clearance between the Sorter and the Copier
49
Set the Mode
49
Sf-D23
49
Place the Copier on the Desk
49
Secure the Copier to the Desk
50
Connect the Desk Relay Harness
50
Remount the Rear Coverlet of the Copier
50
Secure the Desk on the Floor
50
Pull out the Cassette
51
Adjust the Front and Rear Paper Guides
51
Adjust the Side Guide
51
Set the Paper Size Switch
52
Change the Paper Size Indicator
52
Place the Paper in the Cassette
52
Set the Mode
52
Adjust any Center Misalignment
53
Sf-Ic11
53
To Change the Size Setting of Side Plate F and Side Plate R
54
To Change the Size Position of the Rear End Plate
54
To Set the Size Detection Spacer
54
To Change the Paper Size Indication Plate
55
To Install the Cassette Main Unit on the Paper Tray
55
Sf-Dm11
55
To Remove the Rear Cabinet of the Copier Main Unit
55
To Install the ADU Drive Unit
56
To Install the Rear Cabinet of the Copier Main Unit
56
To Remove the Toner Collecting Container
56
To Remove the Cover Plate
56
To Install the ADU Unit
56
To Install the Right Stopper
56
To Install the Toner Collecting Container
57
To Check and Adjust the Matching Guide
57
To Adjust the Center Dislocation
57
Sf-Cm11
58
Remove the Rear Cabinet Panel from the Desk
58
Install the Lift-Up Unit
58
Remount the Rear Cabinet Panel Onto the Desk
59
Remove the Right Cabinet Panel from the Front Right Cabinet Panel of the Desk
59
Remove the Cover
59
Install the Paper Feed Unit
59
Remove the Packing Screw from the Paper Cassette
59
Change the Positions of the Front and Rear Side Plates
59
Position the Rear Edge Plate
60
Set the Paper Size Detection Spacer
60
Change the Paper Size Indicator
60
Fit the Paper Cassette Guides into the Guide Rails
60
Mount the Right Stopper
60
Install the Paper Cassette
61
Place the Paper
61
6 ] Disassembly and Reassembly
62
Process Unit
62
Manual Feed Multicopy Unit
64
Paper Feed Unit
66
Transport Baseplate Unit
68
Fuser Unit
70
Duplex Copy Unit
72
Rear Frame Side Major Components
74
Operation Panel Unit and Document Size Sensor Board
77
Optical Unit
79
Developing Unit
83
Clearance Adjustment of Developing Doctor Blade
83
Position Adjustment of Developing Magnet Roller Main Pole
83
Developing Bias Adjustment
84
Notes on Installing Various Rollers of the Developing Unit
84
Notes on Applying the Developing Side Seals (Front and Rear)
84
Processing Unit
85
Adjustment of Blank Lamp Position
85
Adjustment of High-Voltage Output Balance
85
Applying the Special Measuring Tool
85
Adjusting the Transfer Charger Current
86
Checking the Electrostatic Main Charger Current
87
Adjusting the Electrostatic Main Charger Grid Voltage
87
Adjusting the Separation Charger Output
88
Notes on Maintenance for High-Voltage Units
88
Electrostatic Charger Unit
88
Transfer/Separation Charger Unit
88
Optical System
89
Adjusting the Reference Position of Lens
90
Adjusting the Reference Position of 4. and 5. Mirror
90
Adjusting the Longitudinal Magnification
90
Adjusting the Resolution
91
Adjusting the Lateral Magnification
92
Inputting the Lens Travel Correction Value
92
Correcting the Longitudinal Distortion
94
Correcting the Lateral Distortion
95
Adjusting the Center Deviation
96
Adjusting the Exposure Balance
96
Adjusting the Copy
97
Adjustment of Copy Density
100
When Must the Copy Density be Adjusted
100
Notes on Adjustment of Copy Density
100
Procedure for Copy Density Adjustment
100
Initial Setting of Auto-Exposure Density Level (User Adjustment)
100
Initial Setting of TSM Mode (User Adjustment)
100
Adjustment of AE Sensor Level
100
Setting of Drum Sensitivity
100
Setting of Test Chart
101
Adjustment of Copy Density
101
Adjustments Relating to Process Control
105
Simulation
107
Introduction
107
Purpose
107
Simulation Execution Procedure
107
Simulation and Diagnostics
107
Trouble Codes List
123
Key Operator Program
124
Maintenance and Others
125
Counters and Simulations Related to Maintenance
126
Alarm Message
127
Setting the Copy Counter Mode
129
Replacing the Ozone Filter
129
Replacing the Suction Ozone Filter
129
Oil/Grease Points
130
Gear of Main Driving Unit
130
Paper-Feed Torque Limiter 500-Sheet Cassette Brake Spring
131
Optical Rail
131
Advertisement
Share and save
Advertisement
Related Products
Sharp SF-1020
Sharp SF-1120
Sharp MFP Series
Sharp SF-D23
Sharp server
SHARP SF-2052
Sharp SF-2014
Sharp SF-2050
Sharp SF-2020
Sharp SF-2030
Sharp Categories
Microwave Oven
LCD TV
TV
Stereo System
All in One Printer
More Sharp Manuals
Login
Sign In
OR
Sign in with Facebook
Sign in with Google
Upload manual
Upload from disk
Upload from URL