Sign In
Upload
Manuals
Brands
Rimage Manuals
Disc Duplicator
3410
Rimage 3410 Manuals
Manuals and User Guides for Rimage 3410. We have
3
Rimage 3410 manuals available for free PDF download: User Manual, Upgrade Installation
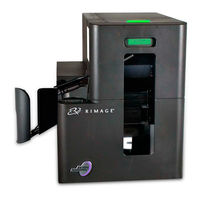
Rimage 3410 User Manual (231 pages)
Brand:
Rimage
| Category:
Disc Duplicator
| Size: 6.42 MB
Table of Contents
English
3
Table of Contents
3
Introduction
4
Set Your Printing Preferences on a Windows PC
18
Access Printing Preferences
18
Access Printing Preferences through the Windows Start Menu
18
Access Printer Preferences through CD Designer Software
18
Access Printer Preferences for Printing PDF Files
18
Set the Media Type, Media Size, Orientation and Ribbon Type
19
Set the Print Quality, Color Matching and Image Adjustments
19
Set the Printable Area
20
Adjust the Print Alignment and Color Density
20
Check the Ribbon Remaining
21
Change the Print and Retransfer Ribbons
22
Change the Print Ribbon
22
Remove the Print Ribbon
22
Install the Print Ribbon
23
Remove the Retransfer Ribbon
25
Install the Retransfer Ribbon
26
Maintain the 3410 and 5410N
28
Overview
28
Cautionary Information
28
Preventative Maintenance Schedule
28
Clean the Everest 400 Printer
29
Clean the Print Head
29
Clean the Tacky Rollers
30
Clean the Sensors
31
Operate Gemini Utilities
33
Deutsch
36
Einführung
37
Über dieses Benutzerhandbuch
37
Allgemeines zu Professional 3410 und 5410N
37
Zubehörsatz
38
Anleitung zum Auspacken und Einrichten
38
Wichtige Informationen
39
Support-Kontaktinformationen
39
Weitere Online-Informationen
39
Technischer Support
39
Haftungsausschluss: Aufzeichnungssoftware für Optische Discs
39
Informationen zu Sicherheit und Standards
40
Sicherheitsmaßnahmen
40
Länderspezifische Sicherheits- und Warnhinweise für Breitband-Datenübertragungssysteme: 2400-2483,5 Mhz
41
Informationen zu Standards
42
Druckeranforderungen
43
Band-Anforderungen
43
Everest 400-Bänder
43
Grafikdesign-Anforderungen
43
Druckanforderungen
43
Ansicht und Bedienelemente des Professional 3410 und 5410N
44
Vorderansicht
44
Rückansicht
45
5410N
45
Bedienungs- und Anzeigeelemente
46
Statuslampe
46
Bedienfeld
46
Kontrollleuchten am Bedienfeld
46
Ansicht und Bedienelemente des Professional 3410 und 5410N
45
Ansicht und Bedienelemente des Professional 3410 und 5410N
46
PC-Netzschalter
47
Ansicht und Bedienelemente des Professional 3410 und 5410N
47
Betrieb des Professional 3410 und 5410N-Systems
48
Einschalten des Systems
48
Ausschalten des Systems
48
Betrieb des Professional 3410 und 5410N-Systems
49
Anhalten des Systems
49
Laden der Discs
49
Herausnehmen von Discs
49
Einlegen einer Disc in die Druckerschublade
49
Betrieb des Professional 3410 und 5410N-Systems
50
Einlegen einer Disc in den Rekorder
50
Festlegen der Druckeinstellungen auf einem Windows-PC
51
Zugreifen auf die Druckeinstellungen
51
Zugreifen auf die Druckeinstellungen über das Startmenü von Windows
51
Zugreifen auf die Druckeinstellungen über die CD Designer-Software
51
Zugreifen auf Druckeinstellungen zum Drucken von PDF-Dateien
51
Einstellen von Medientyp, Mediengröße, Ausrichtung und Bandtyp
52
Festlegen der Druckqualität, Farbabstimmung und Bildeinstellungen
52
Festlegen des Bedruckbaren Bereichs
53
Anpassen der Druckausrichtung und Farbdichte
53
Überprüfen der Verbleibenden Bandmenge
54
Austauschen der Druck- und Retransfer-Bänder
55
Austauschen des Druckbands
55
Entfernen des Druckbands
55
Einlegen des Druckbands
56
Austauschen des Retransfer-Bands
58
Entfernen des Retransfer-Bands
58
Einlegen des Retransfer-Bands
59
Warten der Modelle 3410 und 5410N
61
Übersicht
61
Vorsichtsmaßnahmen
61
Präventiver Wartungsplan
61
Warten der Modelle 3410 und 5410N
62
Reinigen des Druckers Everest 400
62
Reinigen des Druckkopfs
62
Reinigen der Reinigungsrollen
63
Warten der Modelle 3410 und 5410N
63
Warten der Modelle 3410 und 5410N
64
Reinigen der Sensoren
64
Warten der Modelle 3410 und 5410N
65
Ausführen von Gemini Utilities
66
Starten von Gemini Utilities
66
Ändern des Anzeigenamens der Roboter-Station
66
Aktivieren des Signaltongebers
66
Français
69
Introduction
70
À Propos de Ce Guide D'utilisation
70
À Propos des Systèmes Professional 3410 Et 5410N
70
Kit D'accessoires
71
Instructions de Déballage Et de Configuration
71
Informations Importantes
72
Informations Relatives À L'assistance
72
Informations Complémentaires en Ligne
72
Assistance Technique
72
Avis D'exclusion de Responsabilité Pour Le Logiciel D'enregistrement Sur CD Optique
72
Informations de Sécurité Et de Conformité
73
Précautions de Sécurité
73
Mises en Garde Et Avertissements Spécifiques Selon Le Pays Pour Les Systèmes de Transmission Large Bande : 2 400-2 483,5 Mhz
74
Informations de Conformité
75
Exigences Relatives À L'imprimante
76
Spécifications des Rubans
76
Rubans Pour L'everest 400
76
Exigences Relatives À la Conception des Étiquettes
76
Exigences Relatives À L'impression
76
Identification des Pièces des Systèmes Professional 3410 Et 5410N
77
Vue de Face
77
Vue Arrière
78
5410N
78
Informations Relatives Aux Différentes Parties du Produit
79
Voyant D'état
79
Panneau de Commande
79
Voyants du Panneau de Commande
79
Identification des Pièces des Systèmes Professional 3410 Et 5410N
78
Identification des Pièces des Systèmes Professional 3410 Et 5410N
79
Bouton de Mise Sous Tension du PC
80
Identification des Pièces des Systèmes Professional 3410 Et 5410N
80
Fonctionnement des Systèmes Professional 3410 Et 5410N
81
Mise Sous Tension du Système
81
Mise Hors Tension du Système
81
Fonctionnement des Systèmes Professional 3410 Et 5410N
82
Mise en Pause du Système
82
Chargement des Disques
82
Déchargement des Disques
82
Positionnement D'un Disque Sur Le Plateau de L'imprimante
82
Fonctionnement des Systèmes Professional 3410 Et 5410N
83
Positionnement D'un Disque Sur Le Plateau du Graveur
83
Configuration de Vos Options D'impression Sur un PC Windows
84
Accédez Aux Options D'impression
84
Accès Aux Options D'impression Par Le Biais du Menu Démarrer de Windows
84
Accès Aux Options D'impression Via Le Logiciel CD Designer
84
Accès Aux Options D'impression Pour L'impression de Fichiers PDF
84
Réglage du Type Et des Dimensions du Support, de L'orientation Et du Type de Ruban
85
Définition de la Qualité D'impression, de la Correspondance des Couleurs Et des Réglages de L'image
85
Définition de la Zone Imprimable
86
Réglage de L'alignement D'impression Et de la Densité des Couleurs
86
Vérification du Ruban Restant
87
Remplacement des Rubans D'impression Et de Retransfert
88
Remplacement du Ruban D'impression
88
Retrait du Ruban D'impression
88
Installation du Ruban D'impression
89
Remplacement du Ruban de Retransfert
91
Retrait du Ruban de Retransfert
91
Installation du Ruban de Retransfert
92
Maintenance des Systèmes 3410 Et 5410N
94
Présentation
94
Informations Importantes
94
Programme de Maintenance Préventive
94
Maintenance des Systèmes 3410 Et 5410N
95
Nettoyage de L'imprimante Everest 400
95
Nettoyage de la Tête D'impression
95
Nettoyage des Rouleaux Amoureux
96
Maintenance des Systèmes 3410 Et 5410N
96
Maintenance des Systèmes 3410 Et 5410N
97
Nettoyage des Capteurs
97
Maintenance des Systèmes 3410 Et 5410N
98
Fonctionnement des Utilitaires Gemini
99
Lancement des Utilitaires Gemini
99
Modification du Nom D'affichage du Chargeur Automatique
99
Activation du Bipeur
99
Español
102
Introducción
103
Acerca de Esta Guía del Usuario
103
Acerca de Professional 3410 y 5410N
103
Kit de Accesorios
104
Instrucciones de Desembalaje y Configuración
104
Información Importante
105
Información de Contacto de Soporte
105
Más Información en Línea
105
Soporte Técnico
105
Exención de Responsabilidad del Software de Grabación de Discos Ópticos
105
Información de Seguridad y Conformidad
106
Precauciones de Seguridad
106
Precauciones y Advertencias Específicas de Los Países para Los Sistemas de Transferencia Inalámbrica de Datos: 2400-2483,5 Mhz
107
Información de Conformidad
108
Requisitos de la Impresora
109
Requisitos de Cinta
109
Cintas para la Impresora Everest 400
109
Requisitos para el Diseño de Etiquetas
109
Requisitos de Impresión
109
Identificación de las Partes de Los Modelos Professional 3410 y 5410N
110
Vista Delantera
110
Vista Trasera
111
5410N
111
Información sobre las Piezas
112
Luz de Estado
112
Panel de Control
112
Indicadores del Panel de Control
112
Identificación de las Partes de Los Modelos Professional 3410 y 5410N
111
Identificación de las Partes de Los Modelos Professional 3410 y 5410N
112
Botón de Encendido del Equipo
113
Identificación de las Partes de Los Modelos Professional 3410 y 5410N
113
Funcionamiento del Sistema Professional 3410 y 5410N
114
Encendido del Sistema
114
Apagado del Sistema
114
Funcionamiento del Sistema Professional 3410 y 5410N
115
Pausa del Sistema
115
Carga de Discos
115
Descarga de Discos
115
Colocación de un Disco en la Bandeja de la Impresora
115
Funcionamiento del Sistema Professional 3410 y 5410N
116
Colocación de un Disco en la Bandeja de la Grabadora
116
Configure las Preferencias de Impresión en un Equipo con Windows
117
Acceso a las Preferencias de Impresión
117
Acceso a las Preferencias de Impresión a Través del Menú Inicio de Windows
117
Acceso a las Preferencias de Impresión a Través de CD Designer
117
Acceso a las Preferencias de Impresión para Archivos PDF
117
Configuración del Tamaño de Medio, Tipo de Medio, Orientación y Tipo de Cinta
118
Configuración de la Calidad de Impresión, Combinación de Colores y Ajustes de Imagen
118
Configuración del Área de Impresión
119
Ajuste la Alineación de Impresión y la Densidad del Color
119
Verificación de la Cinta Restante
120
Cambie las Cintas de Impresión y de Retransferencia
121
Cambio de la Cinta de Impresión
121
Extracción de la Cinta de Impresión
121
Instalación de la Cinta de Impresión
122
Cambio de la Cinta de Retransferencia
124
Extracción de la Cinta de Retransferencia
124
Instalación de la Cinta de Retransferencia
125
Mantenimiento de Los Sistemas 3410 y 5410N
127
Descripción General
127
Información de Precaución
127
Programa de Mantenimiento Preventivo
127
Mantenimiento de Los Sistemas 3410 y 5410N
128
Limpieza de la Impresora Everest 400
128
Limpieza del Cabezal de Impresión
128
Limpieza de Los Rodillos Adhesivos
129
Limpieza de Los Sensores
130
Opere las Gemini Utilities (Herramientas de Gemini)
132
Funcionamiento de Gemini Utilities
132
Inicio de Gemini Utilities
132
Cambio del Nombre a Mostrar del Autoloader
132
Activado de la Alerta Sonora
132
日本語
135
Professional 3410 および 5410N について
136
本ユーザー ガイドについて
136
アクセサリー キッ ト
137
開梱およびセッ トアップ取扱説明書
137
重要情報
138
サポート連絡先
138
オンラインでご覧いただける詳細情報
138
テクニカル サポート
138
光ディスク記録ソフトウェアの免責条項
138
安全性および法令順守に関する情報
139
安全のための予防措置
139
2400-2483.5 Mhz
140
法令順守に関する情報
141
プリンタの要件
142
リボンの要件
142
Everest 400 リボン
142
ラベル デザインの要件
142
印刷の要件
142
Professional 3410 および 5410N の部品の確認
143
正面図
143
Professional 3410 および 5410N の部品の確認
144
背面図
144
5410N
144
部品情報
145
状態表示ランプ
145
コントロール パネル
145
コントロール パネルの表示図
145
Professional 3410 および 5410N の部品の確認
145
Pc 電源ボタン
146
Professional 3410 および 5410N の部品の確認
146
Professional 3410 および 5410N システムの操作
147
システムの電源をオンにする
147
システムの電源をオフにする
147
Professional 3410 および 5410N システムの操作
148
システムの一時停止
148
ディスクの装着
148
ディスクを取り出します
148
プリンタ トレイにディスクを装着する
148
Professional 3410 および 5410N システムの操作
149
レコーダ トレイにディスクを装着する
149
Windows PC 上での印刷環境設定
150
印刷環境設定へのアクセス
150
Windows の[スタート]メニューから印刷環境設定にアクセス
150
CD Designer ソフトウェアから印刷環境設定にアクセス
150
Pdf ファイルの印刷環境設定へのアクセス
150
メディア タイプおよびメディア サイズ、 印字方向リボン タイプの設定
151
印刷品質、 カラー マッチング、 画像調整の設定
151
印刷可能領域の設定
152
印刷位置および色濃度の調整
152
リボン残量のチェック
153
印刷リボンと再転写リボンの交換
154
印刷リボンの交換
154
印刷リボンの取り外し
154
印刷リボンの取り付け
155
再転写リボンの交換
157
再転写リボンの取り外し
157
再転写リボンの取り付け
158
3410 および 5410N のメンテナンス
160
注意事項
160
予防メンテナンス スケジュール
160
3410 および 5410N のメンテナンス
161
Everest 400 プリンタのクリーニング
161
印刷ヘッ ドのクリーニング
161
粘着ローラーのクリーニング
162
3410 および 5410N のメンテナンス
162
センサーのクリーニング
163
3410 および 5410N のメンテナンス
164
Gemini ユーティ リティの操作
165
Gemini ユーティ リティの開始
165
オートローダの表示名の変更
165
警報器を有効にする
165
Italiano
168
Introduzione
169
Informazioni Sulla Presente Guida Per L'utente
169
Informazioni Su Professional 3410 E 5410N
169
Kit DI Accessori
170
Disimballaggio E Istruzioni DI Configurazione
170
Informazioni Importanti
171
Informazioni DI Contatto Per Il Supporto Clienti
171
Ulteriori Informazioni on Line
171
Assistenza Tecnica
171
Liberatoria Per Il Software DI Masterizzazione Dei Dischi Ottici
171
Informazioni Sulla Sicurezza E Sulla Conformità
172
Norme Precauzionali DI Sicurezza
172
Precauzioni E Avvertenze Relative Ai Sistemi DI Trasmissione Dati in Banda Larga a Seconda Dei Paesi 2400-2483,5 Mhz
173
Informazioni Sulla Conformità
174
Requisiti Della Stampante
175
Requisiti del Nastro
175
Nastri Per la Everest 400
175
Requisiti del Modello DI Etichetta
175
Requisiti DI Stampa
175
Identificare I Componenti del Professional 3410 E 5410N
176
Vista Anteriore
176
Vista Posteriore
177
5410N
177
Informazioni Sulle Parti
178
Spia DI Stato
178
Pannello DI Comando
178
Spie del Pannello DI Comando
178
Identificare I Componenti del Professional 3410 E 5410N
177
Identificare I Componenti del Professional 3410 E 5410N
178
Pulsante DI Accensione PC
179
Identificare I Componenti del Professional 3410 E 5410N
179
Funzionamento del Sistema Professional 3410 E 5410N
180
Accendere Il Sistema
180
Spegnimento del Sistema
180
Funzionamento del Sistema Professional 3410 E 5410N
181
Mettere in Pausa Il Sistema
181
Caricare I Dischi
181
Scaricare I Dischi
181
Collocazione DI un Disco Sul Vassoio Della Stampante
181
Funzionamento del Sistema Professional 3410 E 5410N
182
Posizionare un Disco Sul Vassoio del Masterizzatore
182
Configurazione Delle Preferenze DI Stampa Su un PC Windows
183
Accesso alle Preferenze DI Stampa
183
Accesso alle Preferenze DI Stampa Mediante Il Menu Start DI Windows
183
Accesso alle Preferenze DI Stampa Mediante Il Software CD Designer
183
Accesso alle Preferenze Della Stampante Per Stampare File PDF
183
Impostazione Delle Dimensioni, del Tipo E Dell'orientamento del Supporto E del Tipo DI Nastro
184
Impostazione Della Qualità DI Stampa, Della Corrispondenza Dei Colori E Regolazione Dell'immagine
184
Impostare L'area DI Stampa
185
Regolazione Dell'allineamento DI Stampa E Della Densità DI Colore
185
Controllo del Nastro Rimanente
186
Sostituzione Dei Nastri DI Stampa E Ritrasferimento
187
Sostituzione del Nastro DI Stampa
187
Rimozione del Nastro DI Stampa
187
Installare Il Nastro DI Stampa
188
Sostituzione del Nastro DI Ritrasferimento
190
Rimozione del Nastro DI Ritrasferimento
190
Installare Il Nastro DI Ritrasferimento
191
Manutenzione del 3410 E 5410N
193
Panoramica
193
Informazioni DI Avvertenza
193
Pianificazione Della Manutenzione Preventiva
193
Manutenzione del 3410 E 5410N
194
Pulizia Della Stampante Everest 400
194
Pulizia Della Testina DI Stampa
194
Pulizia Dei Rulli Adesivi
195
Manutenzione del 3410 E 5410N
195
Manutenzione del 3410 E 5410N
196
Pulizia Dei Sensori
196
Manutenzione del 3410 E 5410N
197
Funzionamento Delle Utilità Gemini
198
Avvio Delle Utilità Gemini
198
Modifica del Nome del Display Dell'autoloader
198
Attivazione del Cicalino
198
汉语
201
关于 Professional 3410 和 5410N
202
关于本用户指南
202
附件包
202
打开包装和设置指令
203
重要信息
204
支持联系信息
204
在线了解更多信息
204
技术支持
204
光盘刻录软件免责声明
204
安全和合规信息
205
安全预防措施
205
特定国家对使用宽频带数据传输系统的注意和警告事项:2400-2483.5 Mhz
206
合规信息
207
打印机要求
208
色带要求
208
Everest 400 色带
208
标签设计要求
208
打印要求
208
识别 Professional 3410 和 5410N 的部件
209
正视图
209
识别 Professional 3410 和 5410N 的部件
210
后视图
210
5410N
210
部件信息
211
状态灯
211
控制面板
211
控制面板指示器
211
识别 Professional 3410 和 5410N 的部件
211
Pc 电源按钮
212
识别 Professional 3410 和 5410N 的部件
212
操作 Professional 3410 和 5410N 系统
213
打开系统的电源
213
关闭系统的电源
213
操作 Professional 3410 和 5410N 系统
214
暂停系统
214
装载光盘
214
卸出光盘
214
将光盘放在打印机托盘上
214
操作 Professional 3410 和 5410N 系统
215
将光盘放在刻录机托盘上
215
在 Windows PC 上设置打印首选项
216
访问打印首选项
216
通过 Windows 开始菜单访问打印首选项
216
通过 CD Designer 访问打印机首选项
216
访问用于打印 Pdf 文件的打印机首选项
216
设置介质类型、介质尺寸、方向和色带类型
217
设置打印质量、颜色匹配和图像调节
217
设置可打印区域
218
调节打印对齐和色彩密度
218
检查色带剩余量
219
更换打印和重传色带
220
更换打印色带
220
卸下打印色带
220
安装打印色带
221
更换重传色带
223
卸下重传色带
223
安装重传色带
224
告诫信息
226
预防性维护时间表
226
清洁 Everest 400 打印机
227
清洁打印头
227
清洁粘性辊
228
清洁传感器
229
操作 Gemini 实用程序
231
启动 Gemini 实用程序
231
更改 Autoloader 显示名称
231
启用蜂鸣器
231
Advertisement
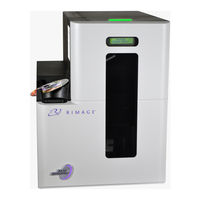
Rimage 3410 User Manual (34 pages)
Brand:
Rimage
| Category:
Disc Duplicator
| Size: 9.07 MB
Table of Contents
Table of Contents
3
Introduction
5
About this User Guide
5
About the Professional 3410 and 5410N
5
Accessory Kit
6
Unpacking and Setup Instructions
6
Important Information
7
Support Contact Information
7
Learn more Online
7
Technical Support
7
Optical Disc Recording Software Disclaimer
7
Safety and Compliance Information
8
Safety Precautions
8
Country-Specific Cautions and Warnings for Wideband Data Transmission Systems: 2400- 2483.5 Mhz
9
Compliance Information
10
Printer Requirements
11
Ribbon Requirements
11
Everest 400 Ribbons
11
Label Design Requirements
11
Print Requirements
11
Identify the Parts of the Professional 3410 and 5410N
12
Front View
12
Back View
13
5410N
13
Parts Information
14
Status Light
14
Control Panel
14
Control Panel Indicators
14
Identify the Parts of the Professional 3410 and 5410N
14
PC Power Button
15
Operate the Professional 3410 and 5410N System
16
Power on the System
16
Power off the System
16
Pause the System
17
Load the Discs
17
Unload the Discs
17
Place a Disc on the Printer Tray
17
Place a Disc on the Recorder Tray
18
Set Your Printing Preferences on a Windows PC
19
Access Printing Preferences
19
Access Printing Preferences through the Windows Start Menu
19
Access Printer Preferences through CD Designer Software
19
Access Printer Preferences for Printing PDF Files
19
Set the Media Type, Media Size, Orientation and Ribbon Type
20
Set the Print Quality, Color Matching and Image Adjustments
20
Set the Printable Area
21
Adjust the Print Alignment and Color Density
21
Check the Ribbon Remaining
22
Change the Print and Retransfer Ribbons
23
Change the Print Ribbon
23
Remove the Print Ribbon
23
Install the Print Ribbon
24
Change the Retransfer Ribbon
26
Remove the Retransfer Ribbon
26
Install the Retransfer Ribbon
27
Maintain the 3410 and 5410N
29
Overview
29
Cautionary Information
29
Preventative Maintenance Schedule
29
Clean the Everest 400 Printer
30
Clean the Print Head
30
Clean the Tacky Rollers
31
Clean the Sensors
32
Operate Gemini Utilities
34
Start Gemini Utilities
34
Change the Autoloader Display Name
34
Enable the Beeper
34
Rimage 3410 Upgrade Installation (4 pages)
Install the Output Bin Upgrade
Brand:
Rimage
| Category:
Disc Duplicator
| Size: 2.07 MB
Advertisement
Advertisement
Related Products
Rimage Desktop 360i
Rimage Professional 3400
Rimage Allegro 100
Rimage Allegro 20
Rimage AutoEverest
Rimage Catalyst 6000
Rimage Catalyst 6000N
Rimage Categories
Printer
Disc Duplicator
Computer Hardware
Printer Accessories
Software
More Rimage Manuals
Login
Sign In
OR
Sign in with Facebook
Sign in with Google
Upload manual
Upload from disk
Upload from URL