Sign In
Upload
Manuals
Brands
Pioneer Manuals
Car Receiver
AVIC-F850BT
Pioneer AVIC-F850BT Manuals
Manuals and User Guides for Pioneer AVIC-F850BT. We have
2
Pioneer AVIC-F850BT manuals available for free PDF download: Operation Manual, Installation Manual
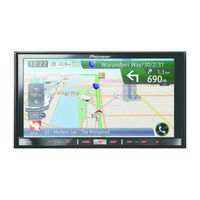
Pioneer AVIC-F850BT Operation Manual (208 pages)
Navigation AV System
Brand:
Pioneer
| Category:
Car Receiver
| Size: 10.22 MB
Table of Contents
Table of Contents
2
Introduction
10
Manual Overview
10
How to Use this Manual
10
Conventions Used in this Manual
10
Terms Used in this Manual
10
Notice Regarding Video Viewing
11
Notice Regarding DVD-Video Viewing
11
Notice Regarding MP3 File Usage
11
Ipod Compatibility
11
Map Coverage
12
Protecting the LCD Panel and Screen
12
Notes on Internal Memory
12
Before Removing the Vehicle Battery
12
Data Subject to Erasure
12
Basic Operation
14
Checking Part Names and Functions
14
Protecting Your Product against Theft
16
Removing the Detachable Faceplate
16
Attaching the Detachable Faceplate
17
Adjusting the LCD Panel Angle
17
Inserting and Ejecting a Disc
17
Inserting a Disc (for AVIC-F50BT)
17
Ejecting a Disc (for AVIC-F50BT)
17
Inserting a Disc (for AVIC-F950DAB, AVIC-F950BT and AVIC-F850BT)
18
Ejecting a Disc (for AVIC-F950DAB, AVIC-F950BT and AVIC-F850BT)
18
Inserting and Ejecting an SD Memory Card
18
Inserting an SD Memory Card (for AVIC-F50BT)
18
Ejecting an SD Memory Card (for AVIC-F50BT)
18
Inserting an SD Memory Card (for AVIC-F950DAB, AVIC- F950BT and AVIC-F850BT)
19
Ejecting an SD Memory Card (for AVIC-F950DAB, AVIC- F950BT and AVIC-F850BT)
19
Connecting and Disconnecting an Ipod
20
Connecting Your Ipod
20
Disconnecting Your Ipod
21
Plugging and Unplugging a USB Storage Device
21
Plugging in a USB Storage Device
21
Unplugging a USB Storage Device
22
Startup and Termination
22
On First-Time Startup
22
Regular Startup
23
A Message about the Map Database
23
Demonstration Images
23
Temporarily Clearing the Screen (Navigation System in Standby Mode)
23
How to Use the Navigation Menu Screens
24
Shortcut Menu
25
Selecting the Shortcut
25
Removing a Shortcut
25
Using the Touch Panel
26
Using the Common Touch Panel Keys
26
Operating List Screens (E.g. POI List)
26
Operating the On-Screen Keyboard
26
Swipe Action
27
Swipe Action List
28
How to Use the Map
30
How to Read the Map Screen
30
Enlarged Map of the Intersection
31
The Display While Driving on the Motorway
32
Types of the Road Stored in the Map Database
32
Operating the Map Screen
32
Scrolling the Map to the Position You Want to See
32
Viewing Information about a Specified Location
33
Switching the View Mode
34
Switching the Map Orientation
34
Displaying One-Way Street Marks
35
Displaying POI on the Map
35
Displaying Preinstalled Pois on the Map
35
Registering a Scale
36
Searching for and Selecting a Location
37
The Basic Flow of Creating Your Route
37
Searching for a Location by Address
38
Searching for a Street Name First
38
Searching for a City Name First
39
Finding Your Destination by Specifying the Postcode
40
Searching by Selected City History
41
Setting up a Route to Your Home
41
Searching for Points of Interest (POI)
41
Searching for a POI Directly from the Name of the Facilities
41
Searching for a Nearby POI
42
Searching for Pois Around the Destination
42
Searching for Pois Around the City
43
Deleting the Icons Displayed after Searching for a Nearby POI
44
Selecting Destination from Stored Locations
44
Selecting a Location You Searched for Recently
44
Searching for a Location by Coordinates
45
After the Location Is Decided
46
Setting a Route to Your Destination
46
Displaying Multiple Routes
46
Checking and Modifying the Current
47
Displaying the Route Overview
47
Checking the Current Itinerary
47
Modifying the Route Calculation Conditions
48
Items that Users Can Operate
48
Editing Waypoints
49
Adding a Waypoint
49
Deleting a Waypoint
49
Sorting Waypoints
50
Skipping a Waypoint
50
Using the Demonstration Guidance
50
Finishing the Demonstration Guidance
51
Cancelling the Route Guidance
51
Editing the Data on the Use of Navigation
52
Registering and Editing Locations
52
Storing Favourite Locations
52
Editing Registered Locations
52
Deleting a Favourite Location from the List
52
Deleting the Destination History from the List
53
Deleting Learned Routes
54
Deleting Track Logs
54
Using Traffic Information
55
Checking All Traffic Information
55
Checking Traffic Information on the Route
56
How to Read Traffic Information on the Map
56
Setting an Alternative Route to Avoid Traffic Jams
56
Checking for Traffic Jams Automatically
57
Selecting the Preferred RDS-TMC Service Provider Manually
57
Registering and Connecting a Bluetooth
58
Preparing Communication Devices
58
Registering Your Bluetooth Devices
58
Searching for Nearby Bluetooth Devices
58
Pairing from Your Bluetooth Devices
62
Deleting a Registered Device
65
Connecting a Registered Bluetooth Device Manually
65
Setting for Priority Connecting
66
Using Hands-Free Phoning
67
Displaying the Phone Menu
67
Making a Phone Call
67
Direct Dialling
67
Calling a Number in the Phone Book
68
Dialling from the History
69
Redialling a Call
69
Dialling a Favourite Location
69
Dialling a Facility's Phone Number
70
Receiving a Phone Call
70
Answering an Incoming Call
70
Transferring the Phone Book
71
Deleting Registered Contacts
72
Deleting the History Information
72
Changing the Phone Settings
73
Editing the Device Name
73
Editing the Password
73
Stopping Bluetooth Wave Transmission
74
Answering a Call Automatically
74
Setting the Automatic Rejection Function
74
Notes for Hands-Free Phoning
75
Basic Operations of the AV Source
76
Displaying the AV Operation Screen
76
Selecting a Source
76
Turning off the AV Source
76
AV Source Plate Display
76
Using the Radio
77
Starting Procedure
77
Reading the Screen
77
Using the Touch Panel Keys
78
Storing Broadcast Frequencies
78
Storing the Strongest Broadcast Frequencies
79
Using Radio Text
79
Using Advanced Functions
80
Tuning in Strong Frequencies
80
Limiting Stations to Regional Programming
80
Searching for an RDS Station by PTY Information
80
Receiving Traffic Announcements
80
Using News Programme Interruption
81
Tuning into Alternative Frequencies
81
Interruption Icon Status
82
Switching the Sound Quality of the FM Tuner
82
Operating by Hardware Buttons
82
Using the Digital Radio (DAB)
83
Starting Procedure
83
Reading the Screen
83
Using the Touch Panel Keys
84
Storing Broadcast Frequencies
84
Selecting a Channel from the List
85
Listening to a Recent Broadcast
85
Using Advanced Functions
86
Switching to a Channel with Good Receiving Sensitivity Automatically
86
Operating by Hardware Buttons
86
Playing Audio Cds
87
Starting Procedure
87
Reading the Screen
87
Using the Touch Panel Keys
87
Operating by Hardware Buttons
88
Playing Music Files on ROM
89
Starting Procedure
89
Reading the Screen
89
Using the Touch Panel Keys
90
Operating by Hardware Buttons
90
Playing a DVD-Video
91
Starting Procedure
91
Reading the Screen
91
Using the Touch Panel Keys
91
Starting Playback from a Specified Time
92
Direct Number Search
93
Operating the DVD Menu
93
Resuming Playback (Bookmark)
93
Searching for a Specific Scene and Starting Playback from a Specified Time
93
Changing the Wide Screen Mode
94
Frame-By-Frame Playback
94
Slow Motion Playback
94
Using the DVD Menu by Touch Panel Keys
94
Operating by Hardware Buttons
95
Reading the Screen
96
Using the Touch Panel Keys
96
Playing a DIVX Video
97
Frame-By-Frame Playback
97
Slow Motion Playback
97
Starting Playback from a Specified
98
Changing the Wide Screen Mode
98
Playing DIVX ® VOD Content
99
Operating by Hardware Buttons
99
DVD-Video or DIVX Setup
100
Displaying DVD/DIVX® Setup Menu
100
Setting the Top-Priority Languages
100
Setting the Angle Icon Display
100
Setting the Aspect Ratio
101
Setting the Parental Lock
101
Setting the Code Number and Level
101
Setting the Auto Play
102
Setting the Subtitle File for DIVX
102
Language Code Chart for Dvds
103
Playing Music Files (from USB or SD)
104
Starting Procedure
104
Reading the Screen
104
Using the Touch Panel Keys (Music)
105
Operating by Hardware Buttons
106
Playing Video Files (from USB or SD)
107
Starting Procedure
107
Reading the Screen
107
Using the Touch Panel Keys (Video)
108
Searching for a Specific Scene and Starting Playback from a Specified Time
108
Operating by Hardware Buttons
109
Reading the Screen
110
Using an Ipod (Ipod)
111
Using the Touch Panel Keys
112
Changing the Wide Screen Mode
113
Operating by Hardware Buttons
113
Using Aha Radio
114
Information for Compatibility of Connected Devices
114
Starting Procedure
115
For Iphone with 30-Pin Connector Users
115
For Iphone with Lightning Connector Users
115
For Smartphone Users
115
Reading the Screen
116
Using the Touch Panel Keys
116
Functions Coupled with Aha Radio and the Navigation System
118
Viewing POI Information with Aha Radio
118
Using the Bluetooth Audio Player
119
Starting Procedure
119
Reading the Screen
119
Using the Touch Panel Keys
120
Operating by Hardware Buttons
121
Using AV Input
122
Reading the Screen
122
Using AV1
122
Using AV2
122
Using the Touch Panel Keys
122
Changing the Wide Screen Mode
123
Using Appradio Mode
125
Starting Procedure
125
For Iphone with 30-Pin Connector Users
125
For Iphone with Lightning Connector Users
126
For Smartphone Users
126
Using the Keyboard
128
Using the Sound MIX Function
128
Other Functions
129
Displaying the Image of Your Application (Iphone with 30-Pin Connector)
129
Displaying the Image of Your Application (Iphone with Lightning Connector)
129
Displaying the Image of Your Application (Smartphone)
129
Customising Preferences
131
Displaying the Information Screen
131
Checking the Connections of Leads
131
Checking Sensor Learning Status and Driving Status
132
Clearing Status
133
Checking the Device Number
133
Checking the Version Information
133
Registering Your Home
133
Displaying the Adjustment and Correction Screen
134
Switching the Muting/Attenuation Timing
134
Switching the Muting/Attenuation Level
135
Setting the Volume for Guidance and Phone
135
Correcting the Current Location
135
Switching the Road on Which You Are Driving
136
Displaying the Screen for Navigation Function Settings
136
Setting the Speed Limit Display
136
Changing the Road Colour
136
Setting the Scroll-Locked 2D (Normal) View
137
Displaying the 3D Landmarks
137
Setting the Detailed City Map
137
Setting the Barrier Graphic for the City Map
138
Setting the Map Colour Change between Day and Night
138
Displaying the Track Log
138
Deleting the Track Log Automatically
139
Setting the Current Street Name Display
139
Setting the Criteria of Route Calculation
139
Setting the Use of Toll Roads
139
Setting the Use of Ferries
140
Setting the Route Calculation by Learning Route
140
Setting the Route Calculation Allowing for Time Restrictions
140
Setting the Use of Motorways
140
Setting to Select Your Route Automatically Using the Route Alternatives Function
141
Displaying the Distance and Estimated Time
141
Setting the Route Alternatives Function to Avoid Traffic Jams and Closed/Blocked Roads
141
Setting the Auto-Zoom Display
142
Changing the Setting of the Navigation Interruption Screen
142
Setting the App Operation Screen Interruption
142
Changing the Virtual Speed of the Vehicle
142
Changing the Unit between Km and Miles
143
Displaying the Traffic Notification Icon
143
Changing the View Mode
143
Displaying the Screen for System Settings
143
Selecting the Language
144
Setting the Time Difference
144
Changing the Preinstalled Splash Screen
144
Changing to the Splash Screen Stored on the SD Memory Card
145
Adjusting the Response Positions of the Touch Panel (Touch Panel Calibration)
145
Setting the Illumination Colour
146
Reversing the Climate Control Status Display
147
Displaying the Icon for Setting the Rear Display Output
147
Displaying the Screen for AV System Settings
147
Setting Video Input 1 (AV1)
148
Setting Video Input 2 (AV2)
148
Changing the Screen Size of SD/USB Video
148
Displaying Your DIVX VOD Registration Code
149
Displaying Your DIVX VOD Deregistration Code
149
Setting the Ipod Connection
149
Switching Auto PI Seek
149
Setting the FM Tuning Step
150
Displaying the Screen for AV Sound Settings
150
Using Balance Adjustment
150
Adjusting Loudness
151
Using the Equaliser
151
Adjusting Source Levels
153
Using the High Pass Filter
153
Using the Subwoofer Output
154
Enhancing Bass (Bass Booster)
154
Using Sonic Centre Control
154
Adjusting the Equaliser Curve Automatically (Auto EQ)
154
Before Operating the Auto EQ Function
155
Performing Auto EQ
155
Displaying the Screen for App Settings
157
Selecting the Device Connection Method
157
Setting the Keyboard Language with Application for Iphone
158
Setting the Rear Output
158
Adjusting the Picture
159
Selecting the Video for Rear Display
160
Replicating the Settings
160
Using the Rear View Camera Functions
161
Setting for Rear View Camera
161
Setting Guidelines on the Rear View Image
162
Setting the Safe Mode
163
Displaying Obstacle Detection
164
Displaying the Operating Status of the Climate Control Panel
164
Other Functions
166
Setting the Anti-Theft Function
166
Setting the Password
166
Entering the Password
166
Deleting the Password
166
Forgotten Password
166
Restoring the Navigation System to the Default or Factory Settings
167
Restoring the Default Setting
167
Restoring the Navigation System to the Initial State
167
Setting Items to be Deleted
168
Appendix
170
Troubleshooting
170
Messages for Navigation Functions
175
Messages for AV Functions
176
Messages for Bluetooth Functions
178
Positioning Technology
179
Positioning by GPS
179
Positioning by Dead Reckoning
179
How Do GPS and Dead Reckoning Work Together
179
Handling Large Errors
180
When Positioning by GPS Is Impossible
180
Conditions Likely to Cause Noticeable Positioning Errors
181
Route Setting Information
183
Route Search Specifications
183
Handling and Care of Discs
183
Built-In Drive and Care
184
Ambient Conditions for Playing a Disc
184
Playable Discs
184
DVD-Video and CD
184
AVCHD Recorded Discs
185
Playing Dualdisc
185
Dolby Digital
185
Detailed Information for Playable Media
185
Compatibility
185
Media Compatibility Chart
188
Bluetooth
192
SD and SDHC Logo
192
Wma/Wmv
192
DIVX
192
Aac
193
Android
193
Detailed Information Regarding Connected Ipod Devices
193
Ipod and Iphone
193
Lightning
194
App Store
194
Ios
194
Itunes
194
Using App-Based Connected Content
194
Aha Radio
194
Hdmi
194
Mhl
195
Using the LCD Screen Correctly
195
Handling the LCD Screen
195
Liquid Crystal Display (LCD) Screen
195
Maintaining the LCD Screen
195
LED (Light-Emitting Diode) Backlight
195
Display Information
196
Destination Menu
196
Phone Menu
196
Information Menu
196
Edit/Settings Menu
197
Edit Data Menu
197
Navi Settings Menu
197
AV Settings Menu
198
Setting According to Source Menu
199
App Settings Menu
199
System Settings Menu
199
Bluetooth Settings Menu
200
Glossary
201
Specifications
204
Advertisement
Pioneer AVIC-F850BT Installation Manual (148 pages)
Brand:
Pioneer
| Category:
Car Navigation system
| Size: 5 MB
Table of Contents
English
2
Table of Contents
2
Your New Navigation System and this Manual
3
Important Safeguards
3
Connecting the System
5
Precautions before Connecting the
5
Before Installing this Product
5
To Prevent Damage
6
Notice for the Blue/White Lead
6
Notice for the Violet/White Lead
6
Parts Supplied
7
Installing the HDMI Cable Holder
7
Connecting the System
8
When Connecting the Android™ Device
10
When Connecting to Separately Sold Power Amp
12
When Connecting a Rear View Camera
14
When Connecting the External Video Component
15
Using an AV Input (AV1)
15
Using an AV Input (AV2)
16
When Connecting the Rear Display
16
When Using a Rear Display Connected to Rear Video Output
16
Installation
17
Precautions before Installation
17
To Avoid Electromagnetic Interference
17
Before Installing
17
Installation Notes
18
Installing the Navigation System
18
Installing the GPS Aerial
19
Installation Notes
19
Precautions - Parts Supplied
21
Mounting on the Sun Visor
21
Installing the Microphone
21
Installation on the Steering Column
22
Adjusting the Microphone Angle
22
Français
23
Importantes Mesures de Sécurité
24
Précautions
24
Votre Nouveau Système de Navigation Et Ce Manuel
24
Avant D'installer Ce Produit
26
Branchement du Système
26
Précautions À Prendre Avant de Brancher Le
26
Pour Éviter Toute Détérioration
27
Remarque Concernant Le Câble Violet/Blanc
27
Remarque Concernant Le Fil Bleu/Blanc
27
Installation du Support Pour Câble HDMI
28
Pièces Fournies
28
Branchement du Système
30
Lors de la Connexion de L'appareil Android
32
Branchement D'un Amplificateur de Puissance Vendu Séparément
34
Branchement D'une Caméra de Rétrovisée
36
Branchement D'un Élément VIDéo Externe
37
Utilisation D'une Entrée AV (AV1)
37
Branchement de L'écran Arrière
38
Utilisation D'un Écran Arrière Raccordé À la Sortie VIDéo Arrière
38
Utilisation D'une Entrée AV (AV2)
38
Installation
39
Pour Éviter Les Parasites Électromagnétiques
39
Précautions À Prendre Avant
39
Avant de Procéder À L'installation
40
Installation du Système de Navigation
40
Remarques Sur L'installation
40
Installation de L'antenne GPS
42
Pièces Fournies
42
Remarques Sur L'installation
42
Installation de L'antenne Dans Le Véhicule (Sur Le Tableau de Bord Ou la Lunette Arrière)
43
Installation du Microphone
44
Installation Sur Le Pare-Soleil
44
Pièces Fournies
44
Installation Sur la Colonne de Direction
45
Réglage de L'angle du Microphone
46
Italiano
47
Il Nuovo Sistema DI Navigazione E Il Presente Manuale
48
Precauzioni
48
Misure DI Sicurezza Importanti
49
Collegamento del Sistema
50
Precauzioni Prima DI Collegare Il Sistema
50
Prima DI Installare Questo Prodotto
50
Informazione Sul Cavetto Blu/ Bianco
51
Informazione Sul Cavetto Viola/ Bianco
51
Per Evitare Danni
51
Installazione del Supporto del Cavo HDMI
52
Parti in Dotazione
52
Collegamento del Sistema
54
Collegamento del Dispositivo Android
56
Quando si Effettua Il Collegamento a un Amplificatore in Vendita Separatamente
58
Quando si Effettua Il Collegamento a una Telecamera DI Visione Posteriore
60
Quando si Collega Il Componente Video Esterno
61
Uso DI un Ingresso AV (AV1)
61
Quando si Collega Il Display Posteriore
62
Quando si Utilizza un Display Posteriore Collegato a Un'uscita Video Posteriore
62
Uso DI un Ingresso AV (AV2)
62
Installazione
63
Per Evitare Disturbi Elettromagnetici
63
Precauzioni Prima Dell'installazione
63
Installazione del Sistema DI Navigazione
64
Note Sull'installazione
64
Prima Dell'installazione
64
Installazione Dell'antenna GPS
66
Note Sull'installazione
66
Parti in Dotazione
66
Quando si Installa L'antenna All'interno del Veicolo (Sul Cruscotto O Sul Piano Portaoggetti Posteriore)
67
Installazione del Microfono
68
Montaggio Sul Parasole
68
Parti in Dotazione
68
Installazione Sulla Colonna DI
69
Sterzo
69
Regolazione Dell'angolazione del Microfono
70
Español
71
Precauciones
72
Precauciones Importantes
72
Su Nuevo Sistema de Navegación y Este Manual
72
Antes de Instalar Este Producto
74
Conexión del Sistema
74
Precauciones Antes de Conectar el
74
Aviso para el Cable Conductor Azul/Blanco
75
Aviso para el Cable Conductor Violeta/Blanco
75
Para Impedir Daños
75
Instalación del Soporte de Cable HDMI
76
Piezas Suministradas
76
Conexión del Sistema
78
Al Conectar el Dispositivo Android
80
Conexión al Amplificador de Potencia que Se Vende por Separado
82
Conexión de una Cámara de Retrovisor
84
Conexión del Componente de Vídeo Externo
85
Uso de la Entrada AV (AV1)
85
Conexión de la Pantalla Trasera
86
Uso de la Entrada AV (AV2)
86
Uso de una Pantalla Trasera Conectada a la Salida de Vídeo Trasera
86
Instalación
87
Para Impedir que Se Produzcan Interferencias Electromagnéticas
87
Precauciones Antes de la Instalación
87
Antes de la Instalación
88
Instalación del Sistema de Navegación
88
Notas Acerca de la Instalación
88
Instalación de la Antena GPS
90
Notas Acerca de la Instalación
90
Piezas Suministradas
90
Cuando Instale la Antena en el Interior del Vehículo (en el Tablero de Instrumentos O en la Bandeja Trasera)
91
Instalación del Micrófono
92
Montaje en el Parasol
92
Piezas Suministradas
92
Instalación en la Columna de Dirección
93
Ajuste del Ángulo del Micrófono
94
Deutsch
95
Anleitung
96
Ihr Neues Navigationssystem und diese
96
Vorsichtsmaßnahmen
96
Wichtige Sicherheitshinweise
97
Anschluss des Systems
98
Vor dem Anschließen des Systems zu
98
Vor dem Einbau dieses Produkts
98
Zur Vermeidung von Schäden
99
Anmerkung zum Blau/Weißen
100
Anmerkung zum Violett/Weißen Kabel
100
Kabel
100
Mitgelieferte Teile
100
Anbringen der HDMI - Kabelhalterung
101
Anschluss des Systems
102
Bei Anschluss eines Android™-Geräts
104
Beim Anschluss an den Separat Erhältlichen Leistungsverstärker
106
Beim Anschluss einer Heckkamera
108
Bei Anschluss der Externen Videokomponente
109
Verwendung eines AV-Eingangs (AV1)
109
Bei Anschluss des Zusätzlichen Displays
110
Bei Verwendung eines Zusätzlichen Displays, das an den Hinteren Videoausgang Angeschlossen ist
110
Verwendung eines AV-Eingangs (AV2)
110
Einbau
111
Vor der Installation zu Beachten
111
Zur Vermeidung Elektromagnetischen Rauschens
111
Einbau des Navigationssystems
112
Hinweise zur Befestigung
112
Vor dem Einbau
112
Einbau der GPS-Antenne
114
Hinweise zur Befestigung
114
Mitgelieferte Teile
114
Einbau der Antenne IM Fahrzeuginnenraum (auf dem Armaturenbrett oder der Hutablage)
115
Einbau des Mikrofons
116
Mitgelieferte Teile
116
Montage an der Sonnenblende
116
Befestigung auf der Lenksäule
117
Anpassen des Mikrofonwinkels
118
Dutch
119
Belangrijke Veiligheidsvoorschriften
120
Uw Nieuwe Navigatiesysteem en Deze Handleiding
120
Voorzorgen
120
Systeemcomponenten Aansluiten
122
Voor U Dit Product Inbouwt
122
Voorzorgen Voor Het Aansluiten Van Het
122
Opmerking over de Blauw/Witte Draad
123
Opmerking over de Violet/Witte Draad
123
Voorkomen Van Beschadigingen
123
De HDMI -Kabelhouder Monteren
124
Meegeleverde Onderdelen
124
Systeemcomponenten Aansluiten
126
Wanneer Het Android™ Apparaat Wordt Aangesloten
128
Bij Aansluiting Op Een Los Verkrijgbare Eindversterker
130
Bij Aansluiting Van Een Achteruitkijkcamera
132
Bij Aansluiting Van Een Externe Videocomponent
133
Gebruik Van Een AV-Ingang (AV1)
133
Bij Aansluiten Van Het Achterdisplay
134
Bij Gebruik Van Een Achterdisplay Dat Op de Achtervideo-Uitgang Is Aangesloten
134
Gebruik Van Een AV-Ingang (AV2)
134
Inbouwen
135
Voorkomen Van Elektromagnetische Storingen
135
Voorzorgen Voor Installatie
135
Inbouwen Van Het Navigatiesysteem
136
Opmerkingen Betreffende de Installatie
136
Voor de Installatie
136
Installeren Van de GPS-Antenne
138
Meegeleverde Onderdelen
138
Opmerkingen Betreffende de Installatie
138
Bevestigen Van de Antenne Binnen in de Auto (Op Het Dashboard of de Hoedenplank)
139
De Microfoon Installeren
140
Meegeleverde Onderdelen
140
Montage Op de Zonneklep
140
Installatie Op Stuurkolom
141
De Hoek Van de Microfoon Aanpassen
142
Advertisement
Related Products
Pioneer AVIC-F320BT
PIONEER AVIC-F930BT
PIONEER AVIC-F9210BT
PIONEER AVIC-F9220BT
PIONEER AVIC-F910BT
PIONEER AVIC-F710BT
Pioneer AVIC-F950DAB
Pioneer AVIC-F50BT
Pioneer AVIC-F930BTXNAU
Pioneer AVIC-F950BT
Pioneer Categories
Car Receiver
Receiver
Stereo Receiver
Amplifier
CD Player
More Pioneer Manuals
Login
Sign In
OR
Sign in with Facebook
Sign in with Google
Upload manual
Upload from disk
Upload from URL