Sign In
Upload
Manuals
Brands
Pioneer Manuals
Car Navigation system
AVIC-5100NEX
Pioneer AVIC-5100NEX Manuals
Manuals and User Guides for Pioneer AVIC-5100NEX. We have
3
Pioneer AVIC-5100NEX manuals available for free PDF download: Operation Manual, Installation Manual, Firmware Update Manual
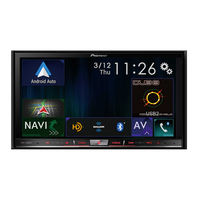
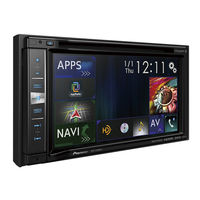
Pioneer AVIC-5100NEX Operation Manual (264 pages)
Brand:
Pioneer
| Category:
Car Navigation system
| Size: 12.89 MB
Table of Contents
2
Table of Contents
11
Manual Overview
11
How to Use This Manual
11
Conventions Used in This Manual
11
Terms Used in This Manual
12
Notes On Internal Memory
12
Before Removing the Vehicle Battery
12
Data Subject to Erasure
12
Resetting the Microprocessor
13
Basic Operation
13
Checking Part Names and Functions
14
Remote Control
15
Use and Care of the Remote Control
15
Installing the Battery
15
Using the Remote Control
16
Protecting Your Product against Theft
16
Removing the Detachable Faceplate
16
Attaching the Detachable Faceplate
16
Notes On Using the LCD Panel
17
Adjusting the LCD Panel Angle
17
Inserting/Ejecting/Connecting Media
17
Inserting and Ejecting a Disc
18
Inserting and Ejecting an SD Memory Card
19
Connecting and Disconnecting an Ipod
19
Plugging and Unplugging a USB
19
Storage Device
19
Startup and Termination
19
On First-Time Startup
20
Regular Startup
20
A Message about the Map Database
20
Turning Off the Display
20
When the Application Screen Is Available
20
When the Application Screen Is Not Available
22
How to Use the Screens
22
Switching Screens Using the Touch Panel Keys
23
Switching Screens Using the Hardware Buttons
24
Supported AV Source
24
Displaying the AV Operation Screen
25
Selecting a Front Source On the AV Source Selection Screen
25
Selecting a Front Source On the Source List
25
Selecting a Rear Source
25
Turning Off the AV Source
25
Changing the Display Order of Source Icons
26
Changing the Display Order of Source Keys
26
Using the Touch Panel
26
Using the Common Touch Panel Keys
27
Operating List Screens
27
Operating the Time Bar
27
Operating the On-Screen Keyboard
28
On First-Time Startup of the Navigation System
29
How to Use the Navigation Menu Screen
29
Operating the Navigation Menu Screen
31
How to Use the Map
31
How to Read the Map Screen
31
AV Information Bar
32
Operating the Map Screen
32
Changing the Scale of the Map
32
Smart Zoom
32
Switching Between 2D, 3D, and 2D North Up Views
33
Scrolling the Map to the Position You Want to See
33
Control Keys On the Scrolled Map
34
Understanding the Route Guidance
34
Frequently Shown Route Events
35
Browsing the Data Field
35
When the System Cannot Receive a GPS Signal
37
Searching for a Destination
37
Searching for a Location By Address
38
Searching for Points of Interest (POI)
38
Searching for Pois Using Preset Categories
39
Searching for Pois By Categories or Directly From the Name of the Facilities
40
Searching for Providers Nearby That Offer Emergency or Roadside Assistance Services
41
Selecting a Destination From Stored Locations
41
Selecting a Destination From Stored Routes
42
Selecting a Location You Searched for Recently
42
History
42
Smart History
43
Searching for a Location Using "Combined Search
44
Searching for a Location By the Coordinates
44
Searching for a Location By Scrolling the Map
45
Using the "Map Location" Screen
46
Checking and Modifying the Current
46
Modifying the Route
46
Building a Route Using "Route Planner
47
Adding Waypoints
47
Checking Route Alternatives
48
Checking Detour Routes
48
Checking Route Information and Preferences
49
Canceling the Current Route Guidance
50
Watching the Simulation of the Route
51
Registering and Editing Locations and
51
Storing a Location in "Saved Location
51
Storing Your Home and Your Workplace Location
51
Storing Your Favorite Locations
51
Editing Stored Locations
52
Storing a Route in "Saved Routes
53
Editing the Stored Route
53
Renaming Stored Routes
53
Deleting Stored Routes
53
Saving a Location As an Alert Point
54
Editing the Stored Alert Points
55
Receiving Real-Time Traffic Information
55
Viewing the Traffic List
55
Checking the Traffic Incidents On the Map
56
When Traffic Incidents Occur On Your Route
56
Turning the Traffic Information On or Off
57
Checking Useful Information about Your
57
Checking Useful Information
58
Recording Your Travel History
58
Activating Trip Logger Temporarily
58
Browsing the Trip Log
59
Setting the Trip Logger
59
Editing a Trip Log
59
Using the Trip Computer Mode
60
Calculating the Fuel Consumption
60
Setting the Initial Odometer Value
60
Entering the Fuel Consumption Information
61
Setting the Car Maintenance Schedule
62
Customizing Preferences of the
62
Customizing the Navigation Settings
63
Restoring the Default Settings
63
Information On Each Option of "Settings
63
Route Preferences" Settings
65
Sound" Settings
66
Warnings" Settings
66
Navigation Map" Settings
68
Regional" Settings
69
Display" Settings
69
Traffic" Settings
69
Weather" Settings
69
Fuel" Settings
69
Trip Monitor" Settings
69
Online Services" Settings
70
Usage Reports" Settings
70
Setting the Alert Point Warnings
71
Expanding the Use of the Navigation Functions
71
Be Sure to Read before You Use AVICSYNC Function
72
What Is the AVICSYNC App
72
Compatibility and Connectivity
72
AVICSYNC Compatibility
73
Preparations before Using the AVICSYNC Function
73
Getting the Map Update
74
Registering and Connecting a Bluetooth
74
Preparing Communication Devices
74
Registering Your Bluetooth Devices
74
Searching for Nearby Bluetooth Devices
75
Pairing From Your Bluetooth Devices
76
Connecting to a Bluetooth Device Automatically
76
Deleting a Registered Device
77
Connecting a Registered Bluetooth Device Manually
77
Switching Visibility
77
Entering the PIN Code for Bluetooth Wireless Connection
78
Displaying the Bluetooth Address
78
Clearing the Bluetooth Memory
78
Updating Bluetooth Software
79
Displaying the Bluetooth Software Version
80
Using Hands-Free Phoning
80
Displaying the Phone Menu
80
Touch Panel Keys
80
Reading the Screen
81
Making a Phone Call
81
Direct Dialing
81
Calling a Number in the Phone Book
82
Dialing From the History
83
Using the Preset Dial Lists
83
Receiving a Phone Call
84
Answering an Incoming Call
84
Minimizing the Dial Confirmation Screen
85
Changing the Phone Settings
85
Answering a Call Automatically
85
Switching the Ring Tone
85
Inverting Names in the Phone Book
85
Setting the Private Mode
86
Adjusting the Other Party's Listening Volume
86
Using the Voice Recognition Function
86
Notes for Hands-Free Phoning
88
Ipod / Iphone or Smartphone Setup Operation
88
The Basic Flow of Ipod / Iphone or Smartphone Setup
88
Setting the Device Connection Method
88
Ipod Compatibility
89
Android Device Compatibility
89
Appradio Mode Compatibility
89
Mirrorlink Device Compatibility
90
Information On the Connections and Functions for Each Device
93
Using the Radio
93
Using the Touch Panel Keys
93
Reading the Screen
94
Starting Procedure
94
Selecting a Band
94
Manual Tuning
94
Seek Tuning
95
Selecting a Preset Channel From the Preset Channel List
95
Storing Broadcast Frequencies
95
Storing the Strongest Broadcast Frequencies
95
Tuning Into Strong Frequencies
96
Storing Song Information to an Ipod (Itunes Tagging)
96
Operating with the Hardware Buttons
97
HD Radio Reception
97
HD Radio Stations
97
Using the Touch Panel Keys
98
Reading the Screen
99
Starting Procedure
99
Selecting a Band
99
Manual Tuning
99
Seek Tuning
100
Selecting a Preset Channel From the Preset Channel List
100
Storing Broadcast Frequencies
100
Storing the Strongest Broadcast Frequencies
100
Tuning Into Strong Frequencies
101
Switching the Seek Mode
102
Switching the Reception Mode
102
Storing Song Information to an Ipod (Itunes Tagging)
102
Operating with the Hardware Buttons
103
Playing a Disc
103
Using the Touch Panel Keys (For Audio)
103
Using the Touch Panel Keys (For Video)
105
Reading the Screen (For Audio)
105
Reading the Screen (For Video)
106
Starting Procedure
106
Selecting Files From the File Name List
106
Playing Tracks in Random Order
106
Setting a Repeat Play Range
107
Switching the Media File Type
107
Searching for the Part You Want to Play
107
Operating the DVD Menu
108
Switching the Subtitle Language
108
Switching the Audio Language
108
Frame-By-Frame Playback
108
Slow Motion Playback
108
Returning to a Specified Scene
109
Resuming Playback (Bookmark)
109
Operating the DVD Menu Using Touch Panel Keys
109
Switching the Multi-Angle DVD Display
109
Selecting the Audio Output
110
Operating with the Hardware Buttons
111
Playing Compressed Audio Files
111
Using the Touch Panel Keys
112
Reading the Screen
113
Starting Procedure (For Disc)
113
Starting Procedure (For USB/SD)
113
Switching the Browse Mode
114
Selecting Files From the File Name List
114
Selecting a File From the List Related to the Song Currently Playing (Link Search)
114
Playing Files in Random Order
115
Setting a Repeat Play Range
115
Switching the Media File Type
115
Operating with the Hardware Buttons
117
Playing Compressed Video Files
117
Reading the Screen
117
Starting Procedure (For Disc)
117
Starting Procedure (For USB/SD)
117
Selecting Files From the File Name List
118
Setting a Repeat Play Range
118
Frame-By-Frame Playback
118
Slow Motion Playback
118
Switching the Media File Type
118
Operating with the Hardware Buttons
119
Playing Compressed Still Image Files
119
Using the Touch Panel Keys
119
Reading the Screen
119
Starting Procedure
120
Selecting Files From the File Name List
120
Playing Files in Random Order
120
Setting a Repeat Play Range
120
Switching the Media File Type
120
Setting the Slideshow Interval
121
Operating with the Hardware Buttons
122
Using an Ipod
122
Using the Touch Panel Keys (For Audio)
122
Using the Touch Panel Keys (For Video)
123
Using the Touch Panel Keys (For Itunes Radio)
123
Reading the Screen (For Audio)
124
Reading the Screen (For Video)
124
Reading the Screen (For Itunes Radio)
125
Starting Procedure
125
Setting the Shuffle Play
125
Setting a Repeat Play Range
126
Selecting Song or Video Sources From the Playlist Screen
127
Using Itunes Radio
127
Playing Back Songs Similar to the Current Song
127
Setting the Current Song Not to Be Played Back Again
127
Adding the Current Song to the Wish List
128
Using This Product's Ipod Function From Your Ipod
128
Changing the Speed of Audiobook Playback
129
Displaying Lists Related to the Song Currently Playing (Link Search)
129
Operating with the Hardware Buttons
129
Playing Back Music From a Music App Other Than Ipod Music, As the Ipod Source
129
Using the Touch Panel Keys
130
Reading the Screen
131
Using the Touch Panel Keys
131
Reading the Screen
132
Starting Procedure
133
Using Appradio Mode
133
Using the Touch Panel Keys (App Control Side Bar)
134
Starting Procedure
135
Using the Keyboard
136
Adjusting the Image Size (For Smartphone Users)
137
Displaying the Image of Your Application (Iphone with 30-Pin Connector)
137
Displaying the Image of Your Application (Iphone with Lightning Connector)
138
Displaying the Image of Your Application (Smartphone)
138
Using Android Auto
139
Starting Procedure
139
Setting the Driving Position
140
Adjusting the Volume
140
Using Mirrorlink Mode
140
Using the Touch Panel Keys (App Control Side Bar)
140
Starting Procedure
141
Using the Audio MIX Function
142
Streaming Pandora
142
Pandora Operations
142
Using the Touch Panel Keys
143
Reading the Screen
143
Starting Procedure
144
For Iphone with a 30-Pin Connector Users
144
For Iphone with a Lightning Connector Users
144
For Smartphone Users
145
Selecting a Pandora Station From the List
145
Creating a Station
145
Operating with the Hardware Buttons
147
Using Aha Radio
147
Reading the Screen
147
Starting Procedure
147
For Iphone with a 30-Pin Connector Users
147
For Iphone with a Lightning Connector Users
148
For Smartphone Users
148
Operating with the Hardware Buttons
149
Using Idatalink
149
Activating Idatalink Maestro
149
Updating the Idatalink Maestro Module
149
Starting Procedure
151
Hands-Free Phone
151
Setting Bluetooth
152
Phone Book Screen
152
History List Screen
152
Dial Screen
152
Dial Confirmation Screen
153
Using a Bluetooth Audio Player
153
Using the Touch Panel Keys
154
Reading the Screen
154
Starting Procedure
155
Selecting Files From the File Name List
155
Playing Files in Random Order
155
Setting a Repeat Play Range
155
Operating with the Hardware Buttons
156
Using the Siriusxm ® Satellite Radio
156
Siriusxm Satellite Radio Operations
156
Subscribing to the Siriusxm Satellite Radio Service
156
Using the Touch Panel Keys
157
Reading the Screen
158
Starting Procedure
159
Manual Tuning
159
Selecting a Preset Channel From the Preset Channel List
159
Storing Broadcast Channels
159
Selecting a Siriusxm Channel Directly
160
Selecting a Channel From a List of All Channels
160
Selecting a Channel From the Category List
160
Switching the Displayed List
161
Using the Replay Function
161
Setting Siriusxm Tunestart
162
Using Tunescan
162
Using Category Scan
162
Using Tunemix
163
Checking the Update Traffic and Weather Information
163
Registering the City
164
Setting Parental Lock
164
Setting the Passcode
164
Locking the Channel
165
Using the Content Alerts Function (Such As Song Alerts, Artist Alerts and Game Alerts)
165
Memorizing the Current Contents
165
Setting the Program You Want to Be Alerted for
166
Selecting Teams for Game Alert
167
Setting the Featured Favorites Function
168
Setting the Update Notification for Featured Favorites
168
Using the Sportsflash Function
169
Selecting Teams for Sportsflash
170
Restoring the Siriusxm Settings to the Default
170
Storing Song Information to an Ipod (Itunes Tagging)
171
Operating with the Hardware Buttons
172
Using an HDMI Source
172
Using the Touch Panel Keys
172
Reading the Screen
172
Starting Procedure
173
Using an AUX Source
173
Using the Touch Panel Keys
173
Reading the Screen
173
Starting Procedure
174
Setting the Video Signal
174
Switching the Operation Screen
175
Using AV Input
175
Using the Touch Panel Keys
175
Reading the Screen
175
Starting Procedure
176
Setting the Video Signal
177
Using MIXTRAX
177
Touch Panel Keys
177
Selecting an Item to Play Songs
177
Selecting Songs Not to Be Played
178
Specifying the Playback Portion
178
Setting the Flash Pattern
179
System Settings
179
Navigation Info Window
179
Setting Automatic Switching to the Navigation Screen
179
Activating the Bluetooth Audio Source
180
Setting the Ever Scroll
180
Setting AV Input
180
Setting the Rear View Camera
181
Setting Rear View Camera Activation
181
Setting the Polarity of the Rear View Camera
182
Setting the Reversed Image Display for the Rear View Image
182
Setting the Camera for Camera View Mode
183
Displaying the Parking Assist Guidelines
183
Setting Guidelines On the Rear View Image
184
Setting the Second Camera Input
185
Setting the Second Camera Activation
185
Setting the Reversed Image Setting for the Second Camera Input Image
185
Turning Off the Demo Screen
186
Selecting the System Language
186
Setting the Keyboard Language with the Application for Iphone
186
Setting the Beep Sound
187
Adjusting the Response Positions of the Touch Panel (Touch Panel Calibration)
187
Setting the Dimmer Function
188
Setting Whether to Activate the Dimmer Function
188
Setting the Duration of Time for the Dimmer Function to Be Active
189
Adjusting the Picture
190
Displaying the Firmware Version
190
Updating Firmware
191
Checking Sensor Learning Status and Driving Status
192
Clearing the Status
192
Checking the Connections of Leads
194
Audio Adjustments
194
Using Fader/Balance Adjustment
194
Using Balance Adjustment
195
Switching Sound Muting/Attenuation
195
Adjusting Source Levels
198
Adjusting the Filter
198
Adjusting the Front and Rear Speaker Output
198
Using the Subwoofer Output
199
Selecting the Listening Position
199
Adjusting the Speaker Output Levels Finely
200
Adjusting the Time Alignment
202
Using the Automatic Sound Levelizer
202
Using the Equalizer
202
Recalling Equalizer Curves
203
Customizing the Equalizer Curves
203
Using the Auto-Adjusted Equalizer
203
Adjusting the Equalizer Curve Automatically (Auto EQ)
204
Before Operating the Auto EQ Function
204
Performing Auto EQ
207
Theme Menu
207
Selecting the Background Display
207
Changing to the Background Display Image Stored On the External Storage Device (USB, SD)
208
Setting the Illumination Color
208
Selecting the Color From the Preset Colors
209
Creating a User-Defined Color
209
Selecting the Theme Color
209
Selecting the Clock Image
210
Changing the Preinstalled Splash Screen
210
Changing to the Splash Screen Stored On the External Storage Device (USB, SD)
211
Replicating the Settings
211
Exporting "Theme" Settings
212
Importing "Theme" Settings
213
Setting Up the Video Player
213
Setting the Top-Priority Languages
213
Setting the Subtitle Language
213
Setting the Audio Language
214
Setting the Menu Language
214
Setting the Angle Icon Display
215
Setting the Aspect Ratio
215
Setting Parental Lock
215
Setting the Code Number and Level
216
Displaying Your DIVX VOD Registration Code
217
Displaying Your DIVX VOD Deregistration Code
217
Automatic Playback of Dvds
218
Setting the Video Signal for the Rear View Camera
219
Language Code Chart for Dvds
220
Favorite Menu
220
Creating a Shortcut
220
Selecting a Shortcut
220
Removing a Shortcut
221
Common Operations
221
Setting the Time and Date
221
Storing Song Information to an Ipod (Itunes Tagging)
222
Setting the "Sound Retriever" Function
223
Changing the Wide Screen Mode
224
Other Functions
224
Selecting the Video for the Rear Display
224
Setting the Anti-Theft Function
224
Setting the Password
225
Entering the Password
225
Deleting the Password
226
Forgotten Password
226
Restoring This Product to the Default Settings
226
Restoring the Default Settings
227
Appendix
227
Troubleshooting
229
Error Messages
236
Positioning Technology
236
Positioning By GPS
236
Positioning By Dead Reckoning
236
How Do GPS and Dead Reckoning Work Together
237
Handling Large Errors
237
When Positioning By GPS Is Impossible
238
Conditions Likely to Cause Noticeable Positioning Errors
240
Route Setting Information
240
Route Search Specifications
240
Handling and Care of Discs
241
Built-In Drive and Care
241
Ambient Conditions for Playing a Disc
241
Playable Discs
241
DVD-Video and CD
242
AVCHD Recorded Discs
242
Playing Dualdisc
242
Dolby Digital
242
Detailed Information for Playable Media
242
Compatibility
245
Media Compatibility Chart
249
Bluetooth
249
Siriusxm Satellite Radio
249
HD Radio Technology
249
Sdhc
249
Wma/Wmv
249
DIVX
250
Aac
250
Google, Google Play, Android , and Android Auto
250
Mirrorlink
250
Mixtrax
250
Detailed Information Regarding Connected Ipod Devices
250
Ipod and Iphone
251
Lightning
251
App Store
251
Ios
251
Itunes
251
Itunes Radio
251
Using App-Based Connected Content
252
Pandora
252
Aha Radio
252
Hdmi
252
Mhl
252
IVONA Text-To-Speech
252
Notice Regarding Video Viewing
253
Notice Regarding MP3 File Usage
253
Notice Regarding Open Source Licenses
253
Map Coverage
253
Using the LCD Screen Correctly
253
Handling the LCD Screen
253
Liquid Crystal Display (LCD) Screen
254
LED (Light-Emitting Diode) Backlight
255
Display Information
255
Phone Menu
255
System Menu
256
Theme Menu
257
Audio Menu
257
Video Setup Menu
258
Bluetooth Menu
259
Specifications
Advertisement
Pioneer AVIC-5100NEX Installation Manual (72 pages)
Brand:
Pioneer
| Category:
GPS
| Size: 3.13 MB
Table of Contents
2
English
2
Table of Contents
3
Precautions
3
Your New Product and This Manual
3
Important Safeguards
5
Connection
5
Precautions before Connecting the System
5
Before Installing This Product
6
To Prevent Damage
6
Notice for the Blue/White Lead
7
Parts Supplied
8
Connecting the Power Cord (1)
10
Connecting the Power Cord (2)
12
Connecting the System
14
Connecting to Separately Sold Power Amp
15
Connecting an Iphone, Ipod, Android Device or a Mirrorlink™ Device
17
Connecting an Iphone with Lightning Connector
17
Connecting Via the USB Port
17
Connecting Via the HDMI Port
18
Connecting Via the RGB Input
18
Connecting an Iphone with 30-Pin Connector
18
Connecting Via the AUX Input
19
Connecting Via the RGB Input
19
Connecting the Android™ Device
19
Connecting an Android Device with an HDMI Port
20
Connecting an Android Device with an MHL Port
20
Connecting the Android or Mirrorlink™ Device
21
Securing the High Speed HDMI ® Cable
22
Connecting a Rear View Camera
23
Connecting the External Video Component
23
Using AV Input
24
Using an AUX Input
25
Connecting an HDMI Device
25
Connecting the Rear Display
25
When Using a Rear Display Connected to Rear Video Output
26
Installation
26
Precautions before Installation
26
To Avoid Electromagnetic Interference
26
Before Installing
27
For AVIC-8100NEX and AVIC-7100NEX Users
27
Installing This Product
27
Installation Notes
28
Parts Supplied
28
Installation Using the Screw Holes On the Side of This Product
29
Fastening the Detachable Faceplate
30
Installing the GPS Antenna
30
Installation Notes
30
Parts Supplied
31
When Installing the Antenna Inside the Vehicle (On the Dashboard or Rear Shelf)
32
Installing the Microphone
32
Parts Supplied
32
Mounting On the Sun Visor
33
Installation On the Steering Column
33
Adjusting the Microphone Angle
34
After Installation
34
After Installing This Product
35
Français
36
Précautions
36
Votre Nouveau Produit Et Ce Manuel
37
Importantes Mesures De Sécurité
38
Avant D'installer Ce Produit
38
Connexion
38
Précautions À Prendre Avant De Brancher Le Système
39
Pour Éviter Toute Détérioration
40
Remarque Concernant Le Fil Bleu/Blanc
40
Pièces Fournies
42
Branchement Du Cordon D'alimentation (1)
44
Branchement Du Cordon D'alimentation (2)
46
Branchement Du Système
48
Connexion À Un Amplificateur De Puissance Vendu Séparément
49
Connexion D'un Iphone, Ipod, Appareil Android Ou Appareil Mirrorlink
51
Connexion D'un Iphone Avec Connecteur Lightning
51
Connexion Via Le Port USB
51
Connexion Via Le Port HDMI
52
Connexion Via L'entrée RGB
52
Connexion D'un Iphone Avec Connecteur À 30Broches
52
Connexion Via L'entrée AUX
53
Connexion Via L'entrée RGB
53
Connexion D'un Périphérique Android
53
Connexion D'un Périphérique Android Via Un Port HDMI
54
Connexion D'un Périphérique Android Via Un Port MHL
54
Connexion D'un Appareil Android Ou Mirrorlink
55
Fixation Du Câble HDMI Haute Vitesse
56
Connexion D'une Caméra De Rétrovisée
57
Connexion D'un Élément VIDéo Externe
57
Utilisation De L'entrée AV
58
Utilisation D'une Entrée AUX
59
Connexion D'un Périphérique HDMI
59
Connexion De L'afficheur Arrière
59
Utilisation D'un Écran Arrière Raccordé À La Sortie VIDéo Arrière
60
Installation
60
Pour Éviter Les Parasites Électromagnétiques
60
Précautions À Prendre Avant
60
L'installation
61
Avant De Procéder À L'installation
61
Pour Les Utilisateurs De AVIC-8100NEX Et AVIC-7100NEX
61
Installation De Ce Produit
61
Remarques Sur L'installation
62
Pièces Fournies
62
Installation En Utilisant Les Trous De Vis Sur Les Côtés De Ce Produit
63
Fixation De La Façade Amovible
64
Installation De L'antenne GPS
64
Remarques Sur L'installation
64
Pièces Fournies
65
Installation De L'antenne Dans Le Véhicule (Sur Le Tableau De Bord Ou La Lunette Arrière)
66
Installation Du Microphone
66
Pièces Fournies
66
Installation Sur Le Pare-Soleil
67
Installation Sur La Colonne De Direction
67
Réglage De L'angle Du Microphone
68
Après Avoir Installé Ce Produit
68
Après L'installation
Pioneer AVIC-5100NEX Firmware Update Manual (7 pages)
System Firmware Update Instructions
Brand:
Pioneer
| Category:
Car Receiver
| Size: 0.46 MB
Advertisement
Share and save
Advertisement
Related Products
Pioneer AVIC-505
Pioneer AVIC-90DVD
Pioneer AVICF500BT - CD-VM1 Optional Microphone
Pioneer AVIC-X1BT
PIONEER AVIC-F920BT
Pioneer AVIC-F60DAB
Pioneer AVIC-F930T
Pioneer AVIC-F9880BT
Pioneer AVIC-EVO1
Pioneer AVIC-F900BT/XS/RE
Pioneer Categories
Car Receiver
Receiver
Amplifier
Stereo Receiver
DVD Player
More Pioneer Manuals
Login
Sign In
OR
Sign in with Facebook
Sign in with Google
Upload manual
Upload from disk
Upload from URL