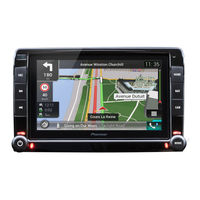
Sign In
Upload
Manuals
Brands
Pioneer Manuals
Car Navigation system
AVIC-EVO1
Pioneer AVIC-EVO1 Manuals
Manuals and User Guides for Pioneer AVIC-EVO1. We have
5
Pioneer AVIC-EVO1 manuals available for free PDF download: Installation Manual, Operation Manual, Quick Start Manual
Pioneer AVIC-EVO1 Installation Manual (140 pages)
Brand:
Pioneer
| Category:
Car Navigation system
| Size: 5.52 MB
Table of Contents
English
2
Table of Contents
2
Precautions
3
Your New Product and this Manual
3
Important Safeguards
3
Connection
5
Precautions before Connecting the System
5
Before Installing this Product
5
To Prevent Damage
6
Notice for the Blue/White Lead
6
Parts Supplied
7
Connecting the Power Cord
8
Description of the Coloured Cables
9
Connecting the System
10
Connecting the Main Unit to the Face Panel
11
Connecting to Separately Sold Power Amp
12
Connecting an Ipod / Iphone or an Android Device
13
Attaching Identification Labels to USB Cables
14
Connecting an Iphone with Lightning Connector
14
Connecting Via the USB Port (Iphone)
14
Connecting an Iphone with 30-Pin Connector
15
Connecting Via the AUX Input (Iphone)
15
Connecting the Android Device
15
Connecting a Rear View Camera
16
Using an AUX Input
17
Connecting the Rear Display
18
When Using a Rear Display Connected to Rear Video Output
18
Installation
19
Precautions before Installation
19
To Avoid Electromagnetic Interference
19
Before Installing
19
Installation Precautions before Installation
19
Installing this Product
20
Installation Notes
20
Installing the GPS Aerial
21
Installation Notes
21
Installing the Microphone
22
After Installation
23
After Installing this Product
23
Français
24
Importantes Mesures de Sécurité
25
Précautions
25
Votre Nouveau Produit Et Ce Manuel
25
Avant D'installer Ce Produit
27
Connexion
27
Précautions À Prendre Avant de Brancher Le Système
27
Pour Éviter Toute Détérioration
28
Remarque Concernant Le Fil Bleu/Blanc
28
Pièces Fournies
30
Branchement du Cordon D'alimentation
31
Description des Câbles de Couleur
32
Branchement du Système
33
Raccordement de L'unité Principal Au Panneau Frontal
34
Connexion À un Amplificateur de Puissance Vendu Séparément
35
Connexion D'un Ipod / Iphone Ou D'un Appareil Android
36
Apposition D'étiquettes D'identification Aux Câbles USB
37
Connexion D'un Iphone Avec Connecteur Lightning
37
Connexion Via Le Port USB (Iphone)
37
Connexion D'un Iphone Avec Connecteur À 30Broches
38
Connexion Via L'entrée AUX (Iphone)
38
Connexion D'un Périphérique Android
38
Connexion D'une Caméra de Rétrovisée
39
Utilisation D'une Entrée AUX
40
Connexion de L'afficheur Arrière
41
Utilisation D'un Écran Arrière Raccordé À la Sortie VIDéo Arrière
41
Installation
42
Pour Éviter Les Parasites Électromagnétiques
42
Précautions À Prendre Avant
42
L'installation
42
Avant de Procéder À L'installation
43
Installation de Ce Produit
43
Remarques Sur L'installation
43
Installation de L'antenne GPS
44
Remarques Sur L'installation
44
Installation du Microphone
45
Après Avoir Installé Ce Produit
46
Après L'installation
46
Italiano
47
Il Nuovo Prodotto E Il Presente Manuale
48
Misure DI Sicurezza Importanti
48
Precauzioni
48
Connessione
50
Precauzioni Prima DI Collegare Il Sistema
50
Prima DI Installare Questo Prodotto
50
Per Evitare Danni
51
Informazione Sul Cavetto Blu/ Bianco
51
Parti in Dotazione
53
Collegamento del Cavo DI Alimentazione
54
Descrizione Dei Cavi Colorati
55
Collegamento del Sistema
56
Collegamento Dell'unità Principale al Pannello Frontale
57
Collegamento a un Amplificatore in Vendita Separatamente
58
Collegamento DI un Ipod / Iphone O DI un Dispositivo Android
59
Applicazione DI Etichette Identificative Ai Cavi USB
60
Collegamento DI un Iphone con Connettore Lightning
60
Collegamento Tramite la Porta USB (Iphone)
60
Collegamento Dei Dispositivi Android
61
Collegamento DI un Iphone con Connettore a 30 Pin
61
Collegamento Tramite L'ingresso AUX (Iphone)
61
Collegamento DI una Telecamera DI Visione Posteriore
62
Uso Dell'ingresso AUX
63
Collegamento del Display Posteriore
64
Quando si Utilizza un Display Posteriore Collegato a Un'uscita Video Posteriore
64
Installazione
65
Per Evitare Disturbi Elettromagnetici
65
Precauzioni Prima Dell'installazione
65
Installazione del Prodotto
66
Note Sull'installazione
66
Prima Dell'installazione
66
Installazione Dell'antenna GPS
67
Note Sull'installazione
67
Installazione del Microfono
68
Dopo L'installazione
69
Dopo L'installazione del Prodotto
69
Español
70
Precauciones
71
Precauciones Importantes
71
Su Nuevo Producto y Este Manual
71
Antes de Instalar Este Producto
73
Conexión
73
Precauciones Antes de Conectar el Sistema
73
Para Impedir Daños
74
Aviso para el Cable Conductor Azul/Blanco
74
Piezas Suministradas
76
Conexión del Cable de Alimentación
77
Descripción de Los Cables de Colores
78
Conexión del Sistema
79
Conexión de la Unidad Principal al Panel de Carátula
80
Conexión al Amplificador de Potencia que Se Vende por Separado
81
Conexión Manual de un Ipod / Iphone O un Dispositivo Android
82
Colocación de Etiquetas de Identificación en Los Cables USB
83
Conexión de un Iphone con Conector Lightning
83
Conexión Mediante el Puerto USB (Iphone)
83
Conexión de Dispositivos Android
84
Conexión de un Iphone con Conector de
84
Clavijas
84
Conexión Mediante la Entrada AUX (Iphone)
84
Conexión de una Cámara de Retrovisor
85
Utilización de una Entrada AUX
86
Conexión de la Pantalla Trasera
87
Uso de una Pantalla Trasera Conectada a la Salida de Vídeo Trasera
87
Instalación
88
Para Impedir que Se Produzcan Interferencias Electromagnéticas
88
Precauciones Antes de la Instalación
88
Antes de la Instalación
89
Instalación de Este Producto
89
Notas Acerca de la Instalación
89
Instalación de la Antena GPS
90
Notas Acerca de la Instalación
90
Instalación del Micrófono
91
Después de Instalar Este Producto
92
Después de la Instalación
92
Deutsch
93
Ihr Neues Produkt und diese Anleitung
94
Vorsichtsmaßnahmen
94
Wichtige Sicherheitshinweise
94
Verbindung
96
Vor dem Anschließen des Systems zu Beachten
96
Vor dem Einbau dieses Produkts
96
Zur Vermeidung von Schäden
97
Anmerkung zum Blau/Weißen Kabel
98
Mitgelieferte Teile
99
Stromkabel Anschließen
100
Beschreibung der Farbigen Kabel
101
Anschluss des Systems
102
Anschließen der Haupteinheit an die Fronttafel
103
Anschluss an den Separat Erhältlichen Leistungsverstärker
104
Verbindung eines Ipod/Iphone oder eines Android-Gerätes
105
Anschluss an ein Iphone mit Lightning Connector
106
Anschluss über den USB-Anschluss (Iphone)
106
USB-Kabel mit Kennzeichnungsetiketten Markieren
106
Anschluss an ein Iphone mit 30-Poligem Anschluss
107
Anschluss über den AUX-Eingang (Iphone)
107
Anschluss des Android -Geräts
107
Anschluss einer Heckkamera
108
Verwenden des AUX-Eingangs
109
Anschluss des Zusätzlichen Displays
110
Bei Verwendung eines Zusätzlichen Displays, das an den Hinteren Videoausgang Angeschlossen ist
110
Einbau
111
Vor der Installation zu Beachten
111
Einbau dieses Produkts
112
Hinweise zur Befestigung
112
Vor dem Einbau
112
Zur Vermeidung Elektromagnetischen Rauschens
112
Einbau der GPS-Antenne
113
Hinweise zur Befestigung
113
Einbau des Mikrofons
114
Nach dem Einbau
115
Nach dem Einbau dieses Produkts
115
Dutch
116
Belangrijke Veiligheidsvoorschriften
117
Uw Nieuwe Product en Deze
117
Handleiding
117
Voorzorgen
117
Verbinding
119
Voor U Dit Product Inbouwt
119
Voorzorgen Voor Het Aansluiten Van Het Systeem
119
Voorkomen Van Beschadigingen
120
Opmerking over de Blauw/Witte Draad
120
Meegeleverde Onderdelen
122
Het Stroomsnoer Aansluiten
123
Beschrijving Van de Gekleurde Kabels
124
Systeemcomponenten Aansluiten
125
Het Hoofdtoestel Met Het Voorpaneel Verbinden
126
Aansluiten Op Een Los Verkrijgbare Eindversterker
127
Een Ipod/Iphone of Android-Apparaat Aansluiten
128
Een Iphone Met Lightning-Connector Aansluiten
129
Aansluiten Via de USB-Poort (Iphone)
129
Identificatielabels Bevestigen Aan USB-Kabels
129
Een Android -Apparaat Aansluiten
130
Een Iphone Met 30-Pens Connector Aansluiten
130
Aansluiten Via de AUX-Ingang (Iphone)
130
Een Achteruitkijkcamera Aansluiten
131
De AUX-Ingang Gebruiken
132
Het Achterdisplay Aansluiten
133
Bij Gebruik Van Een Achterdisplay Dat Op de Achtervideo-Uitgang Is Aangesloten
133
Inbouwen
134
Voorkomen Van Elektromagnetische Storingen
134
Voorzorgen Voor Installatie
134
Installeren Van Dit Product
135
Opmerkingen Betreffende de Installatie
135
Voor de Installatie
135
Installeren Van de GPS-Antenne
136
Opmerkingen Betreffende de Installatie
136
De Microfoon Installeren
137
Na de Installatie Van Dit Product
138
Na Installatie
138
Advertisement
Pioneer AVIC-EVO1 Operation Manual (78 pages)
Brand:
Pioneer
| Category:
Car Navigation system
| Size: 3.58 MB
Table of Contents
Table of Contents
2
Precaution
4
Notes on Internal Memory
4
About this Manual
4
Checking Part Names and Functions
4
Basic Operation
4
Plugging and Unplugging a USB Storage Device
5
How to Use the Screens
6
Using the Touch Panel
7
Changing the Display Order of Sources
7
Selecting a Source
7
Displaying the AV Operation Screen
7
Supported AV Source
7
How to Use the Navigation Menu Screen
8
Operating the Navigation Menu Screen
9
How to Read the Map Screen
10
Operating the Map Screen
10
How to Use the Map
10
Understanding the Route Guidance
11
How to Plan Your Route
12
Searching for a Location by Address
12
Searching for a
12
Destination
12
Searching for Points of Interest (POI)
13
Selecting a Destination from Stored Locations
14
Selecting a Destination from Stored Routes
14
Selecting a Location You Searched for Recently
14
Searching for a Location Using "Combined Search
14
Searching for a Location by the Coordinates
15
Searching for a Location by Scrolling the Map
15
Using the "Map Location" Screen
15
Modifying the Route
16
C Hecking and Modifying the Current Route
16
Deleting Stored Routes
18
Editing the Stored Route
18
Storing a Route in " Saved Routes
18
Storing a Location in " Saved Location
18
R Egistering and Editing Locations and Routes
18
Saving a Location as an Alert Point
19
Information (TMC)
20
C Hecking Useful
20
Information about Your Trip
20
Displaying the "Useful Information" Menu
20
Recording Your Travel History
21
Using the Trip Computer Mode
21
Calculating the Fuel Consumption
22
Customising the Navigation Settings
22
Customising Preferences of the Navigation
22
Information on each Option of " Settings
23
Setting the Alert Point Warnings
26
Getting the Map Update
27
Expanding the Use of the Navigation Functions
27
Compatibility and Connectivity
27
Registering Your Bluetooth Devices
28
Displaying the "Bluetooth" Screen
28
Bluetooth ® Connection
28
Connecting a Registered Bluetooth Device Manually
29
Switching Visibility
29
Entering the PIN Code for Bluetooth Wireless Connection
29
Displaying the Device Information
29
Clearing the Bluetooth Memory
29
Updating Bluetooth Software
29
Displaying the Bluetooth Software Version
29
Making a Phone Call
30
Receiving a Phone Call
30
Displaying the Phone Menu Screen
30
Hands-Free Phoning
30
Changing the Phone Settings
31
Using the Voice Recognition Function
31
Notes for Hands-Free Phoning
31
Smartphone
31
Setup
32
Setting the Device Connection Method
32
Android ™ Device Compatibility
32
Information on the Connections and Functions for each Device
33
Starting Procedure
35
Storing the Strongest Broadcast Frequencies
35
Displaying the "Radio Settings" Screen
35
Radio
35
Digital Radio
36
Digital Radio Tuner Operations
37
Starting Procedure
37
Listening to a Recent Broadcast (Time Shift Mode)
37
Selecting a Service Component
37
Displaying the "DAB Settings" Screen
37
Disc
38
Starting Procedure
40
Searching for the Part You Want to Play
40
Operating the DVD Menu
40
Operating the DVD Menu Using Touch Panel Keys
40
Starting Procedure (for Disc)
43
Starting Procedure (for USB)
43
Pod
44
Connecting Your Ipod
45
Starting Procedure
45
Selecting Song or Video Sources from the Playlist Screen
45
Using this Product's Ipod Function from Your Ipod
45
Selecting a Song from the List Related to the Song Currently Playing (Link Search)
46
Using Apple Music Radio
46
Using Apple Carplay
46
Starting Procedure
46
Apple Carplay
46
Using Android Auto
47
Starting Procedure
47
Setting the Driving Position
47
Adjusting the Volume
47
Android Auto
47
Setting the Auto-Launch Function
48
Setting the Driving Position
48
Adjusting the Volume
48
Starting Procedure
49
Bluetooth Audio Player
49
AUX Source
49
Using MIXTRAX
50
Starting Procedure
50
M Ixtrax
50
Setting the Video Signal
50
Selecting an Item from the List
51
Selecting Songs Not to be Played
51
Displaying the Vehicle Information Screen
51
Displaying Obstacle Detection Information
51
Displaying the Operating Status of the Climate Control Panel
51
Adapter
51
Ehicle Equipment Information
51
Setting Bluetooth Audio Source Activation
52
Setting the Beep Tone
52
Setting the Ever Scroll
52
Setting the Rear View Camera
52
Setting Navigation Screen Interruption
52
Displaying the "System" Set Ting Screen
52
Using the Multi-Function Display
52
Setting the Navigation Information Bar
52
System Settings
52
Setting the Camera for Camera View Mode
53
Setting the Dimmer
54
Adjusting the Picture
54
Selecting the System Language
54
Setting the Safe Mode
54
Setting the Demo Mode
54
Displaying the Open Source Licences
55
Checking Sensor Learning Status and Driving Status
55
Checking the Connections of Leads
55
Setting the Subwoofer Output
56
Selecting the Listening Position
56
Adjusting the Cutoff Frequency Value
56
Displaying the "Audio" Setting Screen
56
Setting the Rear Speaker Output
56
Adjusting Source Levels
56
Audio Adjustments
56
Adjusting the Time Alignment
57
Using the Equaliser
57
Adjusting the Equaliser Curve Automatically (Auto EQ)
57
Replicating the Settings
59
Displaying the "Theme" Setting Screen
59
Selecting the Wallpaper
59
Setting the Illumination Brightness
59
Selecting the Theme Colour
59
Selecting the Style of the Clock
59
Changing the Preinstalled Splash Screen
59
T Heme Menu
59
Setting up the Video Player
60
Ideo Settings
60
Setting the Video Signal for the Rear View Camera
61
Setting the Video Output Format
61
Changing the Wide Screen Mode
62
Setting the " Sound Retriever" Function
62
Setting the Time and Date
62
Removing a Shortcut
62
Selecting a Shortcut
62
Creating a Shortcut
62
Other Functions
62
Favourite Menu
62
Storing Song Information to an Ipod (Itunes ® Tagging)
62
Selecting the Video for the Rear Display
63
Setting the Anti-Theft Function
63
Restoring this Product to the Default Settings
63
Troubleshooting
64
Appendix
64
Error Messages
65
Positioning Technology
67
Handling Large Errors
68
Detailed Information for Playable Media
71
Route Setting Information
71
Bluetooth
73
Android Auto
74
Detailed Information Regarding Connected Ipod Devices
74
Mixtrax
74
Aac
74
DIVX
74
Flac
74
Google, Google Play, Android
74
Using App-Based Connected Content
75
Mhl
75
IVONA T Ext-To-Speech
75
Notice Regarding Video Viewing
75
Notice Regarding DVD-Video Viewing
75
Notice Regarding Open Source Licences
75
Map Coverage
75
Using the LCD Screen Correctly
75
Pioneer AVIC-EVO1 Quick Start Manual (16 pages)
Navigation AV System
Brand:
Pioneer
| Category:
Car Navigation system
| Size: 0.61 MB
Advertisement
Pioneer AVIC-EVO1 Quick Start Manual (16 pages)
Navigation AV System
Brand:
Pioneer
| Category:
Car Navigation system
| Size: 1.73 MB
Pioneer AVIC-EVO1 Operation Manual (2 pages)
NAVIGATION AV SYSTEM FOR FIAT DUCATO
Brand:
Pioneer
| Category:
Car Navigation system
| Size: 0.29 MB
Advertisement
Related Products
Pioneer AVIC-EVO1-OC2-MTB
Pioneer AVIC-EVO1-OC1-MTB
Pioneer AVIC-EVO1-G72-QYI
Pioneer AVIC-EVO1-G72-BBF
Pioneer AVIC-EVO1-DX2-GRY
Pioneer AVIC-EVO1-DT2-C-GR
Pioneer AVIC-EVO1-PL2-VAL
Pioneer AVIC-EVO1-PL1-VAL
Pioneer AVIC-EVO1-G72-DMD
Pioneer AVIC-EVO1-DX1-GRY
Pioneer Categories
Car Receiver
Receiver
Stereo Receiver
Amplifier
CD Player
More Pioneer Manuals
Login
Sign In
OR
Sign in with Facebook
Sign in with Google
Upload manual
Upload from disk
Upload from URL