MINOLTA-QMS PagePro 4100E Manuals
Manuals and User Guides for MINOLTA-QMS PagePro 4100E. We have 5 MINOLTA-QMS PagePro 4100E manuals available for free PDF download: User Manual, Service Manual

MINOLTA-QMS PagePro 4100E User Manual (213 pages)
Network Interface Card for PagePro 4100E; PagePro 4100GN
Brand: MINOLTA-QMS
|
Category: Printer Accessories
|
Size: 4.03 MB
Table of Contents
-
-
-
-
Servers55
-
-
-
-
-
BSD System79
-
Aix 4.081
-
Hp-Ux81
-
As/40082
-
Sco Unix84
-
-
-
-
-
Installing MAP117
-
Using MAP118
-
-
BOOTP (Windows)
128-
Using BOOTP129
-
-
-
Using Nimanage130
-
Configuration132
-
Error Log132
-
-
-
-
-
Access Methods
147 -
Printer Monitor
148-
Printer Status149
-
Summary149
-
Input Tray150
-
Output bin151
-
Others151
-
System152
-
-
Network153
-
About154
-
-
-
Print Option164
-
Change Password168
-
Reset169
-
Languages170
-
-
Menu Items
176-
IP Parameters176
-
LPD Printers176
-
Protocols176
-
Reset Unit176
-
Change Password177
-
-
-
Network Card
196
-
-
Advertisement
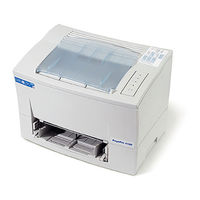
MINOLTA-QMS PagePro 4100E User Manual (173 pages)
Konica Minolta PagePro 4100E: User Manual
Brand: MINOLTA-QMS
|
Category: Printer
|
Size: 3.16 MB
Table of Contents
-
-
-
-
-
-
-
-
Adding Fonts69
-
-
-
-
Paper Panel
89 -
Font Panel
94
-
-
Loading Paper
109
-
Troubleshooting
138-
-
Printer Messages
153-
Lamp Functions153
-
Status Messages154
-
User Messages155
-
Service Messages157
-
-
-
Appendix
160-
-
Hardware160
-
Software160
-
Operating System160
-
-
Index
166
-

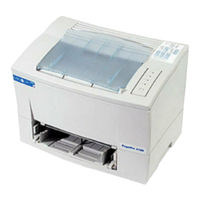
MINOLTA-QMS PagePro 4100E User Manual (173 pages)
PagePro Laser Printer
Brand: MINOLTA-QMS
|
Category: Printer
|
Size: 4.92 MB
Table of Contents
-
-
-
-
-
-
-
-
Adding Fonts69
-
-
-
-
Paper Panel
89 -
Font Panel
94
-
-
Loading Paper
109
-
Troubleshooting
138-
-
Printer Messages
153-
Lamp Functions153
-
Status Messages154
-
User Messages155
-
Service Messages157
-
-
-
Appendix
160-
-
Hardware160
-
Software160
-
Operating System160
-
-
Index
166
-
Advertisement

MINOLTA-QMS PagePro 4100E Service Manual (126 pages)
Brand: MINOLTA-QMS
|
Category: Printer
|
Size: 1.92 MB
Table of Contents
-
-
-
Overview25
-
-
-
Panel Button37
-
Timing Chart50
-
Print Ending50
-
-
Paper Path51
-
Drum Charge58
-
Development61
-
Fusing63
-
Paper Exit66
-
-
-
Screws72
-
-
5 Adjustment
105 -
-
-
No Power113
-
MINOLTA-QMS PagePro 4100E User Manual (67 pages)
Konica Minolta PagePro 4100: User Guide
Brand: MINOLTA-QMS
|
Category: Printer
|
Size: 0.99 MB