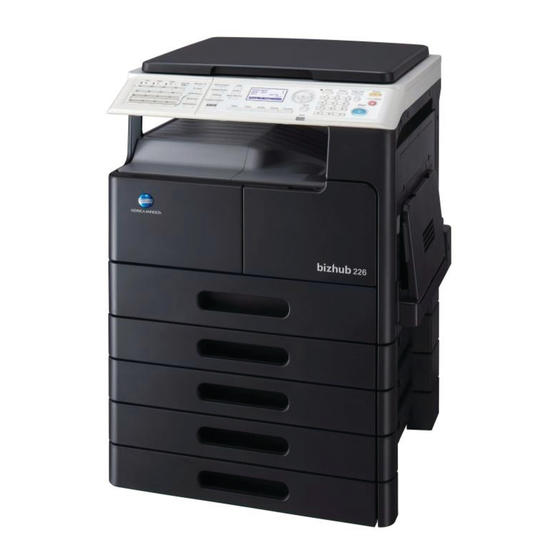
Sign In
Upload
Manuals
Brands
Konica Minolta Manuals
All in One Printer
BIZHUB 226
Konica Minolta BIZHUB 226 Manuals
Manuals and User Guides for Konica Minolta BIZHUB 226. We have
5
Konica Minolta BIZHUB 226 manuals available for free PDF download: User Manual, Quick Start Manual, Quick Manual
Konica Minolta BIZHUB 226 User Manual (180 pages)
fax
Brand:
Konica Minolta
| Category:
Mfp
| Size: 2.85 MB
Table of Contents
Table of Contents
3
1 Introduction
9
Welcome
11
User's Guides
11
User's Guide
11
Conventions Used in this Manual
12
Symbols Used in this Manual
12
To Use this Machine Safely
12
Procedural Instruction
12
Key Symbols
13
Original and Paper Indications
13
Original and Paper Sizes
13
2 Before Using the Fax Function
15
Control Panel
17
Name and Function of each Part on Control Panel
17
Extended Operation Panel MK-749 (Optional)
20
Display Message
21
List of Pictograms in Fax Mode
22
Initial Mode
22
Original
23
Using the ADF
23
Original Types
23
Cautions on Original
24
First Required Registration and Setting Check
25
Required Registration
25
Checking the Default Settings
25
Specifying the Current Date and Time
26
Specifying the Time to Switch to the Daylight-Saving Time
27
Registering a Local Fax Number
28
Registering a Sender Name
29
Specifying the Line Type
30
Specifying the Line Monitor Sound
30
Specifying the Communication Line
31
3 How to Use the Fax Function
33
Transmission Procedure
35
Loading the Original
37
Loading the Original into the ADF
37
Loading the Original on the Original Glass
38
Specifying the Fax Image Quality
39
Specifying the Image Quality
39
Specifying a Destination
40
Specifying Only One Destination
40
Entering a Fax Number
40
One Touch Dial
41
Speed Dial
42
Group Dial
43
Program Dial
44
Address Book (List, Search)
45
Chain Dial
46
Specifying Multiple Destinations (Sequential Broadcast Transmission)
47
Manual Redialing
48
Operations During Original Scanning
49
If Memory Has Overflowed
49
When [YES] Is Selected
49
When [NO] Is Selected
49
If a Transmission Fails
50
Sending a Fax after Calling (Manual Transmission)
51
Canceling a Transmission
52
Canceling (Deleting) a Transmission Reservation
52
Checking the Communication Result (Report/List)
53
Checking the Communication Result
53
Printing out a Report or List
53
Report or List Types
54
TX Result Report
54
Activity Report
54
Memory Image Print
54
One-Touch Dial List
55
Speed Dial List
55
Key Setting List
55
Relay Box List
55
Machine Status List
55
Configuration Page
55
PCL Font List
55
Memory Transmission and Immediate Transmission
56
Memory Transmission
56
Immediate Transmission
56
Specifying the Transmission Time (Specified-Time Transmission)
57
Collectively Sending Multiple Originals at the Specified Time (Batch Transmission)
58
Receiving Data
59
Memory Receiving
59
Paper Size of Received Document
59
Paper Priority Sequence of Received Document
59
Automatically Receiving Data (Fax Only Mode)
59
Manually Receiving Data
60
Making a Call
61
Receiving a Call
62
4 Convenient Transmission and Receiving Functions
63
Transmission with F-Code (F-Code TX)
65
Specifying an F Code at Fax Transmission
65
Specifying an F Code to Register a Destination
66
Using a Confidential User Box for Sending and Receiving (Confidential Communication)
67
Registering a Confidential User Box
67
Sending Data to a Confidential User Box (Confidential Transmission)
68
Printing out an Original Received by Confidential Reception
69
Sending a Document with a Receiver's Instruction (Polling TX)
70
Using Polling TX
70
Deleting a Document Sent by Polling
71
Receiving a Sender's Document with an Instruction of this Machine (Polling RX)
72
Specify a Relay Distribution Station for Transmission (Relay Instruction Transmission)
73
Specify this Machine as a Relay Distribution Station (Relay Broadcasting)
75
Forwarding a Received Document to the Specified Destination (Forward)
76
5 Internet Fax
77
Transmitting an Internet Fax
79
Basic Transmission Procedure
79
Using the Address Book for Search (Address Search)
81
Configuring Transmission Settings
83
Specifying the Transmission Time
83
Selecting the Basic or Advanced Mode
84
Specifying the Maximum Transmission Size
84
Specifying the Maximum Transmission Resolution
84
Specifying the Compression Coding Method
85
Specifying the Image Quality and Density When Scanning the Original
86
Specifying the Image Quality
86
Specifying the Density
86
Adding Functions
87
Specifying a Title
87
Specifying a Forward Destination
87
Specifying Header Printing
88
Receiving an Internet Fax
89
Receivable Data
89
Receiving an Internet Fax Automatically
90
Receiving an Internet Fax Manually
90
6 Pc-Fax
91
Overview of PC-Fax
93
Pc-Fax
93
Operating Environment
94
Setup Procedure
95
USB Connection
95
Network Connection
95
Installing the Fax Driver
96
Connection Method and Installation Procedure
96
Uninstalling the Fax Driver
96
Manual Uninstallation
96
Sending a Fax
98
Creating a Fax Cover Sheet
99
Configuring Fax Driver Settings
100
Basic Settings
100
Configuring Sender Information
101
Registering a Destination in the Address Book
102
Editing a Destination in the Address Book
102
Registering a Group in the Address Book
103
Editing a Group in the Address Book
103
Deleting a Destination or Group in the Address Book
103
Importing Data to the Address Book
104
Exporting Data from the Address Book
104
7 Utility and Fax Settings
105
Utility Settings
107
Store Address
110
Registration Items
110
Registering Destinations in the One-Touch Dial
111
Changing or Deleting a One-Touch Dial Destination
112
Registering Destinations in the Speed Dial
113
Changing or Deleting a Speed Dial Destination
114
Registering Destinations in the Group Dial
115
Changing or Deleting a Group Dial Destination
116
Registering Destinations in the Program Dial
117
Changing or Deleting the Sequential Broadcast Transmission Program
118
Changing or Deleting the Specified-Time Transmission Program
118
Changing or Deleting the Confidential Transmission Program
119
Changing or Deleting the Polling RX Program
119
Changing or Deleting the Relay Instruction Transmission Program
120
Fax Registration
121
Fax Registration Items
121
Registering the Confidential User Box
121
Deleting the Confidential User Box Setting
122
Registering the Relay User Box
123
Deleting the Relay User Box Setting
124
Fax TX Setting
125
Fax TX Setting Items
125
Specifying the Scanning Density
125
Specifying the Quality Priority
126
Specifying the Default TX Mode
126
Configuring Header Printing
126
Configuring the Fax Number Confirmation Function
126
Fax RX Setting
127
Fax RX Setting Items
127
Specifying the Memory RX Mode
128
Releasing the Memory RX Mode
128
Specifying the Number of Rings
129
Configuring the Print Reduction
129
Configuring the RX Printing
129
Configuring the RX Mode
130
Configuring the Forward Mode
130
Configuring Footer Printing
130
Selecting a Tray
131
Configuring the Closed Network
131
Report Setting
132
Report Setting Items
132
Selecting Whether to Automatically Print out a Activity Report
132
Selecting Whether to Automatically Print out a Reservation Report
132
Selecting Whether to Automatically Print out a Transmission Result Report
133
Selecting Whether to Automatically Print out a Receiving Result Report
133
8 Pagescope Web Connection
135
Overview
137
Operating Environments
137
How to Use Pagescope Web Connection
138
How to Access
138
How to View the Screen
138
User Mode and Administrator Mode
139
How to Operate
139
User Mode
140
System] - [Summary]
140
System] - [Details]
140
System] - [Maintenance] - [Counter]
141
System] - [Maintenance] - [Power Save Setting]
142
System] - [Online Assistance]
142
Print Job] - [Print Job Manegement]
143
Print Job] - [File Download]
143
Print] - [Settings] - [Paper Handling]
144
Print] - [Settings]
144
Print] - [Settings] - [Printer Setting]
145
Print] - [Test Print]
146
Print] - [Font Information]
146
Address] - [One-Touch Dial Setting]
147
Address] - [Speed Dial Setting]
147
Address] - [Group Dial Setting]
148
Network] - [Summary]
148
9 If this Message Appears
149
Primary Messages and Corrective Actions
151
10 If You Suspect a Failure then Do the Following
153
Having Problems Sending a Fax
155
Having Problems Receiving a Fax
156
Having Problems Making a Call
157
11 Others
159
Fax Specifications
161
Lsu
162
What Is LSU
162
LSU Operating Environment
162
Setup Procedure
162
Installing LSU
163
Starting LSU
163
LSU Screen
164
Connecting LSU to this Machine
164
Downloading the Registered Information from this Machine
164
Creating a New Configuration File
165
11.2.10 Registering Destinations in the One-Touch Dial
165
11.2.11 Editing a One-Touch Dial Destination
165
11.2.12 Registering Destinations in the Speed Dial
166
11.2.13 Editing a Speed Dial Destination
166
11.2.14 Registering Destinations in the Group Dial
167
11.2.15 Editing a Destination in the Group Dial
167
11.2.16 Printing out the One-Touch Dial, Speed Dial, or Group Dial List
167
11.2.17 Saving Settings in a Computer
168
11.2.18 Saving Settings on this Machine
168
11.2.19 Saving the Utility Settings
168
11.2.20 Configuring Administrator Settings
170
11.2.21 Viewing the Total Counter
171
11.2.22 Viewing the Configuration Page
171
11.2.23 Uninstalling LSU
171
Glossary
172
12 Index
173
Advertisement
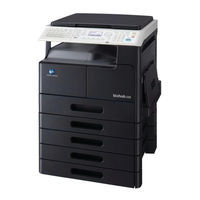
Konica Minolta BIZHUB 226 User Manual (160 pages)
Brand:
Konica Minolta
| Category:
All in One Printer
| Size: 5.01 MB
Table of Contents
Table of Contents
3
1 Introduction
7
Welcome
9
User's Guides
9
User's Guide
9
Conventions Used in this Manual
10
Symbols Used in this Manual
10
To Use this Machine Safely
10
Procedural Instruction
10
Key Symbols
11
Original and Paper Indications
11
Original and Paper Sizes
11
2 Before Using this Machine
13
Part Names and Their Functions
15
Main Body
17
Exterior of the Main Unit
17
Interior of the Main Unit
19
Reverse Automatic Document Feeder (Option)/Automatic Duplex Unit (Option)
20
Reverse Automatic Document Feeder
20
Automatic Duplex Unit
20
Paper Feeder Unit (Option)
21
Control Panel
22
Name and Function of each Part on the Control Panel
22
Extended Operation Panel MK-749 (Option)
24
Display Message
25
Power
30
Turning on the Power
30
Turning off the Power
30
Initial Mode
30
Auto Panel Reset
30
Sleep Mode
31
Auto Shut Time
31
Next Copy Job
31
Saving Electricity
32
Setting Sleep Mode
32
Specifying the Auto Shut Time
33
3 Before Making Copies
35
Paper
37
Paper Type
37
Paper Size
38
Loadable Number of Sheets
39
Precautions for Using Paper
39
Image Copy/Printing Area
40
Storing Paper
41
Loading Paper
42
Loading Paper into Tray1
42
Loading Paper to Tray2/Tray3/Tray4/Tray5
43
Original
44
Using ADF
44
Original Type
44
Precautions on Originals
45
Loading the Original
46
Loading the Original into the ADF
46
Setting the Original on the Original Glass
47
Loading the Highly Translucent or Transparent Original
48
Setting the Book Original
49
Setting Originals of Different Sizes (Mixed Original)
50
4 Making Copies
53
Copy
55
Basic Copying Method
55
Reducing or Enlarging a Standard Size Original to a Different Standard Size
56
Specifying the Image Quality to Fit the Original
56
Specifying the Density
57
Setting the Original Direction
58
Stopping, Restarting, or Erasing the Copy Job
59
Selecting the Tray
60
Auto Tray Change Function
60
Tray Selection Order by Tray Change Function
61
Manually Making Copies
62
Paper Type and Number of Sheets of Paper Available for the Bypass Tray
62
Adjusting the Bypass Tray
62
Loading Plain Paper into the Bypass Tray
63
Loading OHP Transparencies into Bypass Tray
64
Loading Envelopes into the Bypass Tray
65
Manually Making Copies (Bypass Tray)
67
Making Copies on Various Types of Paper
68
Making Copies on OHP Transparencies
68
Making Copies on Custom Size Paper
69
Making Copies on Envelopes
71
Specifying the Zoom Ratio to Copy the Original
72
Zoom Ratio Setting Type
72
Setting the Auto Zoom Function
72
Setting the Fixed Zoom Ratio
73
Setting the Zoom Ratio Manually
73
Setting the X/Y Variable Zoom Ratio
74
Changing Copy Density to Copy the Original
75
Setting the Copy Density
75
Confirming the Machine Counter
76
Items You Can Confirm Using the Machine Counter
76
Viewing the Total Counter
76
Printing Reports
77
5 Making Copies in Advanced Manner
79
Finishing Setting (Sorting, Grouping)
81
Finishing Type
81
Setting Finishing
83
Making 1-Sided or 2-Sided Copy
84
Configuring 2In1 or 4In1 Copy Settings
86
Using the ID Copy
88
Making Copies by Entering the ID (Account) Number
89
Setting Book Separation Copy
90
Frame/Center Erase Type
91
Erasing a Part of the Original and Making Copies (Erase)
92
Precautions When Making Copies in the Erase Mode
92
Setting the Erase
93
Making Copies with Black and White Reversed (Neg./Pos. Reverse)
94
Making Copies with a Binding Margin
95
Precautions When Making Copies with a Binding Margin
95
Setting a Binding Margin
96
Making Copies with a Date and
97
Registering or Recalling the Copy Settings
98
Registering the Copy Setting
98
Recalling the Copy Setting and Making Copies
99
6 Utility and Copy Settings
101
Utility
103
Machine Setting
104
Select Machine Setting
105
Changing the Auto Panel Reset Setting
105
Changing the Sleep Mode Setting
106
Changing the Auto Shut Time
106
Changing the Image Quality When Using the ADF
107
Changing the Image Quality When Using the Original Glass
107
Changing the Density
108
Changing the LCD Contrast
108
Changing Key Speed Setting
109
Changing the Language to be Displayed on the Display
110
Tray Settings
111
Selecting Tray Settings
111
Setting the Unit of the Paper Size
112
Configuring Paper Settings for Tray1
112
Configuring Settings for Tray2 to Tray5
113
Registering a Custom Size
114
Drum Dray (Dew Condensation Removal)
116
Administrator Settings
117
Selecting the Administrator Setting
118
Changing the Administrator Number
118
Enabling a Change of the Auto Shut Time
119
Configuring Setting so that Sleep Mode Is Not Used
119
Specifying ACCOUNT TRACK MODE
119
Registering ID (Account)
120
Changing or Deleting the ID (Account)
121
Displaying or Erasing the Total Counter by ID (Account)
122
Erasing All Total Counters by ID (Account)
122
Copy Setting 1
123
Selecting COPY SETTING 1
123
Setting the Tray Priority
124
Specifying the Quality Priority
124
Specifying the Density Priority
125
Specifying the Density Level Priority (Auto)
125
Specifying the Density Level Priority (Manual)
126
Setting 2-Sided Printing
126
Setting the Copy
127
Setting the Original Page Margin Position
127
Setting the Book Binding Position
128
Adjusting the Page Margin Width
128
Setting the Erase Width
129
Setting a Small Size Original
129
Copy Setting 2
130
Selecting COPY SETTING 2
130
Setting the Copy Mode Priority
131
Specifying the Finishing Priority
131
Specifying the Alternate Output
132
Setting 4In1 Page Copy Order
132
Specifying the Mixed Original Priority
133
Configure ORIG. DIRECTION Setting
133
Configuring BOOK SEPARATION Setting
134
Setting Stamp Printing
134
Setting the Page Number Print Format
135
Setting the Date/Time Print Format
135
7 If You Suspect a Failure then Do the Following
137
If this Copy Is Output
139
Major Messages and Troubleshooting
141
The Copier Does Not Function
143
8 Others
145
Major Specifications
147
Reverse Automatic Document Feeder DF-625
148
Automatic Duplex Unit AD-509
149
Daily Maintenance
150
Housing
150
Original Glass
150
Slit Scan Glass
150
Original Pad
151
Control Panel
151
9 Index
153
Index by Item
155
Index by Button
158
Konica Minolta BIZHUB 226 User Manual (108 pages)
Brand:
Konica Minolta
| Category:
All in One Printer
| Size: 1.45 MB
Table of Contents
Table of Contents
3
1 Introduction
7
Welcome
9
User's Guides
9
User's Guide
9
Conventions Used in this Manual
10
Symbols Used in this Manual
10
To Use this Machine Safely
10
Procedural Instruction
10
Key Symbols
11
Original and Paper Indications
11
Original and Paper Sizes
11
2 Overview
13
Printer Controller
15
Roles of the Printer Controller
15
Standard Controller
15
Optional Image Controller
16
Flow of Printing
17
Operating Environment
18
Connectable Computers and Operating Systems
18
For Windows
18
For Linux
18
Interface Used for Connection
18
USB Interface
18
Ethernet
18
Connection Diagram
19
Setup Procedure
20
For Local Connection (USB Port)
20
For Network Connection
20
3 Installing the Printer Driver (for Windows)
21
Printer Drivers Compatible with Respective Operating Systems
23
Manually Uninstalling the Printer Driver
24
4 Setting the GDI/PCL Printer Driver
25
Printer Driver Setting Window
27
Displaying the Setting Window
27
Print Settings Window
28
Properties Window
29
Device Options] Tab
30
Device Options]
30
Common Operations
31
Common Settings
31
Saving the Settings ([Easy Set])
32
Setup] Tab
33
Function List
33
Setting Custom Size
34
Using Secure Print
35
Specifying from the Printer Driver
35
Outputting in this Machine
35
Layout] Tab
37
Per Page Setting] Tab
38
Watermark] Tab
39
Function List
39
Creating a New Watermark
40
Editing a Watermark
41
Quality] Tab
42
Function List
42
Setting the Font
43
5 Setting the XPS Printer Driver
45
Printer Driver Setting Window
47
Displaying the Setting Window
47
Print Settings Window
48
Properties Window
49
Device Options] Tab
50
Device Options]
50
Common Operations
51
Common Settings
51
Saving the Settings ([Easy Set])
52
Setup] Tab
53
Layout] Tab
54
Quality] Tab
55
6 Operating the Panel for Printer Functions
57
Printer Operation
59
Printer Indicator
59
Starting Printing
59
Canceling a Print Job
60
Power Save Mode
61
7 Printing in the Linux Environment
63
System Environment Requirements
65
Preparation for Printing
66
Installing the Printer Driver
66
Adding the Printer
67
Manually Adding the Printer Driver
68
Adding a Printer from CUPS Administration Web Page
68
Configuring the Default Settings of the Printer Driver
68
[Device Options]
69
[Paper]
69
[General]
69
[Duplex]
69
[Secure Print Settings]
69
[Account Track]
70
[Quality]
70
Printing Procedure
71
8 Pagescope Web Connection
73
Overview
75
Operating Environments
75
How to Use Pagescope Web Connection
76
How to Access
76
How to View the Screen
76
User Mode and Administrator Mode
77
How to Operate
77
User Mode
78
System] - [Summary]
78
System] - [Details]
78
System] - [Maintenance] - [Counter]
79
System] - [Maintenance] - [Power Save Setting]
80
System] - [Online Assistance]
80
Print Job] - [Print Job Management]
81
Print Job] - [File Download]
81
Print] - [Settings] - [Paper Handling]
82
Print] - [Settings] - [Paper Layout]
82
Print] - [Settings] - [Printer Setting]
83
Print] - [Test Print]
84
Print] - [Font Information]
84
Address] - [One-Touch Dial Setting]
85
Address] - [Speed Dial Setting]
85
Address] - [Group Dial Setting]
86
Network] - [Summary]
86
9 Troubleshooting
87
Main Messages and Troubleshooting
89
Handling Print Data When an Error Occurs
90
MACHINE TROUBLE] Error
90
Temporary Error
90
10 Appendix
91
Print Specifications
93
Manually Installing the Printer Driver (for Windows)
94
Checking the Connection Method
94
Using Lpr/Port9100 Connection for Installation
95
Operations Required to Use this Function (for Administrators)
95
Installing the Printer Driver by Automatically Detecting the Printer
95
Installing the Printer Driver by Creating a New Port
97
Using IPP Connection for Installation
99
Operations Required to Use this Function (for Administrators)
99
Using the Web Service Connection for Installation
101
Web Service
101
Operations Required to Use this Function (for Administrators)
101
Installation Methods
101
Using USB Connection for Installation
102
Updating the Printer Driver
103
11 Index
105
Index by Item
107
Index by Button
108
Advertisement
Konica Minolta BIZHUB 226 Quick Start Manual (19 pages)
NETWORK PORT DEFINITION Lot 26 (801/2013/EU) for black/white products
Brand:
Konica Minolta
| Category:
All in One Printer
| Size: 1.61 MB
Table of Contents
Table of Contents
2
Bizhub 758/PRO 958
3
Bizhub 558/458/368/308
5
Bizhub 654E/754E
7
Bizhub 554E/454E/364E/284E/224E
9
Bizhub 306/266
10
Bizhub 367/287/227
11
Bizhub 4750/4050
12
Bizhub 4020
13
Bizhub 3320
14
Bizhub 4700P/4000P
15
Bizhub 3301P
16
Bizhub 226
17
Konica Minolta BIZHUB 226 Quick Manual (2 pages)
Brand:
Konica Minolta
| Category:
Printer
| Size: 0.29 MB
Advertisement
Related Products
Konica Minolta bizhub 223
Konica Minolta Bizhub 222
Konica Minolta bizhub 227
Konica Minolta bizhub 224e
Konica Minolta 223 series
Konica Minolta bizhub 283
Konica Minolta BIZHUB 250/350
Konica Minolta Magicolor 2490 MF
Konica Minolta Bizhub 282
Konica Minolta Magicolor 2590
Konica Minolta Categories
All in One Printer
Printer
Digital Camera
Measuring Instruments
Copier
More Konica Minolta Manuals
Login
Sign In
OR
Sign in with Facebook
Sign in with Google
Upload manual
Upload from disk
Upload from URL