Sign In
Upload
Manuals
Brands
Husqvarna Manuals
Power Pack
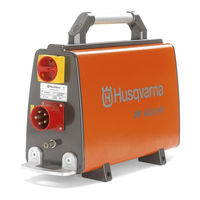
PP490HF
Husqvarna PP490HF Manuals
Manuals and User Guides for Husqvarna PP490HF. We have
3
Husqvarna PP490HF manuals available for free PDF download: Workshop Manual
Husqvarna PP490HF Workshop Manual (165 pages)
Brand:
Husqvarna
| Category:
Power Pack
| Size: 33.51 MB
Table of Contents
Table of Contents
3
3 Literature
7
Workshop Manual
7
Spare Parts Catalogue
7
Operator's Manual
7
4 Safety Instructions
8
General
8
Warning and Information
8
ESD General Notice
8
Emergency Stop Button
9
Start Blade Rotation
9
Transport and Storage
9
5 Tools and Special Tools
10
Tools
10
6 Components - Navigation
15
PP 490 (External)
15
PP 490 (Internal)
16
7 Service and Maintenance
17
The Service-Related Differences between the WS480 and WS440
17
The Service-Related Differences between the PP480 and PP440
18
The Service-Related Differences between the PP480 and PP490
19
Funktion Test WS400
20
Function Test Power Pack
21
Function Test Remote Control
22
WS400 HF Service
25
Power Pack Service
27
RC Unit Sevice
27
Service 100H
28
Service 200H
29
8 Technical Information and Troubleshooting
31
General
31
Temp Sensors
31
Fault Codes PRIME Tools
32
Error Message (LED Indicator) PRIME Tools
34
Fault Codes
35
Trouble Shooting Tree
37
Description of LED Codes
67
9 Remote Control
71
RC Service Menu
71
10 Repair Instructions Wall Saw
72
10.1. Blade Gard
72
Replacing the Bearings in the Blade Guard Guide Wheels
72
Disassembly
72
Assembly
72
Calibrating the Two Adjustable Wheels
73
Checking that the Blade Guard Guide Is Parallel with the Blade
73
Remove Blade Flange
74
Renovate Blade Flange
74
10.2. Saw Arm
77
Detach Arm/Housing
77
Inspect the Clutch
78
Disassemble Arm
79
Remove Clutch Gear Shafts
80
Inspect Clutch Gear Shafts
82
Align Clutch Gear Shafts (Only WS482)
83
Disassemble the Gear Selector (Only WS482)
84
Install the Gear Selector (Only WS482)
85
Reinstall Clutch Shafts
86
Click for 3D Steps
86
Replace Bearings
89
Replace Axle Bearing
91
Assemble Bearings
93
Mount Saw Arm
95
10.3. Saw Head
98
Remove Covers
98
Remove Handle/Blade Guard Mount
98
Dismantling the Saw Head Electronics
99
Click for 3D Steps
99
Remove Feed Motors
101
Remove Feed Motor Gearbox
102
Adjust Play on Feed Motor Gearbox
103
Reassemble the Feed Motor Gearbox
104
Remove Motor
105
Dismantle the Motor
106
Replace Motor Bearings
107
Replace the Motor Temp Sensor
109
Assemble the Motor
110
Remove Feed Shaft
111
Measure the Teeth Wear
112
Inspect the Track Feed Slip Clutch
112
Disassemble the Track Feed Slip Clutch
113
Replace the Needle Bearing
114
Assemble the Track Feed Slip Clutch
115
Replace the Arm Feed Bearing
116
Assemble the Feed Shaft
118
Click for 3D Steps
118
Assemble Feed Motors
120
Click for 3D Steps
120
Assemble the Saw Head Electronics
121
Click for 3D Steps
121
11 Repair Instructions Power Pack
124
Opening the
124
Replacing the Cover Seals
125
Replacing the CAN Bus Contact
126
Replacing the Voltage Inducator Lamp
127
Replacing the Power Inlet and the Residual Current Device (RCD)
128
Replacing the Single Phase Socket
130
Replacing the Emergency Stop Button
131
Replacing the Harting Connector Assembly, Wall Saw
132
Replacing the Main Contactor
134
Replacing the Transformer
135
Remove the WS Contactor
136
Remove 15A Fuse Boxes
137
Remove the Prime Contactor
138
Remove DIN-Rail Bracket
138
Replacing the Main Board
139
Replacing Controller Board
141
Water Valve
142
Dismantle the Inverter Board
143
Assemble the Inverter Board
145
12 Firmware Upgrade
146
What Is What on the Multiprogrammer
146
Firmware Update for PP440, PP480 and PP490
146
Inverter Side
147
Main Board Side
149
Firmware Update for PP440 -Controller Board Only
153
Upgrade the RC-Unit Firmware
155
Function Test
155
13 Wiring Diagrams
156
Electrical Drawings
156
WS482 Saw Head Circuit Board
156
Pp480
157
PP490 4-Pin
158
PP490 5-Pin
159
Simplified Wiring Diagram
160
Pp480
160
Pp490
161
Remote Control
162
Cable Wiring Guide
163
Contact Connected to WS 480/440 HF (Angled Connection)
163
Contact Connected to PP 480/440 HF (Straight Connection)
164
Advertisement
Husqvarna PP490HF Workshop Manual (165 pages)
Brand:
Husqvarna
| Category:
Inverter
| Size: 34.64 MB
Table of Contents
Table of Contents
3
Literature
7
Workshop Manual
7
Spare Parts Catalogue
7
Operator's Manual
7
Safety Instructions
8
General
8
Warning and Information
8
ESD General Notice
8
Emergency Stop Button
9
Start Blade Rotation
9
Transport and Storage
9
Tools and Special Tools
10
Tools
10
Components - Navigation
15
PP 490, PP 492 (External)
15
PP 490, PP 492 (Internal)
16
Service and Maintenance
17
The Service-Related Differences between the WS482, WS442 and WS440
17
The Service-Related Differences between the PP480 and PP440
18
The Service-Related Differences between the PP480 and PP490
19
Funktion Test WS400
20
Function Test Power Pack
21
Function Test Remote Control
22
WS400 HF Service
25
Power Pack Service
27
RC Unit Sevice
27
Service 100H
28
Service 200H
29
Technical Information and Troubleshooting
31
General
31
Temp Sensors
31
Fault Codes PRIME Tools
32
Error Message (LED Indicator) PRIME Tools
34
Fault Codes
35
Trouble Shooting Tree
37
Description of LED Codes
67
Remote Control
71
RC Service Menu
71
10. Repair Instructions Wall Saw
72
10.1. Blade Gard
72
Replacing the Bearings in the Blade Guard Guide Wheels
72
Disassembly
72
Assembly
72
Calibrating the Two Adjustable Wheels
73
Checking that the Blade Guard Guide Is Parallel with the Blade
73
Remove Blade Flange
74
Renovate Blade Flange
74
10.2. Saw Arm
77
Detach Arm/Housing
77
Inspect the Clutch
78
Disassemble Arm
79
Remove Clutch Gear Shafts
80
Inspect Clutch Gear Shafts
82
Align Clutch Gear Shafts ( WS482 and WS442 )
83
Disassemble the Gear Selector
84
Install the Gear Selector
85
Reinstall Clutch Shafts
86
Click for 3D Steps
86
Replace Bearings
89
Replace Axle Bearing
91
Assemble Bearings
93
Mount Saw Arm
95
10.3. Saw Head
98
Remove Covers
98
Remove Handle/Blade Guard Mount
98
Dismantling the Saw Head Electronics
99
Click for 3D Steps
99
Remove Feed Motors
101
Remove Feed Motor Gearbox
102
Adjust Play on Feed Motor Gearbox
103
Reassemble the Feed Motor Gearbox
104
Remove Motor
105
Dismantle the Motor
106
Replace Motor Bearings
107
Replace the Motor Temp Sensor
109
Assemble the Motor
110
Remove Feed Shaft
111
Measure the Teeth Wear
112
Inspect the Track Feed Slip Clutch
112
Disassemble the Track Feed Slip Clutch
113
Replace the Needle Bearing
114
Assemble the Track Feed Slip Clutch
115
Replace the Arm Feed Bearing
116
Assemble the Feed Shaft
118
Click for 3D Steps
118
Assemble Feed Motors
120
Click for 3D Steps
120
Assemble the Saw Head Electronics
121
Click for 3D Steps
121
11. Repair Instructions Power Pack
124
Opening the
124
Replacing the Cover Seals
125
Replacing the CAN Bus Contact
126
Replacing the Voltage Inducator Lamp
127
Replacing the Power Inlet and the Residual Current Device (RCD)
128
Replacing the Single Phase Socket
130
Replacing the Emergency Stop Button
131
Replacing the Harting Connector Assembly, Wall Saw
132
Replacing the Main Contactor
134
Replacing the Transformer
135
Remove the WS Contactor
136
Remove 15A Fuse Boxes
137
Remove the Prime Contactor
138
Remove DIN-Rail Bracket
138
Replacing the Main Board
139
Replacing Controller Board
141
Water Valve
142
Dismantle the Inverter Board
143
Assemble the Inverter Board
145
12. Firmware Upgrade
146
What Is What on the Multiprogrammer
146
Firmware Update for PP440, PP480 and PP490
146
Inverter Side
147
Main Board Side
149
Firmware Update for PP440 -Controller Board Only
153
Upgrade the RC-Unit Firmware
155
Function Test
155
13. Wiring Diagrams
156
Electrical Drawings
156
WS482 Saw Head Circuit Board
156
Pp480
157
PP490, PP492 4-Pin
158
PP490, PP492 5-Pin
159
Simplified Wiring Diagram
160
Pp480
160
Pp490, Pp492
161
Remote Control
162
Cable Wiring Guide
163
HF (Angled Connection)
163
Contact Connected to PP 480/440 HF (Straight Connection)
164
Husqvarna PP490HF Workshop Manual (165 pages)
Brand:
Husqvarna
| Category:
Inverter
| Size: 33.38 MB
Table of Contents
Table of Contents
3
Literature
7
Workshop Manual
7
Spare Parts Catalogue
7
Operator's Manual
7
Safety Instructions
8
General
8
Warning and Information
8
ESD General Notice
8
Emergency Stop Button
9
Start Blade Rotation
9
Transport and Storage
9
Tools and Special Tools
10
Tools
10
Components - Navigation
15
PP 490 (External)
15
PP 490 (Internal)
16
Service and Maintenance
17
The Service-Related Differences between the WS482, WS442 and WS440
17
The Service-Related Differences between the PP480 and PP440
18
The Service-Related Differences between the PP480 and PP490
19
Funktion Test WS400
20
Function Test Power Pack
21
Function Test Remote Control
22
WS400 HF Service
25
Power Pack Service
27
RC Unit Sevice
27
Service 100H
28
Service 200H
29
Technical Information and Troubleshooting
31
General
31
Temp Sensors
31
Fault Codes PRIME Tools
32
Error Message (LED Indicator) PRIME Tools
34
Fault Codes
35
Trouble Shooting Tree
37
Description of LED Codes
67
Remote Control
71
RC Service Menu
71
10. Repair Instructions Wall Saw
72
10.1. Blade Gard
72
Replacing the Bearings in the Blade Guard Guide Wheels
72
Disassembly
72
Assembly
72
Calibrating the Two Adjustable Wheels
73
Checking that the Blade Guard Guide Is Parallel with the Blade
73
Remove Blade Flange
74
Renovate Blade Flange
74
10.2. Saw Arm
77
Detach Arm/Housing
77
Inspect the Clutch
78
Disassemble Arm
79
Remove Clutch Gear Shafts
80
Inspect Clutch Gear Shafts
82
Align Clutch Gear Shafts ( WS482 and WS442 )
83
Disassemble the Gear Selector
84
Install the Gear Selector
85
Reinstall Clutch Shafts
86
Click for 3D Steps
86
Replace Bearings
89
Replace Axle Bearing
91
Assemble Bearings
93
Mount Saw Arm
95
10.3. Saw Head
98
Remove Covers
98
Remove Handle/Blade Guard Mount
98
Dismantling the Saw Head Electronics
99
Click for 3D Steps
99
Remove Feed Motors
101
Remove Feed Motor Gearbox
102
Adjust Play on Feed Motor Gearbox
103
Reassemble the Feed Motor Gearbox
104
Remove Motor
105
Dismantle the Motor
106
Replace Motor Bearings
107
Replace the Motor Temp Sensor
109
Assemble the Motor
110
Remove Feed Shaft
111
Measure the Teeth Wear
112
Inspect the Track Feed Slip Clutch
112
Disassemble the Track Feed Slip Clutch
113
Replace the Needle Bearing
114
Assemble the Track Feed Slip Clutch
115
Replace the Arm Feed Bearing
116
Assemble the Feed Shaft
118
Click for 3D Steps
118
Assemble Feed Motors
120
Click for 3D Steps
120
Assemble the Saw Head Electronics
121
Click for 3D Steps
121
11. Repair Instructions Power Pack
124
Opening the
124
Replacing the Cover Seals
125
Replacing the CAN Bus Contact
126
Replacing the Voltage Inducator Lamp
127
Replacing the Power Inlet and the Residual Current Device (RCD)
128
Replacing the Single Phase Socket
130
Replacing the Emergency Stop Button
131
Replacing the Harting Connector Assembly, Wall Saw
132
Replacing the Main Contactor
134
Replacing the Transformer
135
Remove the WS Contactor
136
Remove 15A Fuse Boxes
137
Remove the Prime Contactor
138
Remove DIN-Rail Bracket
138
Replacing the Main Board
139
Replacing Controller Board
141
Water Valve
142
Dismantle the Inverter Board
143
Assemble the Inverter Board
145
12. Firmware Upgrade
146
What Is What on the Multiprogrammer
146
Firmware Update for PP440, PP480 and PP490
146
Inverter Side
147
Main Board Side
149
Firmware Update for PP440 -Controller Board Only
153
Upgrade the RC-Unit Firmware
155
Function Test
155
13. Wiring Diagrams
156
Electrical Drawings
156
WS482 Saw Head Circuit Board
156
Pp480
157
PP490 4-Pin
158
PP490 5-Pin
159
Simplified Wiring Diagram
160
Pp480
160
Pp490
161
Remote Control
162
Cable Wiring Guide
163
HF (Angled Connection)
163
Contact Connected to PP 480/440 HF (Straight Connection)
164
Advertisement
Advertisement
Related Products
Husqvarna PP 492
Husqvarna PP440HF
Husqvarna PP480HF
Husqvarna PP 325 E
Husqvarna PP 345 E
Husqvarna PP 70
Husqvarna PP 480 HF
Husqvarna PP490
Husqvarna PP455E
Husqvarna PP 418
Husqvarna Categories
Lawn Mower
Trimmer
Chainsaw
Motorcycle
Saw
More Husqvarna Manuals
Login
Sign In
OR
Sign in with Facebook
Sign in with Google
Upload manual
Upload from disk
Upload from URL