Sign In
Upload
Manuals
Brands
Daikin Manuals
Air Conditioner
FTXTP25M5V1B
Daikin FTXTP25M5V1B Manuals
Manuals and User Guides for Daikin FTXTP25M5V1B. We have
7
Daikin FTXTP25M5V1B manuals available for free PDF download: Service Manual, Installer's Reference Manual, User Reference Manual, Installation Manual, Operation Manual
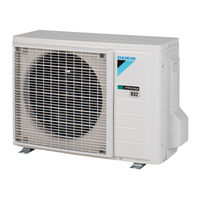
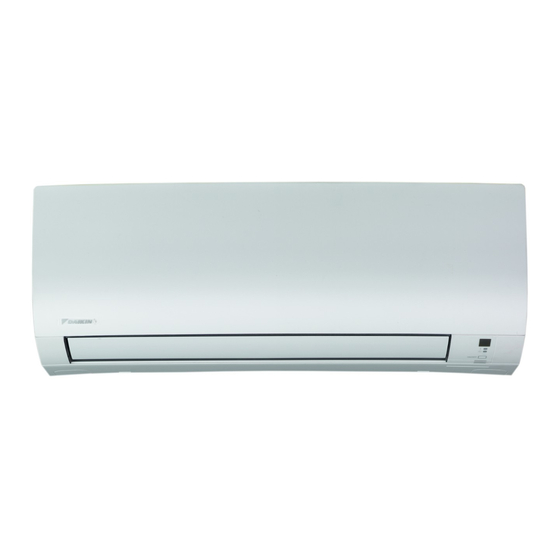
Daikin FTXTP25M5V1B Service Manual (264 pages)
R32 Optimized Heating 4 Split
Brand:
Daikin
| Category:
Air Conditioner
| Size: 63.3 MB
Table of Contents
Table of Contents
4
Safety Precautions
7
Meaning of Warnings and Symbols
7
Dangers
8
Warnings
8
Cautions
14
Notices
14
General Operation
15
Troubleshooting
16
To Display the Error Code on the User Interface
16
To Reset the Error Code Via Remote Controller
16
To Reset the Error Code Via Outdoor Unit
16
To Perform a Test Run
16
To Perform a Test Run in Winter Season
17
To Perform a Test Run Using the User Interface
17
Error Based Troubleshooting
17
A1-00 - PCB Abnormality
17
A5-00 - Outdoor Unit: High Pressure Peak Cut / Freeze Protection Problem
18
A6-00 - Indoor Unit Fan Motor Abnormality
19
Streamer Unit Abnormality
19
C4-00 - Heat Exchanger Temperature Sensor Problem
20
C9-00 - Room Thermistor Abnormality
20
Humidity Sensor Abnormality
21
Intelligent Thermal Sensor Abnormality
21
E1-00 - Outdoor Unit: PCB Defect
22
E3-00 - Outdoor Unit: Actuation of High Pressure Switch
23
E5-00 - Outdoor Unit: Overheat of Inverter Compressor Motor
24
E6-00 - Outdoor Unit: Compressor Startup Defect
25
E7-00 - Outdoor Unit: Malfunction of Outdoor Unit Fan Motor
26
E8-00 - Outdoor Unit: Power Input Overvoltage
26
Outdoor Unit: Cool/Heat Switchover Problem
27
F3-00 - Outdoor Unit: Malfunction of Discharge Pipe Temperature
28
F6-00 - Outdoor Unit: Abnormal High Pressure in Cooling
29
F8-00 - System Shutdown Due to Compressor Internal Temperature Abnormality
29
H0-00 - Outdoor Unit: Voltage/Current Sensor Problem
30
H3-00 - Outdoor Unit: Malfunction of High Pressure Switch
31
H6-00 - Outdoor Unit: Malfunction of Position Detection Sensor
32
H8-00 - Outdoor Unit: Malfunction of Compressor Input System
33
H9-00 - Outdoor Unit: Malfunction of Outdoor Air Thermistor
33
J3-00 - Outdoor Unit: Malfunction of Discharge Pipe Thermistor
34
J6-00 - Outdoor Unit: Malfunction of Heat Exchanger Thermistor
34
L3-00 - Outdoor Unit: Electrical Box Temperature Rise Problem
34
L4-00 - Outdoor Unit: Malfunction of Inverter Radiating Fin Temperature Rise
35
L5-00 - Outdoor Unit: Inverter Instantaneous Overcurrent
36
P4-00 - Outdoor Unit: Malfunction of Radiating Fin Temperature Sensor
37
U0-00 - Outdoor Unit: Shortage of Refrigerant
37
U2-00 - Outdoor Unit: Defect of Power Supply Voltage
38
U4-00 - Indoor/Outdoor Unit Communication Problem
39
Indoor Unit, Outdoor Unit Mismatching Problem
40
Symptom Based Troubleshooting
42
Operation Does Not Start
42
Operation Sometimes Stops
42
Operation Starts but the Unit Does Not Cool/Heat
43
Operating Noise and Vibrations
44
Abnormal High Pressure
45
Abnormal Low Pressure
46
Indoor Fan Starts Operating but the Compressor Does Not Operate
47
Operation Starts and the Unit Stops Immediately
48
Operation Stops, Unit Cannot Start for a While
48
Unit Discharges White Mist
49
Humidifying Problem
49
Swing Flap Does Not Operate
49
Components
50
4-Way Valve
50
Checking Procedures
50
Repair Procedures
53
Compressor
57
Checking Procedures
57
Repair Procedures
62
Compressor Thermal Protector
68
Checking Procedures
68
Repair Procedures
69
Expansion Valve
72
Checking Procedures
72
Repair Procedures
76
Front Panel Motor
79
Checking Procedures
79
Repair Procedures
81
High Pressure Switch
83
Checking Procedures
83
Repair Procedures
84
Humidity Sensor
86
Checking Procedures
86
Repair Procedures
87
Indoor Unit Fan Motor
89
Checking Procedures
89
Repair Procedures
90
Indoor Unit Heat Exchanger
94
Checking Procedures
94
Repair Procedures
95
Indoor Unit Main PCB
97
Checking Procedures
97
Repair Procedures
103
Indoor Unit Power PCB
109
Checking Procedures
109
Repair Procedures
113
Intelligent Eye Sensor
118
Checking Procedures
118
Repair Procedures
120
Intelligent Thermal Sensor
122
Checking Procedures
122
Repair Procedures
123
Main PCB
126
Checking Procedures
126
Repair Procedures
132
Outdoor Unit Fan Motor
135
Checking Procedures
135
Repair Procedures
138
Outdoor Unit Heat Exchanger
141
Checking Procedures
141
Repair Procedures
142
Plate Work
144
Outdoor Unit
144
Indoor Unit
151
Reactor
165
Checking Procedures
165
Repair Procedures
167
Streamer Unit
167
Checking Procedures
167
Swing Flap Motor
170
Main Swing Flap Motor
170
Secondary Swing Flap Motor
180
Swing Raster Motor
184
Checking Procedures
184
Repair Procedures
186
Thermistors
195
Checking Procedures
195
Repair Procedures
200
Wifi Control PCB
205
Checking Procedures
205
Repair Procedures
206
Third Party Components
209
Electrical Circuit
209
Checking Procedures
209
Repair Procedures
210
Refrigerant Circuit
211
Checking Procedures
211
Repair Procedures
216
External Factors
220
Checking Procedures
220
Maintenance
222
To Clean the Outdoor Unit Heat Exchanger
222
To Clean the Indoor Unit Heat Exchanger
222
To Clean the Indoor Unit Heat Exchanger in Extreme Condition
223
To Clean the Indoor Unit and Wireless Remote Control
223
To Clean the Front Panel
224
To Clean the Air Filters
224
To Clean the Titanium Apatite Deodorising Filter and the Silver Particle Filter (Ag-Ion Filter)
227
To Replace the Titanium Apatite Deodorising Filter and the Silver Particle Filter (Ag-Ion Filter)
229
Technical Data
231
Detailed Information Setting Mode
231
Detailed Information Setting Mode: Indoor Unit
231
Detailed Information Setting Mode: Outdoor Unit
231
Detailed Information Setting Mode: Remote Controller
231
Wiring Diagram
232
Wiring Diagram: Outdoor Unit
232
Wiring Diagram: Indoor Unit
235
Piping Diagram
242
Piping Diagram: Outdoor Unit
242
Piping Diagram: Indoor Unit
243
Component Overview
248
Component Overview: Outdoor Unit
248
Component Overview: Indoor Unit
249
Field Information Report
253
Service Tools
256
Field Settings
257
Field Settings: Indoor Unit
257
Field Settings: Outdoor Unit
260
Advertisement
Daikin FTXTP25M5V1B Installer's Reference Manual (60 pages)
Brand:
Daikin
| Category:
Air Conditioner
| Size: 7.61 MB
Table of Contents
Table of Contents
2
About the Documentation
4
About this Document
4
Meaning of Warnings and Symbols
5
General Safety Precautions
7
For the Installer
7
General
7
Installation Site
8
Refrigerant - in Case of R410A or R32
11
Electrical
12
Specific Installer Safety Instructions
15
About the Box
17
Indoor Unit
17
To Unpack the Indoor Unit
17
To Remove the Accessories from the Indoor Unit
17
About the Unit
19
System Layout
19
Operation Range
19
About the Wireless LAN
19
Precautions When Using the Wireless LAN
20
Basic Parameters
20
Unit Installation
21
Preparing the Installation Site
21
Installation Site Requirements of the Indoor Unit
21
Opening the Unit
22
To Remove the Front Panel
22
To Open the Service Cover
23
To Remove the Front Grille
23
Mounting the Indoor Unit
24
To Install the Mounting Plate
24
To Drill a Wall Hole
25
To Remove the Pipe Port Cover
25
Connecting the Drain Piping
26
General Guidelines
26
To Connect the Piping on Right Side, Right-Back, or Right-Bottom
26
To Connect the Piping on Left Side, Left-Back, or Left-Bottom
26
To Check for Water Leaks
26
To Connect the Piping on Right Side, Right-Back, or Right-Bottom
27
To Connect the Piping on Left Side, Left-Back, or Left-Bottom
28
To Check for Water Leaks
29
Piping Installation
30
Preparing Refrigerant Piping
30
Refrigerant Piping Requirements
30
Refrigerant Piping Insulation
31
Connecting the Refrigerant Piping
31
About Connecting the Refrigerant Piping
31
Precautions When Connecting the Refrigerant Piping
31
Preparing Refrigerant Piping
31
Pipe Bending Guidelines
31
Guidelines When Connecting the Refrigerant Piping
32
Pipe Bending Guidelines
33
To Flare the Pipe End
33
To Connect the Refrigerant Piping to the Indoor Unit
34
To Check Refrigerant Piping Joints for Leaks after Charging Refrigerant
34
Notice
34
Electrical Installation
36
About Connecting the Electrical Wiring
36
Precautions When Connecting the Electrical Wiring
36
Information
36
Also Read the Precautions and Requirements in the "2 General Safety
36
Guidelines When Connecting the Electrical Wiring
37
Specifications of Standard Wiring Components
39
To Connect the Electrical Wiring to the Indoor Unit
39
Finishing the Indoor Unit Installation
41
To Insulate the Drain Piping, Refrigerant Piping and Interconnection Cable
41
To Pass the Pipes through the Wall Hole
41
Refrigerant Piping Diameter
41
To Fix the Unit on the Mounting Plate
42
Closing the Unit
42
To Re-Install the Front Grille
42
To Close the Service Cover
42
To Re-Install the Front Panel
43
Wireless LAN Adapter Installation
44
To Install the Adapter
44
To Connect the Adapter with the Unit
44
To Place the Adapter into the Unit
45
To Check the Functionality of the Adapter
46
Setting the Wireless LAN
46
To Install the ONECTA App
46
Configuration
47
To Set a Different Channel of the Indoor Unit Infrared Signal Receiver
47
Commissioning
49
Overview: Commissioning
49
Checklist before Commissioning
49
To Perform a Test Run
50
To Perform a Test Run in Winter Season
50
Hand-Over to the User
51
Disposal
52
Technical Data
53
Wiring Diagram
53
Unified Wiring Diagram Legend
53
Glossary
56
Daikin FTXTP25M5V1B Installer's Reference Manual (56 pages)
Brand:
Daikin
| Category:
Air Conditioner
| Size: 7.52 MB
Table of Contents
Table of Contents
2
1 About the Documentation
4
About this Document
4
Meaning of Warnings and Symbols
5
2 General Safety Precautions
7
For the Installer
7
General
7
Installation Site
8
Refrigerant - in Case of R410A or R32
11
Electrical
12
3 Specific Installer Safety Instructions
15
4 About the Box
18
Overview: about the Box
18
Indoor Unit
18
To Unpack the Indoor Unit
18
To Remove the Accessories from the Indoor Unit
18
5 About the Unit
20
System Layout
20
Operation Range
20
About the Wireless LAN
20
Precautions When Using the Wireless LAN
21
Basic Parameters
21
6 Unit Installation
22
Preparing the Installation Site
22
Installation Site Requirements of the Indoor Unit
22
Opening the Unit
23
To Remove the Front Panel
23
To Open the Service Cover
24
To Remove the Front Grille
24
Mounting the Indoor Unit
25
To Install the Mounting Plate
25
To Drill a Wall Hole
26
To Remove the Pipe Port Cover
26
Connecting the Drain Piping
27
General Guidelines
27
To Connect the Piping on Right Side, Right-Back, or Right-Bottom
27
To Connect the Piping on Left Side, Left-Back, or Left-Bottom
27
To Check for Water Leaks
27
To Connect the Piping on Right Side, Right-Back, or Right-Bottom
28
To Connect the Piping on Left Side, Left-Back, or Left-Bottom
29
To Check for Water Leaks
30
7 Piping Installation
31
Preparing Refrigerant Piping
31
Refrigerant Piping Requirements
31
Refrigerant Piping Insulation
32
Connecting the Refrigerant Piping
32
About Connecting the Refrigerant Piping
32
Precautions When Connecting the Refrigerant Piping
32
Preparing Refrigerant Piping
32
Pipe Bending Guidelines
32
Guidelines When Connecting the Refrigerant Piping
33
Pipe Bending Guidelines
34
To Flare the Pipe End
34
To Connect the Refrigerant Piping to the Indoor Unit
35
8 Electrical Installation
36
About Connecting the Electrical Wiring
36
Precautions When Connecting the Electrical Wiring
36
Guidelines When Connecting the Electrical Wiring
37
Specifications of Standard Wiring Components
38
To Connect the Electrical Wiring to the Indoor Unit
38
9 Finishing the Indoor Unit Installation
40
To Insulate the Drain Piping, Refrigerant Piping and Interconnection Cable
40
To Pass the Pipes through the Wall Hole
40
To Fix the Unit on the Mounting Plate
41
Closing the Unit
41
To Re-Install the Front Grille
41
To Close the Service Cover
41
To Re-Install the Front Panel
41
10 Wireless LAN Adapter Installation
43
To Install the Adapter
43
To Connect the Adapter with the Unit
43
To Place the Adapter into the Unit
44
To Check the Functionality of the Adapter
45
Setting the Wireless LAN
45
To Install the Daikin Residential Controller Application
45
11 Configuration
46
To Set a Different Address
46
12 Commissioning
48
Overview: Commissioning
48
Checklist before Commissioning
48
To Perform a Test Run
49
To Perform a Test Run in Winter Season
49
13 Hand-Over to the User
50
14 Disposal
51
15 Technical Data
52
Wiring Diagram
52
Unified Wiring Diagram Legend
52
16 Glossary
55
Advertisement
Daikin FTXTP25M5V1B User Reference Manual (44 pages)
Brand:
Daikin
| Category:
Air Conditioner
| Size: 3.79 MB
Table of Contents
Table of Contents
2
1 About the Documentation
4
About this Document
4
Meaning of Warnings and Symbols
4
2 User Safety Instructions
6
General
6
Instructions for Safe Operation
7
3 About the System
11
Indoor Unit
11
Indoor Unit Display
12
About the User Interface
12
Components: User Interface
13
Status: User Interface LCD
13
To Operate the User Interface
14
4 Before Operation
15
Overview: before Operation
15
To Insert the Batteries
15
To Mount the User Interface Holder
15
To Turn on the Power Supply
16
5 Operation
17
Operation Range
17
When to Use Which Feature
17
Operation Mode and Temperature Setpoint
18
To Start/Stop Operation Mode and to Set the Temperature
19
Airflow Rate
19
To Adjust the Airflow Rate
20
Airflow Direction
20
To Adjust Vertical Airflow Direction
21
To Adjust Horizontal Airflow Direction
21
To Use 3-D Airflow Direction
21
Comfort Airflow Operation
21
To Start/Stop Comfort Airflow Operation
22
Powerful Operation
22
To Start/Stop Powerful Operation
22
Econo Operation
23
To Start/Stop Econo Operation
23
OFF/ON Timer Operation
23
To Start/Stop off Timer Operation
24
To Start/Stop on Timer Operation
24
To Combine off Timer and on Timer
24
Wireless LAN Connection
25
Precautions When Using the Wireless LAN
25
To Install the Daikin Residential Controller Application
25
6 Energy Saving and Optimum Operation
26
7 Maintenance and Service
28
Overview: Maintenance and Service
28
To Clean the Indoor Unit and User Interface
29
To Clean the Front Panel
30
To Open the Front Panel
30
About the Air Filters
30
To Clean the Air Filters
30
To Clean the Titanium Apatite Deodorising Filter and the Silver Particle Filter (Ag-Ion Filter)
31
To Replace the Titanium Apatite Deodorising Filter and the Silver Particle Filter (Ag-Ion Filter)
32
To Close the Front Panel
32
To Take Following Items into Account before a Long Idle Period
32
Winter Season
33
8 Troubleshooting
34
Symptoms that Are NOT System Malfunctions
36
Symptom: a Sound Like Water Flowing Is Heard
36
Symptom: a Blowing Sound Is Heard
36
Symptom: a Ticking Sound Is Heard
36
Symptom: a Whistling Sound Is Heard
36
Symptom: a Clicking Sound During Operation or Idle Time Is Heard
36
Symptom: a Clapping Sound Is Heard
36
Symptom: White Mist Comes out of a Unit (Indoor Unit)
36
Symptom: the Units Can Give off Odours
36
Symptom: the Outdoor Fan Rotates While the Air Conditioner Is Not in Operation
37
Solving Problems Based on Error Codes
37
Troubleshooting for Wireless LAN Connection
38
9 Disposal
40
Daikin FTXTP25M5V1B User Reference Manual (44 pages)
Brand:
Daikin
| Category:
Air Conditioner
| Size: 3.96 MB
Table of Contents
Table of Contents
2
About the Documentation
4
About this Document
4
Meaning of Warnings and Symbols
4
User Safety Instructions
6
General
6
Instructions for Safe Operation
7
About the System
11
Indoor Unit
11
Indoor Unit Display
12
About the User Interface
12
Components: Wireless Remote Control
13
Status: Wireless Remote Control LCD
13
To Operate the Wireless Remote Control
14
Before Operation
15
Overview: before Operation
15
To Insert the Batteries
15
To Mount the Wireless Remote Control Holder
15
To Turn on the Power Supply
16
Operation
17
Operation Range
17
When to Use Which Feature
17
Operation Mode and Temperature Setpoint
18
To Start/Stop Operation Mode and to Set the Temperature
19
Airflow Rate
19
To Adjust the Airflow Rate
20
Airflow Direction
20
To Adjust Vertical Airflow Direction
21
To Adjust Horizontal Airflow Direction
21
To Use 3D Airflow Direction
21
Comfort Airflow Operation
21
To Start/Stop Comfort Airflow Operation
22
Powerful Operation
22
To Start/Stop Powerful Operation
22
Econo Operation
23
To Start/Stop Econo Operation
23
OFF/ON Timer Operation
23
To Start/Stop off Timer Operation
24
To Start/Stop on Timer Operation
24
To Combine off Timer and on Timer
25
Wireless LAN Connection
25
Precautions When Using the Wireless LAN
25
To Install the ONECTA App
26
Energy Saving and Optimum Operation
27
Maintenance and Service
29
Overview: Maintenance and Service
29
To Clean the Indoor Unit and Wireless Remote Control
30
To Clean the Front Panel
31
To Open the Front Panel
31
About the Air Filters
31
To Clean the Air Filters
31
To Clean the Titanium Apatite Deodorising Filter and the Silver Particle Filter (Ag-Ion Filter)
32
To Replace the Titanium Apatite Deodorising Filter and the Silver Particle Filter (Ag-Ion Filter)
33
To Close the Front Panel
33
To Take Following Items into Account before a Long Idle Period
33
Winter Season
35
Troubleshooting
36
Symptoms that Are NOT System Malfunctions
38
Symptom: a Sound Like Water Flowing Is Heard
38
Symptom: a Blowing Sound Is Heard
38
Symptom: a Ticking Sound Is Heard
38
Symptom: a Whistling Sound Is Heard
38
Symptom: a Clicking Sound During Operation or Idle Time Is Heard
38
Symptom: a Clapping Sound Is Heard
38
Symptom: White Mist Comes out of a Unit (Indoor Unit)
38
Symptom: the Units Can Give off Odours
38
Symptom: the Outdoor Fan Rotates While the Air Conditioner Is Not in Operation
39
Solving Problems Based on Error Codes
39
Troubleshooting for Wireless LAN Connection
40
Disposal
42
Daikin FTXTP25M5V1B Installation Manual (20 pages)
Brand:
Daikin
| Category:
Air Conditioner
| Size: 5.91 MB
Table of Contents
Table of Contents
1
Table of Contents
6
About the Documentation
6
About this Document
6
Specific Installer Safety Instructions
6
About the Box
8
Indoor Unit
8
To Remove the Accessories from the Indoor Unit
8
About the Unit
8
About the Wireless LAN
8
Precautions When Using the Wireless LAN
8
Basic Parameters
8
Unit Installation
8
Preparing the Installation Site
8
Installation Site Requirements of the Indoor Unit
8
Mounting the Indoor Unit
9
To Install the Mounting Plate
9
To Drill a Wall Hole
9
To Remove the Pipe Port Cover
9
Connecting the Drain Piping
10
To Connect the Piping on Right Side, Right-Back, or Right-Bottom
10
To Connect the Piping on Left Side, Left-Back, or Left- Bottom
10
To Check for Water Leaks
10
Piping Installation
10
Preparing Refrigerant Piping
10
Refrigerant Piping Requirements
10
Refrigerant Piping Insulation
11
Connecting the Refrigerant Piping
11
To Connect the Refrigerant Piping to the Indoor Unit
11
To Check Refrigerant Piping Joints for Leaks after Charging Refrigerant
11
Electrical Installation
11
Specifications of Standard Wiring Components
11
To Connect the Electrical Wiring to the Indoor Unit
12
Finishing the Indoor Unit Installation
12
To Insulate the Drain Piping, Refrigerant Piping and Interconnection Cable
12
To Pass the Pipes through the Wall Hole
13
To Fix the Unit on the Mounting Plate
13
Wireless LAN Adapter Installation
13
To Install the Adapter
13
To Connect the Adapter with the Unit
13
To Place the Adapter into the Unit
14
To Check the Functionality of the Adapter
14
Setting the Wireless LAN
14
To Install the ONECTA App
14
Configuration
14
Commissioning
14
Checklist before Commissioning
15
To Perform a Test Run
15
To Perform a Test Run in Winter Season
15
Disposal
15
Technical Data
15
Wiring Diagram
15
Unified Wiring Diagram Legend
15
Information
15
Technical Engineering Data
15
Daikin Website (Publicly Accessible)
15
Daikin FTXTP25M5V1B Operation Manual (16 pages)
Brand:
Daikin
| Category:
Air Conditioner
| Size: 3.6 MB
Table of Contents
Table of Contents
1
Table of Contents
2
About the Documentation
2
About this Document
2
User Safety Instructions
2
Instructions for Safe Operation
2
About the System
4
Indoor Unit
4
Indoor Unit Display
4
About the User Interface
4
Components: Wireless Remote Control
5
To Operate the Wireless Remote Control
5
Before Operation
5
To Insert the Batteries
5
To Mount the Wireless Remote Control Holder
5
To Turn on the Power Supply
5
Operation
5
Operation Range
5
Operation Mode and Temperature Setpoint
6
To Start/Stop Operation Mode and to Set the Temperature
6
Airflow Rate
6
To Adjust the Airflow Rate
6
Airflow Direction
6
To Adjust Vertical Airflow Direction
7
To Adjust Horizontal Airflow Direction
7
To Use 3D Airflow Direction
7
Comfort Airflow Operation
7
To Start/Stop Comfort Airflow Operation
7
Powerful Operation
7
To Start/Stop Powerful Operation
7
Econo Operation
7
To Start/Stop Econo Operation
7
OFF/ON Timer Operation
8
To Start/Stop off Timer Operation
8
To Start/Stop on Timer Operation
8
To Combine off Timer and on Timer
8
Wireless LAN Connection
8
Precautions When Using the Wireless LAN
8
To Install the ONECTA App
8
Energy Saving and Optimum Operation
9
Maintenance and Service
9
Overview: Maintenance and Service
9
To Clean the Indoor Unit and Wireless Remote Control
10
To Clean the Front Panel
10
To Open the Front Panel
10
To Clean the Air Filters
10
To Clean the Titanium Apatite Deodorising Filter and the Silver Particle Filter (Ag-Ion Filter)
10
To Replace the Titanium Apatite Deodorising Filter and the Silver Particle Filter (Ag-Ion Filter)
11
To Close the Front Panel
11
To Take Following Items into Account before a Long Idle Period
11
Winter Season
12
Troubleshooting
12
Disposal
12
Information
12
Advertisement
Related Products
Daikin FTXTP25K3V1B
Daikin FTXTP25-35K
Daikin FTXTP25N5V1B
Daikin FTXTP35M5V1B
Daikin FTXTP35K3V1B
Daikin FTXTP35N5V1B
Daikin FTXTP-M
Daikin FTXTM40M2V1B
Daikin FTXTJ30A2V1BB
Daikin FTXTM30M2V1B
Daikin Categories
Air Conditioner
Heat Pump
Remote Control
Chiller
Fan
More Daikin Manuals
Login
Sign In
OR
Sign in with Facebook
Sign in with Google
Upload manual
Upload from disk
Upload from URL