Sign In
Upload
Manuals
Brands
Brother Manuals
Sewing Machine
Z-8560A
Brother Z-8560A Manuals
Manuals and User Guides for Brother Z-8560A. We have
7
Brother Z-8560A manuals available for free PDF download: Service Manual, Instruction Manual, Manual De Instrucciones, Parts Book, Catalog, Brochure & Specs, Parts List
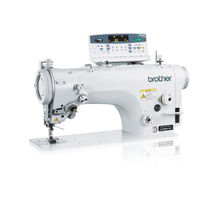
Brother Z-8560A Service Manual (128 pages)
Electronic Direct drive zigzag lock stitcher with thread trimmer
Brand:
Brother
| Category:
Sewing Machine
| Size: 2.44 MB
Table of Contents
Safety Instructions
3
Maintenance and Inspection
6
Table of Contents
8
1 Machine Specifications
10
2 Sewing Pattern
11
3 Function Settings
12
Setting Memory Switches
12
List of Memory Switch Settings
13
Data Initialization
23
Resetting the Settings to Their Defaults
23
When Data Is Initialized Automatically
25
Error History Checking Method
26
Error History Display Examples
27
Software Version Checking Method
27
Version Update Checking Method
27
Checking Input and Output
28
Input and Output Checking Method
28
Input and Output Check List
28
DIP Switch Setting Method
30
Needle Zigzag Home Position Adjustment Procedure
31
4 Using Cf Cards
32
Precautions When Handling CF Cards (Commercially Available)
32
Structure of a CF Card Folder
32
Preparation for Reading/Writing Data
33
Reading Additional Sewing Data into the Sewing Machine
34
Writing Additional Sewing Data to CF Cards
35
Reading Memory Switch Data into the Sewing Machine
36
Writing Memory Switch Data to a CF Card
37
Updating the Control Program Version
38
Control Program Version Updating Procedure
38
Restoring the Control Program if an Error Occurs During Version Updating
39
Writing Error Log Data to CF Cards
40
5 Mechanical Descriptions
41
Needle Bar and Thread Take-Up Mechanisms
41
Lower Shaft and Shuttle Race Mechanisms
42
Zigzag Mechanism
43
Presser Foot Mechanism
44
Feed Mechanism
46
Lubrication Mechanism
49
Thread Trimmer Mechanism (8560A Only)
51
Tension Release Mechanism
52
Thread Wiper Mechanism (8560A Only, Optional Device)
54
6 Disassembly
55
Covers
56
Presser Foot Mechanism
57
Needle Bar Mechanism
57
Zigzag Mechanism
58
Rotary Hook Mechanism
60
Lubrication Mechanism
61
Feed Mechanism
61
Thread Trimmer Mechanism (8560A Only)
62
Thread Wiper Mechanism (8560A Only, Optional Device)
63
7 Assembly
64
Thread Wiper Mechanism (8560A Only)
64
Feed Mechanism
65
Lubrication Mechanism
66
Zigzag Mechanism
67
Needle Bar Mechanism
68
Rotary Hook Mechanism
69
Presser Foot Mechanism
70
Covers
71
Thread Wiper Mechanism (8560A Only, Optional Device)
72
8 CHANGING the FEED AMOUNT to LONG STITCH SPECIFICATIONS (from 2.0Mm to 5.0Mm)
73
9 Adjustments
76
Actuator Position
76
Adjusting the Safety Switch Position
77
Thread Tension Spring
78
Presser Foot Height
79
Feed Dog Height
79
Feed Dog Angle
80
Feed Dog Forward/Back and Sideways Position
80
Feed Amounts for Reverse Stitching and Condense Stitching
81
Needle and Feed Timing
81
Needle Bar Height
82
Needle Zigzag Forward/Back Position
83
Needle Zigzag Sideways Position
84
Needle Zigzag Load
85
Needle and Rotary Hook Timing
85
Bobbin Case Holder Bracket Position
86
Adjusting the Rotary Hook Lubrication Amount
87
Adjusting the Presser Foot Floating Amount (Minute Lifting Amount)
88
Adjusting the Treadle
88
Adjusting the Quick Reverse Device (8550A-A31, 8560A)
89
Adjusting the Tension Release During Thread Trimming (8560 Only)
90
Adjusting the Position of the Thread Trimming Cam (8560A Only)
91
Adjusting the Tension of the Plate Spring (8560A Only)
92
Adjusting the Thread Trailing Length after Thread Trimming (8560A Only)
92
Adjusting the Thread Wiper (8560A Only, Optional Device)
93
10 APPLYING GREASE (When "Greaseup" Appears)
94
To Continue Sewing Temporarily Without Applying Grease
94
Applying Grease
95
Resetting the Cumulative Operating Time
96
11 Electrical Mechanism
97
Precautions While Carrying out Adjustments
97
Control Box Internal Configuration
98
Description of Fuses
99
Power Supply P.C. Board (Fuses and Fuse Resistors)
99
Main P.C. Board (Fuses and Fuse Resistors)
100
Description of Connectors
101
Connector Positions
101
Troubleshooting
103
Troubleshooting Procedure
103
Diagnosis Flowchart
104
Remedy
106
Wiring Diagrams
110
12 Treadle Unit
112
Types
112
Standard Setting Values
113
Standard Settings for Treadle Depression Stroke
114
13 Standing Operation Pedal
116
Installing the Foot Plug
116
Connectors
117
14 Troubleshooting
118
15 Error Codes
123
16 Segment Display Definition Table
126
Advertisement
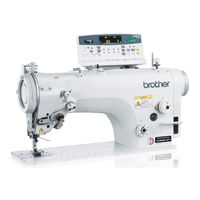
Brother Z-8560A Instruction Manual (90 pages)
ELECTRONIC DIRECT DRIVE ZIGZAG LOCK STITCHER
Brand:
Brother
| Category:
Sewing Machine
| Size: 3.17 MB
Table of Contents
Safety Instructions
2
Maintenance and Inspection
5
Table of Contents
7
1 Names of Major Parts
9
2 Machine Specifications
10
3 Sewing Pattern Table
11
4 Installation
12
Table Processing Diagram
13
Installation
14
Machine Head
15
Operation Panel
15
Cotton Stand
16
Lubrication
17
Connecting the Cords
18
Opening the Control Box Cover
18
Power Cord
20
Test Operation (Operating the Treadle)
21
Turning on the Power
21
Operating the Treadle
22
5 Preparation before Sewing
23
Installing the Needle
23
Removing the Bobbin Case
23
Winding the Lower Thread
24
Installing the Bobbin Case
24
Threading the Upper Thread
25
Adjusting the Stitch Length
26
Backtacking
27
Using the Knee Lifter
28
Using the Thread Wiper (8560A Only)
28
6 Using the Operation Panel (Basic Operations)
29
Names and Functions
29
Pattern Setting Method
33
Sewing Pattern Table
33
Setting the Sewing Pattern
34
Setting the Zigzag Width
39
Setting the Zigzag Base Line Position
40
Setting the Zigzag Stop Position
41
Setting Start Backtacking (8560A, 8550A-A31 Only)
42
Setting End Backtacking (8560A, 855A-A31 Only)
43
Setting Continuous Backtacking (8560A and 8550A-A31 Only)
44
Setting Fixed Stitches/Name Label Sewing (8560A, 8550A-A31 Only)
45
Automatic Sewing
46
Using the Lower Thread Counter
47
7 Using the Operation Panel (Advanced Operations)
48
Names and Functions
48
Adjusting the Needle up Stop Position
49
LOCK Key
50
Resetting All Settings to Their Defaults
50
Using User Programs
51
Recording Sewing Data
51
Retrieving Recorded Sewing Data
52
Setting the Maximum Sewing Speed
53
8 Sewing
54
9 Thread Tension
55
Adjusting the Thread Tension
55
Adjusting the Presser Foot Pressure
56
10 Cleaning
57
Daily Cleaning Procedures
57
Applying Grease (When "GREASEUP" Appears
60
11 Replacing Parts
63
Fixed Knife and Movable Knife (8560A Only)
63
Gauge Parts
64
(Presser Foot, Needle Plate and Feed Dog)
64
Replacing the Stopper
64
Changing the Feed Amount to Long Stitch Specifications (from 2.0Mm to 5.0Mm)
65
Changing the Maximum Feed Amount
65
12 Standard Adjustments
67
Actuator Position
67
Adjusting the Safety Switch Position
68
Adjusting the Thread Tension Spring
69
Adjusting the Presser Foot Height
70
Adjusting the Feed Dog Height
70
Adjusting the Feed Dog Angle
71
Adjusting the Forward/Back Position of the Feed Dog
71
Adjusting the Needle Bar Height
72
Needle and Rotary Hook Timing
72
Bobbin Case Holder Position Bracket Position
73
Adjusting the Rotary Hook Lubrication Amount
74
Adjusting the Presser Foot Floating Amount (Minute Lifting Amount)
75
Adjusting the Treadle
75
Adjusting the Position of the Thread Trimming Cam (8560A Only)
76
Adjusting the Tension of the Lower Thread Presser Spring (8560A Only)
77
Adjusting the Thread Trailing Length after Thread Trimming (8560A Only)
77
Adjusting the Thread Wiper (8560A Only)
78
13 Optional Parts
79
Presser Bar U and Presser Bar Tip
79
14 WHEN USING a NON-STANDARD FEED DOG (8560A Only)
81
15 Troubleshooting
82
Sewing
82
Error Code Displays
87
Instruction Manual
90
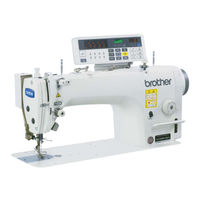
Brother Z-8560A Parts Book (70 pages)
ELECTRONIC DIRECT DRIVE ZIGZAG LOCK STITCHER
Brand:
Brother
| Category:
Sewing Machine
| Size: 3.43 MB
Table of Contents
Table of Contents
5
Machine Body
6
Needle Bar and Thread Take-Up Mechanism
8
Zigzag Mechanism
12
Presser Foot Mechanism
14
Feed Mechanism
16
Knee Lifter Mechanism
22
Quick Reverse Mechanism
24
H1. Rotary Hook Mechanism
26
H2. Rotary Hook Mechanism
28
Lubrication
30
Threading Mechanism
34
Bobbin Winder Mechanism
36
M1. Thread Trimmer Mechanism
38
M2. Thread Trimmer Mechanism
40
Tension Release Mechanism
42
Thread Wiper Mechanism
44
Q1. Control Box and Motor Mechanism
46
Q2. Control Box Mechanism
48
Q3. Control Box Mechanism
50
Knee Switch Mechanism
52
Quick Reverse Switch Mechanism
54
Presser Foot Lifting Solenoid Set
56
Accessories
58
Ga1. Gauge Parts List
62
Ga2. Gauge Parts List
63
Ga3. Gauge Parts List
64
Wa. Warning Labels
65
Index
66
Advertisement
Brother Z-8560A Catalog (13 pages)
Industrial Sewing Machines
Brand:
Brother
| Category:
Sewing Machine
| Size: 1.62 MB
Table of Contents
Lock Stitch Sewing Machine
4
Twin Needle Lock Stitch Sewing Machine
6
Twin Needle Split Needle Bar Lock Stitch Sewing Machine
7
Buttonhole Sewing Machine
8
Button Attaching Machine
8
Bar Tacking Machine
9
Pattern Tacking Machine
9
Programmable Electronic Pattern Sewing Machine
10
Double Chain Stitch Sewing Machine
11
Brother Z-8560A Brochure & Specs (6 pages)
Electronic direct drive zigzag lock stitcher; Electronic direct drive zigzag lock stitcher with thread trimmer
Brand:
Brother
| Category:
Sewing Machine
| Size: 0.88 MB
Table of Contents
Thread Trimmer
1
Easy Maintenance
5
Sewing Examples
5
Specifications
6
Brother Z-8560A Parts List (1 page)
HM Parts List - English
Brand:
Brother
| Category:
Sewing Machine
| Size: 0.08 MB
(Spanish) Brother Z-8560A Manual De Instrucciones (90 pages)
MAQUINA ELECTRONICA DE ZIGZAG CON MOTOR INCORPORADO AL EJE; MAQUINA ELECTRONICA DE ZIGZAG CON MOTOR INCORPORADO AL EJE Y CORTAHILOS
Brand:
Brother
| Category:
Sewing Machine
| Size: 3.09 MB
Table of Contents
Instrucciones de Seguridad
2
Table of Contents
7
1 Nombres de las Piezas Principales
9
2 Especificaciones de la Maquina
10
3 Cuadro de Patrones de Costura
11
4 Instalacion
12
Diagrama de Procesado para Mesa de Montaje
13
Instalación
14
Panel de Controles
15
Soporte del Carrete
16
Lubricación
17
Conexión de Los Cables
18
Apertura de la Cubierta de la Caja de Controles
18
Funcionamiento de Prueba (Usando el Pedal)
21
Conectando la Alimentación
21
Uso del Pedal
22
5 Preparativos Antes de Coser
23
Colocación de la Aguja
23
Manera de Sacar la Caja de la Bobina
23
Bobinado del Hilo Inferior
24
Instalación de la Caja de la Bobina
24
Enhebrado del Hilo Superior
25
Ajuste del Largo de Puntada
26
Rematado
27
Usando la Palanca del Levantador de Rodilla
28
Uso del Retirador de Hilo
28
6 Uso del Panel de Control (Operaciones Basicas)
29
Nombres y Funciones
29
Método de Ajuste de Patrón
33
Cuadro de Patrones de Costura
33
Ajuste del Patrón de Costura
34
Ajuste el Ancho de la Puntada de Zigzag
39
Ajuste la Posición de Línea de Base de Zigzag
40
Ajuste la Posición de Parada de la Puntada de Zigzag
41
Ajuste de Rematado por atrás Inicial (sólo 8560A, 8550A-A31)
42
Ajuste de Rematado por atrás Final (sólo 8560A, 855A-A31)
43
Ajuste de Rematado por atrás Continuo (sólo 8560A y 8550A-A31)
44
Ajuste de la Costura de Puntadas Fijas/Etiquetas(sólo 8560A, 8550A-A31)
45
Uso del Contador del Hilo Inferior
47
7 Uso del Panel de Control (Operaciones Avanzadas)
48
Nombres y Funciones
48
Ajuste de la Posición de Parada con Aguja Levantada
49
Tecla LOCK
50
Reponiendo todos Los Ajustes a Sus Valores por Defecto
50
Usando Los Programas de Usuario
51
Grabación de Datos de Costura
51
Recuperación de Datos de Costura Grabados
52
Ajuste de la Velocidad Máxima de Costura
53
8 Costura
54
9 Tension del Hilo
55
Ajuste de la Tensión del Hilo
55
Ajuste de la Presión del Prensatelas
56
10 Limpieza
57
Procedimientos Diarios de Limpieza
57
Lubrique (cuando Aparece "GREASEUP
60
11 Cambio de Partes
63
Cuchilla Fija y Cuchilla Móvil (sólo 8560A)
63
Partes Calibradas (Prensatelas, Placa de Agujas y Alimentador)
64
Cambio del Tope
64
Cambio de la Alimentación para Especificaciones de Puntadas Largas (desde 2,0 MM a 5,0 MM)
65
Cambio de la Alimentación Máxima
65
12 Ajustes Estandares
67
Posición del Actuador
67
Ajuste de la Posición del Interruptor de Seguridad
68
Ajuste del Resorte del Tirahilos
69
Ajuste de la Altura del Prensatelas
70
Ajuste de la Altura del Alimentador
70
Ajuste del Ángulo del Alimentador
71
Ajuste de la Posición Hacia Adelante/Atrás del Alimentador
71
Ajuste de la Altura de la Barra de Aguja
72
Sincronización de la Aguja y el Garfio Giratorio
72
Ajuste de la Posición de Tope del Garfio Giratorio
73
Ajuste de la Lubricación del Cangrejo
74
Ajuste de la Cantidad de Flotación del Prensatelas (Cantidad Mínima de Elevación)
75
Ajuste del Pedal
75
Ajuste de la Posición de la Leva de Cortahilos (sólo 8560A)
76
Ajuste de la Tensión del Resorte Prensor del Hilo Inferior (sólo 8560A)
77
Ajuste del Largo Sobrante de Hilo Después del Corte de Hilo (sólo 8560A)
77
Ajuste del Limpiahilos (sólo 8560A)
78
13 Partes Opcionales
79
Barra Prensora U y Punta de Barra Prensora
79
14 AL USAR un ALIMENTADOR no ESTANDAR (sólo 8560A)
81
15 Localizacion de Averias
82
Costura
82
Exhibiciones de Códigos de Error
87
Advertisement
Related Products
Brother Z-8550A
Brother Z-8550B
Brother Z-8560B
Brother ZE-855A
Brother ZE-856A
Brother ZM-850A
Brother ZE-8570
Brother ZM-851A
Brother ZE-8580
Brother 0446700
Brother Categories
Sewing Machine
All in One Printer
Printer
Label Maker
Fax Machine
More Brother Manuals
Login
Sign In
OR
Sign in with Facebook
Sign in with Google
Upload manual
Upload from disk
Upload from URL