Sign In
Upload
Manuals
Brands
Avery Dennison Manuals
Printer Accessories
ALS 104
Avery Dennison ALS 104 Manuals
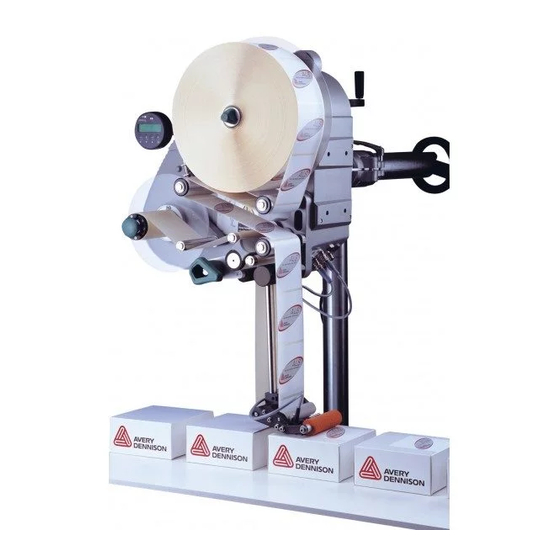
Manuals and User Guides for Avery Dennison ALS 104. We have
2
Avery Dennison ALS 104 manuals available for free PDF download: User Manual, Installation Manual
Avery Dennison ALS 104 User Manual (47 pages)
Label Dispenser
Brand:
Avery Dennison
| Category:
Printer Accessories
| Size: 1 MB
Table of Contents
Table of Contents
3
1 Please Note
5
General Notes
5
Validity and Binding Effect of this Manual
5
Contents
5
Technical Status
5
Copyright
5
Manufacturer
5
Illustrations and Descriptions
6
Signs and Symbols
6
Dangers and Risk Notes
6
Figures
6
Button Symbols
6
Functions
6
Supplementary Information
6
Safety Instructions
7
Information and Qualifications
7
Follow the Instructions
7
Keep the Product Information at Hand
7
Ensure the Required Qualifications Are Met
7
Operational Safety of the Unit
8
Proper Usage
8
Protection against Injuries by Electrical Current
8
Protection against Injuries by Mechanical Action
9
Protection against Injuries by Chemicals
9
Before Beginning Production
10
Due Diligence of the Operating Company and the Service Technician
10
Due Diligence of the User
10
Safety Notes on the Unit
11
2 Product Description
12
Overview
12
Components
12
Control Panel
14
Operating LED
14
Status LED
14
LCD Display
14
Buttons
14
Connection Arrangement
15
Connections on the Back of the Device
15
Sensor Connections
15
Mode of Operation
16
Technical Specifications
17
Characteristics
17
Labels
17
Label Sensor
17
Power Supply
17
Electronics
17
Internal Interfaces
18
Status Messages, Test Functions
18
Dimensions
18
Environmental Conditions
18
Integration
18
Certificates
18
Design Models
19
Right-Handed Version
19
Left-Handed Version
19
Options
20
External Control Panel
20
Fixed Dispensing Edge
20
Swivelling Dispensing Edge
20
Spring-Loaded Dispensing Edge
20
Pneumatic Dispensing Edge
21
V-Shape Dispensing Edge
21
Adjustable Dispensing Edge Holder
21
Outer Diameter Control Sensor
22
Dust/Splash Guard
22
Additional Material Guide Disk
22
Printer
23
Narrow Label Spring Kit
23
Operating Modes
24
Dispensing Mode
24
Dispensing Speed
24
Start Offset
24
Dispensing Manually
24
Configuration Mode
25
Function of the Double-Arrow Button
25
Menus
25
Functions
26
Function Overview
26
Function Descriptions
27
LABEL SETUP Menu
27
MACHINE SETUP Menu
27
SERVICE FUNCTION Menu
27
Inserting Label Material
28
Prerequisites
28
Inserting a Label Roll
29
Removing Spent Backing Paper
29
Removing Glue Residue
29
Inserting a New Label Roll
29
Threading the Label Web
30
Threading Guide
30
Threading the Label Roll at the Dispensing Edge
31
Threading the Label Roll Onto the Drive Roller
32
Fastening the Label Roll to the Rewinder
32
3 Before Operation
32
Electrical Connections
33
Power Supply Standard Machine
33
Checking the Power Supply Setting
33
Connecting the Power Cable
34
Power Supply with Dust/Splash Guard Option
34
Connecting Sensors
34
Mechanical Settings
35
7 Appendix
35
Adjusting the Unwinder's Core Diameter
35
Positioning the Pressure Roller
35
Calibrating the Label Sensor
36
Setting the Dancer Arm Restoring Force
36
4 Operation
36
Start-Up and Shutdown
37
Turning on the Unit
37
Starting Label Dispensing
37
Dispensing with a Product Sensor
37
Dispensing Without a Product Sensor
37
Stopping the Dispensing Process
37
Configuration and Monitoring
38
Function Menu Settings
38
Label Length
38
Label Stop Position
38
Dispensing Speed
39
Label Position on the Product
40
Monitoring Functions
41
Missing Labels
41
Recognising the End of the Label Roll in Advance
41
5 After Operation
42
Maintenance and Cleaning
42
Changing Fuses
42
Cleaning Agents
43
Regular Maintenance
43
Removing Paper Debris
43
6 Operational Failures
44
Error Messages
44
Error Messaging
44
List of Error Messages
44
Avery Dennison Deutschland Gmbh Ohmstrasse
45
Advertisement
Avery Dennison ALS 104 Installation Manual (36 pages)
Labeller
Brand:
Avery Dennison
| Category:
Printer
| Size: 1 MB
Table of Contents
Table of Contents
3
Please Observe the Following
4
General Information
4
Validity and Applicability of this Manual
4
Contents
4
Technical State
4
Liability
4
Copyright Notice
4
Manufacturer
4
Illustrations
5
Notes on Installation and Repair Work
6
General Information
6
Environmental Protection
6
Rules for Electromagnetic Compatibility
7
Safety Instructions
8
Information and Qualifications
8
Pay Attention to the Information
9
Information Must be Made Available
9
Machine Operating Safety
10
Installation, Maintenance
10
After All Servicing or Repair Work
10
Safe Operation
11
Protect against Injuries that Can Result from Electrical Current
11
Protection against Injuries that Can Result from Mechanical Actions
12
Installation Dimension Diagrams
13
Unpacking, Assembling and Connecting the Machine
15
Transport
15
Unpacking
15
Setting up
16
For Machines Held from the Rear Side
17
Holding Machine in Place by Side Plate or Base Plate
19
Attaching the Dispensing Edge
20
L-Shaped Dispensing Edge
20
V-Shaped Dispensing Edge
21
Adjustable Dispensing Edge Holder
21
Connecting to the Mains Power Supply
22
Setting Power Supply Voltage
23
Plugging in the Power Lead
24
Connecting the External Operator Panel
25
Mounting the External Operator Panel
25
Connecting the Sensors
26
Label Sensor
26
Connecting the Label Sensor
26
Switching between PNP/NPN
27
Setting the Label Sensor
28
Product Sensor
29
Connecting Product Sensor
29
Roll Diameter Sensor
30
Installing
30
Connecting the Roll Diameter Sensor
31
Setting the Roll Diameter
32
Function Test
32
Rotary Encoder
33
Requirements for Rotary Encoder
33
Connecting the Rotary Encoder
34
Adjusting the Rotary Encoder to the Label Dispenser
34
Advertisement
Related Products
Avery Dennison ALS 309
Avery Dennison ALS 306
Avery Dennison ALS 330/430
Avery Dennison ALS 230
Avery Dennison ALS 204
Avery Dennison ALS 330
Avery Dennison ALS 450
Avery Dennison ALS 380
Avery Dennison ALS 221
Avery Dennison ALS 421
Avery Dennison Categories
Printer
Label Maker
Barcode Reader
Printer Accessories
Battery Charger
More Avery Dennison Manuals
Login
Sign In
OR
Sign in with Facebook
Sign in with Google
Upload manual
Upload from disk
Upload from URL