moon 350P Owner's Manual
Neo series
Hide thumbs
Also See for 350P:
- Owner's manual (16 pages) ,
- Owner's manual (16 pages) ,
- Owner's manual (20 pages)
Table of Contents
Advertisement
Quick Links
Advertisement
Table of Contents

Related Manuals for moon 350P


Summary of Contents for moon 350P
- Page 1 350P Series Preamplifier Owner’s Manual...
- Page 2 350P Nēo Series...
-
Page 3: Important Safety Instructions
Owner’s Manual Important Safety Instructions Read these instructions. receptacles, and the point where they exit from the apparatus. Unplug mains cord during Keep these instructions. transportation. Heed all warnings. 11. Only use attachments and accessories specified by Follow all instructions. the manufacturer. - Page 4 350P, immediately disconnect it from the AC component. To completely disconnect this mains and take it to your MOON dealer for a apparatus from the AC mains, disconnect the complete check-up. power supply cord plug from the AC receptacle.
-
Page 5: Table Of Contents
Installation & Placement Front Panel Controls Optional Digital Inputs Optional Phono Section Rear Panel Connections Balanced Operation SimLink™ Operating the Nēo 350P Remote Control Operation Specifications www.simaudio.com Simaudio Ltd., 1345 Newton Road Boucherville, Québec J4B 5H2 CANADA Date Code: 20150909... -
Page 6: Introduction
350P Nēo Series Introduction One single-ended audio input which functions as a Thank you for selecting the Nēo 350P Preamplifier as a part of your hi-fi reproduction system. This preamplifier “pass-through”, bypassing gain stage has been designed to offer state-of-the-art high-end... -
Page 7: Unpacking
Warranty and product registration information (USA and Canada only) Once the Nēo 350P is unpacked, inspect it thoroughly and report any damage to your dealer immediately. We suggest that you keep all of the original packaging, storing it in a safe, dry place in case you’re required to transport this product. -
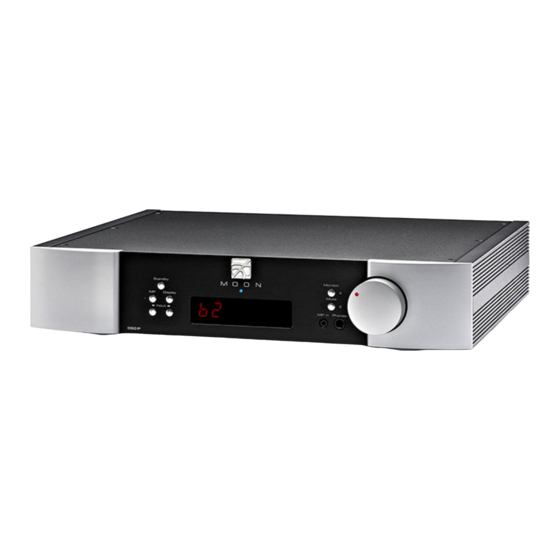
Page 8: Front Panel Controls
The front panel will look similar to Figure 1 (above). The large display window indicates the selected input source. If your Nēo 350P includes the digital input option, additional information will appear in the display window. Refer to the section entitled “Optional Digital Inputs” on page 9 for further details.. -
Page 9: Optional Digital Inputs
“----” which indicate The rotary “Volume” control determines the output that the 350P is in the process of locking onto the level. The volume control has an embedded red LED to external digital signal – this may take several seconds. -
Page 10: Optional Phono Section
Figure 3: Nēo 350P Optional Phono Section Circuit Board Layout Internal Settings We strongly recommend that you ask your MOON Authorized Dealer to make these adjustements. If you decide to do this on your own, any damage cause to this component, including from static discharge, will... - Page 11 MC for an MM For moving magnet (MM) cartridges, it is recommended cartridge as this will overload the 350P. When using a that you leave the jumpers inserted in the factory MC cartridge, you should insert the supplied jumpers default setting of 47kΩ.
-
Page 12: Rear Panel Connections
A3/PH. The RCA input and output connectors on the rear panel have been color coded: ‘white’ for the left channel and ‘red’ for the right channel. If your Nēo 350P is equipped with the optional phono section, the input labeled ‘A3/P’... -
Page 13: Balanced Operation
MOON components. For example, if feature may not function. Also, there is no master component in a SimLink™ chain; no one particular you were to connect the Nēo 260D to the 350P via the component operates as the main communications SimLink™, pressing the (play) button on the Nēo... -
Page 14: Operating The Nēo 350P
LED on the front panel will illuminate, indicating plan on being away for a few days, it may not be a bad that the 350P is now powered up and ready for use. idea to power off your preamplifier. Please keep in mind that once fully “broken-in”, your 350P requires several... -
Page 15: Remote Control Operation
The MUTE button turns off the output volume. Pressing the “Mute” button a second time will reinstate the output volume level back to its current setting. NOTE: The buttons labelled ◄ BAL ► don’t affect the operation of the 350P. Figure 5: CRM-2 Remote Control... - Page 16 (also using a 1/8” mini-jack cable). When you launch the MiND App on your Apple smart device (full list on the MiND page of our website) and select this system’s ZONE, the 180 MiND will turn on, as will both 350P and the 330A;...
-
Page 17: Specifications
Owner’s Manual Specifications Configuration Fully balanced differential, stereo Balanced inputs (XLR) 2 pairs Single-ended inputs (RCA) 4 pairs Mini-jack input 1 (1/8”) Monitor Loop (RCA) Input Sensitivity 200mV – 5.0V RMS Input Impedance 22,000Ω Headphone output 1 (1/4” Stereo TRS) Balanced outputs (XLR) 1 pair Single-ended outputs (RCA) -
Page 18: Www.simaudio.com
Balanced Pin Assignment: Pin 1 Ground Pin 2 Positive Pin 3 Negative NOTE: If you require the RS-232 codes for your Nēo 350P, please visit the "Contact Us" page and complete the "Information request" form on our website at www.simaudio.com. - Page 19 Owner’s Manual...
- Page 20 350P Nēo Series...
Need help?
Do you have a question about the 350P and is the answer not in the manual?
Questions and answers