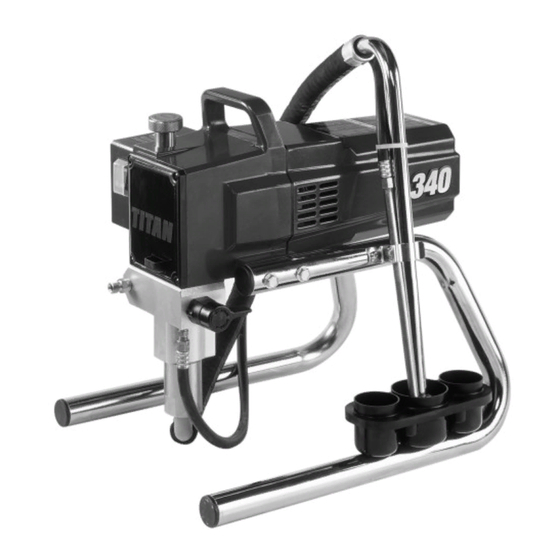
Titan 340 Owner's Manual
Airless sprayer
Hide thumbs
Also See for 340:
- Owner's manual (56 pages) ,
- Installation, maintenance & parts manual (12 pages)
Table of Contents
Advertisement
Do not use this equipment before reading this manual!
340
Model Number:
Skid Complete, 230V
Skid Complete, 110V
Printed in the U. S. A.
Airless Sprayer
International Model
704-2115
704-2125
Owner's Manual
For professional use only
NOTE: This manual contains important warnings
NOTE: This manual contains important warnings
and instructions. Please read and retain for
and instructions. Please read and retain for
reference.
reference.
0804 © 2004 Titan Tool Inc. All rights reserved. Form No. 313-2408B
Advertisement
Chapters
Table of Contents

Related Manuals for Titan 340


Summary of Contents for Titan 340
- Page 1 NOTE: This manual contains important warnings Skid Complete, 110V 704-2125 and instructions. Please read and retain for and instructions. Please read and retain for reference. reference. 0804 © 2004 Titan Tool Inc. All rights reserved. Form No. 313-2408B Printed in the U. S. A.
-
Page 2: Table Of Contents
• Never use the spray gun without the safety guard. the unit is always earthed over the electrical installation. The contact should be made using a shockproof socket earthed in accordance with the regulations. © Titan Tool Inc. All rights reserved. -
Page 3: Earthing Instructions
A leak is capable of injecting material into the skin. modify the plug provided. If the plug will not fit the outlet, have Inspect the paint hose before each use. the proper outlet installed by a qualified electrician. © Titan Tool Inc. All rights reserved. -
Page 4: General Description
Make sure all airless hoses and spray guns are electrically 5. Turn the unit on by moving the ON/OFF switch to the ON grounded and rated for at least 23 MPa (3300 PSI) fluid position. pressure. © Titan Tool Inc. All rights reserved. -
Page 5: Painting
WARNING Ground the gun by holding it against the edge of the metal container while flushing. Failure to do so may lead to a static electric discharge, which may cause a fire. © Titan Tool Inc. All rights reserved. -
Page 6: Spraying
Lap each stroke. If you are spraying horizontally, rather than in a fine spray. aim at the bottom edge of the preceding stroke, so as to lap Paint tailing pattern the previous pattern by 50%. © Titan Tool Inc. All rights reserved. -
Page 7: Cleanup
NOTE: For long-term or cold weather storage, pump mineral spirits through the entire system. For short-term storage when using latex paint, pump water mixed with Titan Liquid Shield Plus through the entire system (see the Accessories section of this manual for part number). -
Page 8: Maintenance
Always contact the supplier of solvents shroud. for recommendations. 3. Using a small screwdriver, pry off the two plastic brush 4. If you have any further questions concerning your TITAN covers. Airless Sprayer, call TITAN: 4. Disconnect the black and red wires from the motor Customer Service (U.S.) .......1-800-526-5362... -
Page 9: Replacing The Transducer
13. Reassemble the pump by reversing steps 1–6. CAUTION Make sure the transducer is aligned properly with the hole in the pump block during reassembly. Improper alignment may cause damage to the transducer o-ring. © Titan Tool Inc. All rights reserved. -
Page 10: Servicing The Fluid Section
13. Using a wrench, tighten the retainer nut securely. 14. Slide the top of the piston rod into the T-slot on the connecting rod. © Titan Tool Inc. All rights reserved. -
Page 11: Replacing The Filters
4. Turning counterclockwise, thread the new or cleaned filter into the pump block. 5. Slide the filter housing over the filter and thread it into the pump block until secure. Filter Housing Filter Seal Pump Block © Titan Tool Inc. All rights reserved. -
Page 12: Troubleshooting
4. Faulty or loose wiring. 4. Inspect or take to a Titan authorized service center. 5. Excessive motor temperature. 5. Allow motor to cool. - Page 13 1. The pressure adjustment is too low. 1. Rotate the pressure control knob clockwise to increase the pressure setting. 2. Improper voltage supply. 2. Connect the input voltage to the proper voltage for the unit. © Titan Tool Inc. All rights reserved.
- Page 14 à vapeur. Il y a risque de pénétration suivies: d'eau dans l'appareil ce qui peut provoquer un court-circuit. 1. Pour éviter les dangers, lire attentivement les consignes d'utilisation et suivez les recommandations qui s'y trouvent. © Titan Tool Inc. Tous droits réservés. Français...
- Page 15 Il est ne s'adapte pas à la prise, demander à un électricien qualifié conseillé de consulter un chirurgien plasticien ou un d'installer une prise appropriée. chirurgien des mains. © Titan Tool Inc. Tous droits réservés. Français...
- Page 16 12. Al limpiar la unidad, no pulverizar nunca solventes en un envase que tenga una abertura pequeña (piquera). Puede formarse una mezcla explosiva de gas/aire. El envase debe estar puesto a tierra. © Titan Tool Inc. Todos los derechos reservados. Español...
- Page 17 No modificar la reconstrucción de manos. clavija que se suministra; si la misma no encaja en la toma de corriente, hacer que un electricista especializado instale la toma de corriente apropiada. © Titan Tool Inc. Todos los derechos reservados. Español...
-
Page 18: Parts Listings
Motor cover..........1 ---------- Gear box assembly........1 ---------- Motor assembly ..........1 704-178 Right leg assembly ........1 704-179 Left leg assembly........1 700-258 PRIME/SPRAY valve assembly....1 761-178 Screw............4 704-300 Suction set assembly........1 704-185 Fluid section assembly .......1 © Titan Tool Inc. All rights reserved. -
Page 19: Motor Assembly
NOTE: All electrical work should be performed by a Titan authorized service center. Electrical Schematic, 230V Electrical Schematic, 110V Motor Motor Starter Starter Rectifier Rectifier Motor Motor Micro Switch Micro Switch (Pressure (Pressure Control) Control) © Titan Tool Inc. All rights reserved. -
Page 20: Gear Box Assembly
Gear Box Assembly © Titan Tool Inc. All rights reserved. -
Page 21: Suction Set Assembly
(includes items 2 and 5–7) 704-109 O-ring (for hot solvents, optional) 700-1024 Elbow ............1 704-127 Retaining clip ..........1 700-1023 Siphon hose (includes items 2–4, and 7) ......1 704-391 Clip..............1 700-805 Inlet screen ..........1 © Titan Tool Inc. All rights reserved. -
Page 22: Fluid Section Assembly
Install lower packings with raised lip and O-ring facing up. NOTE: Packing kit P/N 703-401 includes those items marked with an *. Also included are packing grease P/N 700-203 and piston guide tool P/N 700-793. © Titan Tool Inc. All rights reserved. -
Page 23: Accessories
Liquid Shield Plus (injection/explosion) Cleans and protects spray systems 313-1847 Shock hazard label against rust, corrosion and premature wear. Now with -25º anti-freeze protection. Part # Description 314-483 ...4 ounce bottle 314-482 ...1 quart bottle © Titan Tool Inc. All rights reserved. -
Page 24: Warranty
Warranty Titan Tool, Inc., (“Titan”) warrants that at the time of delivery to the original purchaser for use (“End User”), the equipment covered by this warranty is free from defects in material and workmanship. With the exception of any special, limited, or extended warranty published by Titan, Titan’s obligation under this warranty is limited to replacing or repairing without charge those parts which, to Titan’s reasonable satisfaction, are shown to be defective within...
Need help?
Do you have a question about the 340 and is the answer not in the manual?
Questions and answers