Table of Contents
Advertisement
Quick Links
Download this manual
See also:
User Manual
Advertisement
Table of Contents

Related Manuals for D-Link DPH-C160S


Summary of Contents for D-Link DPH-C160S
- Page 1 Handset & Base Station User Guide DPH-C160S v1.01...
- Page 2 www.dlink.com.au...
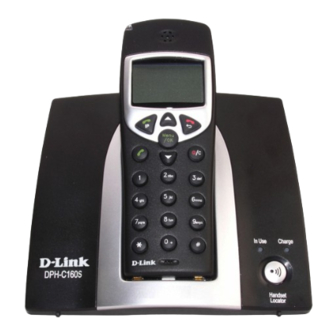
- Page 3 Ring Indicator Up scroll LCD Display Disconnect/on hook VoIP call Clear entry/Power on/off Menu/OK 10 Down scroll PSTN call 11 Microphone Ear speaker www.dlink.com.au...
-
Page 4: Table Of Contents
Index INSTALLATION PHONE BOOK Unpacking Using the Phone Book Connection Keypad Characters Belt Clip Dialling from the Phone Book Battery Storing Names/Numbers Battery Charge Indicator Changing Names/Numbers Turning The Handset On and Off Deleting Entries Range Erasing all Entries (Out of Range Warning) Headset CALLER LIST Handset Indicator... -
Page 5: Installation
Router/Gateway. IMPORTANT! Under power failure conditions the DPH-C160S will not operate. Please ensure that a separate telephone not dependant on local power is available for emergency use. The earpiece of the handset may attract small objects such as staples and pins, care should be taken when placing the handset near these items. -
Page 6: Belt Clip
You should hear it click into place. BATTERY The DPH-C160S is supplied with environmentally-friendly nickel metal hydride (NiMH) batteries – 3 x AAA 1.2V. As with all batteries, performance may degrade over time; should you notice that the standby time has reduced considerably or there are signs of leakage, the batteries should be replaced. -
Page 7: Battery Charge Indicator
1-2 minutes. RANGE The range of the DPH-C160S varies depending on different factors in the surrounding environment. Radio waves transmitting the call may be hindered by obstructions or signal reflections that can reduce the range. -
Page 8: Out Of Range Warning
Installation Out of Range Warning If the handset is carried to far from the base station during a call, the sound quality will deteriorate and a warning tone will be heard. Unless the handset is moved closer to the base station within a few seconds the call will be disconnected. -
Page 9: The Lcd Display
Installation THE LCD DISPLAY Icon Description Signal Strength Indicates the current signal strength between the handset and the base station more bars indicate higher signal strength. This icon is always displayed when the telephone is on. In Use Displayed when the telephone is in use (i.e., a telephone call is in progress). -
Page 10: Operation
Operation MAKING A VOIP CALL 1. Enter the required telephone. Mistakes can be erased by pressing the Clear button. 2. Press and the telephone number will now be dialled via the VoIP service. 3. Press to terminate the call. MAKING A PSTN CALL 1. -
Page 11: Volume Control
Operation VOLUME CONTROL The speaker and earpiece volume may be adjusted during a call using (1 – low, 9 – high). HANDS FREE SPEAKERPHONE In addition to normal handset mode you can select hands free mode. With hands free mode you make a call then place the handset on a table or similar hard surface, this allows everyone in the room to converse with the caller. -
Page 12: Handset Locator
Operation HANDSET LOCATOR Pressing the Handset Locator button on the base station will activate the paging signal on the handset. This function is used to help locate the handset. The signal will stop once the button is pressed. www.dlink.com.au... -
Page 13: Menu
Menu Description of the menu system The DPH-C160S has a menu system controlled by the buttons directly under the LCD display. The functions shown in the display (directly above the button) are: Accesses the menu system. Also to scroll one step forward and/or confirm selected option. -
Page 14: System Info
0282057456 PLEASE NOTE! If the DPH-C160S is connected to a network that does not have a DHCP server running or is unable to obtain and IP address it will use the default address of 10.1.1.1. This will allow you to access the device and configure the correct IP address settings that you require. -
Page 15: Call Log
Call Log The call log feature will allow you to keep track of all of your calls dialled, received and missed. The handset will keep a listing of the ten last calls for each category. MISSED This will display a listing of all missed calls registered by the handset. Please find that you can return a missed call by selecting the call from the list and by pressing and the telephone number will be... -
Page 16: Contact List
Contact List This option will display a listing of all the Phone Numbers that have been configured in the Contact List via the GUI. This is also a listing of the numbers that can be used for Speed Dial if configured via the GUI. The maximum supported configurable contacts are to a maximum of ten numbers. -
Page 17: Phone Book
Phone Book USING THE PHONE BOOK The phone book is used to store names and telephone numbers. A stored phone number can be dialled using fewer keystrokes than if dialled manually. If you subscribe to a Caller ID service the name/number of the caller will be displayed when you receive an incoming call (names will only display when associated with a number store in the phone book). -
Page 18: Storing Names/Numbers
Phone Book STORING NAMES/NUMBERS IN THE HANDSET 1. Press Menu. 2. Scroll through using to Phone Book. Press OK. 3. Now scroll through using to Add. Press OK. 4. Enter name for contact. Press the corresponding number button one or more times for the first letter (refer to the table on the previous page). -
Page 19: Erasing All Entries
Phone Book ERASING ALL ENTRIES FROM PHONE BOOK 1. Press Menu. 2. Scroll through using to Phone Book. Press OK. 3. Now scroll through using to Erase All. 4. Press OK, then press OK again to confirm the deletion of this entry from the phone book. -
Page 20: Caller List
Caller List PSTN CALLS 1. Press Menu. 2. Scroll through using to Caller List. Press OK. 3. Now scroll through using to PSTN Calls. Press OK. 4. Scroll through the entries in the Caller List using 5. Press and the telephone number will be dialled. ERASE ALL 1. -
Page 21: Hs Setting
HS Setting PSTN RING The handset has several different ringer volumes and melodies which can be selected. There is no ringer on the base station. 1. Press Menu. 2. Scroll through using to HS Setting. Press OK. 3. Now scroll through using to PSTN Ring. -
Page 22: Set Keytone
HS Setting SET KEYTONE When the handset buttons are pressed a tone will be heard, this can be switched on or off. 1. Press Menu. 2. Scroll through using to HS Setting. Press OK. 3. Now scroll through using to Set Keytone. Press OK. 4. -
Page 23: Set Pin
6. Now re-type your new PIN and press OK to confirm selection. PLEASE NOTE! If you forget your PIN you may need to return the unit to D-Link in order for the unit to be reset. So please write this PIN down in a safe place for further use. -
Page 24: Anykey Talk
HS Setting ANYKEY TALK This function allows incoming calls to be answered using any key on the handset while ringing. 1. Press Menu. 2. Scroll through using to HS Setting. Press OK. 3. Now scroll through using to Anykey Talk. Press OK. 4. -
Page 25: Bs Setting
BS Setting DIAL MODE This function allows you to configure the base station for use with DTMF or PULSE dialling. 1. Press Menu. 2. Scroll through using to BS Setting. Press OK. 3. Enter your current base station PIN code (default PIN: 1590). 4. -
Page 26: Pause Time
BS Setting PAUSE TIME This function allows you to configure the Pause Time used on the base station. 1. Press Menu. 2. Scroll through using to BS Setting. Press OK. 3. Enter your current base station PIN code (default PIN: 1590). 4. -
Page 27: Remove Hs
BS Setting REMOVE HS This function allows you to remove a handset from this base station. 1. Press Menu. 2. Scroll through using to BS Setting. Press OK. 3. Enter your current base station PIN code (default PIN: 1590). 4. Now scroll through using to Remove HS. -
Page 28: Change Pin
6. Now re-type your new PIN and press OK to confirm selection. PLEASE NOTE! If you forget your PIN you may need to return the unit to D-Link in order for the unit to be reset. So please write this PIN down in a safe place for further use. -
Page 29: Select Base
Select Base The select base feature allows you to specify what Base Station you wish to use if you are registered to multiple Base stations. You can either use the specific Base or choose the Auto option which will connect you to the Base Station with the strongest signal. 1. -
Page 30: Hs Register
HS Register To enable the use of more than one handset a registration has to be performed. Every new additional handset must be registered in order to use the current base station; each base station can handle up to 4 handsets. -
Page 31: Troubleshooting
Troubleshooting Check that the telephone cord and Ethernet cord is undamaged and properly plugged in. Disconnect any additional equipment that may be connected. If the problem is resolved, the fault is with the other equipment. Check the charge contacts on the handset and base station are clean. No number shown on the LCD display when ringing In order for this feature to function, you must subscribe to the Caller ID service provided by your network operator. - Page 32 Each of the below dial strings will play a voice through the handset speaker with the relevant information. **1 − will play your DPH-C160S’s IP address, helpful for accessing the Web GUI. **2 − will play your DPH-C160S’s phone number to ensure the correct details are in the Handset.
Need help?
Do you have a question about the DPH-C160S and is the answer not in the manual?
Questions and answers