DCS RGU-366 User Manual
Professional range
Hide thumbs
Also See for RGU-366:
- User manual (100 pages) ,
- Installation instructions manual (56 pages) ,
- Installation instructions manual (27 pages)

Related Manuals for DCS RGU-366


Summary of Contents for DCS RGU-366
- Page 1 Professional range User guide RGU/RGV, RDU/RDV & RGUC/RGVC models La cuisinière professionnelle Guide d’utilisation Modèles RGU/RGV, RDU/RDV et RGUC/RGVC US CA...
- Page 2 WARNING! If the information in this manual is not followed exactly, a fire or explosion may result causing property damage, personal injury or death. Do not store or use gasoline or other flammable vapors and liquids in the vicinity of this or any other appliance. NEVER use this appliance as a space heater to heat or warm the room.
-
Page 3: Table Of Contents
The models shown in this user guide may not be available in all markets and are subject to change at any time. For current details about model and specification availability in your country, please visit our website listed on the back cover or contact your DCS by Fisher & Paykel dealer. -
Page 4: Safety And Warnings
Safety and warnings IMPORTANT SAFETY INSTRUCTIONS To reduce the risk of fire, electrical shock, injury to persons, or damage when using the appliance, follow the important safety instructions listed below: WARNING! Electrical Shock Hazard Before removing a faulty oven light bulb, make sure you turn the power to the range off at the main fuse or circuit breaker panel. -
Page 5: Important Safety Instructions
Safety and warnings IMPORTANT SAFETY INSTRUCTIONS WARNING! Explosion Hazard If you smell gas, do not use the appliance. Open a window or door to let the gas escape, then follow the instructions on the inside front cover of this manual. Do not use water on grease fires. - Page 6 Safety and warnings IMPORTANT SAFETY INSTRUCTIONS Read all the instructions before using the appliance. Use the appliance only for its intended purpose as described in these instructions. Proper installation – Be sure your appliance is properly installed and grounded by a qualified technicican.
- Page 7 Safety and warnings IMPORTANT SAFETY INSTRUCTIONS Safe food handling: leave food in the oven for as short a time as possible before and after cooking. This is to avoid contamination by organisms which may cause food poisoning. Take particular care during warmer weather. Clean only the parts listed in this manual.
-
Page 8: Introduction
Introduction 48” models RGU 484GG RGU/RGV 486GL RGU/RGV 486GD RDU/RDV 484GG RDU/RDV 486GL RDU/RDV 486GD RGU/RGV 485GD RDU/RDV 485GD... - Page 9 Introduction 36” models RGU/RGV 366 RGU/RGV 364GL RGU/RGV 364GD RDU/RDV 366 RDU/RDV 364GL RDU/RDV 364GD 30” models RGU/RGV 305 RDU/RDV 305 RGUC/RGVC 305...
- Page 10 Introduction Before you start Make sure that the anti-tip bracket at the right rear of the range has been properly installed. Open the main oven door and find the model and serial numbers on the label in the bottom right-hand corner of the oven frame (see the drawing opposite). Note these numbers down for future reference in the space provided in section ‘Warranty and service’...
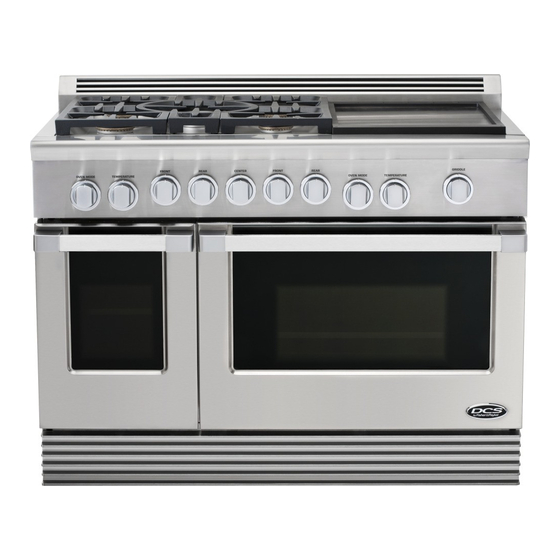
- Page 11 Introduction Grill and griddle covers Oven vents Grill grate Back trim Griddle vents Burner grates Griddle Grease drip-pans Grill knob Cooktop burner Control panel knobs Secondary oven Griddle knob mode knob Oven frame Secondary oven Oven door gasket temperature knob Main oven Broiler mode knob...
-
Page 12: First Use
First use Conditioning the oven Conditioning will burn off any manufacturing residues and ensure that you get the best results right from the start. Insert all the shelves. See ‘Positioning the shelves’ for instructions. Turn on the ventilation hood above your range on high. Heat the empty oven at 450 F for: 30 minutes using BAKE... -
Page 13: Oven Use
Oven use Positioning the shelves Shelf positions are numbered from the bottom. Position the shelves you will need before turning the oven on. For advice on which shelf position to use, see sections ‘Oven modes’ , ‘Oven cooking guidelines’ , and ‘Baking charts’... - Page 14 Oven use To insert the shelves - MAIN OVEN Guard rail Make sure the guard rail is at the back, Hold the shelf firmly with both hands, facing up and the slides are not extended. making sure you grip the wire shelf too to stop it sliding forward.
- Page 15 Oven use To insert the shelves - SECONDARY OVEN (48” models only) Guard rail Side rack wire Make sure the guard rail is at the back, Position the shelf: it should rest on the side facing up. rack wires, as shown. Safety stop Tilt the front up slightly to help the safety Lower the shelf back onto the side rack...
-
Page 16: Oven Modes
Oven use Oven modes Important! In all oven modes, a cooling fan may come on to prevent parts of the range from overheating; you will he It is normal for the fan to stay on after the oven is turned off. Depending on your model, your oven may have only some or all of the oven modes below. - Page 17 Oven use ear the fan noise and feel warm air coming from the vents in the back trim. TYPICAL FOODS ARRANGEMENT DO I NEED TO PREHEAT THE OVEN? For baking: preheat until Pies If baking on more than one the temperature knob Pizza shelf, ensure items or pans are halo turns from orange...
-
Page 18: Using Your Oven For Baking And Roasting
Oven use Using your oven for baking and roasting Halo (Red) Check that you have the shelf/shelves you Turn the OVEN MODE knob will need in place. counterclockwise to BAKE or BAKE If not, see section ‘Positioning the shelves’ CONVECTION. for instructions. -
Page 19: Using Your Oven For Broiling
Oven use Using your oven for broiling Halo (Red) Check that you have the shelf you will need Turn the OVEN MODE knob in place. counterclockwise to BROIL or BROIL If not, see section ‘Positioning the shelves’ CONVECTION. for instructions. Make sure you turn the knob exactly to the setting, never past it. -
Page 20: Using Your Oven For Proofing Dough
Oven use Using your oven for proofing dough RDU/RDV-48 models Halo (Red) Turn the OVEN MODE knob of the AFTER 3 MINUTES, place the dough in the secondary oven counterclockwise oven in a covered, heatproof bowl. to PROOF. The oven will heat to an ideal proofing temperature (100 F) in about 3 minutes. - Page 21 Oven use Using your oven for proofing dough All other models If your model has a secondary oven, we recommend using it for proofing dough, as the smaller volume ensures a more even temperature. Halo Halo Halo (Red) (Orange) (Unlit) Turn the OVEN MODE knob AFTER 5 MINUTES, turn the temperature counterclockwise to BAKE and the...
-
Page 22: Oven Cooking Guidelines
Oven use Oven cooking guidelines Important! Use all the oven modes with the oven door closed. Never use aluminum foil to cover the oven shelves or to line the floor of the oven. The trapped heat can irreversibly damage the enamel and may even cause fire. Do not place water, ice, or any dish or tray directly on the oven floor, as this will irreversibly damage the enamel. - Page 23 A suitable roasting rack can be purchased through your DCS by Fisher & Paykel dealer or Customer Care. When roasting larger items like a whole turkey, use only the pan and grid for greater stability.
-
Page 24: Baking Charts
Oven use Baking charts The settings in the following chart are guidelines only. Follow the instructions in your recipe or on food packaging and be prepared to adjust the oven settings and baking times to achieve the best possible results for you. Settings in bold indicate the recommended method. - Page 25 Oven use Baking charts RGU/RGV and RGUC/RGVC models – Main oven Single or Shelf Temperature Time Food Mode multi shelf position(s) (min) single BAKE 350-375 Sugar cookies single BAKE CONVECTION 325-350 multi 1 and 3 BAKE 325-350 28-32 Yellow cake multi 1 and 3 BAKE CONVECTION 300-350...
-
Page 26: Cooktop Use
Cooktop use Using the cooktop burners Halo (Red) Identify the knob of the burner you want to Push the knob in and turn it counterclockwise use. to LITE. Make sure you stop at LITE before turning the knob to any flame setting. The halo will glow red. -
Page 27: Guidelines For Using The Cooktop Burners
If not, see ‘Troubleshooting’ for advice. Use woks only with a wok ring. Wok rings can be purchased separately through your DCS by Fisher & Paykel dealer or Customer Care. To use, place the wok ring over the grates, making sure the small protrusions on its bottom straddle the grate fingers. -
Page 28: Using The Grill
Cooktop use Using the grill The grill has a reversible grate. It will change color with use as oils cook onto the surface. This is normal and doesn’t affect grilling performance. Ridged side Flat side For foods where you For foods that need want the fat to run more support and don’t down, such as:... -
Page 29: Using The Griddle
Cooktop use Grill cooking guidelines Important! Never leave the grill unattended during use. Grease drippings may cause short flare-ups or even sustained flaming. If left unattended, these may cause fire. Make sure you have your ventilation hood set on maximum during grilling. Clean the grease drip-pan after every use. -
Page 30: Care And Cleaning
Care and cleaning DON’Ts Read these cleaning instructions and the ‘Safety Do not use aerosol cleaners until the and warnings’ section before you start cleaning range has completely cooled. The your range. propellant substance in these cleaners Before cleaning or removing any part, make could catch fire in the presence of heat. - Page 31 Care and cleaning What? How? Important! Do not use stainless Wipe with a damp cloth using a solution of Control knobs, steel cleaner on these mild detergent and hot water. Oven handles, parts, as doing so may Dry thoroughly with microfiber cloth. Kickstrip grate damage their coating.
- Page 32 Care and cleaning What? How? Important! Oven parts Pre-soak any stubborn soiling in a Broil/roast pan and slotted grid solution of mild detergent and hot water. Wash by hand or in a dishwasher. Bake and broil burners (gas ovens) Do not clean these parts. They self-clean during normal use. Broil element (electric ovens) Do not use oven cleaners or any...
- Page 33 Care and cleaning What? How? Important! Cooktop parts Keep the notches of the flame Check that the burner is turned OFF and Burner caps and spreaders clear. Soiling may brass flame allow it to cool. spreaders clog these and cause ignition Lift off the burner cap and brass flame problems.
- Page 34 Care and cleaning What? How? Important! Cooktop parts The grill grate should be Check that the grill has been turned off. Grill grate cleaned immediately after Put on barbecue mitts for protection use (while it is still hot), so against steam and heat. that food particles do not Scrub the grill with a brass bristle become ‘baked-on’...
- Page 35 Care and cleaning What? How? Important! Cooktop parts Take extreme care while To remove light soiling after each use: Griddle cleaning a hot griddle: While the griddle is still hot, use a wear barbecue mitts and square-edged spatula or brass brush be careful of steam and hot to clean the griddle of grease and food surfaces.
-
Page 36: Removing And Replacing The Oven Door
Care and cleaning Removing and replacing the oven door Important! Do not lift the oven door by its handle. Doing so may damage the door. Make sure the oven and the door are cool before you begin to remove the door. Before removing the door, make sure there is a large enough clear, protected surface in the kitchen to rest the door on. -
Page 37: To Replace The Oven Door
Care and cleaning To replace the oven door Notch Hold the door firmly in an approximately Insert the hinge tongues into the slots, halfway open position. making sure that the notches on both sides drop into place as shown. Open the door fully. Fully close the levers on the left and right hinges, as shown, then close the door. -
Page 38: Removing And Replacing The Side Racks
Care and cleaning Removing and replacing the side racks To remove side racks Lock stud Retaining wire Remove any shelves first. See section Gently pull down on the retaining wire from ‘Positioning the shelves’ for instructions. underneath the lock stud. The retaining wire will pop out. -
Page 39: Replacing The Burner Parts
Care and cleaning Replacing the burner parts Important! When replacing the burners, make sure that the two locating pins on the bottom of the brass flame spreader are properly aligned with the locating pin holes on the top of the simmer ring. Incorrect alignment will produce a potentially dangerous flame and poor burner performance. -
Page 40: Replacing The Oven Light Bulb
Care and cleaning Replacing the oven light bulb Important! Use a 40 W, 120 V appliance light bulb for replacement. Do not use a standard light bulb in any oven, the heat will break it. Allow the oven (including the lamp cover and the bulb) to cool completely. Remove any shelves that may get in the way. -
Page 41: Using The Clean Cycle
Care and cleaning Using the cycle CLEAN About the CLEAN cycle Main ovens in RDU/RDV and RGUC/RGVC models feature a self-cleaning cycle ( CLEAN ) which takes care of the mess and grime that is traditionally associated with oven cleaning. During self- cleaning, the oven reaches very high temperatures. - Page 42 Care and cleaning To start a CLEAN cycle Remove oven shelves, side racks and all other accessories, bakeware, and utensils. See ‘Removing and replacing the side racks’ and ‘Positioning the shelves’ for instructions. Wipe up any spills or grease deposits and remove any loose food soiling. Failure to do so may discolor the oven surfaces and cause excessive smoking during the cycle.
- Page 43 Care and cleaning When a CLEAN cycle has finished The halo around the temperature knob will go out. You need to: Turn the oven mode and temperature knobs clockwise to OFF. The door may remain locked. Once the oven has cooled to a cooking temperature (this may take up to 30 minutes), the door will automatically unlock.
-
Page 44: Troubleshooting
Troubleshooting If you can’t find an answer to your problem in the chart below, or if the problem cannot be fixed, you will need technical help. Contact your Authorized Service Center or Customer Care. Problem Possible causes What to do Oven The oven doesn’t work No power supply (oven light and... - Page 45 Troubleshooting Problem Possible causes What to do Oven Condensation around Food has high moisture content or Condenstaion is normal. You oven (e.g. on control local climate (temperature, can wipe the drops off the panel or top of oven humidity) is contributing to control panel.
- Page 46 Troubleshooting Problem Possible causes What to do Oven The oven door won’t The door is locked because a See section ‘Using the CLEAN open. CLEAN cycle is underway or cycle’ in ‘Care and cleaning’ for the oven has not yet cooled to information.
- Page 47 Troubleshooting Problem Possible causes What to do Cooktop burners Some burners will not Burner parts or ignitors may be Check that the burner parts light. are clean, dry, and correctly wet, dirty, or misaligned. assembled. Check that the Flames do not burn all ignitors are clean and dry.
- Page 48 Troubleshooting Problem Possible causes What to do Cooktop burners The burner flames are Technical fault: the gas is the Do not use your cooktop uneven, very large, wrong type or hasn’t been burners. Contact your yellow or yellow-tipped adjusted properly. Authorized Service Center or or sooty.
-
Page 49: Warranty And Service
Warranty and service Before you call for service or assistance ... Check the things you can do yourself. Refer to the installation instructions and your user guide and check that: your product is correctly installed you are familiar with its normal operation. If after checking these points you still need assistance or parts, please refer to the Service &...
Need help?
Do you have a question about the RGU-366 and is the answer not in the manual?
Questions and answers