Table of Contents
Advertisement
Advertisement
Table of Contents

Related Manuals for Asko OP8631S


Summary of Contents for Asko OP8631S
- Page 1 Operating instructions OP8631S / OP8631B...
-
Page 3: Table Of Contents
Electric oven Dear customer! We sincerely thank you for your purchase. We believe you will soon fi nd ample evidence that you can really rely on our products. To make the use of the appliance easier, we attach these comprehensive instruction manual. The instructions should aid you in getting familiar with your new appliance. -
Page 4: Important Warnings
Important - Read before using the appliance Safety percautions • This appliance can be used by children aged from 8 years and above and persons with reduced physical, sensory or metal capabilities or lack of experience and knowledge if they have been given supervision or instruction concerning use of the appliance in a safe way and understand the hazards involved. - Page 5 Warnings • The appliance may only be connected to the power mains by an authorized service technician or expert. • Tampering with the appliance or non-professional repair thereof may result in risk of severe injury or damage to the product. Any repairs may only be carried out by an authorized service technician or expert.
- Page 6 Appliance purpose The appliance is intended for conventional preparation of food in households and should not be used for any other purpose. Individual options of use are comprehensively described in this instruction manual. Oven door switch The switch will turn off the oven heating and the fan when door is opened during oven operation;...
-
Page 7: Appliance Description
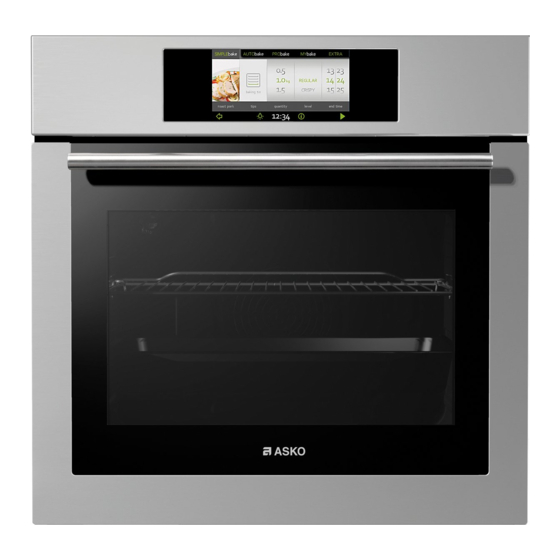
Appliance description The fi gure represents one of the appliance models. Since a group of appliances to which these instructions apply, have different features, the instruction manual may describe functions and equipment that may not be available in your appliance. 1. -
Page 8: Control Unit - Touch Control
Control unit – touch control On/Off Child lock Back to main menu Oven light Clock INFO Oven control SIMPLEbake AVTObake PRObake MYbake • A fi eld coloured green or orange indicates the selected Extra settings setting. • Move through the menu by sliding your fi nger up and Back to previous menu down or left and right. -
Page 9: Oven Control
Oven control Before the fi rst use • Remove all accessories from the oven and clean them with warm water and regular detergent. Do not use any abrasive cleaners. • When the oven heats up for the fi rst time, the characteristic smell of “the new”... -
Page 10: Selecting The Language
Selecting the language If you are not happy with the language in which the messages on the display are presented, you may select another one. Select the CLOCK display in the main menu. Touch the ( ) symbol to set the language. A list of languages will appear; slide up and down to scroll through the list. - Page 11 If the display is not touched within 5 minutes, the light is automatically switched off and clock will be displayed (in clock display mode, power consumption is approx. 3 W higher than when the appliance is turned off). Oven control The process of preparing food in your oven can be controlled in two ways: A) COOKING BY SELECTING THE TYPE OF FOOD –...
- Page 12 AVTObake In this mode, fi rst select the type of food. This is followed by automatic setting of the quantity, level of doneness, and cooking end time. The program offers a choice of 65 preset recipes complete with photos. The recipes were reviewed by professional chefs and nutrition experts.
- Page 13 • All settings are indicated on the display. The last frame displays the oven temperature and the cooking time elapsed. • To change the current settings during cooking, touch the ( symbol to display the temperature and remaining time sliders. •...
- Page 14 B) COOKING BY SELECTING THE OPERATION MODE PRObake Use this mode when you wish to prepare any type and amount of food. In this mode, you manually choose the cooking/heating system, temperature, duration, cooking end time, and preheating. All cooking parameters and settings may be changed during cooking as well.
- Page 15 Grill Only the infra heater is activated (which also operates, along with the upper heater, in the Large grill mode). This mode is appropriate for grilling smaller quantities of toasted sandwiches, grill sausages, or simply for toasting bread. Preset temperature 240°C. Grill &...
- Page 16 Lower heater / Aqua Clean The heat is only radiated by the heater installed in the bottom of the oven. Select this operation mode when you wish to bake / cook the bottom side of the dish more thoroughly (e.g. for moist pastry with fruit fi...
- Page 17 • After setting the heater combination and temperature, touch the START symbol to start cooking, or choose extra settings (see section Timer Functions). • All settings are indicated on the display. The last frame displays the oven temperature and the cooking time elapsed.
- Page 18 After one minute, the acoustic signal will be switched off automatically. Setting the delayed start – combination of cooking time and end time In this mode, you may specify the duration of the cooking process (cooking time) and the time when you wish the cooking process to stop (end time).
- Page 19 Baking in several stages STEPbake feature can be used as an extension to the PRObake - STEPbake system. This function allows you to select all settings manually. In one cooking process, up to three different successive cooking steps can be combined. By selecting the heaters, temperature, and cooking time, you will cook and brown your dishes just the way you like them.
- Page 20 For safety reasons, the oven will automatically switch off after a certain cooking time: - after 10 hours if the set temperature is higher than 120°C; - after 24 hours if the set temperature is lower than 120°C.manjša od 120°C. Extra functions Touch the EXTRA fi...
- Page 21 Quick preheat • Use this function if you wish to heat the oven as quickly as possible to the desired temperature. This function is not appropriate for cooking food. • When the oven heats up to the desired temperature, the heating process is completed.
- Page 22 Minute minder. Use this function independently of oven operation when you wish to be warned at a previously set time. The minder’s countdown timer can be set to a maximum of 10 hours. - Set the clock by touching the CLOCK symbol. Touch the ) symbol to select the settings time and confi...
- Page 23 Using your own recipes The fi lmstrip can be moved left and right. Your favourite recipes that you have previously stored in the memory can be retrieved and used at any time. The list may contain up to 120 different recipes. Select and set the procedure by touching the MYbake fi...
- Page 24 Before pyrolitic cleaning, the extendible telescopic guides should be removed from the oven! Stainless steel profi le For easier insertion of the baking tray, the inserted profi le (depending on the allows both telescopic guides to be pulled out equally and model) simultaneously.
-
Page 25: Oven Accessories
Oven accessories (depending on the model) The glass tray is intended for baking dishes, but may also be used as a serving tray. Do not use the pyrolitic self-cleaning program to clean the glass baking tray! The grid onto which the container with food, or the food directly, is placed. - Page 26 PYROLITIC DEEP BAKING TRAY is intended for baking meat and moist pastry; it is also intended as a drip tray. PYROLITIC DEEP BAKING TRAY is marked with a dot (embossment). It can be cleaned using the automatic pyrolitic cleaning program. Unless you are using the grill, or the deep baking tray is used only as a drip tray when spit-roasting, the deep tray should not be inserted into the fi...
-
Page 27: Food Preparation
Food preparation Baking pastry • For baking pastry, use the . mode of operation. (Oven operation with the selected mode, or system, depends on the appliance model). • When baking pastry, always remove the fat fi lter. Instructions • When baking pastry, always observe the instructions on the shelf / guide level, temperature, and cooking time indicated in the pastry baking table. - Page 28 be the uppermost tray. • If possible, prepare bite-size pastry, such as cupcakes, in the same thickness and height. Unevenly sized pastry will be unevenly browned! • When baking several types of pastry simultaneously, there will be a signifi cant amount of vapor in the oven, resulting in accumulation of condensate on the oven door.
- Page 29 Pastry baking table for combined upper and lower heater or hot air operating mode - when cooking on one level only Type of pastry Guide (from Temperature Guide (from Temperature Cooking time the bottom) (°C) the bottom) (°C) (minutes) Sweet pastry Marble cake, ring cake 160-170 150-160...
- Page 30 Settings table for baking pastry with hot air and lower heater Type of pastry Guide (from the bottom) Temperature (°C) Cooking time (minutes) Cheesecake (750g cheese) 150-160 65-80 - short pastry Pizza * - leavened dough 200-210 15-20 Quiche Loraine - short crust 180-200 35-40 dough...
- Page 31 Cooking / roasting meat • To cook meat, use the operating modes • Data printed in bold represent the most appropriate operation mode for a particular type of meat. • When cooking meat, the use of the fat fi lter is recommended (depending on the model).
- Page 32 Meat cooking table for upper/lower heater combination or with hot air - when cooking on one level only Type of meat Weight Guide (from Tempera- Guide (from Tempera- Cooking bottom) ture (°C) bottom) ture (°C) time (min.) Beef Beef roast 1000 190-210 180-190...
- Page 33 Grilling and browning • When grilling meat, you should be particularly careful. The high temperatures and infra heater heat the grid and other parts of the oven to very high degrees; use protective kitchen gloves and special meat tongs. • Hot fat may squirt out of pierced meat (e.g. from sausages). To avoid burning your skin or eyes, use meat tongs.
- Page 34 Spit roasting (only with some models) • The rotating roast spit set consists of a rotating spit with a detachable handle and two forks with screws for fi xing the meat chunk. • When using the roast spit, fi rst insert the special support frame into the third guide from the bottom.
- Page 35 Cooking table - Large grill Type of food Weight Guide level Temperature Temperature Cooking time (from bot- (°C) (°C) (min) tom) Meat and sausages 4 beef loin chops, rare 180g/pc 14-16 4 beef loin chops, medium “ 16-20 4 beef loin chops, well done “...
-
Page 36: Programmed Cooking
Cooking table - grill Food type Weight (g) Guide level Temperature Temperature Cooking time (from bot- (°C) (°C) (min.) tom) Meat and sausages 2 beef loin stakes, well done 180g/pc 18-21 2 cutlets 20-22 2 pork neck steaks 180g/pc 18-22 4 grill sausages 100g/pc 11-14... - Page 37 Cooking procedure using the meat probe • Connect the meat probe plug to the socket and stick the probe into the chunk of food. The socket is located in the upper corner of the left oven cavity wall. The socket is protected by a metal plug which should be removed and replaced after the end of cooking.
- Page 38 Preservation table Food to be preserved Quantity After appearance Standing time of bubbles (in the oven T=170-180°C, until (min) boiling / bubbling (min.) Fruit Strawberries 6x1 liter approx. 40-55 turn off Stone fruit 6x1 liter approx. 40-55 turn off Apple puree 6x1 liter approx.
-
Page 39: Cleaning And Maintenance
Cleaning and maintenance Do not use a steam cleaner or a high-pressure steam cleaner to clean the appliance. Before you start cleaning the appliance, disconnect it from the power mains and let it cool down. Appliance housing front Clean the surfaces with liquid non-abrasive detergents intended for smooth surfaces, and a soft cloth. -
Page 40: Cleaning Oven
Cleaning Oven 1. Automatic self-cleaning program – PYROLYSIS The PYROLYSIS program allows automatic cleaning of the oven interior by employing high temperature that causes the grease stains and other impurities to incinerate and thus reduces them to ashes. During pyrolitic cleaning, unpleasant odors may be emitted from the oven. - Page 41 During the automatic cleaning program, the oven interior lighting will be switched off. After a certain period of time, oven door will be automatically locked for your safety. Symbol ( ) will appear on the display. After the cleaning process, oven door will remain locked for approx.
- Page 42 from being burnt onto the oven. • The easiest way to remove grease is by using warm soapsuds while the oven is still warm. • In case of particularly stubborn dirt, use the conventional oven cleaners. Then, rinse the oven thoroughly with clean water to remove all residues of the cleaner.
- Page 43 Maintenance (depending Removing the telescopic pull-out guides on the model) To facilitate cleaning of the oven interior side walls, the telescopic pull-out guides can be removed • Hold the guide rack by its lower end and rotate it inwards; then, remove them from the holes on the upper side. •...
- Page 44 Removing and replacing the oven door with a cam hinge • Completely open the oven door. Lift the clips of the lower hinge supports on both sides to the upright position and clip them to the plug of the upper hinge supports. •...
- Page 45 • Slowly close the door until the clips are pressed against the supports / seats. At approximately 15° (relative to the closed door position), pull the door slightly upward and pull them out of the both hinge supports on the appliances (Figure 3). •...
- Page 46 Oven bulb (only with some models) Oven bulb is considered a replacement ware part and is not covered by the warranty. Replace the bulb with a new one with the following specifi cations: socket G 9, 230 V, 25 W, 300°C. •...
-
Page 47: Special Warnings And Error Reporting
Special warnings and error reporting During the warranty period, any repairs may only be performed by service technicians authorized by the appliance manufacturer. Before starting the repair, the appliance must be disconnected from the power mains by removing the fuse or by removing the mains cord from the wall outlet. Unauthorized tampering and repairs may cause the risk of electric shock and short circuit;... -
Page 48: Instructions For Installation And Connection
Instructions for installation and connection Important warnings • The appliance may only be connected by a qualifi ed expert. • The appliance should be fi tted with a device that disconnects it from all poles of the home network (an omnipolar switch), with at least 3 mm of distance between the contacts in open position. - Page 49 If the width of your cupboard is insuffi cient to allow inserting the oven, the installed spacers on oven walls should be replaced with smaller ones that are also supplied (H=8).
- Page 50 Electrical connection The appliance may only be connected to the power mains by an authorized service technician or a registered electrician! Incorrect connection may result in damage to or destruction of respective parts of the appliance; in such cases, the warranty is void. •...
- Page 51 Procedure • Use a screwdriver to open the cover of the connection terminal on the back of the appliance. Release the two clips as indicated on the cover of the connection terminal. • The mains cord must be inserted into the strain release device which protects the cable from being pulled out.
-
Page 52: Technical Characteristics
Technical characteristics Rating plate A Serial number B Code C Model D Type E Trademark F Technical information G Compliance indications / symbols WE RESERVE THE RIGHT TO MAKE ANY CHANGES THAT DO NOT AFFECT THE FUNCTIONALITY OF THE APPLIANCE. Instructions for use of the appliance can also be found on our website at www.gorenje.com / <... - Page 56 The appliance identifi cation card is located on the bottom of the appliance. Stick the appliance identifi cation card here. When contacting the service department, have the complete type number to hand. You will fi nd the addresses and phone numbers of the service organisation on the guarantee card. en (04-15)
Need help?
Do you have a question about the OP8631S and is the answer not in the manual?
Questions and answers