
Related Manuals for Uniden GSHC1000 Series


Summary of Contents for Uniden GSHC1000 Series
- Page 1 GSHC1000/3000/5000 Series Guardian Smart Home Control For more exciting new products please visit our website: Australia: www.uniden.com.au OWNER’S MANUAl...
-
Page 2: Important Safety Instructions
IMPORTANT SAFETY INSTRUCTIONS When using your equipment, always follow basic safety precautions to reduce the risk of fire, electric shock and injury to persons, including the following: The units are NOT waterproof. DO NOT expose it to rain or moisture (for •... - Page 3 Failure to follow the instructions in this owner’s manual will void the warranty. Uniden assumes no liability for damages to property or injury to persons caused by improper handling or failure to comply with these safety instructions.
-
Page 4: Table Of Contents
CONTENTS Important Safety Instructions ................2 Introduction ......................5 What’s In The Box .....................7 Getting to Know Your Devices ................8 Gateway ......................8 Remote Key ...................... 8 Door/Window Sensor ..................9 Motion/PIR ...................... 9 Indoor Siren ....................10 App Cam 24 ....................10 App Cam 25 ....................11 App Cam 26 ....................12... -
Page 5: Introduction
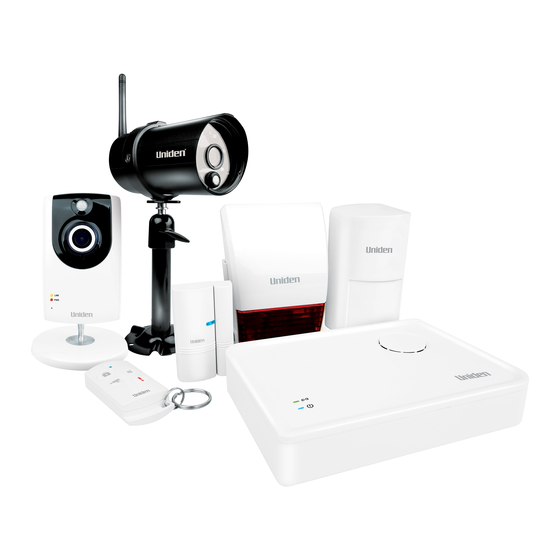
INTRODUCTION Thank you for buying Uniden’s Guardian Smart Home Control Kit! The Guardian Smart Home Control is the smart way of securing your home. It consists of Gateway, Door/Window Sensors, Indoor Siren, Motion/PIR Sensor, Remote Key and indoor/outdoor IP Cameras. All the senors/devices/IP cameras work in conjunction with the Gateway to keep a close watch on your property and alert you when required. - Page 6 Now, let’s look at a possible scenario of how you could install the Gateway, various sensors, Indoor Siren and the App Cams, in your home. In the graphic illustration below, the Gateway Hub, the Indoor Siren, Motion/ PIR Sensor and the App Cam 26 have been set up in the living room. There is a Door/Window Sensor installed on the kitchen door and an App Cam 24 set up in the nursery.
-
Page 7: What's In The Box
WHAT’S IN THE BOX CONTENTS GSHC1000 GSHC3000 GSHC5000 GATEWAY AC Adaptor Ethernet Cable REMOTE KEY Battery MOTION/PIR SENSOR Battery Adhesive Pad Wall Mount Bracket Wall Mount Screw DOOR/WINDOW SENSOR Battery Adhesive Pad Wall Mount Screw INDOOR SIREN AC Adaptor Wall Mount Bracket Wall Mount Screw APPCAM24 AC Adaptor... -
Page 8: Getting To Know Your Devices
GETTING TO KNOW YOUR DEVICES In this section, we will take a look at the each of the sensors/devices/IP cameras included in the Guardian Smart Home Control package. Gateway The Gateway (GSHC-GW) is the head of the Guardian Smart Home Control system. -
Page 9: Door/Window Sensor
Door/Window Sensor The Door/Window Sensor (GSHC-MD) monitors the entrances to your home. Battery Cover Motion/PIR Sensor The Motion/PIR (GSHC-PIR) Sensor uses the passive infra red technology to detect movement in a monitored area. Button (Press to open the battery cover) Lens... -
Page 10: Indoor Siren
Indoor Siren The Indoor Siren (GSHC-SIR) produces a powerful 110db siren and has a flashing LED light. It is weatherproof and can function on batteries too. App Cam 24 The App Cam 24 is an indoor wireless IP Camera that offers day/night on site/ remote live viewing, recording and storage. -
Page 11: App Cam 25
App Cam 25 The App Cam 25 is an outdoor, wireless, weatherproof IP Camera that offers day/night on site/remote live viewing, recording and storage. Antenna Infrared LEDs Link LED Power LED PIR Sensor Camera Stand SMA Connector USB to RJ-45 RJ45 Power Cable / Reset Button MicroSD Card... -
Page 12: App Cam 26
App Cam 26 The App Cam 26 is an indoor, wireless, IP Camera that offers day/night on site/remote live viewing, recording and storage. Light Sensor Infrared LEDs Microphone Reset LAN Port Link LED Power Input Antenna Connector MicroSD Card Slot... -
Page 13: Setting Up The System
Please ensure that your Gateway and mobile device is connected to the same WiFi router for the initial setup. Step 1: Download the App Download the Uniden GuardianHome App from the Apple App Store or Google Play. Step 2: Install the Gateway/Connect to Internet 1. -
Page 14: Activate The Sensors
Step 4: Activate The Sensors PLEASE NOTE: For your convenience, we have pre-paired the sensors (Remote Key, Door/Window Sensor, Motion/PIR Sensor) to the Gateway. Please take off the insulating plastic tag on the sensors to activate them. Please refer to the images below. Motion/PIR Sensor Door/Window Sensor Remote Key... -
Page 15: Pairing The Cameras
Step 6: Pairing the Cameras App Cam 24 The App Cam 24 is included in the GSHC1000 (Starter Kit) and the GSHC 3000 (Outdoor/Indoor Kit) and does NOT come paired to the Gateway. Connecting to the Gateway Follow the steps below to pair the App Cam 24 to the Gateway. - Page 16 App Cam 25 The App Cam 25 is included in the GSHC 3000 (Outdoor/ Indoor Kit) and does NOT come paired to the Gateway. Connecting to the Gateway Follow the steps below to pair the App Cam 25 to the Gateway.
- Page 17 App Cam 26 The App Cam 26 is included only in the GSHC5000 (Deluxe Kit) and does NOT come paired to the Gateway. Connecting to the Gateway Follow the steps below to pair the App Cam 26 to the Gateway. 1.
- Page 18 Changing the Camera’s Connection from Wired to Wireless Once you have paired the App Cam 24, 25 or 26 you can change the connection from wired (ethernet cable) to wireless (WiFi) . 1. For camera to work wirelessly with the Gateway, you will need to add router to App.
-
Page 19: Installing The Cameras
Installing the Cameras App Cam 24 1. Hold the base of the camera stand where you want to mount it and mark the location of the screw holes. 2. Use the included screws and anchors to attach the base to the wall or ceiling. You can also attach the base into a flat surface such as a tabletop if needed. - Page 20 Attach the camera Tighten the brace against to the mounting the camera to screw and turn it secure it to the desired in place. direction. Loosen the wingnut to Adjust the post to unlock the the correct angle, mounting then tighten the post.
-
Page 21: Manual Pairing
Manual Pairing All sensors and the Indoor Siren have been pre-paired out of box. However, should you encounter connection problem, or if you buy additional sensors/Indoor Siren, please refer to the manual pairing instruction below. from the Status screen to add a sensor. The GuardianHome App displays a list of devices. - Page 22 Motion/PIR Sensor 1. Select Motion/PIR Sensor from the Select Device screen, by tapping the arrow ( ) next to it. 2. Tap to initiate the pairing process and then press the ‘pairing’ button located inside the battery compartment. 3. Enter the ‘Device Name’, ‘Location’ and tap to complete the pairing process.
- Page 23 Indoor Siren 1. Select Siren from the Select Device screen, by tapping the arrow ( ) next to it. 2. Tap to initiate the pairing process and press the ‘pairing’ button located inside the battery compartment. 3. Enter the ‘Device Name’, ‘Location’ and to complete the pairing process.
-
Page 24: The Guardianhome App
THE GUARDIANHOME APP Using the GuardianHome App, you can access Uniden’s Guardian Smart Home sensors/devices from anywhere. Use the App to set up scenarios, arm or disarm sensors, display events, set up email alerts, push notifications and configure your system. - Page 25 View the Status of the Sensors/Devices on the App Using the GuardianHome App, you can view the status of your sensors. 1. Open the GuardianHome App and tap the System Name. 2. The Status screen displays the sensors/devices/cameras paired to that system and a set of icons to access other functions.
- Page 26 Configure Setting Allows system configuration such as IP Setup, Security Setup, Notification Setup, Schedule Setup, etc. Alert Icons Alert icons display on the Status screen for a particular sensor/device when it has been triggered, tamepered with or the battery is low. Types of alerts and their icons are given below: Icon What it Indicates?
- Page 27 Access the Status screen. It displays sensors paired to the system and a set of icons to access other functions In this example, the back door sensor has been triggered. The icon displays. Tap on the alert icon to clear it. icon displays, showing that you have acknowledged the sensor alert and the door is still open.
- Page 28 Scenarios Scenarios can be best defined as a series of preset sensor actions triggered by an event. The GuardianHome App allows you to set up scenarios, using a combination of all the sensors/devices, to alert you in case of any event. When you tap Scenario , the Scenario screen displays.
- Page 29 ONE-TOUCH Scenarios With the One-Touch scenario, you can choose to arm the sensors/devices on the system, start camera recording or set off the Indoor Siren along with camera recording. Ideally, One-Touch scenarios can be used to secure your home when you plan to be away.
- Page 30 Using One-Touch Scenarios After having set up each of the options under the One-Touch scenario, you can now activate it either through the Scenario screen or by using the Remote Keys. Activate ARMING through Scenario Screen 1. On the Scenario screen, tap the ARM icon in the One-Touch scenario section.
- Page 31 IF..THEN Scenarios Just like One-Touch scenarios, you must first set up the sensors that will be activated for an If...Then scenario. With an If...Then scenario, you designate a primary sensor. If the primary sensor is triggered, then secondary sensors/ devices activate. For example, you can set up Indoor Siren to activate (sound an alarm) if a Door/Window Sensor is triggered (door opened).
-
Page 32: Display Events
Display Events The Event List displays all triggered events. It shows which sensor was triggered, including the date and Power Switch time. 1. Tap and access the Events screen. Power Switch 2. A list of events displays. Power Switch Power Switch System Setting Access the System setting options for more advanced functions. -
Page 33: Security Setup
Security Setup Use the Security Setup option to change your security code, admin password and set up the PIN lock for the App. Notification Setup If a sensor is triggered, while the system is armed, it can send an email alert and a push notification. -
Page 34: Schedule Setup
Email Alert 1. Access the System Settings screen, then select Notification Setup. 2. Fill in the fields and tap . The System Setting screen displays. You will now receive an email alert if a sensor is triggered. Push Notification To receive notifications on your smartphone, turn ON the ‘Use Notification’ feature and tap Schedule Setup This setup is specifically designed only for the Power Switch. - Page 35 Remote Style The Remote Style mode is designed for easy operation. The control functions are the same as the functions on the remote keys. Once you activate this mode, next time you startup the App the screen will only display the keys on the Remote. To deactivate, go to system setting and deactivate the function in the Remote Style section.
- Page 36 System Alarm The Gateway will not sound the alarm if this option is deactivated. By default, this option is always turned on. About Go to this section if you need information on your firmware version, App version and DID.
-
Page 37: Troubleshooting
TROUBLESHOOTING Problem Possible Solution The Gateway isn’t Check the AC power adaptor. Make sure it is working correctly plugged. Check the Ethernet cable. Make sure the connector is plugged into the WAN port of the Gateway and the other end plugged into the router. -
Page 38: Specification
SPECIFICATION Gateway Model GSHC-GW Operating Voltage DC 12V/1A Ethernet 10/100Mbps Motion/PIR Sensor Model GSHC-PIR Range 150m (line of sight) Detection Range Battery Type 3x1.5V AA Batteries (included) Operating Temperature 0°-40°C Door/Window Sensor Model GSHC-MD Range 150m (line of sight) Battery Type 1x CR2032 Operating Temperature 0°-40°C... - Page 39 Image Sensor Mega pixel CMOS Local Storage Micro SD Card, Class 10 Viewing angle App Cam 24/26: H:75°±3°, V45°±3° App Cam 25: H:50°±3°, V:30°±3° Min. Illumination 1~8 lux Number of LEDs AppCam24/26 :5 IR LEDs with IR switcher AppCam25: 6 IR LEDs with IR switcher: IR Distance 5~8 meters Image Compression...
-
Page 40: Warranty
GSHC1000/GSHC3000/GSHC5000 Important: Satisfactory evidence of the original purchase is required for warranty service. Please refer to our Uniden website for any details or warranty durations offered in addition to those contained below. Warrantor: The warrantor is Uniden Australia Pty Limited ABN 58 001 865 498 (“Uniden Aust”). - Page 41 Product, together with satisfactory evidence of your original purchase (such as a legible copy of the sales docket) to Uniden. Please refer to the Uniden website for address details. You should contact Uniden regarding any compensation that may be payable for your expenses incurred in making a warranty claim.
- Page 44 © 2015 Uniden Australia Pty Limited. Version 1.0...
Need help?
Do you have a question about the GSHC1000 Series and is the answer not in the manual?
Questions and answers