Table of Contents
Advertisement
Quick Links
Owner's Manual
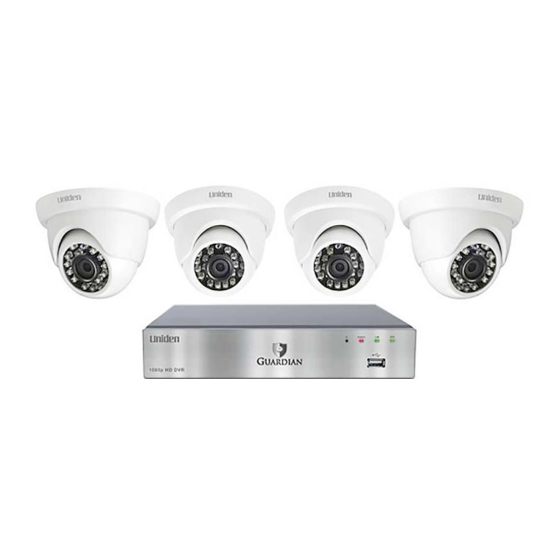
Wired Video Security DVR System
This Owner's Manual applies to the following models:
© 2017 Uniden America Corporation
Irving, Texas
BC6440D
G7404D1
G6440D
G7804D1
G6840D1
G7805D2
G6860D2
G7842D2
G6880D2
G7844D2
G71644D3
G71684D3
GC7440D
GC7840D1
GC7880D3
Issue 2, March 2017
Printed in China
Advertisement
Table of Contents

Related Manuals for Uniden BC6440D


Summary of Contents for Uniden BC6440D
- Page 1 Wired Video Security DVR System This Owner’s Manual applies to the following models: BC6440D G7404D1 G6440D G7804D1 G6840D1 G7805D2 G6860D2 G7842D2 G6880D2 G7844D2 G71644D3 G71684D3 GC7440D GC7840D1 GC7880D3 © 2017 Uniden America Corporation Issue 2, March 2017 Irving, Texas Printed in China...
-
Page 3: Table Of Contents
CONTENTS INTRODUCTION ..................7 FEATURES ......................7 INCLUDED IN THE BOX ..................7 SETTING UP YOUR SYSTEM ..............8 CONNECT DVR TO POWER ................8 CONNECT MOUSE TO DVR .................8 CONNECT DVR TO MONITOR ................8 Monitor with HDMI Port ..................9 Monitor with VGA Port ..................9 TV with BNC Port (VIDEO IN) ................ - Page 4 MAIN MENU OVERVIEW ..............17 MAIN MENU ......................17 SETUP ICON .......................17 Basic Icon ......................18 Live Icon ......................20 Record Icon ..................... 22 Schedule Icon ....................24 Alarm Icon ....................... 26 Network Icon ....................30 Users Icon ....................... 34 PTZ Icon ......................35 Advanced Icon ....................
- Page 5 FIRMWARE UPDATES ................. 48 TROUBLESHOOTING ................49 APPENDIX A: MENU STRUCTURE ............. 52 SPECIFICATIONS ................53 4 CHANNELS/4 CAMERAS .................53 8 CHANNELS/4, 6, OR 8 CAMERAS ..............55 FCC PART 15/IC COMPLIANCE ............57 ONE-YEAR LIMITED WARRANTY ............58...
-
Page 7: Introduction
• Instant USB backup of live video from selected camera. • Upgradeable firmware. • Supports Internet Explorer, Safari, Chrome, and FireFox. • Free Uniden ProHD iOS and Android compatible apps with live viewing, playback, video recording, and snapshot capability. • Instant email alerts with attached snapshots. -
Page 8: Setting Up Your System
SETTING UP YOUR SYSTEM Images in these installation procedures show the back panel of the G6840D1. Other models' back panels will be different, but similar. Basic setup connects the DVR to all peripheral equipment (cameras, mouse, monitor, etc) and power. Once connected, your system is ready for use through the DVR’s menu system. You can set up your system in 2 stages - installing your system hardware and then setting up basic configuration. -
Page 9: Monitor With Hdmi Port
(example) 2. Connect monitor to surge protector plugged into 120V indoor power. 3. The DVR beeps as it powers up. After the UNIDEN welcome screen displays, the Wizard screen displays. 4. Select Exit for now; we will return to the Wizard later in the setup process. -
Page 10: Connect Cameras To Dvr And Power
CONNECT CAMERAS TO DVR AND POWER Each camera connects to one end of the 60 foot extention cable. The other end of the cable connects to the receiver and to power. The ends of the extention cable are marked for Camera or DVR side 1. - Page 11 is reduced over distance. The maximum distance allowed is 330 feet (100 meters). A 60 foot cable is included. If you need a cable longer than 60 feet, then use an RG59 cable (with suitable connectors). • Do not submerge any camera. •...
-
Page 12: Basic Configuration
1. If your DVR is already connected to power, disconnect it. Reconnect the DVR to the power supply; the DVR powers up and the POWER and HDD LEDs on the front light up. 2. After the DVR powers up and the UNIDEN welcome screen displays, the first of three Wizard screens displays. -
Page 13: Set Password
The user name, admin, is already entered. There is no password required so select Login (set a password after you log in). Uniden strongly recommends that you set a password for your system. 3. The Main Menu screen displays. SET PASSWORD 1. - Page 14 1. From the menu shortcut screen, select Main Menu/ Setup/Alarm/Motion. The Motion screen displays. 2. Set each camera’s motion detection specifications. • Select Camera. Select the channel you want to record when motion is detected. • Set Holding Time. Set how long the camera continues recording after motion is no longer detected.
-
Page 15: Basic Operations
BASIC OPERATIONS SEARCH FOR FILES There are three basic methods for searching files – search for files within a certain timeframe, search a timeframe for triggered event records, and search for events through the Information screen. The first two methods use the Search screen (Main Menu/Search). 1. -
Page 16: Find And View Snapshots
BUTTON FUNCTION BUTTON FUNCTION Multi-Screen Display Select Pause to advance the recorded video frame by frame. FIND AND VIEW SNAPSHOTS Go to Main Menu/Search (Image tab). Set the time frame to search for images and select the Search button. See page 41 for details. MASK MOTION SENSITIVE AREAS Motion masking sets up areas to be ignored by the motion sensor. -
Page 17: Main Menu Overview
MAIN MENU OVERVIEW The Main Menu screen displays icons that represent various system operations. Click on an icon to configure, operate, and maintain the DVR Appendix A: Menu Structure shows how the menu, screens, and tabs for screens are organized in the system. MAIN MENU From the menu shortcut screen, select Main Menu (see page 11). -
Page 18: Basic Icon
Basic Icon Select the Basic icon to display the Basic screen. The Basic screen contains three tabs: • System • Date & Time • Daylight Saving Time (DST) System Tab FIELD DESCRIPTION System Type Client or system name. Click the field and a popup keyboard displays. Enter a name if desired. - Page 19 Select Sync Time with NTP Server to automatically get the correct time. Set the network server time as well. Uniden strongly recommends setting the network date and time to have an accurate date and time stamp on recorded videos. FIELD...
-
Page 20: Live Icon
FIELD DESCRIPTION From Set DST beginning date. (Always the second Sunday of March) If Mode = Week, set DST by month, number of week, day of week, and hours to be offset (i.e., March/the 2nd/Sunday/02:00:00) If Mode = Date, set DST by date according to popup calendar. Until Set DST ending date. - Page 21 4. Adjust the brightness, hue, saturation, and contrast of the corresponding channel and select Save. 5. Select another channel to adjust. When you are finished, select Ok. 6. The Live screen displays again. Main Monitor Tab This screen lets you determine in what order the cameras’ live video displays in the screen’s sections.
-
Page 22: Record Icon
Record Icon Select the Record icon to display the Record screen. The Record screen configures how the files will be recorded. It has 5 tabs: • Enable • Recording Quality • Time Stamp • Recycle Record • Snapshot Enable Tab Use this tab to determine if the selected camera will record video or audio, or both. - Page 23 bitrate determine how large a recorded file will be. FIELD DESCRIPTION Resolution Supports both 720P (AHD camera) and 960H (analog camera) resolution. (Default = 720P) Range: 1-30 (Default = 30 fps) Encode Support VBR (Variable Bit Rate) and CBR (Constant Bit Rate) (Default = Variable Bit Rate) Quality The higher the quality is, the clearer the video images are.
-
Page 24: Schedule Icon
Release the mouse and right-click to return to the Stamp tab. 3. Select Apply to save your changes. Recycle Record Tab The Recycle Record tab allows the system to automatically overwrite the oldest recorded files and continue recording when the hard disk is full. If it the box is not checked (not enabled), the system stops recording and displays an information message. - Page 25 Schedule Tab This tab sets up a basic schedule for recording. (Default = No recording blocks selected) 1. Select a channel whose recording schedule you want to set up. 2. Select the icon to allow scheduling, and then double-click on an hour block. A Schedule screen displays.
-
Page 26: Alarm Icon
4. If you want to use that same configuration on another channel, select that channel in the dropdown box for Apply Settings To. Select Copy, then Apply. The configuration is now saved on the second desired channel. 5. If you want to apply the settings from one channel to ALL channels, select All in the dropdown box for Apply Settings To. - Page 27 Basic Tab FIELD DESCRIPTION Enable Check this to allow sensor operation on a specific channel. Type Normally Closed or Normally Open (NC or NO) Name Name the alarm. Alarm Handling Tab This tab lets you set what triggers alarms and how long those alarms remain active. FIELD DESCRIPTION Holding Time...
- Page 28 Trigger - Channel X screen (Alarm Tab) FIELD DESCRIPTION Buzzer A buzzer sounds when an alarm is triggered if this selection is enabled. Show Full Screen A big screen popup alarm displays when an alarm is triggered. To Alarm Out This tab directs alarms to optional alarms (not included) added to the system.
- Page 29 Motion Icon Select the Motion icon to display the Motion screen. This screen has 2 tabs: Motion and Schedule. Motion Tab When a camera detects a motion, the system sounds a motion detection alarm and takes action according to presets from this screen. The Trigger and Area fields lead to other screens to set parameters.
-
Page 30: Network Icon
Drag the mouse to test whether the sensitivity value and the detection Save the settings area are appropriate or Exit Schedule Tab The Schedule screen is the same as on page 28. Video Loss Icon If you lose video from a camera (someone cuts the cable), the system alerts you according to the presets from this screen. - Page 31 • Network • Sub-Stream • Email • WiFi Setup • DDNS Network Tab Do not change these presets. This is for information purposes only. FIELD DESCRIPTION HTTP Port Default = 8091. Server Port Default = 5000. Mobile Port Default = 5001. Obtain an IP Address Default = Checked Automatically...
- Page 32 FIELD DESCRIPTION Resolution Supports CIF Choice range = 1 - 6 Encode Support VBR and CBR (Default = VBR) Quality Select one of the following quality levels: • Lowest • Lower • Low • Medium • Higher Max. Bitrate Select a bitrate from the dropdown box (23kbps ~ 768 kbps). (Default = 64) Check the box on the bottom row to set all cameras’...
- Page 33 FIELD DESCRIPTION SSL Check Provides secure socket layer for login. Send Address Your email account from your provider. Password Password corresponding to sender’s email password. Receive Address When an alarm is generated, the system will send email to the specified mailboxes.
-
Page 34: Users Icon
Selecting this icon brings up the User Management screen. This screen allows you to add and delete users and to change the passwords of existing users. The admin user does not have a password. Uniden strongly recommends that you add a password to the admin user account. -
Page 35: Ptz Icon
Authority Tab This tab allows you to customize what each user can access. Click on the corresponding box to enable/disable access. • Log Search • Two Way Audio • Remote Login • System Setup • File Management • Shut Down •... - Page 36 The Point/Tilt/Zoom icon configures an optional PTZ camera. Tabs in this icon help you set movement patterns. These patterns are Presets (move the camera from point A to point B), Cruise (move the camera through multiple points) or Track. Serial Port Tab FIELD DESCRIPTION Enable...
- Page 37 FIELD DESCRIPTION Preset Click on Setting to display the Preset - Channel x screen. Cruise Click on Cruise to display the Cruise - Channel x screen. Track Click on Setting; a popup toolbar displays on the full screen for the selected channel.
- Page 38 4. Click Save and the preset points are set successfully. You can set a maximum of 128 preset points. 5. Click X to close the pop-up interface. Cruise - Channel X Screen Select Setting under the Cruise column for a specific channel and the Cruise - Channel X screen displays.
-
Page 39: Advanced Icon
Delete the preset Add preset point point Modify the selected Start Controls PTZ recording preset point Recording tracks. Execute the recorded Wiper Control Start Track tracks. Control external IR Hide function devices Adjust PRZ direction Cruise Preset Popup 1. Select a preset number, a speed at which it executes, and how long you want it to execute (up to 60 seconds). -
Page 40: Time Search Tab
• Image. Search for snapshots. Time Search Tab Use this tab if you need to check video for a specific time frame. 1. On the right side of the screen, there is a calendar and a list of cameras. Select cameras to search and then select a specific day to search from the calendar. -
Page 41: File Management Tab
FIELD DESCRIPTION Search Click to display recorded files according to channel number. Lock Check the box of a file you do not want to accidently be deleted (check mark appears in box) and then select Lock. To unlock a file, check the box of a locked file and select Lock. An unlock confirmation screen displays. -
Page 42: Backup Icon
FIELD DESCRIPTION Delete Select to delete the displayed image. Lock Select to lock the displayed image so it cannot be deleted or overwritten. (It can, however, be deleted during disk reformat.) Save Save the current image to a removable storage device. Save All Save all captured images to a removable storage device. -
Page 43: System Icon
It also provides Android and iOS QR codes to access the Uniden ProHD app for download. The Uniden ProHD app accesses the Device ID QR code during setup to add the device to the app. -
Page 44: Network Icon
2. Enter start/end times and select what types of operations to search for. 3. Select Search and the system displays all events that fit those criteria. 4. Select Exit to return to the Information screen. Network Icon Select this icon to display the Network screen. This screen displays existing network parameters for the system. -
Page 45: Exit Icon
Exit Icon Select this icon to return to the Main Menu screen. DISK MANAGEMENT ICON Select this icon to view files on your hard drive and on a connected USB drive (if applicable). 1. Select the Disk Management icon from the Main Menu screen. The Disk Management screen displays. -
Page 46: Logoff Icon
3. Select Cancel to return to the Disk Management screen. LOGOFF ICON The Logoff icon lets you log out of the system. This does not shut down the system but only logs you (as a user) out of the system. When you select the Logoff icon, a confirmation screen displays. SHUT DOWN ICON Select the Shut Down icon save your data and changes and shut off the system. -
Page 47: Remote Access
REMOTE ACCESS SMARTPHONE View live and recorded video remotely using an iOS or Android device and Uniden’s ProHD App. iOS screens are similar to the Android screens and are not shown. 1. From the Apple App Store, Google Play, or the Amazon App store, download the Uniden ProHD app. -
Page 48: Firmware Updates
FIRMWARE UPDATES From time to time, Uniden may update its products' firmware to improve features, fix bugs, or otherwise improve the product. Uniden recommends checking for firmware updates periodically. Check for firmware updates if you have service issues; your firmware may be out of date. -
Page 49: Troubleshooting
TROUBLESHOOTING After turning on, the DVR can not switch on normally. Possible reasons: • The power supply is damaged. • Power cable is damaged. • Firmware is outdated. • The hard disk is damaged. • The DVR internal power board is damaged. The DVR reboots automatically or frequently stops working after booting up for a few minutes Possible reasons: •... - Page 50 Local Video appears blurred. Possible reasons: • The video quality is set too low. • The program data reads incorrectly; reboot the DVR. • The hard disk is damaged. • The DVR hardware is damaged. No audio signal in the surveillance window. Possible reasons: •...
- Page 51 Something wrong with the USB backup. Possible reasons: • There are not enough DVR resources available. Please stop recording and proceed with backup. • The backup device is not compatible. • The backup device is damaged. • Not enough room on backup device. Alarm is not working.
-
Page 52: Appendix A: Menu Structure
APPENDIX A: MENU STRUCTURE Click on Main Menu to view Right-click on the screen to view the Main Menu operations. System menus. SETUP Operation (page 17) * Italic text indicates tabs on screen. RECORD SCHEDULE ALARM NETWORK BASIC LIVE System Live Network Schedule... -
Page 53: Specifications
SPECIFICATIONS 4 CHANNELS/4 CAMERAS B6440D G6440D G6440D1 System 4 Channel/ 4 Channel/ 4 Channel/ 4 Camera 4 Camera 4 Camera View, Record, Playback backup, Backup, Remote Monitoring Pentaplex # Channels 4 BNC Video In 1 BNC Video Out HDMI VGA Out Audio In Audio Out 1 Front, 2 Back... - Page 54 13 days @ 720P cameras = 1 TB drive) 17 days @ 960H CONNECTIVITY Uniden Cloud-based P2P server Connection Windows Supported OS Uniden ProHD (iOS and Android) Remote SW Internet Explorer (Windows) Email Notification iPhone, iPad, Android SmartPhone, Tablet support No-IP.com...
-
Page 55: Channels/4, 6, Or 8 Cameras
B6440D G6440D G6440D1 System 4 Channel/ 4 Channel/ 4 Channel/ 4 Camera 4 Camera 4 Camera 12V, 500mA Power <4W Power Consumption -4° F to 122° F (-20° C to 50° C) Operating Temp 10% - 90% RH Operating Humidity IP66 Environmental Rating Plastic... - Page 56 26 days @ 720P cameras = 1 TB drive) 34 days @ 960H CONNECTIVITY Connection Uniden Cloud-based P2P server Windows Supported OS Uniden ProHD (iOS and Android) Remote SW Internet Explorer (Windows) Email Notification iPhone, iPad, Android SmartPhone, Tablet support No-IP.com...
-
Page 57: Fcc Part 15/Ic Compliance
G6840D1 G6860D2 G6880D2 System 8 Channel/ 8 Channel/ 8 Channel/ 4 Camera 6 Camera 8 Camera 100ft Total Darkness Night Vision Range 0.1 Lux w/o IR LED; 0 Lux w/ IR LED Min Illumination Video Output Cable BNC/Power 60ft Cable Length 12V, 500mA Power <4W... -
Page 58: One-Year Limited Warranty
Important: SAVE YOUR RECEIPT! Evidence of original purchase is required for warranty service. WARRANTOR: Uniden America Corporation (“Uniden”) ELEMENTS OF WARRANTY: Uniden warrants, for one year, to the original retail owner, this Uniden Product to be free from defects in materials & craftsmanship with only the limitations or exclusions set out below.
Need help?
Do you have a question about the BC6440D and is the answer not in the manual?
Questions and answers