
Related Manuals for LXNAV LX Zeus Mobile


Summary of Contents for LXNAV LX Zeus Mobile
- Page 1 LX Zeus v 3.0 25.6.2014 LX Zeus LX Zeus Mobile, 2.8, 4.3, 5.5, 7.0 and 8.0 User’s manual ( Version 3.0) Tkalska 10 SI 3000 Celje Tel: 00 386 3 490 46 70 Fax: 00 386 3 490 46 71 www.lxnavigation.si...
-
Page 2: Table Of Contents
1.1.4 LX Zeus 7.0 ..........................- 7 - 1.1.5 LX Zeus 8.0 ..........................- 8 - 1.1.6 LX Zeus Mobile ........................- 8 - Hardware concept ........................- 8 - 1.2.1 USB and SD port ........................- 9 - 1.2.2 Connections .......................... - Page 3 LX Zeus v 3.0 25.6.2014 2.1.10.6 Tail settings ........................- 28 - 2.1.10.7 Track colour ........................- 28 - 2.1.10.8 Track to destination colour ....................- 28 - 2.1.10.9 View SUBP 3 .........................- 29 - 2.1.10.10 Auto close inactivity time out ..................- 29 - 2.1.10.11 Statistics colours .......................- 29 - 2.1.11...
- Page 4 LX Zeus v 3.0 25.6.2014 3.5.2 Task selection ........................- 48 - Task creation by “hand” ......................- 49 - 3.5.3 3.5.3.1 Create and Edit Zones ....................- 50 - 3.5.4 Task Start (ARM), Restart, Next TP, Clear, Save, Team Code ..........- 51 - 3.5.4.1 Task Start ........................- 51 - 3.5.4.2...
- Page 5 LX Zeus v 3.0 25.6.2014 Remote in second seat ......................- 61 - SECOND SEAT UNIT ........................- 62 - 10.1 Connection of Vario and Remote ....................- 62 - 10.1.1 Secondary Vario setup ......................- 62 - Interaction LX Zeus – LX Zeus Second seat ................- 62 - 10.2 10.2.1 TSK / TP / APT exchange ....................- 62 -...
- Page 6 LX Zeus v 3.0 25.6.2014 12.3.1 Installation of USB D 60 (Vario unit) ..................- 77 - 12.3.1.1 USB-D 60 wiring ......................- 78 - 12.4 Installation of second seat units .....................- 79 - 12.4.1 Electrical installation ......................- 79 - EXPLANATION OF TERMS ......................- 80 - 12.1 Text explanations of NAV BOXes ....................- 80 - ZEUS MOBILE ..........................- 81 - FAQ (FREQUENTLY ASKED QUESTIONS) ................- 82 -...
-
Page 7: System Description
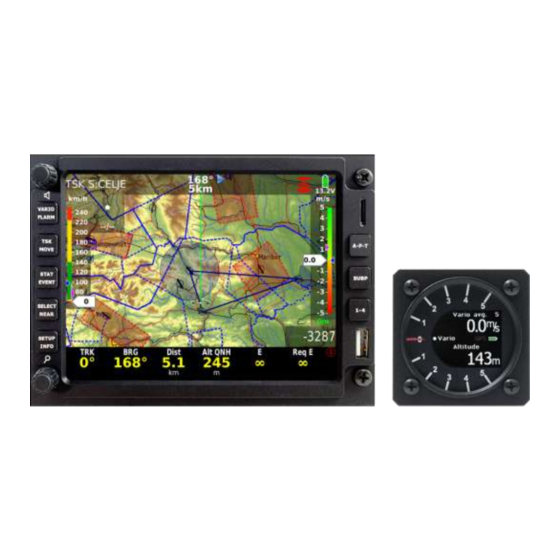
LX Zeus v 3.0 25.6.2014 1 System description The system consists of a minimum of two units. One of them is a gliding computer and another unit is a 57 mm vario. The vario unit is also available as an 80 mm option. The gliding computer has a sunshine readable and anti-reflective 5.5 inch colour display and a high power Linux running computing device. -
Page 8: Lx Zeus 8.0
LX Zeus Mobile LX Zeus Mobile is a derivate from LX Zeus 4.3. The unit uses a 4.3 inch display, the same as by Zeus 4.3. The unit is prepared to be installed as an integral part of the panel, but can be also used as a mobile device installed on panel by using a gooseneck. -
Page 9: Usb And Sd Port
LX Zeus v 3.0 25.6.2014 Both rotary switches are multifunctional as follows: Default functions: audio volume adjustment function zoom selector In edit: zoom: scrolling and press confirmation volume: bigger steps of scrolling and escape/cancel by pressing 1.2.1 USB and SD port An A-size USB port is situated on the front panel. -
Page 10: Technical Data
LX Zeus v 3.0 25.6.2014 1.4 Technical data Computer module 4.3, 5.5, 7.0, 8.0: 4.3, 5.5, 7.0 or 8.0 inch sunshine readable anti-glare display Landscape or portrait orientation Power requirements: typically 400 mA at 12 V (may vary due to backlight intensity settings) 8 push buttons 2 rotary switches with push functions USB size A port... -
Page 11: Operation And Controls
LX Zeus v 3.0 25.6.2014 1.5 Operation and controls 8 push buttons and two rotary switches are used to control the Zeus. LX Navigation Remote Stick can also be used to control the unit. Push buttons are divided into two groups. Group of 5 buttons situated between the two rotary switches are meant for system inputs. - Page 12 LX Zeus v 3.0 25.6.2014 STAT / EVENT button STATISTICS: flight and task statistics EVENT: activation of Event function in Colibri II SELECT / NEAR button SELECT: selection of APT, TP and TSK and Airspace NEAR: activation of near function (Landable points / Markers, Turnpoints, Airspaces…) SETUP / INFO button SETUP: direct access to Setup menu...
-
Page 13: Navigation Push Buttons (3)
LX Zeus v 3.0 25.6.2014 1.4.2 Navigation push buttons (3) Three buttons are used to leaf through the navigation menus of LX Zeus. APT button (Airport, Turn point, Task) After each press the next mode will be selected. This will only change the main page. -
Page 14: Custom Creation Of Bottom Rows (Nav Box Row)
LX Zeus v 3.0 25.6.2014 1-4 button 1-4: LX Zeus uses the bottom row for NAV BOX presentation. Infinite variants are fully programmable and selectable by the 1-4 push button. The colours, transparency and presentation of the bottom NAV BOX container is a matter of custom design. See more in Setup Layout. -
Page 15: Bottom Row Layout
LX Zeus v 3.0 25.6.2014 1.4.2.2 Bottom row layout Bottom row can be positioned on the bottom of the display and as well on the top (in fact any position can be chosen). The info row can be used as single row, double or triple row. For more information see Setup/Layout. -
Page 16: Zoom Rotary Switch
LX Zeus v 3.0 25.6.2014 1.5.1 Zoom Rotary switch Its direct function is the selection of zoom factor (scale of the map) in graphic page. After every change a new scale factor will be selected and the actual scale is shown as 1: xxxxxx and not in kilometres or Nm (as it was in older LX Navigation units). -
Page 17: Automatic Jump Out Of Edit
LX Zeus v 3.0 25.6.2014 1.5.2.1.1 Additional functions The main secondary function of volume rotary switch is its press function. When pressed in edit mode will execute jump out of the menu. The push function isn’t active in navigation menus (APT, TP and TSK). After activation all already done edit inputs will remain, so the button is not a cancel button. -
Page 18: Bottom Row Customization
LX Zeus v 3.0 25.6.2014 AHRS Flaps position 1.7.1.2 Bottom row customization Bottom row consists of NAV BOXes which are all custom specific, which means that the pilot is able to create his own configuration. The procedure is extremely simple and also executable during flight. -
Page 19: Header Customization
LX Zeus v 3.0 25.6.2014 Vertical distance from airspace Arrival altitude Estimated time en route Current efficiency TP/APT/Task Required efficiency TP/APT/Task Track TP/APT/Task Bearing TP/APT/Task Radial TP/APT Compass heading Digital clock Analog clock Flying time ETA (current speed) TP/APT/Task ETA (average speed) TP/APT/Task ETA (MacCready speed) TP/APT/Task GPS position Battery... -
Page 20: Pilot Specific Settings
LX Zeus v 3.0 25.6.2014 2.1 Pilot specific settings The data stored in this part of Setup are pilot specific data. After pilot selection during booting the data of individual pilot becomes active. All settings are saved to the personal saved pilot profile and are active when the pilot is selected (reserve altitude, logger settings, NAV BOX line, layout settings, task colours etc…) 2.1.1 Pilots... -
Page 21: Voice
LX Zeus v 3.0 25.6.2014 2.1.3 Voice In case that LX Voice Module is a part of the system following settings can be arranged. Enable or disable all functions is possible after press on screen buttons. Voice unit should be selected at SETUP / GLIDER – voice unit present (icon –... -
Page 22: Indicators
LX Zeus v 3.0 25.6.2014 LX Zeus has a connection for an external speed command switch, which is wired to the vario unit (USB D 60). With using an external switch it is possible to switch between SC and Vario manually. Setting the External switch mode to ON means that closing of the switch will cause SC mode, and setting External switch mode to OFF means that closing the switch will select Vario mode. -
Page 23: Secondary Indicators
LX Zeus v 3.0 25.6.2014 SC lower nr: display indication by option: altitude, distance, glide difference, true air speed, leg speed, QNH, flight level * Vertical speed of air mass Note! ** Vertical speed – 0.8 m/s Setting Altitude QNH means Altitude indication in ft, doesn’t matter what is set in Units. -
Page 24: Logger - Flight Recorder Settings
LX Zeus v 3.0 25.6.2014 2.1.7 Logger - Flight recorder settings LX Zeus uses Colibri II as an IGC approved flight recorder. Both units collaborate so that all necessary settings can be sent to flight recorder (Colibri II) via Zeus and meaning that no actions on Colibri II are necessary. -
Page 25: Wind
LX Zeus v 3.0 25.6.2014 2.1.9 Wind LX Zeus is able to measure wind under different methods. The method can be selected in Wind menu. Wind calculation results are shown as a standalone indicator in main graphic page and also as NAV BOX if set. -
Page 26: Graphics (User Interface)
LX Zeus v 3.0 25.6.2014 Influence of wind in final glide The actual wind data (speed and direction) influences the final glide calculation. In task mode the final glide indication is based on remaining distance over all TP until finish (not over already flown turn points). Wind influence for individual legs is based on actual wind data. -
Page 27: Fonts
LX Zeus v 3.0 25.6.2014 2.1.10.1.3 Map Orientation The map orientation of LX Zeus can be used in three different ways as follows: North up (North is always on the top of the screen) Track up (The glider always points to the top of the screen) Combination of track up and north up regarding to flight status (circling, straight flight) 2.1.10.1.4 “Flarm”... -
Page 28: Airspaces
LX Zeus v 3.0 25.6.2014 Default task colours: Active zone: pink Active start/finish line: red Inactive zone: cyan Inactive start/finish line: teal Legs yet to cover: royal blue Active leg: yellow Covered leg: green Course to next TP: cyan Transparency can be set at all colours. 2.1.10.5 Airspaces User can define colours of airspace sections that will... -
Page 29: View Subp 3
LX Zeus v 3.0 25.6.2014 2.1.10.9 View SUBP 3 Subpage number 3 can be enabled or disabled. 2.1.10.10 Auto close inactivity time out LX Zeus is monitoring push buttons and rotary switches during editing process. If no action will be detected the program will change back to the last used navigation page in a predefined time slot. -
Page 30: Customization Process Of Moving And Resizing
LX Zeus v 3.0 25.6.2014 indicator Header selected selected 2.1.11.1 Customization process of moving and resizing Move of display element Select indicator Short press Zoom (a significant cursor symbol will appear in the middle of the indicator) use zoom and volume buttons to move the indicator Resize (expand or compress) next press on zoom will open similar window... - Page 31 LX Zeus v 3.0 25.6.2014 2.1.11.1.1 Selecting/Deselecting and editing of indicators Selected indicator to be Editing process: customized Select the indicator that you want to customize (an orange frame will appear). Make a LONG press on Zoom knob (if you won’t make a long press than you will get the option to move or resize it!) After a LONG press a...
- Page 32 LX Zeus v 3.0 25.6.2014 Edited indicator To terminate the customization press Volume first to escape from Edit Background menu and then again press Volume to escape from Properties/Actions menu. An edited indicator will appear on the screen that you have customized. Note! To escape from Edit Background colour menu you don’t necessarily have to press Volume,...
- Page 33 LX Zeus v 3.0 25.6.2014 Properties/Actions window This window appears by LONG press on Zoom knob. In this window colours can be adjusted for selected indicator and also some other settings such as: Number of rows for NAV BOX bottom row Scale size for Sliding speed indicator By pressing on the rows below Actions you can: Select indicators to be seen on the screen...
-
Page 34: Copy Nav Boxes
LX Zeus v 3.0 25.6.2014 2.1.11.2 Copy NAV BOXes Under Layout user can copy NAV BOXes from one screen to another or to have nav box configuration the same on all screens (TP/APT/TSK). User should prepare its NAV BOXes on one screen that is also a reference panel for other screens. -
Page 35: System Setup
LX Zeus v 3.0 25.6.2014 2.2 System Setup The parameters set in this section are valid for all pilots and are therefore global. 2.2.1 Units A huge palette of units can be defined in this menu. By pressing the TSK/MOVE or SELECT/NEAR buttons you will press the screen buttons ‘Set metric’... -
Page 36: Voice Module
LX Zeus v 3.0 25.6.2014 2.2.2.3 Voice module If installed, the voice module should be marked as checked (installed), otherwise the voice module will not work. 2.2.2.4 TE level TE value***, set TE compensation style, 0% for tube compensation TE filter***, only valid by electronic TE compensation The LX system incorporates two configurable electronic filters in the circuitry. -
Page 37: Check List
LX Zeus v 3.0 25.6.2014 Prandtl tube. If problems are experienced with the electronic TE compensation, then the most likely cause is the glider's static source. The static source can be checked by changing the connection of the pneumatic tubes for electronic compensation, and then setting the TE: to 0%. In still air, accelerate to approximately 160 km/h (75 Knots) and reduce the speed. -
Page 38: Data Transfer
LX Zeus v 3.0 25.6.2014 2.2.4 Data transfer The only solution to transfer data to LX Zeus and vice versa is via USB stick. One stick is also part of delivery. The stick should contain one LX Folder with following subfolders (APT, TP, AS…). -
Page 39: Transfer Of Airspace Files
LX Zeus v 3.0 25.6.2014 2.2.4.3 Transfer of Airspace files Use Airspace option of Transfer menu. The files should be in .cub format. The actual airspace data are available for free on www.lxnavigation.com. The airspace files normally cover the whole continent. At the same time, 3 airspace sections can be active. -
Page 40: Service
LX Zeus v 3.0 25.6.2014 2.2.5 Service The menu is mainly used for maintenance except: Compass calibration Level adjustment by units with AHRS With admin password you can set your Zeus back to factory settings with the password 46486. This will also delete all flights from Colibri II. -
Page 41: Locale
LX Zeus v 3.0 25.6.2014 Adjustment procedure is: The internal reference level of Zeus instrument is most likely to be different. So you need to adjust it. On the ground, put your aircraft in the position, which you think that matches the position for the reference airspeed. -
Page 42: Navigation Modes
LX Zeus v 3.0 25.6.2014 3 Navigation modes LX Zeus offers three modes for navigation. These modes are: APT: navigation to Airports which are stored in APT memory TP: navigation to turn points (TP) TSK: task navigation after a task has been entered Any of the three modes are selectable after sequenced pressing on A-P-T push button. -
Page 43: Apt Selection From Near Function
LX Zeus v 3.0 25.6.2014 Note! When using Name filter, input first letters of the airport name. Use Zoom to scroll and press for confirmation. You don’t need to input all characters, just first two or three and after that you can go on by pressing Zoom. -
Page 44: Second Navigation Page (Subpage)
LX Zeus v 3.0 25.6.2014 The bottom row consists of NAV BOXes. Bottom row variants are selectable by 1-4 push button. Any NAV BOX content is custom programmable after using a very simple procedure. Editing NAV BOXes: Long press Zoom (orange frame will appear) Move orange frame by rotating zoom to free space, or replace current NAV BOX by short press on Zoom Select the NAV BOX you want with rotating zoom and confirm it by Zoom press... -
Page 45: Use Of Remote Stick In Apt
LX Zeus v 3.0 25.6.2014 3.3.5 Use of Remote Stick in APT All basic APT functions including fast selection of APT can be done by using the LX Remote Stick. Zoom IN/OUT: Use buttons Minus and Plus on the Remote Stick Select ATP screen: Use APT button and press it until you will have the indication on the top in left corner APT... -
Page 46: Creation Of User Turn Points
LX Zeus v 3.0 25.6.2014 3.4.1 Creation of User Turn points User turn points are turn points that are created by the pilot after using commands of LX Zeus. Such turn points are marked with U and a PILOT icon in front of its name. 3.4.1.1 Creation of a Turn point by hand Press on Zoom button and following menu with screen... -
Page 47: Add Marker
LX Zeus v 3.0 25.6.2014 3.4.1.4 Add Marker The philosophy of a marker is to mark a position that you want to have as your backup. For example, you are flying towards non-landable area and you see the last landable field below you. At this landable field position you can drop a marker. -
Page 48: Navigation To A Turn Point
LX Zeus v 3.0 25.6.2014 3.4.3 Navigation to a Turn Point Navigation towards turn point doesn’t differ to navigation to an airport, so refer 3.3 for details. 3.4.3.1 Use of Remote stick Use of Remote Stick is the same as for the APT, read more at 3.3.5 3.5 Task Mode Task is a complex process that guides the pilot around the turn points of the task. -
Page 49: Task Creation By "Hand
LX Zeus v 3.0 25.6.2014 3.5.3 Task creation by “hand” To create new task you should press push button TSK/MOVE (short press) or short press on Zoom. The task can be created by hand after using of NEW or EDIT screen buttons. -
Page 50: Create And Edit Zones
LX Zeus v 3.0 25.6.2014 3.5.3.1 Create and Edit Zones ZONE function makes it possible to create any known geometry for turn points, start and finish. The zone can be edited by selecting TSK EDIT/ select TP / ZONE. The creation consists of input of sector angles radius and orientation. -
Page 51: Task Start (Arm), Restart, Next Tp, Clear, Save, Team Code
LX Zeus v 3.0 25.6.2014 3.5.4 Task Start (ARM), Restart, Next TP, Clear, Save, Team Code Automatic and manual starts are possible by using functions ARM and NEXT TP. All functions are available by pressing Zoom or push button TSK/MOVE 3.5.4.1 Task Start To start automatically use the ARM command which is... -
Page 52: Over Turn Point
LX Zeus v 3.0 25.6.2014 3.5.4.3 Over Turn point Change over to next turn point may be automatic or manual. Automatic changeover will happen when Auto next of individual zone is set to auto. If the zone is not AUTO NEXT, then you will get the message INSIDE zone. -
Page 53: Team Code
LX Zeus v 3.0 25.6.2014 3.5.4.6 Team Code Team code is a feature enabling you to visualize the position of your wingman and keeping it secret. Short pressing TSK button, a TEAM CODE icon is visible on the right side, near the 1-4 button. Press 1-4 button and a menu requiring team code and reference point will appear. -
Page 54: Use Of Remote Stick
LX Zeus v 3.0 25.6.2014 3.5.7 Use of Remote Stick All basic functions including selection of TSK can be done by using the LX Remote Stick. To select TSK, the TSK screen should be active (upper left corner TSK sign). Press X on the Remote Stick and you will get the window with user and imported tasks. -
Page 55: Airspace Management
LX Zeus v 3.0 25.6.2014 4 Airspace Management The airspace used in LX Zeus can be managed by pilot to achieve optimal relation between loading of the display and readability of the display. Too much information will reduce display readability significantly. 4.1 Basic airspace settings Those settings are available in SETUP / AIRSPACES. -
Page 56: Disabling Of Airspace Sections
LX Zeus v 3.0 25.6.2014 Explanation of airspace warnings The picture is showing that the glider is in the CTR LJUB airspace. It shows that the glider is horizontally 7.4 km INSIDE and vertically 308 m BELOW. The warning is BLUE, because the glider is in fact out of the airspace (below). -
Page 57: Gps Signal Management
LX Zeus v 3.0 25.6.2014 5 GPS signal management LX Zeus has two inputs for GPS signal which are available on the back of the unit. Both solutions are realized by 6P telephone type connectors which are marked as: Colibri II Flarm 5.1 Colibri II plug Note! -
Page 58: Lx Zeus And Colibri Ii
LX Zeus v 3.0 25.6.2014 6 LX Zeus and Colibri II Colibri II and LX Zeus build a compact system that offers that all commands connected with flight recorder can be sent from Zeus. LX Zeus is master and Colibri II is slave. This organization philosophy makes it possible to install Colibri II in a place where the pilot is not able to provide manipulation and also does not need to see the display. -
Page 59: Lx Zeus And Flarm
LX Zeus v 3.0 25.6.2014 7 LX Zeus and Flarm Flarm should be connected to FLARM marked plug of the LX Zeus. Flarm will also receive power via that plug. If Flarm is also connected to the aircraft power network via its own power input wires, a short break circuit problem does not occur due to a built in diode. -
Page 60: Transferring Files From Flarm
LX Zeus v 3.0 25.6.2014 7.3 Transferring files from Flarm Transfer of files from FLARM to Micro SD card is a very easy process. Micro SD card has to be inserted into Micro SD port, which is found on LX ZEUS front panel. After the flight is finished wait for three minutes, then turn LX ZEUS OFF and ON again. -
Page 61: Lx Zeus And Garrrect Trx-1500
LX Zeus v 3.0 25.6.2014 8.2 LX ZEUS and Garrrect TRX-1500 A special cable is needed for that connection. This cable can be ordered at LX Navigation under following code: LX-TRX1500. 9 Remote control LX Zeus can be also operated by remote control stick. The stick is a standard LX Navigation product which differs from sticks used by LX 7000/7007 series only in labelling. -
Page 62: Second Seat Unit
LX Zeus v 3.0 25.6.2014 10 Second seat unit Second seat device is connected to the master unit via CAN bus (not important which one). The connection also includes power for second seat. This means that second seat unit does not need an additional power supply. -
Page 63: Downloading Flights From Second Seat
LX Zeus v 3.0 25.6.2014 10.2.2 Downloading flights from Second seat Downloading flights is possible only from the First seat unit. 11 Flying with LX Zeus It is recommended to prepare the unit for every flight before take-off to ensure a stress-free and joyful flight. -
Page 64: Task Declaration Process
LX Zeus v 3.0 25.6.2014 11.1.1.3 Task declaration process The task declaration process is fully automatic and doesn’t need any pilot interaction. Actual task and pilot data will be written into both flight recorders immediately after selection. The declaration data will not change during flight, even if task data will change due to select or edit process (IGC rule). -
Page 65: Statistics
LX Zeus v 3.0 25.6.2014 11.2.2 Statistics The statistics page will open after press on STAT button. Statistics page offers following statistics data: Thermal analysis (1 and 2) OLC; calculation of OLC points Baro; shows baro trace from take off until present position Task;... -
Page 66: Olc Calculation
LX Zeus v 3.0 25.6.2014 11.2.2.2 OLC Calculation OLC calculation is calculation of OLC points according to rules. Current rules read http://www.onlinecontest.org/olc- 2.0/gliding/cms.html?url=rules In general the scoring software selects a departure point within the powerless part of the flight and fixes up to 5 way points (turn points) and a finish point in such a way that the following two conditions are fulfilled: The raw point score (1 point per km) from the... -
Page 67: Route
LX Zeus v 3.0 25.6.2014 11.2.2.5 Route Route option is a feature showing the path already flown and current task, so detours made can be seen. 11.2.3 Special functions 11.2.3.1 Event function This function is active only if Colibri II is a part of the system. -
Page 68: Task Start
LX Zeus v 3.0 25.6.2014 11.2.4 Task Start Task start is a quite complex procedure, especially with a high density of gliders where many of them intend to start at nearly the same time. As the pilot intends to perform task start in an instance, a very simple operation should be carried out: press on TSK button and confirm ARM option... -
Page 69: Task Restart
LX Zeus v 3.0 25.6.2014 11.2.4.2 Task Restart After a bad start and intention to perform a new start, the pilot is able to execute the so called Restart function. After a press on TSK/MOVE button you will find screen button RESTART. -
Page 70: Final Glide Calculation
LX Zeus v 3.0 25.6.2014 Auto next X becauseR1 is Auto next because R1 more than 9.5 km is less than 9.5 km 11.2.7 Final glide calculation The final glide calculation is based on the following inputs: Note! Actual MC setting Final glide may be Wind also... -
Page 71: Finish Line Crossing
LX Zeus v 3.0 25.6.2014 11.2.8 Finish line crossing Modern competition rules use longer finish lines and also finish cylinders. Zeus is always calculating the shortest way to reach the finish and therefore offers the shortest distance to reach the finish. By final glide calculation is also taken in account that shorter distance. -
Page 72: Artificial Horizon - Ahrs
LX Zeus v 3.0 25.6.2014 Press Volume to Escape from dialogues Edit dialogue will open after a long Red glider is selected, zoom can press on the selected flarm object. be adjusted Flarm details can be seen if a FlarmNet file is installed in Zeus Artificial horizon –... -
Page 73: After Landing
LX Zeus v 3.0 25.6.2014 11.3 After landing It is recommended to keep the instrument ON for a few minutes after landing; this will ensure base line of baro trace. Simply wait until a very significant message on the display will appear (calculating security). It shows that flight recorder is terminating the flight and data security operation of flight recorder is in progress. -
Page 74: Downloading Of Flights Recorded By Zeus
LX Zeus v 3.0 25.6.2014 The process will take a couple of seconds or minutes a significant message will show termination. Note! Password 46486! In case of troubles (error messages USB not This password will delete all flights detected…..), switch Zeus OFF, remove USB stored in Colibri II and also all pilot stick, switch Zeus new ON and try again history in ZEUS! -
Page 75: Icao Charts
LX Zeus v 3.0 25.6.2014 *In case you have switched Colibri II off by hand, turning ON by pressing of Colibri II push button will not work. You should power OFF and ON ZEUS. Colibri will switch on automatically as the power from Zeus will be applied. -
Page 76: Installation
LX Zeus v 3.0 25.6.2014 12 Installation 12.1 Mechanical installation As the larger unit dimensions does not match air norm standard, a new cut out in the panel should be made. There are two ways how to prepare the panel. The first option is to buy a new panel from the manufacturer, and the second solution is to upgrade your existing panel. -
Page 77: Electrical Installation
LX Zeus v 3.0 25.6.2014 At this side the rounded rubber is touching At this side the rounded rubber is the back plate of display, do not push it too pressed fully to the plate. tight 12.3 Electrical installation This part of installation is easy and doesn’t need any specialists. The system receives its power via two power lines, which should be connected to 12V glider power source and ground. -
Page 78: Usb-D 60 Wiring
LX Zeus v 3.0 25.6.2014 12.3.1.1 USB-D 60 wiring - 78 -... -
Page 79: Installation Of Second Seat Units
LX Zeus v 3.0 25.6.2014 12.4 Installation of second seat units The second seat unit shares the same logic as the master, so no difference with mechanical installation works. 12.4.1 Electrical installation The second seat unit doesn’t need external power, as it is powered via the system bus (CAN). For CAN connection two 8P connectors are provided on master and also on repeater. -
Page 80: Explanation Of Terms
LX Zeus v 3.0 25.6.2014 13 Explanation of terms 12.1 Text explanations of NAV BOXes Item Description NAV BOX designator Above ground level Altitude above ground level Air temperature Temp Altitude IGC Altitude recorded by flight recorder (1013 based) Alt IGC Altitude GPS Altitude recorded by GPS GPS Alt... -
Page 81: Zeus Mobile
LX Zeus v 3.0 25.6.2014 Sink Speed Estimated sink rate (polar, speed, bugs, MC) Sink Sp Task delta time Early or late arrival on AAT Task remaining distance Distance to go until finish Task RD Task speed Speed achieved on task Task Sp Team Bearing Bearing to your team partner... -
Page 82: Faq (Frequently Asked Questions)
LX Zeus v 3.0 25.6.2014 15 FAQ (frequently asked questions) 1. Can I connect Swiss Flarm and how it will work? Flarm can be connected to LX Zeus NMEA (flarm) port. Zeus will see flarm objects and will send declaration to flarm (task and pilot’s settings) 2.
Need help?
Do you have a question about the LX Zeus Mobile and is the answer not in the manual?
Questions and answers