
Related Manuals for LXNAV LX Zeus 2.8 Retrofit


Summary of Contents for LXNAV LX Zeus 2.8 Retrofit
- Page 1 LX Zeus LX Zeus Mobile, 2.8, 4.3, 5.5, 7.0 and 8.0 User’s manual ( Version 3.4.3) Tkalska 10 SI 3000 Celje Tel: 00 386 3 490 46 70 Fax: 00 386 3 490 46 71 www.lxnavigation.si...
-
Page 2: Table Of Contents
Screen size options ........................- 7 - 1.1.1 LX Zeus 2.8 ..........................- 7 - 1.1.2 LX Zeus 2.8 Retrofit ......................... - 7 - 1.1.3 LX Zeus 4.3 ..........................- 7 - 1.1.4 LX Zeus 5.5 ..........................- 8 - 1.1.5... - Page 3 LX Zeus v 3.4.3 10.9.2014 2.1.9.1 Circling method ......................- 26 - 2.1.9.2 Straight model .......................- 26 - 2.1.9.3 Manual wind settings .....................- 27 - 2.1.9.4 Influence of wind in final glide ..................- 27 - 2.1.10 Graphics (User Interface) ....................- 27 - 2.1.10.1 Map settings ........................- 27 - 2.1.10.2...
- Page 4 LX Zeus v 3.4.3 10.9.2014 4.3.4 Third navigation page (2 subpage) ..................- 49 - 4.3.5 Use of Remote Stick in APT....................- 50 - Turn point mode ........................- 50 - 4.4.1.1 Edit TP ...........................- 51 - 4.4.1.2 Creation of User Turn points ..................- 51 - 4.4.1.3 Add Marker ........................- 52 - 4.4.1.4...
- Page 5 LX Zeus v 3.4.3 10.9.2014 Task declaration into Flarm .....................- 65 - Transferring files from Flarm ....................- 65 - Flarm Red Box / Mini Box update ...................- 65 - Flarm PIN OUT ..........................- 65 - LX ZEUS AND GARRECHT ......................- 66 - LX ZEUS and Garrecht TRX-1090 ADSB / TRX-2000 .............- 66 - LX ZEUS and Garrrect TRX-1500 ....................- 66 - REMOTE CONTROL ........................- 67 -...
- Page 6 LX Zeus v 3.4.3 10.9.2014 13.2.4.3 Restart Leg ........................- 79 - 13.2.5 Task Finish ........................- 79 - 13.2.6 Flying AAT (Assigned Area Task)..................- 80 - 13.2.7 Final glide calculation ......................- 81 - 13.2.8 Finish line crossing ......................- 81 - 13.2.9 Thermal assistant ......................- 82 - 13.2.10 Flarm management ......................- 82 -...
-
Page 7: System Description
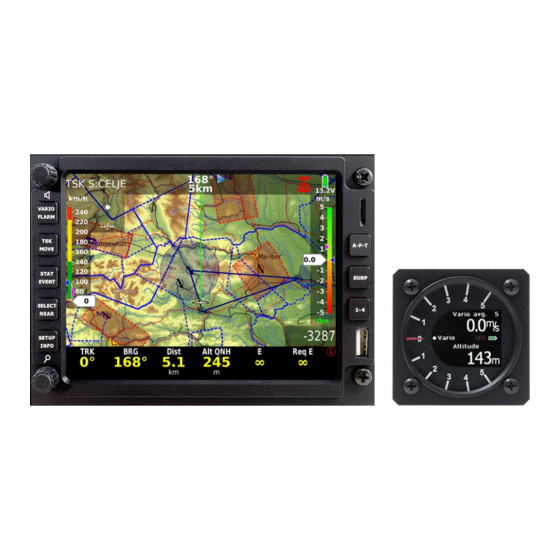
Display orientation is only landscape. 1.1.2 LX Zeus 2.8 Retrofit Zeus 2.8 Retrofit is the same display size as Zeus 2.8 but differs in hardware. Vario (USB-D) module is inside of the main unit and only a vario indicator is needed. Back plate is equal to LX 5000 (2x 15pin connectors). -
Page 8: Lx Zeus 5.5
LX Zeus v 3.4.3 10.9.2014 1.1.4 LX Zeus 5.5 This is the most common used variant and comes with 5.5-inch display. Layout size is: 106x146x52 mm 1.1.5 LX Zeus 7.0 This version size can be fitted in the majority of instrument panels used in modern gliders. The display size is 7-inch and the unit layout is: ... -
Page 9: Usb And Sd Port
LX Zeus v 3.4.3 10.9.2014 Commercially available versions: LX Zeus IGC: package consists of LX Zeus Computer, Colibri II high level approved flight recorder with ENL, OAT sensor, USB key, main power cable with switch, USB D 60 vario unit and USB D cables ... -
Page 10: Software
LX Zeus v 3.4.3 10.9.2014 USB D 60 Vario unit Remote control stick Secondary Vario indicators Compass module Voice module ** CAN bus: Connects Second seat unit *** Colibri II port: Makes possible to arrange direct connection of LX Zeus to Colibri II only via cable (special cable required, is included when purchased together) **** Flarm port can be also used to connect any other GPS source which has an IGC standard connector. -
Page 11: Operation And Controls
LX Zeus v 3.4.3 10.9.2014 1.5 Operation and controls 8 push buttons and two rotary switches are used to control the Zeus. LX Navigation Remote Stick or LX joy can also be used to control the unit. Push buttons are divided into two groups. Group of 5 buttons situated between the two rotary switches are meant for system inputs. -
Page 12: Tsk / Move Button
LX Zeus v 3.4.3 10.9.2014 1.5.1.2 TSK / MOVE button TSK: task management, for next actions use press buttons near to the labels MOVE: executing of move function by AAT 1.5.1.3 STAT / EVENT button STATISTICS: flight and task statistics ... -
Page 13: Setup / Info Button
LX Zeus v 3.4.3 10.9.2014 1.5.1.5 SETUP / INFO button SETUP: direct access to Setup menu INFO: information about GPS source, and other data, system configuration (latest software version), selected pilot with all data, glider configuration and sunrise/sunset time. Here you can find also a message about disabled AHRS. - Page 14 LX Zeus v 3.4.3 10.9.2014 subpage is divided into map and 3D terrain display or Artificial horizon (AHRS), if it is the part of the system. 1.5.2.2.1 First navigation subpage First navigation subpage is available after press on SUBP button and this is valid for all three navigation modes.
-
Page 15: Button
LX Zeus v 3.4.3 10.9.2014 1.5.2.3 1-4 button LX Zeus uses the bottom row for NAV BOX presentation. Infinite variants are fully programmable and selectable by the 1-4 push button. The colours, transparency and presentation of the bottom NAV BOX container is a matter of custom design. See more in Setup Layout. -
Page 16: Rotary Switches
LX Zeus v 3.4.3 10.9.2014 1.6 Rotary Switches Both rotary switches are multifunctional; their basic functions are audio volume adjustment and zoom adjustment. The push function on the rotary switches also offers significant help connected with editing and selection. 1.6.1 Zoom Rotary switch Its direct function is the selection of zoom factor (scale of the map) in graphic page. -
Page 17: Additional Functions
LX Zeus v 3.4.3 10.9.2014 1.6.2.1 Additional functions The main secondary function of volume rotary switch is its press function. When pressed in edit mode will execute jump out of the menu. The push function isn’t active in navigation menus (APT, TP and TSK). After activation all already done edit inputs will remain, so the button is not a cancel button. -
Page 18: Bottom Row Customization
LX Zeus v 3.4.3 10.9.2014 Map scale AHRS Flaps position Flarm indicator 1.8.1.2 Bottom row customization Bottom row consists of NAV BOXes which are all custom specific, which means that the pilot is able to create his own configuration. -
Page 19: Header Customization
LX Zeus v 3.4.3 10.9.2014 Distance in NM to selected TP/APT Distance to selected TP/APT Off course distance OLC distance OLC home distance OLC speed Horizontal distance from airspace Vertical distance from airspace ... -
Page 20: Setup
LX Zeus v 3.4.3 10.9.2014 2 Setup Setup menu is available after short press on SETUP labelled push button. The menu is divided into two sections (Pilot and System settings). System settings are settings that are valid for the whole system and are not pilot specific data. -
Page 21: Audio Settings
LX Zeus v 3.4.3 10.9.2014 AAT calculation offers two options: Automatic (default) This method doesn’t need any pilot assistant at all, so pilot can turn to next turn point at any time without using any command. Zeus will automatically detect optimal point in every sector on task. Switch to next turnpoint is performed by Reaching the line which is crossing centre of the sector or already moved turnpoint. -
Page 22: Voice
LX Zeus v 3.4.3 10.9.2014 2.1.3 Voice In case that LX Voice Module is a part of the system following settings can be arranged. Enable or disable all functions is possible after press on screen buttons. Voice unit should be selected at SETUP / GLIDER – voice unit present (icon –... -
Page 23: Indicators
LX Zeus v 3.4.3 10.9.2014 LX Zeus has a connection for an external speed command switch, which is wired to the vario unit (USB D 60). With using an external switch it is possible to switch between SC and Vario manually. Setting the External switch mode to ON means that closing of the switch will cause SC mode, and setting External switch mode to OFF means that closing the switch will select Vario mode. -
Page 24: Secondary Indicators
LX Zeus v 3.4.3 10.9.2014 SC lower nr: display indication by option: altitude, distance, glide difference, true air speed, leg speed, QNH, flight level * Vertical speed of air mass Note! ** Vertical speed – 0.8 m/s Setting Altitude QNH means Altitude indication in ft, doesn’t matter what is set in Units. -
Page 25: Logger - Flight Recorder Settings
LX Zeus v 3.4.3 10.9.2014 use above/below color coding (makes possible to define above and below color of flarm objects) 2.1.7 Logger - Flight recorder settings LX Zeus uses Colibri II as an IGC approved flight recorder. Both units collaborate so that all necessary settings can be sent to flight recorder (Colibri II) via Zeus meaning that no actions on Colibri II are necessary. -
Page 26: Wind
LX Zeus v 3.4.3 10.9.2014 • Zeus (warning with dismiss buttons). Default warnings for airspaces are set to 2 km horizontally and 100 m vertically, but these warning settings can be adjusted. Warning timeout at take off is pre-set to 5 minutes, which means, that first 5 minutes after take off there won’t be any airspace warnings. -
Page 27: Manual Wind Settings
LX Zeus v 3.4.3 10.9.2014 Head/Tail – no circling method needed (shows difference between GS and IAS) Time for straight flight: time in seconds that will be taken for one measurement (valid for straight model). Longer period means better result. Valid only for Compass method and not for Component. ... - Page 28 LX Zeus v 3.4.3 10.9.2014 2.1.10.1.2 Glider image Glider image icon can be in all colours and can also be adjusted by size. Default: Colour white Size 25 (maximum size can be 60) 2.1.10.1.3 Map Orientation The map orientation of LX Zeus can be used in three different ways as follows: ...
-
Page 29: Fonts
LX Zeus v 3.4.3 10.9.2014 2.1.10.2 Fonts Users can define many fonts in the system: Map city (default 15px) Tournpoint labels (default 15 px) Airport labels (default 15 px) Flarm objects (default17 px) Navbox values (default 30 px) – here you can change fonts of bottom row ... -
Page 30: Task Settings
LX Zeus v 3.4.3 10.9.2014 2.1.10.4 Task settings Start lines/zones, turnpoint zones and finish lines/zones can be given different default colours from a large palette. It’s also possible to change their outlines, fills and outline widths. There is a different colour possible for active or inactive zones. -
Page 31: Track Colour
LX Zeus v 3.4.3 10.9.2014 2.1.10.7 Track colour This is in fact an extension of the track vector and shows the pilot where his flight will continue. Default track colour is Green. 2.1.10.8 Track to destination colour This is the line that connects the actual position of the glider with the destination point (track to destination colour). -
Page 32: Layout
LX Zeus v 3.4.3 10.9.2014 2.1.11 Layout LX Zeus offers a very useable feature that makes it possible to change the main graphic page by pilots personal preferences. As mentioned in previous section the main display consists of: bottom row ... - Page 33 LX Zeus v 3.4.3 10.9.2014 2.1.11.1.1 Customization process of moving and resizing Move of display element Select indicator Short press Zoom (a significant cursor symbol will appear in the middle of the indicator) use zoom and volume buttons to move the indicator Resize (expand or compress) ...
- Page 34 LX Zeus v 3.4.3 10.9.2014 After a LONG press a Indication, that the button wrong press Properties/Actions menu will open – was made - SHORT and not LONG correct! Select the colour you want to change (rotate Zoom) and make a SHORT press on Zoom - a new window (Edit Background colour) will open ...
- Page 35 LX Zeus v 3.4.3 10.9.2014 Select row: Select Indicators and press Zoom and a window Select indicators for chosen panels will open Now select the indicators that you want to have on the screen, or deselect that you don’t require. Select and deselect them by rotating and pressing the Zoom knob.
-
Page 36: Copy Navboxes
LX Zeus v 3.4.3 10.9.2014 Indicators The following indicators can be selected: Header – upper row Speed indicator – IAS Sliding speed indicator – not the whole IAS – the shown scale can be customized Variometer – sliding variometer ... -
Page 37: Copy Layout
LX Zeus v 3.4.3 10.9.2014 2.1.11.3 Copy layout User can copy one layout to one or both remaining layouts. Under Reference panel you choose the layout you wish to copy. Under Destination panels you choose to which layout to copy the reference layout. After this has been sorted out, select under operations- Copy from reference to destination. -
Page 38: System Setup
LX Zeus v 3.4.3 10.9.2014 2.2 System Setup The parameters set in this section are valid for all pilots and are therefore global. 2.2.1 Units A huge palette of units can be defined in this menu. By pressing the TSK/MOVE or SELECT/NEAR buttons you will press the screen buttons ‘Set metric’... -
Page 39: Te Level And Te Filter
LX Zeus v 3.4.3 10.9.2014 2.2.2.3 TE level and TE filter TE level***, set TE compensation style, 0% for tube compensation TE filter***, only valid by electronic TE compensation The LX system incorporates two configurable electronic filters in the circuitry. The first filter adjusts the time constant and is adjustable between 0.5 and 5 seconds. -
Page 40: Checklist
LX Zeus v 3.4.3 10.9.2014 TE compensation electronically. The use of a dedicated and accurate fin mounted pitot/static source such as a Prandtl tube might help. There are two ways by which the vario units can be corrected for total energy; electronic TE compensation based on speed changes with time;... -
Page 41: Notepad
LX Zeus v 3.4.3 10.9.2014 2.2.4 Notepad In the Notepad menu you can prepare your own .txt file with whatever you might find useful. You can prepare checklists, notes, input frequencies etc… File .txt can be uploaded with the USB stick by pressing the screen button LOAD (button SELECT/NEAR). -
Page 42: Transfer Of Airport Data
LX Zeus v 3.4.3 10.9.2014 2.2.5.1 Transfer of Airport data Important! LX Zeus is capable to accept airport data in LX Navigation Only one .af file can be active at the format (.af). data available same time, so activate the file after www.lxnavigation.com. -
Page 43: Transfer Of Airspace Files
LX Zeus v 3.4.3 10.9.2014 Go to task Select Transfer file from USB This is valid only for TASKs made on Zeus, tasks done on Seeyou or Strepla have to be uploaded at TP (TP/Task file). 2.2.5.3 Transfer of Airspace files Use Airspace option of Transfer menu. -
Page 44: Service
LX Zeus v 3.4.3 10.9.2014 2.2.6 Service The menu is mainly used for maintenance except: Compass calibration Level adjustment by units with AHRS Detected hardware With admin password you can set your Zeus back to factory settings with the password 46486. This will also delete all flights from Colibri II. -
Page 45: Ahrs Level Adjust (Pitch And Roll)
LX Zeus v 3.4.3 10.9.2014 2.2.6.3 AHRS Level adjust (Pitch and Roll) If the AHRS is not aligned with the glider, then it has to be adjusted. Changes in pitch are caused by changes of aircraft mass changes airspeed. This reference pitch corresponds to one airspeed (indicated airspeed actually) -
Page 46: Disable Ahrs
LX Zeus v 3.4.3 10.9.2014 2.2.6.4 Disable AHRS If you wish to disable AHRS simply do as follows: Push on zoom rotary switch Go to setup Go to Admin password Enter password 2478 and confirm with push on zoom rotary switch ... -
Page 47: Navigation Modes
LX Zeus v 3.4.3 10.9.2014 4 Navigation modes LX Zeus offers three modes for navigation. These modes are: APT: navigation to Airports which are stored in APT memory TP: navigation to turn points (TP) TSK: task navigation after a task has been entered Any of the three modes are selectable after sequenced pressing on A-P-T push button. -
Page 48: Apt Selection From Near Function
LX Zeus v 3.4.3 10.9.2014 Note! When using Name filter, input first letters of the airport name. Use Zoom to scroll and press for confirmation. You don’t need to input all characters, just first two or three and after that you can go on by pressing Zoom. Input of more characters reduces the number of possible airports. -
Page 49: Second Navigation Page (Subpage)
LX Zeus v 3.4.3 10.9.2014 The bottom row consists of NAV BOXes. Bottom row variants are selectable by 1-4 push button. Any NAV BOX content is custom programmable after using a very simple procedure. Editing NAV BOXes: Long press Zoom (orange frame will appear) ... -
Page 50: Use Of Remote Stick In Apt
LX Zeus v 3.4.3 10.9.2014 4.3.5 Use of Remote Stick in APT All basic APT functions including fast selection of APT can be done by using the LX Remote Stick. Zoom IN/OUT: Use buttons Minus and Plus on the Remote Stick Select ATP screen: Use APT button and press it until you will have the indication on the top in left corner APT... -
Page 51: Edit Tp
LX Zeus v 3.4.3 10.9.2014 Extended TP data are available in the lower section of the second navigation page. The upper part of the –subpage) is vertical profile. display (2 Note! Up to three turn point files can be active at the same time. To get the screen buttons for TP The activation should be provided in Setup/Transfer. -
Page 52: Add Marker
LX Zeus v 3.4.3 10.9.2014 Elevation Note! Type option offers plenty turn point Next three inputs may not be highlighted due to the type designators. The designator defines or turn point you are adding. Finish the process with Add the symbol that will appear on the turn point. -
Page 53: Selection From Near
LX Zeus v 3.4.3 10.9.2014 4.4.2.1 Selection from Near LX Zeus Near function offers Turn point selection based on distance. Respected that there is also Country filter active, use All if you want to get all turn points listed. 4.4.3 Navigation to a Turn Point Navigation towards a turn point doesn’t differ to navigation to an airport, so refer 3.3 for details. -
Page 54: Task Creation By "Hand
LX Zeus v 3.4.3 10.9.2014 User task Imported task 4.5.3 Task creation by “hand” To create new task you should press push button TSK/MOVE (short press) or short press on Zoom. The task can be created by hand after using of NEW or EDIT screen buttons. -
Page 55: Create And Edit Zones
LX Zeus v 3.4.3 10.9.2014 Note! The task can also be seen at full ZOOM OUT – you will get the TASK ZOOM function. The task zoom will be active only if on the ground! Note! Active zone has a different colour than inactive zone (colours can be adjusted in SETUP / USER INTERFACE / TASK COLOURS... -
Page 56: Task Start (Arm), Restart, Next Tp, Clear, Save, Team Code, Limitations
LX Zeus v 3.4.3 10.9.2014 4.5.4 Task Start (ARM), Restart, Next TP, Clear, Save, Team Code, Limitations Automatic and manual starts are possible by using functions ARM and NEXT TP. All functions are available by pressing Zoom or push button TSK/MOVE 4.5.4.1 Task Start To start automatically use the ARM command which is... -
Page 57: Over Turn Point
LX Zeus v 3.4.3 10.9.2014 4.5.4.3 Over Turn point Change over to next turn point may be automatic or manual. Automatic changeover will happen when Auto next of individual zone is set to auto. If the zone is not AUTO NEXT, then you will get the message INSIDE zone. If you want to go to next, press TSK/MOVE and press screen button NEXT TP. -
Page 58: Team Code
LX Zeus v 3.4.3 10.9.2014 4.5.4.6 Team Code Team code is a feature enabling you to visualize the position of your wingman and keeping it secret. Short pressing TSK button, a TEAM CODE icon is visible on the right side, near the 1-4 button. Press 1-4 button and a menu requiring team code and reference point will appear. -
Page 59: Task Zoom
LX Zeus v 3.4.3 10.9.2014 4.5.6 Task Zoom By rotating zoom knob to the left will show the whole task (task zoom) on the screen. Task zoom will show all turn points (moved and modified) with airspaces. Task zoom is not visible while flying, only on the ground. -
Page 60: Airspace Management
LX Zeus v 3.4.3 10.9.2014 5 Airspace Management The airspace used in LX Zeus can be managed by pilot to achieve optimal relation between loading of the display and readability of the display. Too much information will reduce display readability significantly. 5.1 Basic airspace settings Those settings are available in SETUP / AIRSPACES. -
Page 61: Disabling Of Airspace Sections
LX Zeus v 3.4.3 10.9.2014 The airspaces can be also seen at the subpage in different colours (yellow and red). You can see vertical profile of airspace with glide path. Airspace is also seen in a second subpage, where the page is split to a map and a vertical profile. -
Page 62: Gps Signal Management
LX Zeus v 3.4.3 10.9.2014 A dialogue to edit airspace after a press on EDIT button 6 GPS signal management LX Zeus has two inputs for GPS signal which are available on the back of the unit. Both solutions are realized by 6P telephone type connectors which are marked as: ... -
Page 63: Gps Signal For Navigation
LX Zeus v 3.4.3 10.9.2014 6.3 GPS signal for navigation Both GPS input connectors are wired to LX Zeus microcontroller module that prepares an integral GPS signal for the main computer. So, the computer will be supplied with valid GPS signal as long as one GPS receiver delivers valid data. -
Page 64: Lx Zeus And Flarm
LX Zeus v 3.4.3 10.9.2014 Important! Any change on task, doesn’t matter USER or IMPORTED will immediately update Colibri II task. As long as on ground, the new data will be written also into declaration of Colibri II flight recorder. The same will happen with the pilot. -
Page 65: Task Declaration Into Flarm
LX Zeus v 3.4.3 10.9.2014 8.2 Task declaration into Flarm In case of an IGC approved version of Flarm, which is connected to Zeus Flarm port, an automatic declaration process is executed. The process is identical as with Colibri II, that means the actual task and pilot data will be sent also towards Flarm. -
Page 66: Lx Zeus And Garrecht
LX Zeus v 3.4.3 10.9.2014 9 LX ZEUS and Garrecht Garrecht units can be simply connected to LX ZEUS without any software requirements. Declaration to flarm will be sent directly from LX Zeus. Updating Garrecht units is not possible via LX Zeus. Connection schematics are shown bellow. -
Page 67: Remote Control
LX Zeus v 3.4.3 10.9.2014 10 Remote Control LX Zeus can be also operated by remote control stick. The stick is a standard LX Navigation product which differs from sticks used by LX 7000/7007 series only in labelling. Therefore the upgrade of an existing stick is very easy. -
Page 68: Lx Joy
LX Zeus v 3.4.3 10.9.2014 11 LX Joy 11.1 General LX Joy is an ergonomically designed, with leader covered remote stick handle for glider airplanes. It consists of 5 buttons and navigation switch on the front side, 1 button on the back side, build in electric circuit and wiring. - Page 69 LX Zeus v 3.4.3 10.9.2014 ZOOM/VOLUME MODE (LED GREEN) Short press: FN Short press: Long Press: / FLARM Long Press: / Short press: ESC Short press: STAT Long Press: / Long Press: / Short press: PTT Long Press: PTT Joystick button: ZOOM OUT VOLUME VOLUME...
- Page 70 LX Zeus v 3.4.3 10.9.2014 PAN MODE (LED RED) Short press: FN Short press: ZOOM Long Press: / Long Press: / Short press: ESC Short press: ZOOM Long Press: / Long Press: / Short press: PTT Long Press: PTT Move up Joystick button: Move left Move right...
-
Page 71: Second Seat Unit
LX Zeus v 3.4.3 10.9.2014 12 Second seat unit Second seat device is connected to the master unit via CAN bus (not important which one). The connection also includes power for second seat. This means that second seat unit does not need an additional power supply. -
Page 72: Tsk / Tp / Apt Exchange
LX Zeus v 3.4.3 10.9.2014 12.2.1 TSK / TP / APT exchange The TSK / TP / ATP can be exchanged from first to second and vice versa. The pilot, who wants to send the task / turn point / airport, should press Zoom knob and select screen button SEND TASK / SEND TP / SEND APT. -
Page 73: Flying With Lx Zeus
LX Zeus v 3.4.3 10.9.2014 13 Flying with LX Zeus It is recommended to prepare the unit for every flight before take-off to ensure a stress-free and joyful flight. This is especially important before any contest, record or badge flights. 13.1 Flight preparation on ground It is suggested to check following: ... -
Page 74: Task Declaration Process
LX Zeus v 3.4.3 10.9.2014 13.1.1.4 Task declaration process The task declaration process is fully automatic and doesn’t need any pilot interaction. Actual task and pilot data will be written into both flight recorders immediately after selection. The declaration data will not change during flight, even if task data will change due to select or edit process (IGC rule). -
Page 75: Statistics
LX Zeus v 3.4.3 10.9.2014 13.2.2 Statistics The statistics page will open after press on STAT button. Statistics page offers following statistics data: Thermal analysis (1 and 2) OLC; calculation of OLC points Baro; shows baro trace from take off until present position ... -
Page 76: Olc Calculation
LX Zeus v 3.4.3 10.9.2014 13.2.2.2 OLC Calculation OLC calculation is calculation of OLC points according to rules. Current rules read http://www.onlinecontest.org/olc- 2.0/gliding/cms.html?url=rules . In general the scoring software selects a departure point within the powerless part of the flight and fixes up to 5 way points (turn points) and a finish point in such a way that the following two conditions are fulfilled: ... -
Page 77: Route
LX Zeus v 3.4.3 10.9.2014 13.2.2.5 Route Route option is a feature showing the path already flown and current task, so detours made can be seen. 13.2.3 Special functions 13.2.3.1 Event function This function is active only if Colibri II is a part of the system. -
Page 78: Pan Mode
LX Zeus v 3.4.3 10.9.2014 13.2.3.3 Pan mode It enables you to move on the map using volume and zoom rotary switches. Pan mode is available in all three modes TP/APT/TSK. To activate the mode, press button SELECT and choose screen button pan mode. -
Page 79: Start Conditions / Limitations
LX Zeus v 3.4.3 10.9.2014 13.2.4.1 Start Conditions / Limitations Some competition rules prescribe some limits (restrictions), which should be respected before start and also at line crossing. After short press on TSK/MOVE a screen button Limitations will appear. Press SUBP to enter limitation option. -
Page 80: Flying Aat (Assigned Area Task)
LX Zeus v 3.4.3 10.9.2014 13.2.6 Flying AAT (Assigned Area Task) AAT (Assigned Area Task) is a modern manner of task flying on competitions. The basic idea is to set relative big sectors around turn points and this makes it possible that the pilot decides how deep into the sector he will fly. -
Page 81: Final Glide Calculation
LX Zeus v 3.4.3 10.9.2014 13.2.7 Final glide calculation The final glide calculation is based on the following inputs: Note! Actual MC setting Final glide may be Wind also visualized Polar NAV BOX. Bugs Ballast ... -
Page 82: Thermal Assistant
LX Zeus v 3.4.3 10.9.2014 13.2.9 Thermal assistant The thermal assistant analyses the thermal while circling. The size of the dot indicates the strength of the thermal – bigger dot means stronger lift. Dots are different colours and depend from MC set. DOT color: ... -
Page 83: Artificial Horizon - Ahrs
LX Zeus v 3.4.3 10.9.2014 Edit dialogue will open after a long Red glider is selected, zoom can be press on the selected flarm object. adjusted Flarm details can be seen if a FlarmNet file is installed in Zeus 13.2.11 Artificial horizon – AHRS Artificial horizon (AHRS) is offered as an integral part of the system, no external boxes necessary. -
Page 84: After Landing
LX Zeus v 3.4.3 10.9.2014 13.3 After landing It is recommended to keep the instrument ON for a few minutes after landing; this will ensure base line of baro trace. There will be a small window, which will show: Flight will end in _ _ time left till logger will stop recording). -
Page 85: Downloading Colibri Ii Flights
LX Zeus v 3.4.3 10.9.2014 13.3.1.1 Downloading Colibri II flights shows Colibri II After finishing of the security calculation process, flight downloading of flights can begin. Downloading of flights stored in Colibri II is possible exclusively by using of a USB stick. -
Page 86: Recommendations For Safe Operation
LX Zeus v 3.4.3 10.9.2014 After Zeus will be powered OFF, Colibri II will remain ON for a limited time (approximately 5 minutes) and will then switch off automatically. This will not happen if Colibri is in flight mode while running on the internal battery. -
Page 87: Installation
LX Zeus v 3.4.3 10.9.2014 14 Installation 14.1 Mechanical installation As the larger unit dimensions does not match air norm standard, a new cut out in the panel should be made. There are two ways how to prepare the panel. The first option is to buy a new panel from the manufacturer, and the second solution is to upgrade your existing panel. -
Page 88: Electrical Installation
LX Zeus v 3.4.3 10.9.2014 At this side the rounded rubber is touching the At this side the rounded rubber is back plate of display, do not push it too tight pressed fully to the plate. 14.3 Electrical installation This part of installation is easy and doesn’t need any specialists. The system receives its power via two power lines, which should be connected to 12V glider power source and ground. -
Page 89: Usb-D 60 Wiring
LX Zeus v 3.4.3 10.9.2014 14.3.1.1 USB-D 60 wiring - 89 -... -
Page 90: Installation Of Second Seat Units
LX Zeus v 3.4.3 10.9.2014 14.4 Installation of second seat units The second seat unit shares the same logic as the master, so no difference with mechanical installation works. 14.4.1 Electrical installation The second seat unit doesn’t need external power, as it is powered via the system bus (CAN). For CAN connection two 8P connectors are provided on master and also on repeater. -
Page 91: Explanation Of Terms
LX Zeus v 3.4.3 10.9.2014 15 Explanation of terms Text explanations of NAV BOXes Item Description NAV BOX designator Above ground level Altitude above ground level Air temperature Temp Altitude IGC Altitude recorded by flight recorder (1013 based) Alt IGC Altitude GPS Altitude recorded by GPS GPS Alt... -
Page 92: Zeus Mobile
LX Zeus v 3.4.3 10.9.2014 Required speed Required speed to finish AAT in time Req Sp Set MacCready Actual MC setting Sink Speed Estimated sink rate (polar, speed, bugs, MC) Sink Sp Task delta time Early or late arrival on AAT Task remaining distance Distance to go until finish Task RD... -
Page 93: Faq (Frequently Asked Questions)
LX Zeus v 3.4.3 10.9.2014 17 FAQ (frequently asked questions) 1. Can I connect Swiss Flarm and how will it work? Flarm can be connected to LX Zeus NMEA (flarm) port. Zeus will see flarm objects and will send declaration to flarm (task and pilot’s settings) 2.
Need help?
Do you have a question about the LX Zeus 2.8 Retrofit and is the answer not in the manual?
Questions and answers