
Subscribe to Our Youtube Channel
Related Manuals for ESAB MultiMaster 160


Summary of Contents for ESAB MultiMaster 160
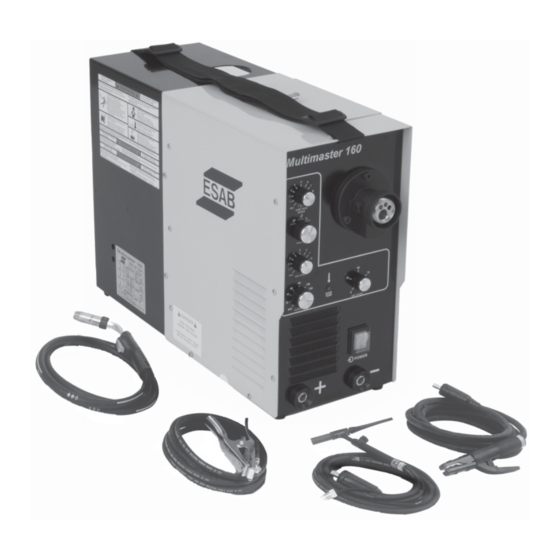
- Page 1 MultiMaster 160 Mig / Tig / Stick Welding Package Instruction Manual F15-678-D 07 / 2005...
- Page 2 Copies of this manual can be obtained by any of the following; Contacting your local ESAB supplier. Downloading a copy from the ESAB web site at www.esabna.com Sending a written request to ESAB WELDING &...
-
Page 3: Table Of Contents
Table of Contents SECTION NO. PAGE NO. SECTION 1.0 - SAFETY PRECAUTIONS ............................3 SECTION 2.0 - INTRODUCTION ............................... 9 SECTION 3.0 - INSTALLATION ..............................13 LOCATION ................................13 ELECTRICAL INPUT CONNECTIONS ......................13 3.2.1 INPUT ELECTRICAL REQUIREMENTS ......................13 3.2.2 INPUT PLUG .............................. - Page 4 Table of Contents...
-
Page 5: Section 1.0 - Safety Precautions
SAFETY PRECAUTIONS WARNING: hese Safety Precautions are for 5. Do not use equipment beyond its ratings. For example, your protection. They summarize precaution- overloaded welding cable can overheat and create a fire ary information from the references listed in hazard. Additional Safety Information section. - Page 6 EQUIPMENT MAINTENANCE -- Faulty or FUMES AND GASES -- Fumes and improperly maintained equipment can gases, can cause discomfort or harm, cause injury or death. Therefore: particularly in confined spaces. Do not breathe fumes and gases. Shield- 1. Always have qualified personnel perform the installa- ing gases can cause asphyxiation.
- Page 7 PRÉCAUTIONS DE SÉCURITÉ a. Éloigner suffisamment tous les matériaux combus- AVERTISSEMENT: Ces règles de sécurité ont pour objet tibles du secteur où l’on exécute des soudures ou des d’ assurer votre protection. Veillez à lire et à observer les coupes à l’arc, à moins de les recouvrir complètement précautions énoncées ci-dessous avant de monter l’...
- Page 8 52529 “Precautions and Safe Practices for Arc Weld- danger d’explosion; ce ventilateur ne fonctionne que ing, Cutting and Gouging” publié par ESAB. Nous si l’interrupteur correspondant du panneau avant se conseillons également de consulter les publications trouve placé...
-
Page 9: Section 2.0 - Introduction
SECTION 2 INTRODUCTION Table 1 Multimaster 160 Specifications Input Primary Input Voltage ............... 208 Vac, 1-Phase ......................230 Vac, 1-Phase Primary Input Current ............... 30 Amp @ 208 Vac ......................27 Amp @ 230 Vac Frequency ..................50/60Hz Power Factor ..................0.81 Nominal Power - MIG ............... -
Page 10: Optional Equipment
SECTION 2 INTRODUCTION Optional Equipment ® MultiMaster 160 Options & Accessories Replacement Work Cable - 10 ft............0369857881 Electrode Holder and Work Cable Kit - 25mm 10 ft......0349501078 Replacement AF-1 Electrode Holder only ........... 882F25 HW-17V 25 ft. w/25mm Connector ............0558002690 Kit, Accessory HW-17 ................. - Page 11 2.4.6 CONTROLS personal injury or loss of life. The Multimaster 160 can be used to weld solid and flux Means potential hazards which could cored wires. The operator selects the process desired on result in personal injury or loss of life.
- Page 12 SECTION 2 INTRODUCTION Drive Motor Inlet Guide MIG Polarity Changeover 2 Roll Connectors Drive Stand Handle Strap Wire Spindle Assembly MIG Gun Connector Primary Input Cable Hinged Wire Compartment Door with Setup Chart Figure 1 - Components...
-
Page 13: Section 3.0 - Installation
There should be at least 18 inches of unrestricted space between the The Multimaster 160 Welding System has an internal Po- machine’s side and rear panels and the nearest obstruc- larity changeover for the MIG Process located under the tion to provide freedom of air movement through the power Hinge Cover. -
Page 14: Threading The Welding Wire
SECTION 3 INSTALLATION C. Feed the wire from the spool through the inlet guide, 3.4.3 WELDING WIRE SPOOL INSTALLATION across the drive roll grooves into the outlet guide and cc connection tube. As with any work area, make sure safety glasses with To ensure proper wire feeding, it is important that the side shields are worn when handling or changing wire wire be kept clean and that the drive rolls be periodically... -
Page 15: To Regulate Flow
SECTION 3 INSTALLATION E. Attach the regulator to the cylinder valve. Align the regulator so that the flowmeter is vertical and then tighten the connection nut with a 1-1/8 in. open end Argon 10-50 cfh or adjustable wrench. To prevent damaging the O- Helium 150-230 cfh ring seals and plastic tube, do not use the flowmeter... -
Page 16: Section 4.0 - Operation
The TEMP lamp illuminates if an over temperature cess selector switch is in the MIG position. Refer to Weld condition occurs within the Multimaster 160. This condition Chart and set the recommended setting. may be caused by excessive duty cycle or over-current conditions. - Page 17 SECTION 4 OPERATION Wire Feed Speed Weld Process Switch Voltage Set Wire Feed Speed Trim Current Set Hot Start Temperature Lamp Figure 8 - Control Panel Main Power Switch Positive Output Negative Output Connection Connection Figure 9 - Front Panel...
-
Page 18: Operating Procedures
SAFETY Section at the front of this manual. 4.2.1 MIG WELDING SET-UP When the PROCESS switch is placed in the MIG position the Multimaster 160 is set to turn ”ON” when the Mig Gun Work Cable trigger is depressed. and Clamp Step 1. -
Page 19: Tig Welding Setup
When the PROCESS switch is placed in the TIG position, the power source as shown in Figure 12. the Multimaster 160 turns “ON” the weld contactor so that power is immediately available to the output connection. The Step 3. Place the WELD PROCESS (1) switch in the Touch TIG starting system is then enabled. -
Page 20: Stick Welding Set-Up
Positive) by placing the Electrode Holder cable in When the PROCESS switch is placed in the STICK the Positive connection terminal on the front of position, the Multimaster 160 turns “ON” the weld the power source. contactor so that power is immediately available to the output connection. -
Page 21: Section 5.0 - Maintenance
SECTION 5 MAINTENANCE 5.2.1 POWER SOURCE 5.0 MAINTENANCE 5.2.1.1 RECTIFIERS AND TRANSISTORS 5.1 MAINTENANCE AND SERVICE It is recommended that the internal components be cleaned occasionally by blowing them out with low pres- sure compressed air. This cleaning operation is neces- sary so that maximum cooling will be accomplished by Be sure that the branch circuit or main disconnect the air stream. - Page 22 SECTION 5 MAINTENANCE...
-
Page 23: Section 6.0 - Replacement Parts
6.1 General 6.2 Ordering Replacement Parts are illustrated on the following figures. Replacement parts may be ordered from your ESAB dis- When ordering replacement parts, order by part number tributor or from: and part name, as illustrated on the figure. - Page 24 SECTION 6 REPLACEMENT PARTS...
- Page 25 SECTION 6 REPLACEMENT PARTS Spare Parts List MultiMaster 160 Item No. Part No. Description Cct. Ref. 0558002626 Multimaster 160 0558002704 Lid with Handle/Strap (Not Shown) 0558002735 Knob Ø 25mm 0558002736 Knob Ø 22mm 0558002707 Connector Dinse 25 +, - 0558002708...
- Page 26 SECTION 6 REPLACEMENT PARTS Multimaster 160 - Bottom Plate...
- Page 27 SECTION 6 REPLACEMENT PARTS Spare Parts List (Con’t) MultiMaster 160 Item No. Part No. Description Cct. Ref. 0558002726 Plate 0558002727 Sink Heat w/Diodes 0558002728 Output Diodes 0558002729 Choke 0558002730 Rectifier Bridge 0558002731 Varistor 0558002732 Auxiliary Transformer 0558002733 Transformer...
- Page 28 Notes...
- Page 29 Notes...
- Page 30 Notes...
- Page 31 Revision History Revision “A” edition of this manual updates the Specification Table on page 7 and revises the MIG, TIG and STICK Process Charts in Section 4 - Operation. Revision “B” - graphics were updated to show current black painted surfaces. Minor part number updates done in spare parts list.
- Page 32 ESAB Welding & Cutting Products, Florence, SC Welding Equipment COMMUNICATION GUIDE - CUSTOMER SERVICES A. CUSTOMER SERVICE QUESTIONS: Telephone: (800)362-7080 / Fax: (800) 634-7548 Hours: 8:00 AM to 7:00 PM EST Order Entry Product Availability Pricing Order Information Returns B. ENGINEERING SERVICE:...
Need help?
Do you have a question about the MultiMaster 160 and is the answer not in the manual?
Questions and answers