Table of Contents
Advertisement
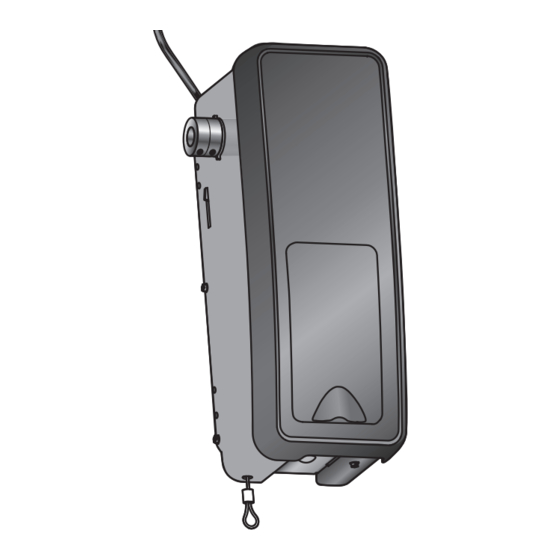
GARAGE DOOR OPENER
For Residential and Light Duty Commercial Use
Install On Sectional Doors With Torsion Assemblies Only
This product is intended for installation only by trained garage door technicians. This
product may require adjustments to door springs and or track configurations. This product
is not intended for use on low headroom tracks or garage doors utilizing extension springs.
■ Please read this manual and the enclosed safety materials carefully!
■ Fasten the manual near the garage door after installation.
■ The door WILL NOT CLOSE unless the Protector System
connected and properly aligned.
■ Periodic checks of the garage door opener are required to ensure safe operation.
■ The model number label is located behind the hinged door of your opener.
■ DO NOT exceed 10 complete cycles of door operation per hour.
■ This garage door opener is ONLY compatible with MyQ
Premium Series
Model 8500RGD
®
and cable tension monitor are
®
and Security✚ 2.0™ accessories.
Raynor Garage Doors
1101 E. River Rd.
Dixon, Illinois 61021
www.raynor.com
Advertisement
Table of Contents
Troubleshooting

Subscribe to Our Youtube Channel
Related Manuals for Raynor Premium series 8500RGD Prodigy II


Summary of Contents for Raynor Premium series 8500RGD Prodigy II
- Page 1 Raynor Garage Doors 1101 E. River Rd. Dixon, Illinois 61021 www.raynor.com Premium Series Model 8500RGD GARAGE DOOR OPENER For Residential and Light Duty Commercial Use Install On Sectional Doors With Torsion Assemblies Only This product is intended for installation only by trained garage door technicians. This product may require adjustments to door springs and or track configurations.
-
Page 2: Table Of Contents
Table of Contents INTRODUCTION Install the Protector System ® ....13 To Erase All Codes From the Door Control (MyQ ® Control Panel) Safety Symbol and Signal Word Review .. 2 Connect Power ........16 Memory ..........27 Planning ........... 3 Install the Battery Backup (optional) .. -
Page 3: Planning
Introduction Planning Survey your garage area to see if any of the conditions below apply to your installation. NOTE: Inspect the torsion bar while the door is raised and lowered. It is important Depending on your requirements, additional materials may be required. that there is no noticeable movement up THIS GARAGE DOOR OPENER IS COMPATIBLE WITH: and down or left and right. -
Page 4: Preparing Your Garage Door
Introduction Preparing Your Garage Door BEFORE YOU BEGIN: To prevent possible SERIOUS INJURY or DEATH: • Disable locks. • ALWAYS call a trained door systems technician if garage door binds, sticks, or is • Remove any ropes connected to the out of balance. -
Page 5: Carton Inventory
Introduction Carton Inventory Accessories included with the garage door opener will vary depending on the model purchased. If anything is missing, carefully check the packing material. Remote Control 3-Button Remote Control Visor Clip Model 893RGX (1) 2 Conductor Bell Wire Remote Light White &... -
Page 6: Assembly
Assembly Attach the Collar to the Garage Door Opener To avoid installation diffi culties, do not run the garage door garage door opener until instructed To prevent possible SERIOUS INJURY to do so. or DEATH, the collar MUST be properly The garage door opener can be installed on either side of the door (see PLANNING section tightened. -
Page 7: Attach Mounting Bracket To Garage Door Opener
Assembly Attach Mounting Bracket to Garage Door Opener HARDWARE Screw 1. Loosely attach slotted side of mounting bracket to the same side of the garage door #10-32 (2) opener as the collar, using self-threading screws provided. NOTE: Do not tighten screws until instructed. Socket Wrench Installation IMPORTANT INSTALLATION INSTRUCTIONS... -
Page 8: Position And Mount The Garage Door Opener
Installation Position and Mount the Garage Door Opener NOTE: For additional mounting options refer to the accessories page. To prevent possible SERIOUS INJURY or DEATH: 1. Close the garage door completely. • Concrete anchors MUST be used if 2. Slide the garage door opener onto the end of the torsion bar. If the torsion bar is too mounting bracket into masonry. -
Page 9: Attach The Emergency Release Rope And Handle
Installation Attach the Emergency Release Rope and Handle 1. Thread one end of the rope through the hole in the top of the red handle so “NOTICE” To prevent possible SERIOUS INJURY reads right side up as shown. Secure with an overhand knot at least 1 inch (2.5 cm) or DEATH from a falling garage door: from the end of the rope to prevent slipping. -
Page 10: Attach The Cable Tension Monitor (Required)
Installation Attach the Cable Tension Monitor (Required) The cable tension monitor MUST be connected NOTE: The cable tension monitor is shipped for left side installation. It is recommended and properly installed before the garage door that the cable tension monitor be installed on the same side of the door as the garage door opener will move in the down direction. -
Page 11: Install The Door Control (Myq Control Panel)
Installation Install the Door Control (MyQ ® Control Panel) Install the door control within sight of the door at a minimum height of 5 feet (1.5 m) where To prevent possible SERIOUS INJURY or small children cannot reach, and away from the moving parts of the door. DEATH from electrocution: For gang box installations it is not necessary to drill holes or install the drywall •... -
Page 12: Install Remote Light
WARNING Installation IMPORTANT INSTALLATION INSTRUCTIONS WARNING WARNING To reduce the risk of SEVERE INJURY or DEATH: 1. This portable luminaire has a polarized plug (one blade 5. NEVER use with an extension cord unless plug can be is wider than the other) as a feature to reduce the risk of fully inserted. -
Page 13: Install The Protector System
Installation Install the Protector System ® The safety reversing sensor must be connected and aligned correctly before the garage door Be sure power is NOT connected to the opener will move in the down direction. This is a required safety device and cannot be disabled. garage door opener BEFORE installing IMPORTANT INFORMATION ABOUT THE SAFETY REVERSING SENSOR the safety reversing sensor. - Page 14 Installation INSTALLING THE BRACKETS Be sure power to the opener is disconnected. Install and align the brackets so the safety reversing sensors will face each other across the garage door, with the beam no higher than 6" (15 cm) above the fl oor. Choose one of the following installations. OPTION A: Track Installation 1.
- Page 15 Installation MOUNTING THE SAFETY REVERSING SENSORS 1. Slide a 1/4"-20x1/2" carriage bolt head into the slot on each sensor. HARDWARE 2. Use wing nuts to fasten safety reversing sensors to brackets, with lenses pointing toward each other across the door. Be sure the lens is not obstructed by a bracket Carriage Bolt extension.
-
Page 16: Connect Power
Installation Connect Power To avoid installation diffi culties, do not run To prevent possible SERIOUS INJURY or DEATH from electrocution or fi re: the garage door opener at this time. • Be sure power is NOT connected to the opener, and disconnect power to circuit To reduce the risk of electric shock, your BEFORE removing cover to establish permanent wiring connection. - Page 17 Installation ENSURE THE SAFETY REVERSING SENSORS ARE ALIGNED The door will not close if the sensors have not been installed and aligned correctly. When the light beam is obstructed or misaligned while the door is closing, the door will reverse and the garage door opener lights will fl ash ten times. If the door is already open, it will not close.
-
Page 18: Install The Battery Backup (Optional)
Installation Install the Battery Backup (optional) When in Battery Backup mode, wireless MyQ ® devices and Timer-To-Close will be disabled. If the optional Battery Backup is part of this installation it should be installed at this time. The Battery Backup can be mounted to either the ceiling or a wall within 3 feet (.9 m) of the garage door opener. -
Page 19: Adjustment
Adjustment Program the Travel Limits Travel limits regulate the points at which the door will stop when moving up or down. Without a properly installed safety reversal system, persons (particularly Adjust the position of the door by using the black and yellow buttons. Black moves the small children) could be SERIOUSLY door UP (open) and yellow moves the door DOWN (close). -
Page 20: Set The Force
Adjustment Set the Force Without a properly installed safety The force setting measures the amount of force required to open and close the door. reversal system, persons (particularly 1. Push the yellow button twice to enter into the Force Adjustment Mode. The LED will small children) could be SERIOUSLY fl... -
Page 21: Test The Safety Reversal System
Adjustment Test the Safety Reversal System TEST Without a properly installed safety reversal system, persons (particularly 1. With the door fully open, place a 1-1/2 inch (3.8 cm) board (or a 2x4 laid fl at) on the small children) could be SERIOUSLY fl... -
Page 22: Test Cable Tension Monitor
Adjustment Test Cable Tension Monitor To prevent possible SERIOUS INJURY If your cable tension monitor has been or DEATH from a falling garage door: activated the LED on the garage door • If possible, use emergency release opener will blink 9 times. handle to disengage door ONLY when garage door is CLOSED. -
Page 23: Operation
WARNING Operation IMPORTANT SAFETY INSTRUCTIONS WARNING WARNING To reduce the risk of SEVERE INJURY or DEATH: 1. READ AND FOLLOW ALL WARNINGS AND INSTRUCTIONS. 9. Safety reversal system MUST be tested every month. Door MUST reverse on contact with 1-1/2" (3.8 cm) high object 2. -
Page 24: Using The Door Control (Myq ® Control Panel)
Operation Using the Door Control (MyQ ® Control Panel) NOTE: Due to power consumption this door control (Model 888LG) cannot be used in conjunction with another wired door control connected to your garage door opener. If an additional door control is needed, the wireless door control model 41A7773-1 can be programmed to the door control (Model 888LG). -
Page 25: Using The Remote Control
Operation Using the Remote Control Press and hold the button down until the door or gate starts to move. The remote control will operate from up to 3 car lengths away on typical installations. Installations and conditions vary, contact an installing dealer for more information. 3-Button Remote Controls Additional buttons on the remote control can be programmed to operate up to 3 devices such as additional garage door openers, light controls, gate operators or access control... -
Page 26: Programming
Programming Your hand-held remote control (model 893RGX) has already been programmed to the door control (MyQ ® Control Panel) at the factory. ® Below are instructions for programming additional remote controls, keyless entries, and MyQ enabled accessories to the door control. NOTE: Use the learn button on the door control to program all accessories. -
Page 27: Internet Gateway (Not Provided)
Programming Internet Gateway (Not Provided) Model 828LG The MyQ ® Internet Gateway gives you control of your garage door from your internet ® Internet Gateway connected computer or mobile device. You must have your internet gateway registered to your customer account at www.myliftmaster.com in order to use it with the MyQ ®... -
Page 28: Reprogramming Light Or Additional Light
Programming Reprogramming Light or Additional Light Your garage door opener remote light has already been programmed at the factory to operate with your opener. Any additional or replacement remote lights will need to be programmed. 1. Press the LEARN button on the light until the LED comes ON. 2. -
Page 29: Maintenance
Maintenance Care of Your Garage Door Opener MAINTENANCE SCHEDULE Once a Month • Manually operate door. If it is unbalanced or binding, call a trained door systems technician. • Check to be sure door opens and closes fully. Adjust limits and/or force if necessary (see Adjustment Steps 1 and 2). -
Page 30: Troubleshooting
Troubleshooting Diagnostic Chart Garage Door Opener Your garage door opener is programmed with self-diagnostic capabilities. The diagnostic LED will fl ash a number of times, then pause, signifying it has found a potential issue. Consult Diagnostic Chart below. Diagnostic Installed Installed Safety Reversing Safety Reversing... -
Page 31: Troubleshooting
Troubleshooting Troubleshooting The garage door doesn't operate from the MyQ ® Home Control App or website. • When using Model 580LG Alternate Power Supply or when in Battery Backup mode, the Internet Gateway will not activate the garage door through the MyQ ®... -
Page 32: Troubleshooting (Continued)
Check to make sure the torsion bar is not visibly moving up and down as it rotates. • Check that the opener is mounted at a right angle to the jackshaft. If not, move the position of the mounting bracket. Power lock makes noise when operating. • Call Raynor ® dealer for replacement power lock. -
Page 33: Repair Parts
Repair Parts Installation Parts L O C L I G KEY PART KEY PART NO. NO. DESCRIPTION NO. NO. DESCRIPTION 888LG ® Control Panel 41A6388 Collar with set screws (2) 893RGX 3-Button remote control 41A6102 Power door lock 10A20 3V2032 lithium battery 41A5266-3 Safety sensor brackets (2) 29B137... -
Page 34: Garage Door Opener Assembly Parts
Repair Parts Garage Door Opener Assembly Parts KEY PART KEY PART NO. NO. DESCRIPTION NO. NO. DESCRIPTION 041DJ002 Logic board complete with plate 41A6095 Motor with bracket 41A6408 Travel Module 41B122 Power cord 41C168 Transformer 41A6348-3 Cover... -
Page 35: Accessories
Remote Light Switch: against damage from lightning anywhere in their home Automatically control your lights and power surges. Easy to install. with an additional Raynor ® Security✚ ® using your garage door opener, remote. a SECURITY✚ 2.0™ remote... -
Page 36: Repair Parts And Service
Repair Parts and Service HOW TO ORDER ® RAYNOR GARAGE DOORS REPAIR PARTS SERVICE IS ON CALL Selling prices will be furnished on request or parts will be OUR LARGE SERVICE ORGANIZATION shipped at prevailing prices and you will be billed SPANS AMERICA accordingly.
Need help?
Do you have a question about the Premium series 8500RGD Prodigy II and is the answer not in the manual?
Questions and answers
I have a Raynor Prodigy lll, it is giving me a code on the remote 4-1, and will not operate, I am trying to find what this code represents.