Table of Contents
Advertisement
Advertisement
Table of Contents

Subscribe to Our Youtube Channel
Related Manuals for Renovator Multi-Tool


Summary of Contents for Renovator Multi-Tool
- Page 1 SAFETY AND OPERATING MANUAL FOR THE STANDARD, DELUXE AND MEGA KIT...
-
Page 2: Table Of Contents
Table of Contents The Renovator Features ..........3 The Renovator Kits ............4 Accessories ..............7 General Power Tool Safety Warnings ......8 Additional Safety Rules ..........11 Operating Tips ..............14 Connecting Attachment Tools ........16 Changing the Angle of the Attachment Tools ....17 Vacuum Accessory Parts ..........18... -
Page 4: The Renovator Kits
MEGA KIT Mega Multi-Tool Kit Comments Attached to the Renovator: The Renovator Multi-Tool Oscillating Head Washer, Spring Washer, 1 each M6 Bolt Instruction Manual Instructional DVD Allen Key Use to connect the accessories Vacuum Attachment Use to control excessive dust and debris... - Page 5 DELUXE KIT Comments Deluxe Multi-Tool Kit Attached to the Renovator: Oscillating Head Washer The Renovator Multi-Tool 1 each Spring Washer M6 Bolt Instruction Manual Instructional DVD Allen Key Use to connect the accessories Vacuum Attachment 5 Pieces Use to control excessive dust and debris...
- Page 6 The 37 Piece Accessory Kit and the Universal Accessory Adaptor is available separately from your Renovator supplier. All the Renovator accessory attachments can be used in conjunction with our “Universal Accessory Adaptor” to enable use with the following multi-tools: Bosch, Rockwell, Fein, Icon and Ozito. The Universal Adaptor is not required to be used with the Renovator.
- Page 7 Sand Paper supplied with the Standard 15 SP40 SP150 piece, the Deluxe 37 piece or the SP60 SP180 Mega 100 piece Renovator kits. SP80 SP240 SP120 SP320 To re-order please go to www.therenovator.com to locate Heavy to Fine Wood Sanding Grades...
-
Page 8: General Power Tool Safety Warnings
General Power Tool Safety Warnings We recommend that you purchase your accessories from the same supplier that sold you The Renovator multi-tool. Only use accessories supplied with The Renovator or purchased from the original supplier. Choose the accessory type according to the type of work you intend to undertake. - Page 9 such as pipes, radiators, ranges and refrigerators. There is an increased risk of electric shock if your body is earthed or grounded. c) Do not expose power tools to rain or wet conditions. Water entering a power tool will increase the risk of electric shock.
- Page 10 parts. Loose clothes, jewellery or long hair can be caught in moving parts. g) If devices are provided for the connection of dust extraction and collection facilities, ensure these are connected and properly used. Use of dust collection can reduce dust-related hazards. 4.
-
Page 11: Additional Safety Rules
Never use the cord for carrying, pulling or unplugging The Renovator. Immediately replace damaged cords. 12. Always start The Renovator in a clear space and let it reach optimal speed before moving into the work piece. 13. Before replacing attachments unplug the power cord. - Page 12 (See Operating Tips on page 14 for more information). CAUTION: Do not let yourself get careless as you become familiar WARNING with The Renovator. A moment of carelessness can cause severe injury. WARNING! Some dust created by The Renovator from sanding, WARNING...
- Page 13 IMPORTANT NOTE Ensure the voltage matches the power supply given on the rating label. The Renovator is fitted with a two core power cord and plug. Remove the power cord from the power socket before any servicing or adjustments are carried out on the unit.
-
Page 14: Operating Tips
2. CONNECTING THE VACUUM ACCESSORY WARNING! Before mounting or replacing the attachment tools or WARNING accessories, turn off The Renovator and pull the plug out of the power source. This preventative safety measure eliminates danger from accidentally starting the power tool. Mount the vacuum device as shown on page 19. - Page 15 4. USING THE Variable SPEED DIAL While The Renovator is running, the variable speed dial can be set to the optimum oscillating frequency for the attachment tools, respective to their application. 5. SECURING THE WORK PIECE Where possible use gripping tools such as clamps or a vice to secure the work piece.
-
Page 16: Connecting Attachment Tools
Connecting Attachment Tools FOLLOW THESE STEPS BEFORE USING ATTACHMENTS REMOVE BOLT Unscrew the bolt and remove the washer (make sure the springwasher stays on the bolt). (1) CLEAN THE TOOL HOLDER Clean the tool holder, the application tool, the bolt and the washer. -
Page 17: Changing The Angle Of The Attachment Tools
Changing the Angle of the Attachment Tools Typical Application: set the tool blade on an angle which will allow easier access to the work area. • Follow the ‘Connecting Tool Attachment’ instructions on page 16. • Set the tool angle before replacing and tightening the bolt and washer. UP TO 8 ANGLE SETTINGS STRAIGHT RIGHT... -
Page 18: Vacuum Accessory Parts
Vacuum Accessory Parts Allen Key (Remove Allen Key once Bolt is tightened firmly) Oscillating Head Bolt Spring Washer Oscillating Head Washer Vacuum Attachment Clip Tooling Attachment Vacuum Hose Connector Vacuum Attachment Oscillating Head Renovator Unit... -
Page 19: Connecting The Vacuum Accessory
Use the vacuum nozzle clip to secure the nozzle firmly and correctly. The clip should snap into the vent slots on either side of the Renovator body. (3) SELECT HOSE CONNECTOR Select the appropriate sized hose connector and slide on to the back end of the vacuum nozzle. - Page 20 USING THE VACUUM ACCESSORY Typical Application: use the vacuum attachment with any tool accessory that may produce a lot of dust and debris. HEAVY SANDING HEAVY SANDING...
-
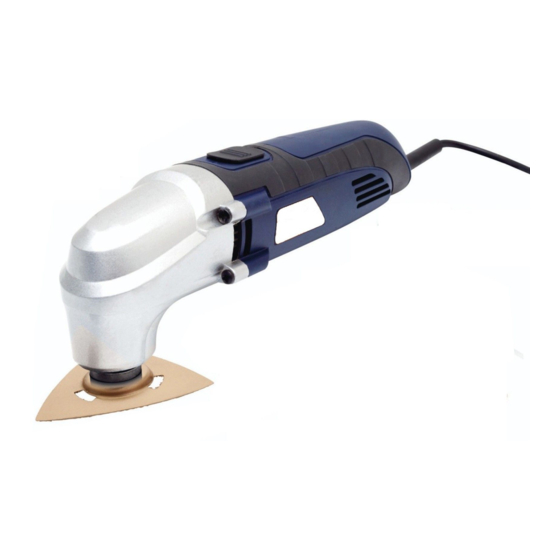
Page 21: Using The Sanding Attachments
Delta sanding pad and make sure it is aligned properly. (2,3) Press the pad down on a flat surface to make a secure connection. Briefly switch the Renovator tool on. This provides for good adhesion and prevents premature wear. (4) - Page 22 Application: Wood Sanding HORIZONTAL PLANE VERTICAL PLANE TIP: Use a courser sand paper first then use a medium grade down to a fine grade grit to get a smooth finish. TIP: Use mini sanding pad with twin-sanding surface for tight corners and sanding upwards.
-
Page 23: Using The Saw Blades
Using the Saw Blades CIRCULAR & SEMI-CIRCULAR EDGE SAW BLADES Typical Application: Cutting wood, plastics, sheet metal, removing putty, copper pipe up to 3mm, plastic pipe. • Select mid oscillation frequency. • Distribute the use of the saw blade evenly to maximise the life of the saw blades. - Page 24 USING THE SEMI-CIRCULAR SAW BLADE Application 1: Cutting plaster board • Select high oscillation frequency. STRAIGHT CUTTING • Distribute the use of the saw blade evenly to maximise the life of the saw blades. Attaching the Semi-circular Saw Blade (Refer to ‘Connecting Attachment Tool’...
- Page 25 TIP: Make sure the tool Set the Speed Dial to 3, it attachments are placed on will cut easier and be easier the Renovator the correct to control. A lower speed will way around. The bend in the lessen the chance of leaving blades project the cutting edge burn marks on wood.
- Page 26 Attaching the E-cut Saw CLEAN THE TOOL HOLDER Blades Remove bolt and washer with the Allen key provided (make sure the springwasher stays on the bolt). (1) ATTACH THE TOOL Select required attachment for the job, place the attachment on top of the octagonal face of the tool making sure that both octagonal faces are flush and firm with each other.
- Page 27 USING THE E-CUT SAW BLADES Application 1: Under cutting skirting board for new flooring • Select high oscillation frequency. • Distribute the use of the saw blade evenly to maximise the life of the saw blades. Using the back side of the new Remove the offcuts.
- Page 28 Application 3: Wood cutting • Select high oscillation frequency. • Distribute the use of the saw blade evenly to maximise the life of the saw blades. NOTCH CUTTING PLUNGE CUTTING BEFORE BEFORE AFTER AFTER STRAIGHT CUTTING NOTCH CUTTING BEFORE BEFORE AFTER PLUNGE CUTTING BEFORE...
- Page 29 Application 4: Nail & Screw Cutting • Select low oscillation frequency. • Distribute the use of the saw blade evenly to maximise the life of the saw blades. SMALL NAIL CUTTING LARGE NAIL CUTTING Application 5: Pipe Cutting • Select low oscillation frequency. •...
-
Page 30: Using The E-Scraper Blade
• Select medium-high oscillation frequency. • Use on stairs or other small to medium areas • Use a smooth, forward motion letting the Renovator do the work. E-SCRAPER BLADE E-SCRAPER BLADE In Mega Kit only... -
Page 31: Using The Semi-Circular Grout Attachment
SEMI-CIRCULAR GROUT ATTACHMENT Typical Application: removing grout and mortar between tiles. • Select high oscillation frequency. • Using the semicircular grout blades, for use on grout, and soft mortar, for getting in between tiles and tight objects and cutting up to walls, use a forward and backward motion. - Page 32 • Use a paint scraper or similar tool to remove the small pieces of broken tile. (5) REMOVE TILE PIECES • Use the Renovator with the Triangular Rasp attachment to remove the remaining hardened grout from beneath the broken tile. (6) TRIANGULAR RASP •...
-
Page 33: Using The Triangular Rasp Attachment
TRIANGULAR & MINI RASP ATTACHMENT Typical Application: Heavy duty paint, grout, mortar and fibreglass removal and shaping. • Select high oscillation frequency. • Use in a smooth circular motion for even coverage or back and forward motion for removing tougher material. TRIANGULAR RASP MINI RASP In Mega Kit only... -
Page 34: The Diamond Cutting Blade
DIAMOND CUTTING BLADE Typical Application: Cutting, scoring ceramic tiles. • Select high oscillation frequency. • Use a guide line or straight edge to help you keep the tool moving in the right direction. • On the top of the tile run the Diamond Blade in a smooth, back and forth motion using a guide if needed. -
Page 35: Maintaining Your Tools
HINTS FOR USING THE RENOVATOR • Avoid using The Renovator for prolonged periods, especially whilst a very low speed is set. If The Renovator becomes too hot, switch The Renovator off. This should cool the motor. • Always keep the blades sharp. -
Page 36: Two Year Warranty Statement
TWO (2) YEAR LIMITED REPLACEMENT WARRANTY STATEMENT If your product becomes defective due to faulty material or workmanship within a period of 2 years from the date of purchase, we warrant to do the following: • For New Zealand Consumers: We will replace the product with a new product, free of charge, or repair the product at our cost, at our discretion. - Page 37 Distributed by: Brand Developers Australia • New Zealand Brand Developers Aust Pty Ltd 461 Plummer Street, Port Melbourne, VIC 3207, AUSTRALIA FAX: +61 3 9681 7825 AUST Customer Care: 1800 890 840 Brand Developers Limited Unit H, 686 Rosebank Road, Avondale, 1026 Auckland, NEW ZEALAND FAX: +64 9 306 8203 NZ Customer Care: 0800 002 999...
Need help?
Do you have a question about the Multi-Tool and is the answer not in the manual?
Questions and answers
Is there a replacement part Delta Sanding pad HP 50 for Renovator Multi Tool available? if so at what price and where can this be purchased?