Table of Contents
Advertisement
Quick Links
Advertisement
Table of Contents

Subscribe to Our Youtube Channel
Related Manuals for ClearCom ECLIPSE-32 MATRIX

Summary of Contents for ClearCom ECLIPSE-32 MATRIX
- Page 1 ECLIPSE-32 MATRIX I N S T R U C T I O N M A N U A L...
- Page 2 Eclipse-32 Matrix Instruction Manual ©2005 Vitec Group Communicatons, Inc. All Rights Reserved Part Number 810315 Rev. A Vitec Group Communications, Inc. 4065 Hollis Street Emeryville, CA 94608-3505 U.S.A Clear-Com is a registered trademark of Vitec Group Communications, Inc. The Clear-Com Logo is a registered trademark of Vitec Group Communications, Inc.
-
Page 3: Table Of Contents
Installing the Eclipse-32 Matrix ........3-1... - Page 4 Wiring to a Computer ........3-14 MAINTAINING AN ECLIPSE-32 MATRIX ......4-1 Recommended Spare Parts.
-
Page 5: Important Safety Instructions
IMPORTANT SAFETY INSTRUCTIONS Please read and follow these instructions before operating an Eclipse-32 matrix system. Keep these instructions for future reference. (1) WARNING: To reduce the risk of fire or electric shock, do not expose this apparatus to rain or moisture. -
Page 6: Specifications
Please familiarize yourself with the safety symbols in Figure 1. When you see these symbols on an Eclipse-32 matrix system, they warn you of the potential danger of electric shock if the system is used improperly. They also refer you to important operating and maintenance instructions in the manual. -
Page 7: Introduction
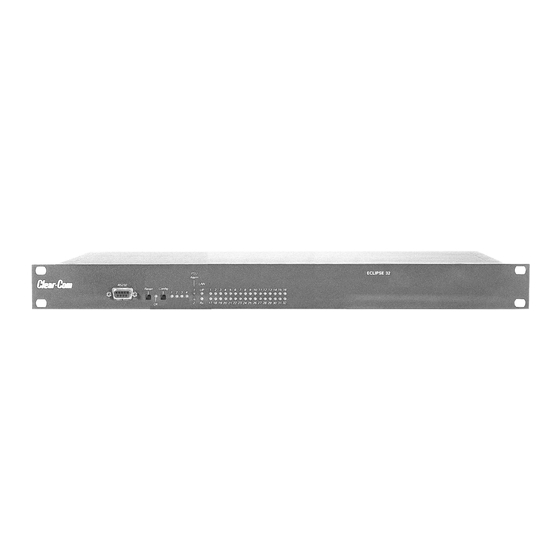
The Eclipse family of communications products now includes the Eclipse-32 digital matrix intercom, which offers 32 full-duplex communication ports, plus four extra 4-wire ports, in a one rack unit (1 RU) chassis. The Eclipse-32 matrix supports the same i-stations, 4000 series stations, ICS digital matrix stations and interfaces as its larger counterpart, the Eclipse-208 matrix, and is programmed and controlled with the same Eclipse Configuration System software. -
Page 8: Powerful Programming Features
• Local and global ISO routes • Control labels The Eclipse-32 matrix allows TCP/IP access to the system for updates. The system may be accessed remotely for programming or to retrieve configurations. Up to four full-system configurations may be stored in the Eclipse-32 matrix, and an unlimited number of configurations may be backed up on a computer and downloaded to the matrix as needed. -
Page 9: Excellent Audio Quality
MATRIX HARDWARE The Eclipse-32 matrix is 19 inches wide and one rack unit high (26.9 cm x 48.3 cm). It installs in a standard Electronics Industry Association equipment rack. -
Page 10: Power Supplies
A rear-panel RJ-45 connector to which you connect cable to run from the matrix to a station or interface is called a “port.” You connect shielded category-5 cable to a “port” to carry signals from the Eclipse-32 matrix to connected remote intercom stations or interfaces. Later chapters of this manual discuss these connections in detail. -
Page 11: Remote Intercom Stations And Accessory Panels
RJ-45 connectors. Digital stations connect to the central matrix through the DIG-2 digital module interface. Digital stations require double-shielded 24 AWG conductor category-6 enhanced (CAT-6E) cable. The following intercom stations are compatible with the Eclipse-32 matrix system: • i-Station family, including expansion panels •... - Page 12 • FOR-22 four-wire interface module • GPI-6 general purpose inputs interface module • RLY-6 relay (general-purpose outputs) interface module Each of these interfaces is described in its own manual. For a full description of the operation, installation, and maintenance of an interface, refer to the individual manual for that interface.
-
Page 13: Operating An Eclipse-32 Matrix
You create a configuration in the Eclipse Configuration System programming software and then upload the configuration to the Eclipse-32 matrix’s operational memory through the software. The Eclipse-32 matrix’s operational memory holds up to four complete configurations. From the controls on the matrix’s front panel, you select which configuration to apply at any given time. -
Page 14: Reset Button
OK LIGHT When flashing, the “OK” light indicates that the Eclipse-32 matrix is running successfully. CONFIGURATION “CONFIG” BUTTON The Eclipse-32 matrix can hold four complete system configurations in its operational memory. -
Page 15: Lan Status Lights
When you connect a local area network to the matrix’s LAN port, the LAN UP light steadily illuminates to indicate that the Eclipse-32 matrix is connected to a local area network. The Rx light flashes when data is being received. -
Page 16: Connecting The Matrix To Remote Devices
Figure 2: Rear Panel of an Eclipse-32 Matrix CONNECTING TO AC POWER An Eclipse-32 matrix’s rear panel contains two IEC AC power input sockets for connecting AC mains power to the two power supplies. Each IEC socket connects cable to one power supply, operating at an input voltage of 100 to 240 volts, between 50 and 60 hertz. -
Page 17: Connecting To General-Purpose Outputs
Eclipse Configuration System programming software. CONNECTING TO A GPI/RLY INTERFACE The RJ-45 socket labeled “GPI/RLY Interface” connects the Eclipse-32 matrix to a GPI-6 or RLY-6 card. The GPI-6 provides six general-purpose opto-isolated logic inputs. The RLY-6 card provides six single-pole, double-throw relay outputs. -
Page 18: Connecting To A Second Eclipse Matrix
CONNECTING TO A SECOND ECLIPSE MATRIX You connect shielded category-5 (CAT-5) cable from the “base loop” socket of one Eclipse-32 matrix to the “base loop” socket of a second Eclipse-32 matrix to form one non-blocking 64-port Eclipse matrix system. The cable connecting the two matrices can be up to 1 meter (3.28 feet) long. -
Page 19: Installing An Eclipse-32 Matrix
The matrix has two separate AC power entry connectors for the two separate power supplies in the system. A fully equipped Eclipse-32 matrix requires 100 to 240 VAC at 50 to 60 Hz with a maximum dissipation of 400 watts. -
Page 20: Wiring The Matrix To Remote Devices
Figure 1: Wiring Interfaces to Rear-Panel Connectors WIRING TO AC MAINS POWER The Eclipse-32 matrix has two IEC mains AC power connectors that provide separate power inputs for the redundant power supplies. If you connect each AC input to a different mains AC branch, one power supply will continue to operate if the other supply’s main AC branch fails. -
Page 21: Wiring To Stations And Interfaces
WIRING TO STATIONS AND INTERFACES Eclipse uses a 4-pair (analog) or single-pair (digital) wiring scheme between the matrix and stations. All Eclipse stations have built-in RJ-45 connectors. 4-Pair Analog Four-pair analog wiring is done with shielded CAT5 RJ-45 cable. • Pair 1 transmits analog audio from the matrix to the station. •... -
Page 22: Single-Pair Digital
Single-Pair Digital Single-pair digital wiring is accomplished with double-shielded 24 AWG conductor CAT-6E enhanced STP cable. Pair 1 transmits and receives multiplexed digital and analog between the matrix frame and the station. Note: Ensure that the “select” switch on the station’s rear panel is in the correct position for the intended use. -
Page 23: Wiring General-Purpose Outputs
Eclipse-32 matrix’s eight double-pole double-throw (DPDT) relays with contact ratings of 30 VDC at 1A. Each general-purpose output has a relay inside the Eclipse-32 matrix. When a general-purpose output is inactive, the associated “common” pin on the GP OUT connector will be shorted to the relevant “normally closed” pin. When a general-purpose output becomes active, the short between the “common”... -
Page 24: Wiring General-Purpose Inputs
To operate the Eclipse-32 matrix in opto-isolated mode: 1. If the Eclipse-32 unit is connected to AC power, disconnect it from AC power. 2. Remove the top cover of the Eclipse-32 matrix by unscrewing the 12 M3 x 6 flat screws and lifting the cover upwards. - Page 25 electricity.When handling a circuit board, be careful not to bend any of the board’s connector pins or component leads. Figure 6 shows the opto-isolated connection. EXTVIN+ +3V3 +3V3 VOUT 7-24V LM78L05ACM 33K2 33K2 10uF_10V 10uF_25V BYG22D R29 1.5K EXTVIN- INPUT 1 EXTERNAL INPUT 1 INPUT 2 1.5K...
- Page 26 Pin Assignments for General-Purpose Inputs Connector DB-25 Female Connector DESCRIPTION Logic Input 1 Logic Input 5 Logic Input 1 Logic Input 2 Logic Input 3 Logic Input 6 Logic Input 5 Logic Input 3 Logic Input 7 Logic Input 7 Logic Input 4 Logic Input 8 Ground...
-
Page 27: Wiring To A Gpi/Rly Interface
WIRING TO A GPI/RLY INTERFACE The RJ-45 connector labeled “GPI/RLY” connects up to 10 RLY-6 or GPI-6 interfaces to the matrix. The following sections give an overview of the wiring of these interfaces. For more detailed discussion of wiring of interfaces in general, see the manual Installing an Eclipse Matrix System: An Overview. -
Page 28: Gpi-6 Interface Wiring
To External Device To connect external devices to the RLY-6 interface, use the two DB-9M connectors on the rear cable assembly panel for the interface. Figure 9 shows the pin assignment of these connectors as viewed from the matrix side of the connector. - Page 29 limit of 60 items. Five RLY-6 and five GPI-6 interfaces would provide 30 relays and 30 inputs for a total of 60 inputs and outputs. IMF-3 Interface Module Frame Wiring To Matrix To connect the GPI-6 to the matrix, plug one end of an RJ-45 cable (eight wires with no reversal) into the GPI/RLY INTERFACE connector on the back of the matrix.
- Page 30 GPI-6 I/O DB-9M GPI-6 I/O DB-9M Figure 11: GPI-6 Application Examples Figures 10 and Figure 11 show how to connect switches or contacts using the power source provided by the GPI-6 module or powering switches from external sources. Each input can be wired to be isolated from each other as a further variation.
-
Page 31: Wiring To A Second Eclipse Matrix
WIRING TO A SECOND ECLIPSE MATRIX The RJ-45 connector labeled “Base Loop” connects the Eclipse-32 matrix to a second Eclipse-32 matrix’s “Base Loop” connector to form one non-blocking 64 port Eclipse system. To make this connection, use a specially constructed screened CAT-5 cable of maximum length 1 meter (3.28 feet). -
Page 32: Wiring To A Computer
WIRING TO A COMPUTER The DB-9 connector labeled “PC” connects the Eclipse-32 matrix to an external computer. This connector is located on the Eclipse-32 matrix’s front panel. To connect a computer to the matrix, run cable from the matrix’s “PC”... -
Page 33: Maintaining An Eclipse-32 Matrix
DUAL, INDEPENDENT POWER SUPPLIES The Eclipse-32 matrix includes two internal power supply units. One power supply unit can power an entire matrix; the second unit provides a backup in case of an equipment failure. - Page 34 Call: +1 510 496 6666 Web site: www.clearcom.com Email: support@clearcom.com FAX: +1 510 496 6610 4 - 2 E C L I P S E - 3 2 M A T R I X I N S T R U C T I O N M A N U A L...
-
Page 35: Specifications
SPECIFICATIONS 0 dBu is referenced to 0.775 volts RMS General Height 44 mm or 1.75 inches (1 RU) Width 482 mm (19 inches) Depth 300 mm (12 inches) Weight 5 kg max. Power Consumption 500 W Max. per inlet Number of Station Compatible Ports Number of Analog Audio Ports Number of Expansion Modules Number of Power Supply Units... - Page 36 Network 10/100 Base-T Ethernet maximum distance: 100 meters connector RJ-45 Serial PC RS-232 Baud rate: 57600 Maximum distance: 10 meters Number of ports: 1 Connector: 9-way D-type socket on front System Programming Crosspoint Level Control 0.355 dB steps Input Level Control 0.355 dB steps Output Level Control 0.355 dB steps...
- Page 37 Supported Stations and Interfaces: ICS-1008, ICS-1016, ICS-52, ICS-92, ICS-62, ICS-102, IMF-102, ICS-2003, i-Station family, XPL-22, XPL-12, IMF-3, TEL-14, CCI-22, FOR-22, RLY-6, GPI-6, DIG-2, 4000 Series Stations. Notice About Specifications While Clear-Com makes every attempt to maintain the accuracy of the information contained in its product manuals, that information is subject to change without notice.
- Page 38 5 - 4 E C L I P S E - 3 2 M A T R I X I N S T R U C T I O N M A N U A L...
-
Page 39: Glossary
Duplex All real-time communication between individuals talking face to face is full duplex, meaning that you can both talk and listen simultaneously. The Eclipse-32 matrix provides full-duplex audio. Eclipse Configuration System Web-based software program that guides the operation of the central matrix circuit cards and connected remote stations. - Page 40 party line, telephone, etc. The interface is connected to a central matrix port. The external non-4-wire device is then connected to the interface. ISO The ISO function, short for “station ISOlation,” allows you to call a destination and interrupt all of that destination’s other audio paths and establish a private conversation.
-
Page 41: Vitec Group Communications Warranty
For technical support from the Americas and Asia Call: +1 510 496 6666 Web site: www.clearcom.com Email: support@clearcom.com FAX: +1 510 496 6610 EXCEPTIONS This warranty does not include damage to a product resulting from cause other than part defect and malfunction. The VGC warranty does not cover any defect,... - Page 42 WARRANTY REPAIRS While VGC will ensure complete system integrity by providing whatever support is necessary to resolve any failure covered under the terms of the warranty, the normal procedure will be to repair or replace any defective Line Replaceable Unit (LRU) that is returned to VGC during the warranty period.
- Page 43 Web site) Email: drake@avc.de For returns from the Americas and Asia Call: +1 510 496 6666 Web site: www.clearcom.com Email: support@clearcom.com or send a FAX: +1 510 496 6610 7 - 3 V I T E C G R O U P C O M M U N I C A T I O N S W A R R A N T Y...
- Page 44 WARRANTY VALIDATION To validate your warranty, fill in the information below, and mail it to your local Technical Service Center. 7 - 4 V I T E C G R O U P C O M M U N I C A T I O N S W A R R A N T Y...
Need help?
Do you have a question about the ECLIPSE-32 MATRIX and is the answer not in the manual?
Questions and answers