
Related Manuals for EWM Picomig 180 Synergic TGE


Summary of Contents for EWM Picomig 180 Synergic TGE
- Page 1 Operating instructions Welding machine Picomig 180 Synergic TGE Picomig 180 puls TGE 099-005114-EW501 12.03.2015 Register now and benefit! Jetzt Registrieren und Profitieren! www.ewm-group.com...
-
Page 2: General Instructions
+49 2680 181-0. A list of authorised sales partners can be found at www.ewm-group.com. Liability relating to the operation of this equipment is restricted solely to the function of the equipment. No other form of liability, regardless of type, shall be accepted. -
Page 3: Table Of Contents
Contents Notes on the use of these operating instructions Contents 1 Contents ..............................3 2 Safety instructions ..........................6 Notes on the use of these operating instructions ................6 Explanation of icons ........................7 General ............................8 Transport and installation ......................12 2.4.1 Ambient conditions ....................... - Page 4 Contents Notes on the use of these operating instructions 5.7.6 MIG/MAG operating point ..................... 39 5.7.6.1 Selecting the welding parameter display mode ..........39 5.7.6.2 Operating point setting using material thickness .......... 39 5.7.6.3 Arc length correction setting ................39 5.7.7 Further welding parameters ..................
- Page 5 Wire feed rollers for aluminium wire ................71 10.1.3 Wire feed rollers for cored wire ..................71 10.1.4 Conversion sets ......................72 11 Appendix A ............................73 11.1 JOB-List ............................73 12 Appendix B ............................74 12.1 Overview of EWM branches ......................74 099-005114-EW501 12.03.2015...
-
Page 6: Safety Instructions
Safety instructions Notes on the use of these operating instructions Safety instructions Notes on the use of these operating instructions DANGER Working or operating procedures which must be closely observed to prevent imminent serious and even fatal injuries. • Safety notes include the "DANGER" keyword in the heading with a general warning symbol. •... -
Page 7: Explanation Of Icons
Safety instructions Explanation of icons Explanation of icons Symbol Description Special technical points which users must observe. Correct Wrong Press Do not press Press and keep pressed Turn Switch Switch off machine Switch on machine ENTER ENTER (enter the menu) ENTER NAVIGATION NAVIGATION (Navigating in the menu) -
Page 8: General
Safety instructions General General DANGER Electromagnetic fields! The power source may cause electrical or electromagnetic fields to be produced which could affect the correct functioning of electronic equipment such as IT or CNC devices, telecommunication lines, power cables, signal lines and pacemakers. •... - Page 9 Safety instructions General WARNING Smoke and gases! Smoke and gases can lead to breathing difficulties and poisoning. In addition, solvent vapour (chlorinated hydrocarbon) may be converted into poisonous phosgene due to the ultraviolet radiation of the arc! • Ensure that there is sufficient fresh air! •...
- Page 10 Safety instructions General CAUTION Obligations of the operator! The respective national directives and laws must be observed for operation of the machine! • National implementation of the framework directive (89/391/EWG), as well as the associated individual directives. • In particular, directive (89/655/EWG), on the minimum regulations for safety and health protection when staff members use equipment during work.
- Page 11 Safety instructions General CAUTION EMC Machine Classification In accordance with IEC 60974-10, welding machines are grouped in two electromagnetic compatibility classes - See 8 Technical data chapter: Class A machines are not intended for use in residential areas where the power supply comes from the low-voltage public mains network.
-
Page 12: Transport And Installation
Safety instructions Transport and installation Transport and installation WARNING Incorrect handling of shielding gas cylinders! Incorrect handling of shielding gas cylinders can result in serious and even fatal injury. • Observe the instructions from the gas manufacturer and in any relevant regulations concerning the use of compressed air! •... -
Page 13: Ambient Conditions
Safety instructions Transport and installation 2.4.1 Ambient conditions CAUTION Installation site! The machine must not be operated in the open air and must only be set up and operated on a suitable, stable and level base! • The operator must ensure that the ground is non-slip and level, and provide sufficient lighting for the place of work. -
Page 14: Intended Use
Intended use Applications Intended use WARNING Hazards due to improper usage! Hazards may arise for persons, animals and material objects if the equipment is not used correctly. No liability is accepted for any damages arising from improper usage! • The equipment must only be used in line with proper usage and by trained or expert staff! •... -
Page 15: Documents Which Also Apply
3.2.1 Warranty For more information refer to the "Warranty registration" brochure supplied and our information regarding warranty, maintenance and testing at www.ewm-group.com! 3.2.2 Declaration of Conformity The designated machine conforms to EC Directives and standards in terms of its design and construction: •... -
Page 16: Machine Description - Quick Overview
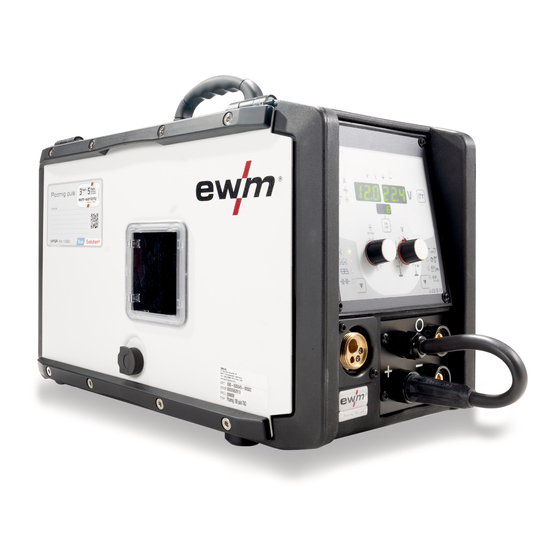
Machine description – quick overview Front view Machine description – quick overview Front view Figure 4-1 099-005114-EW501 12.03.2015... - Page 17 Machine description – quick overview Front view Item Symbol Description Carrying handle Protective cap Cover for the wire feed mechanism and other operating elements. Depending on the machine series, additional stickers with information on the replacement parts and JOB lists will be located on the inside. Wire spool inspection window Check wire supply Slide latch, lock for the protective cap...
-
Page 18: Rear View
Machine description – quick overview Rear view Rear view Figure 4-2 Item Symbol Description Main switch, machine on/off Connecting nipple G¼, shielding gas connection Mains connection cable with connector plug Cooling air outlet Cooling air inlet 099-005114-EW501 12.03.2015... -
Page 19: Inside View
Machine description – quick overview Inside view Inside view Figure 4-3 Item Symbol Description Wire spool holder Wheels Machine feet Wire feed unit Button, Wire inching For inching the wire electrode when changing the wire spool. The welding wire is inched into the tube package with the current off and without the gas being expelled. -
Page 20: Machine Control - Operating Elements
Machine description – quick overview Machine control – Operating elements Machine control – Operating elements Figure 4-4 Item Symbol Description Welding data display (3-digit) Displays the welding parameters and the corresponding values Signal light, JOB-List Illuminates upon display or selection of the JOB number Key button JOB-List Selection of the welding task (JOB) from the JOB list “Collective interference”... - Page 21 Machine description – quick overview Machine control – Operating elements Item Symbol Description Push-button welding parameter display mode Welding current Welding voltage Material thickness Wire feed speed Press for 2 s to put the machine into power-saving mode. To reactivate, activate one of the operating elements.
-
Page 22: Design And Function
Design and function General Design and function General WARNING Risk of injury from electric shock! Contact with live parts, e.g. welding current sockets, is potentially fatal! • Follow safety instructions on the opening pages of the operating instructions. • Commissioning may only be carried out by persons who have the relevant expertise of working with arc welding machines! •... -
Page 23: Machine Cooling
Design and function Machine cooling CAUTION Damage due to incorrect connection! Accessory components and the power source itself can be damaged by incorrect connection! • Only insert and lock accessory components into the relevant connection socket when the machine is switched off. •... -
Page 24: Notes On The Installation Of Welding Current Leads
Design and function Notes on the installation of welding current leads Notes on the installation of welding current leads Incorrectly installed welding current leads can cause faults in the arc (flickering). Lay the workpiece lead and hose package of power sources without HF igniter (MIG/MAG) for as long and as close as possible in parallel. - Page 25 Design and function Notes on the installation of welding current leads Use an individual welding lead to the workpiece for each welding machine! Figure 5-2 Fully unroll welding current leads, torch hose packages and intermediate hose packages. Avoid loops! Always keep leads as short as possible! Lay any excess cable lengths in meanders.
-
Page 26: Mains Connection
Design and function Mains connection Mains connection DANGER Hazard caused by improper mains connection! An improper mains connection can cause injuries or damage property! • Only use machine with a plug socket that has a correctly fitted protective conductor. • If a mains plug must be fitted, this may only be carried out by an electrician in accordance with the relevant national provisions or regulations! •... -
Page 27: Shielding Gas Supply (Shielding Gas Cylinder For Welding Machine)
Design and function Mains connection 5.6.2 Shielding gas supply (shielding gas cylinder for welding machine) 5.6.2.1 Connection WARNING Incorrect handling of shielding gas cylinders! Incorrect handling of shielding gas cylinders can result in serious and even fatal injury. • Observe the instructions from the gas manufacturer and in any relevant regulations concerning the use of compressed air! •... -
Page 28: Gas Test, Rinse Hose Package
Design and function Mains connection 5.6.3 Gas test, rinse hose package • Slowly open the gas cylinder valve. • Open the pressure reducer. • Switch on the power source at the main switch. • Trigger gas test function on the machine control by pressing the button briefly. -
Page 29: Mig/Mag Welding
Design and function MIG/MAG welding MIG/MAG welding 5.7.1 Welding torch and workpiece line connection For connection, observe the operating instructions for the welding torch. Depending on the wire electrode diameter or type, either a steel liner or plastic liner with the correct inner diameter must be inserted in the torch! Recommendation: •... -
Page 30: Mig/Mag Standard Welding
Design and function MIG/MAG welding 5.7.1.1 MIG/MAG standard welding Choose welding current connection socket according to the signal light for the polarity setting! • Select JOB- See 5.7.5 Welding task selection chapter • Polarity selection “+” or polarity selection “-” signal lights show the polarity setting. Figure 5-6 Item Symbol Description... -
Page 31: Mig/Mag Cored Wire Welding
Design and function MIG/MAG welding 5.7.1.2 MIG/MAG cored wire welding Choose welding current connection socket according to the signal light for the polarity setting! • Select JOB- See 5.7.5 Welding task selection chapter • Polarity selection “+” or polarity selection “-” signal lights show the polarity setting. Figure 5-7 Item Symbol Description... -
Page 32: Wire Feed
Design and function MIG/MAG welding 5.7.2 Wire feed 5.7.2.1 Open the protective flap of the wire feeder CAUTION To perform the following steps, the protective flap of the wire feeder needs to be opened. Make sure to close the protective flap again before starting to work. •... -
Page 33: Changing The Wire Feed Rollers
Design and function MIG/MAG welding 5.7.2.3 Changing the wire feed rollers Unsatisfactory welding results due to faulty wire feeding! Wire feed rollers must be suitable for the diameter of the wire and the material. • Check the roller label to verify that the rollers are suitable for the wire diameter. Turn or change if necessary! •... -
Page 34: Inching The Wire Electrode
Design and function MIG/MAG welding 5.7.2.4 Inching the wire electrode CAUTION Risk of injury due to moving parts! The wire feeders are equipped with moving parts, which can trap hands, hair, clothing or tools and thus injure persons! • Do not reach into rotating or moving parts or drive components! •... - Page 35 Design and function MIG/MAG welding Figure 5-10 Item Symbol Description Adjusting nut Feed roll tensioner Fixing the clamping unit and setting the pressure. Clamping unit Knurled screw Pressure roller Drive roller Wire feed nipple Guide tube • Extend and lay out the torch hose package. •...
-
Page 36: Spool Brake Setting
Design and function MIG/MAG welding 5.7.2.5 Spool brake setting Figure 5-11 Item Symbol Description Allen screw Securing the wire spool retainer and adjustment of the spool brake • Tighten the Allen screw (8 mm) in the clockwise direction to increase the braking effect. Tighten the spool brake until the wire spool no longer turns when the wire feed motor stops but without it jamming during operation! 099-005114-EW501... -
Page 37: Definition Of Mig/Mag Welding Tasks
Design and function MIG/MAG welding 5.7.3 Definition of MIG/MAG welding tasks This machine range features simple operation with a very wide range of functions. • JOBs (welding tasks consisting of welding process, type of material, wire diameter and type of shielding gas) are pre-defined for all common welding tasks. -
Page 38: Welding Task Selection
Design and function MIG/MAG welding 5.7.5 Welding task selection The settings for the respective welding parameters are defined by the different JOBs. The right JOB can be determined quickly with the JOB list . 5.7.5.1 JOB selection • Select JOB (welding task) by means of the JOB list. The "JOB list"... -
Page 39: Mig/Mag Operating Point
Design and function MIG/MAG welding 5.7.6 MIG/MAG operating point 5.7.6.1 Selecting the welding parameter display mode The operating point (welding performance) can be displayed or set as the welding current, material thickness or wire speed. Operating Action Result element Switching the display between: Welding current Welding voltage (correction) Material thickness... -
Page 40: Further Welding Parameters
Design and function MIG/MAG welding 5.7.7 Further welding parameters Validity of the settings. Spot time, pause time and wire feed speed settings apply to all JOBs. Throttling effect/dynamics, gas post-flow time, gas pre-flow time and wire burn-back correction are stored for each JOB individually. -
Page 41: Spot Time
Design and function MIG/MAG welding 5.7.7.3 Spot time Select the respective operating mode before setting the spot or pause time. Operating Action Result Display element Selecting the parameter to be set Parameter value set The LED indicates the parameter selected. Choke effect/dynamics Gas post-flow time Spot time... -
Page 42: Burn-Back
Design and function MIG/MAG welding 5.7.7.5 Burn-back • Preselection: Select a MIG/MAG JOB- See 5.7.5 Welding task selection chapter. • Enter the menu (ENTER) Keep the runtime parameter button pressed for 5 s. • Leave the menu (EXIT) Keep the runtime parameter button pressed for 2 s. ENTER EXIT Figure 5-13... -
Page 43: Gas Pre-Flow Time
Design and function MIG/MAG welding 5.7.7.6 gas pre-flow time • Preselection: Select a MIG/MAG JOB- See 5.7.5 Welding task selection chapter. • Enter the menu (ENTER) Keep the runtime parameter button pressed for 5 s. • Leave the menu (EXIT) Keep the runtime parameter button pressed for 2 s. ENTER EXIT Figure 5-14... -
Page 44: Mig/Mag Functional Sequences / Operating Modes
Design and function MIG/MAG welding 5.7.8 MIG/MAG functional sequences / operating modes 5.7.9 Explanation of signs and functions Symbol Meaning Press torch trigger Release torch trigger Shielding gas flowing Welding output Wire electrode is being conveyed Wire creep Wire burn-back Gas pre-flows Gas post-flows Non-latched... - Page 45 Design and function MIG/MAG welding Non-latched mode Figure 5-15 Step 1 • Press and hold torch trigger. • Shielding gas is expelled (gas pre-flows). • Wire feed motor runs at “creep speed”. • Arc ignites after the wire electrode makes contact with the workpiece; welding current flows. •...
- Page 46 Design and function MIG/MAG welding Latched mode Figure 5-16 1. cycle • Press and hold torch trigger • Shielding gas is expelled (gas pre-flows) • Wire feed motor runs at “creep speed” • Arc ignites when the wire electrode makes contact with the workpiece Welding current flows •...
- Page 47 Design and function MIG/MAG welding Spot welding Figure 5-17 Start • Press and hold torch trigger. • Shielding gas is expelled (gas pre-flows). • Arc ignites after the wire electrode makes contact with the workpiece at creep speed. • Welding current flows. •...
- Page 48 Design and function MIG/MAG welding Interval Figure 5-18 Start • Press and hold torch trigger. • Shielding gas is expelled (gas pre-flows). Sequence • Arc ignites after the wire electrode makes contact with the workpiece at creep speed. • Welding current flows. •...
-
Page 49: Conventional Mig/Mag Welding (Gmaw Non Synergic)
Design and function MIG/MAG welding 5.7.10 Conventional MIG/MAG Welding (GMAW non synergic) • Select JOB 188 It is only possible to change the JOB number when no welding current is flowing. Operating Action Result Display element Select JOB list (LED is on) Set JOB number. -
Page 50: Setting The Operating Point (Welding Output)
Design and function MIG/MAG welding 5.7.11.1 Setting the operating point (welding output) The operating point (welding performance) is set with the wire speed and the welding voltage. Operating Action Result element Switch the display between: Welding current (only actual and hold values are displayed) Welding voltage Material thickness (will be skipped) Wire speed... -
Page 51: Tig Welding
Design and function TIG welding TIG welding 5.8.1 Preparing the TIG welding torch The TIG welding torch is to be equipped to suit the relevant welding task! • Fit suitable tungsten electrodes and • an appropriate shielding gas nozzle. • Observe the operating instructions for the TIG welding torch! 5.8.2 Welding torch and workpiece line connection... -
Page 52: Welding Task Selection
Design and function TIG welding 5.8.3 Welding task selection • Select TIG JOB 127. It is only possible to change the JOB number when no welding current is flowing. Operating Action Result Display element Select JOB list (LED is on) Set JOB number. -
Page 53: Further Welding Parameters
Design and function TIG welding 5.8.6 Further welding parameters • Preselection: Select TIG JOB 127- See 5.8.3 Welding task selection chapter. • Enter the menu (ENTER) Keep the runtime parameter button pressed for 5 s. • Leave the menu (EXIT) Keep the runtime parameter button pressed for 2 s. ENTER NAVIGATION EXIT... -
Page 54: Tig Welding Data Display
Design and function TIG welding 5.8.7 TIG welding data display Diagram 5-22 The button for the welding parameter display mode is next to the display. Each time the button is pressed it switches between welding current and welding voltage. The display shows: •... -
Page 55: Function Sequences/Operating Modes
Design and function TIG welding 5.8.9 Function sequences/operating modes 5.8.9.1 Legend Symbol Meaning Press torch trigger Release torch trigger Welding current Gas pre-flows Gas post-flows Non-latched Latched Time Upslope time Downslope time Down Ignition current start End-crater current 099-005114-EW501 12.03.2015... - Page 56 Design and function TIG welding Non-latched mode Figure 5-24 1st cycle • Press and hold torch trigger. • Shielding gas is expelled (gas pre-flows). The arc is ignited using liftarc. • The welding current flows with the value set for the starting current I start •...
-
Page 57: 5.8.10 Tig Automatic Cut-Out
Design and function TIG welding Latched mode Figure 5-25 1st cycle • Press and hold torch trigger. • Shielding gas is expelled (gas pre-flows). The arc is ignited using liftarc. • The welding current flows with the value set for the starting current I start 2nd cycle •... -
Page 58: Mma Welding
Design and function MMA welding MMA welding CAUTION Risk of being crushed or burnt. When replacing spent or new stick electrodes • Switch off machine at the main switch • Wear appropriate safety gloves • Use insulated tongs to remove spent stick electrodes or to move welded workpieces and •... -
Page 59: Welding Task Selection
Design and function MMA welding 5.9.2 Welding task selection • Select MMA JOB 128. It is only possible to change the JOB number when no welding current is flowing. Operating Action Result Display element Select JOB list (LED is on) Set JOB number. -
Page 60: Arcforce
Design and function MMA welding 5.9.5 Arcforce During the welding process, arcforce prevents the electrode sticking in the weld pool with increases in current. This makes it easier to weld large-drop melting electrode types at low current strengths with a short arc in particular. -
Page 61: Hotstart Settings
Design and function MMA welding 5.9.6.1 Hotstart settings • Select MMA JOB 128- See 5.9.2 Welding task selection chapter. • Enter the menu (ENTER) Keep the runtime parameter button pressed for 5 s. • Leave the menu (EXIT) Keep the runtime parameter button pressed for 2 s. ENTER NAVIGATION EXIT... -
Page 62: Maintenance, Care And Disposal
Maintenance, care and disposal General Maintenance, care and disposal DANGER Do not carry out any unauthorised repairs or modifications! To avoid injury and equipment damage, the unit must only be repaired or modified by specialist, skilled persons! The warranty becomes null and void in the event of unauthorised interference. •... -
Page 63: Annual Test (Inspection And Testing During Operation)
In addition to this, returns are also possible throughout Europe via EWM sales partners. Meeting the requirements of RoHS We, EWM AG Mündersbach, hereby confirm that all products supplied by us which are affected by the RoHS Directive, meet the requirements of the RoHS (Directive 2011/65/EU). -
Page 64: Rectifying Faults
Rectifying faults Checklist for rectifying faults Rectifying faults All products are subject to rigorous production checks and final checks. If, despite this, something fails to work at any time, please check the product using the following flowchart. If none of the fault rectification procedures described leads to the correct functioning of the product, please inform your authorised dealer. -
Page 65: Error Messages (Power Source)
Rectifying faults Error messages (power source) Error messages (power source) A welding machine error is indicated by the collective fault signal lamp (A1) lighting up and an error code (see table) being displayed in the machine control display. In the event of a machine error, the power unit shuts down. -
Page 66: Display Machine Control Software Version
Rectifying faults Display machine control software version Display machine control software version The query of the software versions only serves to inform the authorised service staff! ENTER EXIT VOLT VOLT VOLT VOLT Figure 7-1 Display Setting/selection Calibration The machine will be calibrated for approx 2 seconds each time it is switched on. Exit the menu Exit Service menu... -
Page 67: Resetting Welding Parameters To The Factory Settings
Rectifying faults Resetting welding parameters to the factory settings Resetting welding parameters to the factory settings RESET Figure 7-2 Display Setting/selection Calibration The machine will be calibrated for approx 2 seconds each time it is switched on. Initialising Keep the push-button pressed until "InI" is shown on the display. Dynamic power adjustment This requires use of the appropriate mains fuse. - Page 68 Rectifying faults Dynamic power adjustment ENTER (Enter the menu) • Switch off machine at the main switch. • Hold down the "welding parameter display mode" button and simultaneously switch the machine on again. Wait until the "Elt" menu item is shown and release the button. EXIT (Exit the menu) •...
-
Page 69: Technical Data
Technical data Picomig 180 Technical data Picomig 180 Performance specifications and guarantee only in connection with original spare and replacement parts! Setting range MIG/MAG Welding current 5 A to 180 A 5 A to 180 A 5 A to 150 A Welding voltage 14.3 V to 23 V 10.2 V to 17.2 V... -
Page 70: Accessories
Accessories Options Accessories Performance-dependent accessories like torches, workpiece leads, electrode holders or intermediate hose packages are available from your authorised dealer. Options Type Designation Item no. ON Filter Picomig 180 Retrofit option, dirt filter for air inlet 092-002553-00000 ON Trolly Picomig Trolly Picomig 180 with holder for 300 mm wire 092-000312-00000 spool... -
Page 71: Replaceable Parts
Replaceable parts Wire feed rollers Replaceable parts CAUTION Damage due to the use of non-genuine parts! The manufacturer's warranty becomes void if non-genuine parts are used! • Only use system components and options (power sources, welding torches, electrode holders, remote controls, spare parts and replacement parts, etc.) from our range of products! •... -
Page 72: 10.1.4 Conversion Sets
Replaceable parts Wire feed rollers 10.1.4 Conversion sets Type Designation Item no. URUE VERZ>UNVERZ FE/AL Conversion kit, 37mm, 4-roller drive on non-toothed 092-000415-00000 4R SF rollers (steel/aluminium) URUE ROE 2DR4R Conversion kit, 37 mm, 4-roller drive for cored wire 092-000410-00000 0,8/0,9+0,8/0,9 SF URUE ROE 2DR4R Conversion kit, 37 mm, 4-roller drive for cored wire... -
Page 73: Job-List
Appendix A JOB-List Appendix A 11.1 JOB-List We recommend using the characteristics for 1.0-mm solid wire electrodes also for the 0.9-mm solid wire electrodes. For machine versions with pulsed arc welding procedures only. MIG/MAG pulse arc welding can be selected with JOBs 6, 34, 42, 74, 75, 82, 83, 90, 91, 110, 111, 114 and 115. -
Page 74: Overview Of Ewm Branches
Appendix B Overview of EWM branches Appendix B 12.1 Overview of EWM branches 099-005114-EW501 12.03.2015...
Need help?
Do you have a question about the Picomig 180 Synergic TGE and is the answer not in the manual?
Questions and answers