
Related Manuals for Security Tronix ST-PTZMINI-IR10XTA


Summary of Contents for Security Tronix ST-PTZMINI-IR10XTA
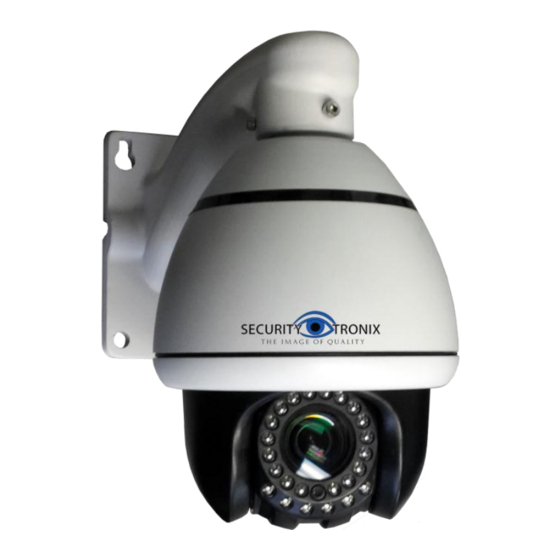
- Page 1 INSTALLATION MANUAL ST-PTZMINI-IR10XTA High Speed Intelligent IR Dome PTZ Color Camera This is a 12 volt DC camera. Copyright North American Cable Equipment...
-
Page 2: Warnings And Cautions
WARNINGS AND CAUTIONS WARNING TO REDUCE THE RISK OF FIRE OR ELECTRIC SHOCK, DO NOT EXPOSE THIS PRODUCT TO RAIN OR MOISTURE. DO NOT INSERT ANY METALLIC OBJECTS THROUGH VENTILATION GRILLS OR OPENINGS ON THE EQUIPMENT. CAUTION EXPLANATION OF GRAPHICAL SYMBOLS The lighting flash with arrowhead symbol, within an equilateral triangle, is intended to alert the user the presence of non-insulated “dangerous voltage”... - Page 3 PRECAUTIONS: Persons without technical qualifications should not attempt to operate this dome device before reading this manual thoroughly. Remove any power to the dome before attempting any operations or adjustments inside the dome cover to avoid potential damage to the mechanism.
-
Page 4: Important Safeguards
IMPORTANT SAFEGUARDS 1. Read these instructions before attempting installation or operation of this dome. 2. Keep these instructions for future reference. 3. Heed all warnings and adhere to electrical specifications. Follow all instructions. 4. Clean only with non-abrasive dry cotton cloth, lint free and approved acrylic cleaners. - Page 5 13. The attached instructions are for use by qualified personnel only. To reduce the risks of electric shock, do not perform any servicing other than contained in the operating instructions unless you are qualified to do so. 14. During usage, the user should abide by all electrical safety standards and adhere to electrical specifications for the operation of the dome.
-
Page 6: Product Summary
Product Summary 1.1 Technical Parameters Model number 4 INCH MINI HIGH SPEED IR DOME CAMERA Optical focus Image sensor 1/4"CCD Signal mode PAL / NTSC Resolution 650TVL Optical focus Manual/Auto, Digital continuous focusing function. Presets Pattern scan 4 Scan Patterns, each can record 100 actions Tour scan Up to 30 presets. - Page 7 Setting the Address, Baud Rate and Protocol This camera uses the On-Screen Menu to change communication settings. This is called “Soft Addressing”. The camera comes from the factory with the default settings of: Address: 1 Baud Rate: 2400 ...
- Page 8 Bracket dimensions System OSD menu settings Power-On / Self-Test When power is connected, the camera will perform a self-test function by panning and tilting the camera as well as testing zoom. After the self-test, the camera will display the Protocol (PTOL), Baud Rate (COMM) and Address (ADDR) as shown in the diagram below.
- Page 9 Storing (saving) preset points: Using a PTZ controller, aim the camera at the desired subject and adjust zoom if desired. To store the preset in the camera, consult the manual for the specific PTZ controller you are using for how to store a preset. Sometimes storing a preset is referred to as “writing”, “saving”, “setting”...
-
Page 10: System Information
<MAIN MENU> To access the camera’s On-Screen Display (OSD) menu, “call” preset 95 using your PTZ controller and the Main Menu screen will appear: MAIN MENU Menu function descriptions Displays basic camera information. SYSTEM INFORMATION ADDR SETTING Used to set the camera address. “PTZ”... -
Page 11: Park Action
<ADDR SETTING> ADDR SETTING Menu function descriptions Sets either HARD and SOFT addressing; Choosing ADDR TYPE HARD will set the dome to address 1. Choosing SOFT allows the address to be set in the menu, below. If SOFT is selected above, enter the desired address ADDR SOFT here. - Page 12 <SET FRAME SCAN> (L/R scan) FRAME SCAN Menu function descriptions SET SCAN POSITION Set the Left & Right scan limit positions Clear left and right limit positions CLEAR FRAME SCAN BACK Return to the previous menu EXIT Exit the menu SET SCAN POSITION SET FRAME SCAN Menu function descriptions...
- Page 13 <POWER UP> This menu sets which action is performed when the camera powers up. It’s useful if there are known issues with blackouts etc. POWER UP Menu function descriptions Don’t perform any action. NONE AUTO SCAN Perform continuous scanning action. RANDOM SCAN Perform intermittent scanning action.
- Page 14 <PATTERNS> PATTERNS Menu function descriptions PATTERN NUMBER Select pattern number. Range: 1~4. Used to program a pattern scan. The menu PROGRAM PATTERN will prompt the user through the steps CLEAR CURRENT PATTERN Clear current pattern data. CLEAR ALL PATTERN Clear the data for ALL patterns. BACK Return to the previous menu.
- Page 15 <CRUISE> CRUISE Menu function descriptions How long the camera waits on each preset DWELL TIME (seconds) point. Cruise list of preset points. There are 3 pages, PRESET LIST each page can contain 10 preset points. Select preset points are included in the cruise 1 = ON 0 = OFF scan (tour).
-
Page 16: Troubleshooting
TROUBLESHOOTING No picture after applying power – (i) check all plugs and cables are connected to the proper connectors: (ii) ensure your power supply is providing the correct voltage and enough current. The picture has ripples – (i) Check to see if the power supply is experiencing AC ripple.
Need help?
Do you have a question about the ST-PTZMINI-IR10XTA and is the answer not in the manual?
Questions and answers