Table of Contents
Advertisement
Advertisement
Chapters
Table of Contents
Troubleshooting

Related Manuals for Oki B721


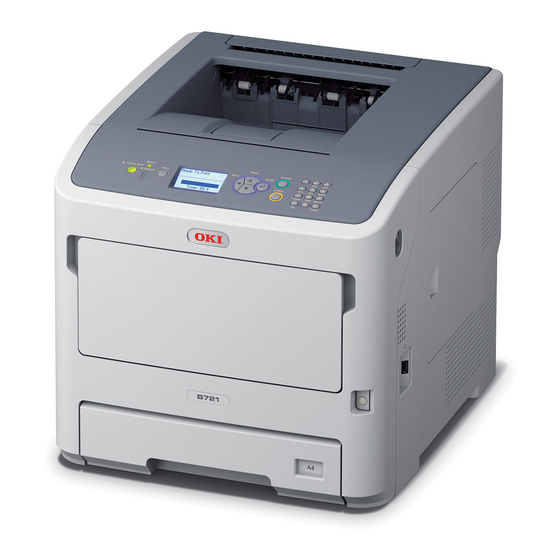
Summary of Contents for Oki B721
-
Page 1: Maintenance Manual
B721 / B731 / MPS5501b Maintenance Manual 070813A ... - Page 2 Copyright Information Copyright © 2013by Oki Data. All Rights Reserved Disclaimer Every effort has been made to ensure that the information in this document is complete, accurate, and up-to- date. The manufacturer assumes no responsibility for the results of errors beyond its control. The manufacturer also cannot guarantee that changes in software and equipment made by other manufacturers and referred to in this guide will not affect the applicability of the information in it.
- Page 3 • Despite that exhaustive efforts were made in preparing the manual to make it accurate, it still may contain errors. Oki Data will not hold itself liable for any damage that results or is claimed to have resulted from repair, adjustment, or modification of the printer conducted by the user using this manual.
-
Page 4: Table Of Contents
CONTENTS Oki Data CONFIDENTIAL CONTENTS 1. Configuration ...............1-1 List of components and accessories ..............2-5 Assembly procedure ..................2-6 System configuration ..................1-2 2.5.1 Assembly of the printer main unit ............2-6 Printer configuration ..................1-3 2.5.2 Connection of the AC cord ..............2-12 Composition of optional items .................1-4 2.5.3... - Page 5 CONTENTS Oki Data CONFIDENTIAL 3.2.18 TR-Assy-Front ...................3-16 4.4.1 Notes on PU/CU board replacement ..........4-36 3.2.19 TR-Assy-Rear ..................3-17 Manual density adjustment setting ..............4-38 3.2.20 Cover-Assy-Stacker ................3-17 Boot Menu List ....................4-39 3.2.21 Eject-Assy ..................3-18 5. Cleaning ................5-1 3.2.22 DC motor (fuser) ................3-20 Cleaning ......................5-2...
- Page 6 CONTENTS Oki Data CONFIDENTIAL 6.5.2.(18) Wiring diagram ..............6-65 6.5.3 Troubleshooting the abnormal images..........6-66 6.5.3.(1) Color has faded-out and blurred entirely. (Refer to Figure 6-2 A.) .............6-67 6.5.3.(2) Stain on white print. (Refer to Figure 6-2 B.) ....6-68 6.5.3.(3) White print (Refer to Figure 6-2 C.) ........6-69 6.5.3.(4) Black banding/black streaking in vertical direction ...6-70...
-
Page 7: Configuration
Oki Data CONFIDENTIAL Configuration System configuration ..............1-2 Printer configuration ..............1-3 Composition of optional items ..........1-4 Specifications ................1-5 Interface specifications .............1-8... -
Page 8: System Configuration
1. Configuration Oki Data CONFIDENTIAL 1.1 System configuration Figure 1-1 represents the system configuration of the printer. solenoid motor clutch TAG PCB(ID) motor clutch 2nd Tray PCB TRAY1 Toner REG1 REG2 STKFL ID2 FAN WLAN HEAD sensor TAG PCB(TC) clutch... -
Page 9: Printer Configuration
1. Configuration Oki Data CONFIDENTIAL 1.2 Printer configuration The internal part of the printer is composed of the following sections: • Electrophotographic processing section • Paper paths • Controller (a combination PU/CU board) • Operator panel • Power supplies (high-voltage power supply/low-voltage power supply) Figure 1-2 represents the configuration of the printer. -
Page 10: Composition Of Optional Items
1. Configuration Oki Data CONFIDENTIAL 1.3 Composition of optional items The following optional items are available for B721/B731/ES7131/MPS5501b: (4) 160 GB hard disk (1) Additional tray unit (tray 2/3/4) (5) LCF (2) Printer Stand (3) Additional RAM (512 MB) 1-4 /... -
Page 11: Specifications
1. Configuration Oki Data CONFIDENTIAL 1.4 Specifications Specification(s) Specification(s) Classifi-cation Item Classifi-cation Item B721 B731/ES7131/MPS5501b B721 B731/ES7131/MPS5501b Dimension Width 435 mm Power Power input 110 - 127 VAC (Range 99 - 140 VAC) consump-tion 220 - 240 VAC (Range 198 - 264 VAC) - Page 12 1. Configuration Oki Data CONFIDENTIAL Specification(s) Specification(s) Classifi-cation Item Classifi-cation Item B721 B731/ES7131/MPS5501b B721 B731/ES7131/MPS5501b Service life Printer life 1,200,000 pages or 5 years Paper size 1st tary Legal 13/13.5/14, letter, executive, statement, A4, A5, B5, custom size, 16K (197 x 273 mm, 195 x 270 mm, Print duty Max.
- Page 13 1. Configuration Oki Data CONFIDENTIAL Specification(s) Specification(s) Classifi-cation Item Classifi-cation Item B721 B731/ES7131/MPS5501b B721 B731/ES7131/MPS5501b Operator Graphic panel with 128 × 64 dots, Emulation Standard PCL5e/PCL XL/PS3 emulation/ panel no display of paper size PDF emulation/XPS/SIDM LED (color) 3 LEDs (green × 2, amber × 1)
-
Page 14: Interface Specifications
1. Configuration Oki Data CONFIDENTIAL 1.5 Interface specifications 1.5.1 USB interface specifications (2) Cables Length: USB 2.0 cables no more than five meters long (two meters or less 1.5.1.1 USB interface overview recommended) (Shielded USB 2.0 cables shall be used.) -
Page 15: Network Interface Specifications
1. Configuration Oki Data CONFIDENTIAL 1.5.2 Network interface specifications 1.5.2.3 Network interface signals (1) 10/100Base-T 1.5.2.1 Network interface overview Basic specifications Pin No. Signal name Direction Function TCP/IP spec. Network layer TXD+ FROM PRINTER Transmission data + ARP , IPv4, IPv6, ICMP , ICMPv6, IPSec... -
Page 16: Usb Host Interface Specifications
1. Configuration Oki Data CONFIDENTIAL 1.5.3 USB host interface specifications 1.5.4 Wireless LAN interface specifications (Wireless Model only) 1.5.3.1 USB host interface overview (1) Basic Specification 1.5.4.1 Wireless LAN interface overview (1) Specification (2) Transmission Mode IEEE802.11 b/g/n (2.4GHz) Hi Speed (480 Mbps ± 0.05 % max.) -
Page 17: Parallel Interface Specifications (Parallel Installed Model Only)
1. Configuration Oki Data CONFIDENTIAL 1.5.5 Parallel interface specifications (Parallel installed Signal Pin No. Signal name Compatible Nibble direction Model only) → PR AUTO FEED nAutoFd HostBusy HostAck 1.5.5.1 Parallel interface overview Logic Gnd CHASSIS Item Details GROUND Chassis Gnd... -
Page 18: Installation
Oki Data CONFIDENTIAL Installation 2.1 Cautions, and do's and don'ts ............2-2 2.2 Unpacking procedure ..............2-3 2.3 Printer installation instructions ............2-4 2.4 List of components and accessories ..........2-5 2.5 Assembly procedure ..............2-6 2.6 Printing of the configuration report ...........2-28 2.7 Connetion methods ..............2-29... -
Page 19: Cautions, And Do's And Don'ts
2. Installation Oki Data CONFIDENTIAL 2.1 Cautions, and do's and don'ts • Do not install the printer in any high-temperature location or a near heat source. • If water or any other liquid enters the inside of the printer, remove the power plug •... -
Page 20: Unpacking Procedure
2. Installation Oki Data CONFIDENTIAL 2.2 Unpacking procedure Personal injuries may occur. Since the printer weights approximately 27 kg, it should be lifted by two or more people. • Remove the four handles from the sides of the box, as illustrated below, and lift the corrugated fiberboard box. -
Page 21: Printer Installation Instructions
2. Installation Oki Data CONFIDENTIAL 2.3 Printer installation instructions Plan view • Install the printer in a location where the following temperature and humidity are met: Ambient temperature: 10 - 32°C Ambient humidity: 20 - 80 % RH (relative humidity) Maximum wet-bulb temperature: 25°C... -
Page 22: List Of Components And Accessories
2. Installation Oki Data CONFIDENTIAL 2.4 List of components and accessories Printer software DVD-ROM • Check to make sure that the components are free from damage, dirt or other AC cable irregularities in their appearance. • Ensure that none of the accessories to the components is missing and that they are Note! No printer cable is supplied with the printer. -
Page 23: Assembly Procedure
2. Installation Oki Data CONFIDENTIAL 2.5 Assembly procedure 2.5.1 Assembly of the printer main unit (3) Insert your finger into the recess on the right side of the printer and pull the front cover open lever to open the front cover forward. - Page 24 2. Installation Oki Data CONFIDENTIAL (6) Open the top cover. (8) Close the top cover. Top cover (9) Close the front cover. (7) Pull out the orange stopper from the fuser unit. Stopper 2-7 / 45487001TH Rev.1...
- Page 25 2. Installation Oki Data CONFIDENTIAL Set the paper into Trays 1/2/3/4. (3) Slide the paper guide and paper stopper to the size of paper to be loaded. Paper stopper Note! This procedure images use tray 1 as an example, but the same procedure applies to trays 2/3/4.
- Page 26 2. Installation Oki Data CONFIDENTIAL (3) Tilt the paper jam release lever of the fuser unit back to the envelope position. Set the paper in MP tray. Possible to get burned. Note! • Do not load paper of different sizes, types, or weights at the same time.
-
Page 27: Setting The Paper
2. Installation Oki Data CONFIDENTIAL (5) Close the front cover. Setting the paper (1) Open the MP Tray forward by inserting your fingers into the front recesses. MP tray (2) Pull out the paper support by holding the center part of it. - Page 28 2. Installation Oki Data CONFIDENTIAL (4) Open the paper set cover. (7) Close the paper set cover. Paper set cover Paper set cover (5) Adjust the manual feeding paper guide to the width of paper to be loaded. Manual feeding paper guide (6) Insert the paper with the print side face up.
-
Page 29: Power Supply Conditions
2. Installation Oki Data CONFIDENTIAL 2.5.2 Connection of the AC cable Turning on the power (1) Plug the AC cable into the AC power socket of your printer. Power supply conditions • Observe the following conditions: Current: 110 - 127 VAC (Range 99 - 140 VAC) 220 - 240 VAC (Range 198 - 264 VAC) Frequency: 50/60 Hz ±... - Page 30 2. Installation Oki Data CONFIDENTIAL Turning off the power When the Printer is Not Used for a Long Time (1) Hold down the power switch for about 1 second. When the printer is not used for a long time due to consecutive holidays or when on vacation, or when changing or attaching parts in repair or maintenance, unplug the AC cable.
-
Page 31: Installation And Recognition Confirmation Of Options
2. Installation Oki Data CONFIDENTIAL 2.5.3 Installation and recognition confirmation of options • Printer and three additional tray units (1) Installation of an Additional Tray Unit An additional tray unit is intended for increasing the amount of paper that can be loaded in the printer, and three additional tray units can be installed to the printer. - Page 32 2. Installation Oki Data CONFIDENTIAL Gently place the printer on the additional trays, inserting the projections of the • Never push down the cassette while it is open. additional tray into the holes on the bottom of the printer. Personal injury may occur.
- Page 33 2. Installation Oki Data CONFIDENTIAL Set the number of trays in the printer driver. Settings for Windows PS printer driver Setting should be made in the printer driver to have the printer recognize every Click [Start] and select [Devices and added tray.
- Page 34 2. Installation Oki Data CONFIDENTIAL Settings for Mac OS X PS printer driver (Mac OS X 10.5 to 10.8) (2) Installation of a printer stand Select [System Preference] from the Apple Menu. Click [Print & Fax]. Select a printer and click [Options &...
- Page 35 2. Installation Oki Data CONFIDENTIAL Put the bottoms of the anti-tip feet (both sides) on the floor, align the sides to the Tighten the anti-tip foot covers (both sides) and anti-tip feet with two screws each. cabinet and tighten them with the two screws each.
- Page 36 2. Installation Oki Data CONFIDENTIAL Put the bottoms of the anti-tip feet on the floor and tighten them with three screws. Attaching a printer stand to the printer Personal injury may occur. Since the printer weights approximately 27 kg, it should be lifted by two or more people.
- Page 37 2. Installation Oki Data CONFIDENTIAL Attaching a printer stand to an additional tray (trays 2/3/4) Turn off your printer, then unplug all the cables from the printer. Turn off the printer by following the steps described under “Turning off the power” in Stack the additional trays one by one on the printer stand then place the printer on them.
- Page 38 2. Installation Oki Data CONFIDENTIAL Lock the two casters on the front side of the additional trays, by pushing down their • Never push down the cassette while it is open. lock levers. Personal injury may occur. • Never push the printer from behind it while the cassette is open.
- Page 39 512 MB RAM. Additional RAM Metal plate Note! • Use only genuine Oki Data products. The performance cannot be guaranteed when other products are used. • The static electricity may cause damage to the parts. Discharge the static electricity in your body by touching grounded metallic parts, etc.
- Page 40 2. Installation Oki Data CONFIDENTIAL Insert the additional RAM into the slot and fix it by pushing it toward the printer. Close the access cover. Note! Be careful of the orientation of the additional RAM. The additional RAM has small dents on its connector, which are to be fitted with a connector of a slot.
- Page 41 2. Installation Oki Data CONFIDENTIAL (4) Installation of a Hard Disk Press the scroll button several times to select [RAM] then press the <ENTER> button. Check that the value of [RAM] has increased. Turn off your printer, then unplug all the cables from the printer.
- Page 42 2. Installation Oki Data CONFIDENTIAL Make sure the LED indicated by the arrow is unlit. If it is lit, wait until it turns off. Insert the right side of the metal plate into the printer, close it, then secure it by tightening the screw.
- Page 43 2. Installation Oki Data CONFIDENTIAL 10. Set up with the operator panel. Press the <ON LINE> button. Press the scroll button on the operator panel. 11. Set up [Hard Disk] in the printer driver. Check that [Configuration] is selected then press the <ENTER> button.
- Page 44 2. Installation Oki Data CONFIDENTIAL Settings for Windows PS printer driver Click [Start] and select [Devices and Printers]. Right-click the [printer name (PS)] icon then select [Printer Properties]. (If you have installed multiple printer drivers, select [Printer Properties] then [printer name (PS)].)
-
Page 45: Printing Of The Configuration Report
2. Installation Oki Data CONFIDENTIAL 2.6 Printing of the configuration report Check that you can print with the printer. Check the detailed settings and status of your printer by printing the contents of the settings (Menu Map). Note! When the printer is in power saving mode, press the <POWER SAVE>... -
Page 46: Connection Methods
2. Installation Oki Data CONFIDENTIAL 2.7 Connection methods 3. Connect the USB cable. <USB connection> (1) Plug one end of the USB cable into the USB interface connection of the printer. Note! Refer to the user’s manual for operating environment. - Page 47 IP address will be automatically obtained on the printer each time it is turned on. If the IP address of this printer is changed, perform the network setting again. With OKI LPR utility, the network setting will be automatically performed if the IP address of this printer is Memo For the setup procedure of the printer driver, see the user’s manual.
- Page 48 2. Installation Oki Data CONFIDENTIAL <Wireless LAN connection> (Wireless Model only) 5. If the access point of the wireless LAN checked in step 1 supports WPS, the printer is automatically connected. Go to “WPS-PBC”. Note! Refer to the user’s manual for operating environment.
- Page 49 2. Installation Oki Data CONFIDENTIAL WPS-PBC (5) Check that [WPS-PBC] is selected and then press the <ENTER> button. (1) Press the scroll button to select [Wireless Setting] and then press the <ENTER> button. (6) Select [Yes] and then press the <ENTER> button.
- Page 50 2. Installation Oki Data CONFIDENTIAL Memo • If [Timeout] is displayed, it is possible that the access point of the WPS-PIN connection destination could not be found within the time limit. Redo from (1) Press the scroll button to select [Wireless Setting] and then press the <ENTER>...
- Page 51 2. Installation Oki Data CONFIDENTIAL (5) Press the scroll button to select [WPS-PIN] and then press the <ENTER> button. (8) [Implementing PIN method…] is displayed on the screen. Note! • Panel operations cannot be performed during WPS execution. (6) Set the 8-character PIN code displayed on the display screen on the access point and start WPS-PIN.
-
Page 52: Configuring Manually
2. Installation Oki Data CONFIDENTIAL Configuring manually (5) Press the scroll button to select [SSID] and then press the <ENTER> button. (1) Check and write down the SSID, encryption scheme, and cryptography key. You can check the SSID, encryption scheme, and cryptography key in the instruction manual for the access point of the Wireless LAN. - Page 53 2. Installation Oki Data CONFIDENTIAL Select the security type checked in step 1. b) Enter the same Key as the WEP Key set for the access point that you want to connect to. Memo After entering the Key, the key is displayed as “*” symbols for security reasons.
- Page 54 2. Installation Oki Data CONFIDENTIAL (11) In the confirmation screen, check the entered SSID and selected security settings. Reconnect to the wireless LAN If there are no problems, press the scroll button to select [Yes] and then press When the wireless is enabled, restart the wireless function. If a problem has the <ENTER>...
- Page 55 2. Installation Oki Data CONFIDENTIAL (4) Select [Yes] and then press the <ENTER> button. (5) When [Yes] is selected in step 4, [Searching for connection] is displayed on the screen. After this, [Connection successful] is displayed, and the wireless LAN can be used on this equipment.
-
Page 56: Checking Of Paper Used By The User
2. Installation Oki Data CONFIDENTIAL 2.8 Checking of paper used by the user Load the media used by the user in the printer, make media weight/media type settings, execute configuration/demo printing, and check the printout to make sure that no toner flakes off. -
Page 57: Component Replacement
Oki Data CONFIDENTIAL Component replacement In this chapter, the procedures for replacement of parts and assemblies and units are described. The replacement procedure is described by removal of the parts. Please install the new parts with following the replacement procedure in reverse order. -
Page 58: Precautions On Component Replacement
3. Component replacement Oki Data CONFIDENTIAL 3.1 Precautions on component replacement (1) Disconnect the AC cable and the interface cable before replacing the parts. (2) Do not disassemble it if the printer works normally. (a) Disconnect the AC cable according to the following procedure. -
Page 59: Maintenance Tool
3. Component replacement Oki Data CONFIDENTIAL [Maintenance tool] The required tools for using the maintenance utility are shown in Table 4-1-2. The required tools for replacing the PCB and the unit are shown in Table 4-1-1. Table 4-1-2 required tools... -
Page 60: Method Of Component Replacement
3. Component replacement Oki Data CONFIDENTIAL 3.2 Method of component replacement (3) Remove the ID unit ① . This section describes the procedure for replacing the parts and assemblies shown in the disassembly diagram. Note! Cover the removed ID unit with paper so that it will not be exposed to light. -
Page 61: Fuser Unit
3. Component replacement Oki Data CONFIDENTIAL 3.2.2 Fuser unit 3.2.3 Cover-Rear-Blind (1) Remove the two screws (silver) ① . (1) Open the front cover and the top cover. (Refer to 3.2.1) (2) Remove the fuser unit ① . (2) Remove the Cover-Rear-Blind ② . -
Page 62: Cover Side-L
3. Component replacement Oki Data CONFIDENTIAL 3.2.4 Cover-Side-L 3.2.5 Cover-Side-R (1) Remove the ID unit. (Refer to 3.2.1) (1) Remove the ID unit. (Refer to 3.2.1) (2) Remove the fuser unit. (Refer to 3.2.2) (2) Remove the fuser unit. (Refer to 3.2.2) (3) Remove the Cover-Rear-Blind. -
Page 63: Pu/Cu-Board
3. Component replacement Oki Data CONFIDENTIAL (4) Disconnect all cables from PU/CU-Board ③ . 3.2.6 PU/CU-Board (5) Remove the four screws (silver) ④ and the screw (silver) ⑤ , and remove the PU/CU-Board ③ . 3.2.6.1 PU/CU-Board (1) Remove the Cover-Rear-Blind. (Refer to 3.2.3) (2) Remove the Cover-Side-R. -
Page 64: How To Remove Battery(Pu/Cu-Board)
3. Component replacement Oki Data CONFIDENTIAL 3.2.6.2 How to remove Battery (PU/CU-Board) (2) How to remove the battery. Insert finger, a needle or a rod in the gap between the battery and the its holder. (1) The position of the battery is shown in the below picture. -
Page 65: Power Supply Unit
3. Component replacement Oki Data CONFIDENTIAL 3.2.7 Power supply unit 3.2.8 DC motor (hop) / DC motor (ID) Warning (1) Remove the Cover-Rear-Blind. (Refer to 3.2.3) Risk of Electric Shock (2) Remove the Cover-Side-R. (Refer to 3.2.5) There is a risk of electric shock during replacement of the low voltage power (3) Remove the Plate-Shield. -
Page 66: Motor Fan (Psu)
3. Component replacement Oki Data CONFIDENTIAL 3.2.9 Motor FAN (PSU) 3.2.10 Motor FAN (ID) / Micro switch (1) Remove the Cover-Rear-Blind. (Refer to 3.2.3) (1) Remove the Cover-Rear-Blind. (Refer to 3.2.3) (2) Remove the Cover-Side-R. (Refer to 3.2.5) (2) Remove the Cover-Side-R. (Refer to 3.2.5) (3) Remove the Plate-Shield. -
Page 67: Hv-Board / Motor-Fan
3. Component replacement Oki Data CONFIDENTIAL 3.2.11 HV-Board / Motor-FAN 3.2.12 LED Assy (1) Remove the Cover-Rear-Blind. (Refer to 3.2.3) (1) Remove the ID unit. (Refer to 3.2.1) (2) While pushing the LED Assy ① in the direction of the arrow (a), unhook the part (2) Remove the Cover-Side-L. -
Page 68: Plate-Assy-Duct
3. Component replacement Oki Data CONFIDENTIAL (7) Remove the retainer-4 ⑥ , and remove the Shaft-Link-Head ⑦ and the two 3.2.13 Plate-Assy-Duct Bearing-Metal ⑧ . ⑧ (1) Remove the Cover-Rear-Blind. (Refer to 3.2.3) (2) Remove the Cover–Side-R. (Refer to 3.2.5) (3) Remove the Plate-Shield. -
Page 69: Frame-Assy-Op-Panel
3. Component replacement Oki Data CONFIDENTIAL 3.2.14 Frame-Assy-OP-Panel 3.2.15 LCD panel (1) Open the front cover. (Refer to 3.2.1) (1) Separate the Frame-Assy-OP-Panel. (Refer to 3.2.14) (2) Remove two screws (black) ① . (2) Remove the five screws (black) ① , and remove the board ② . -
Page 70: Cover-Assy-Front
3. Component replacement Oki Data CONFIDENTIAL 3.2.16 Cover-Assy-Front (1) Remove the Cover-Rear-Blind. (Refer to 3.2.3) (2) Remove the Cover–Side-R. (Refer to 3.2.5) (3) Remove the PU/CU-Board. (Refer to 3.2.6) (4) Remove the power supply unit. (Refer to 3.2.7) (5) Remove the screw (silver) ① , and remove the FG cable of the Cover-Assy-Front ②... -
Page 71: Feeder-Assy-Regist / Clutch
3. Component replacement Oki Data CONFIDENTIAL (10) Remove the two screws (silver/8mm) ⑦ , and remove the Plate-Front ⑧ . 3.2.17 Feeder-Assy-Regist / Clutch (11) Remove the five screws (silver) ⑨ and the two screws (silver) ⑩ , and remove (1) Remove the Cover-Rear-Blind. -
Page 72: Tr-Assy-Front
3. Component replacement Oki Data CONFIDENTIAL (12) Disconnect the cable of the clutch ⑪ from the PU/CU-Board. 3.2.18 TR-Assy-Front (13) Remove the e-ring ⑫ , and remove the clutch ⑪ . (1) Remove the transfer roller. (Refer to 3.2.1) (2) Remove the Cover-Rear-Blind. (Refer to 3.2.3) (3) Remove the Cover–Side-R. -
Page 73: Tr-Assy-Rear
3. Component replacement Oki Data CONFIDENTIAL 3.2.19 TR-Assy-Rear 3.2.20 Cover-Assy-Stacker (1) Remove the Cover-Rear-Blind. (Refer to 3.2.3) (1) Remove the Cover-Rear-Blind. (Refer to 3.2.3) (2) Remove the Cover–Side-R. (Refer to 3.2.5) (2) Remove the Cover-Side-L and the Cover–Side-R. (Refer to 3.2.4 / 3.2.5) (3) Remove the Plate-Assy-Duct. -
Page 74: Eject-Assy
3. Component replacement Oki Data CONFIDENTIAL (6) Open the rear cover, and remove the two screws (silver) ③ . 3.2.21 Eject-Assy (1) Remove the Cover-Rear-Blind. (Refer to 3.2.3) (2) Remove the Cover-Side-L and the Cover–Side-R. (Refer to 3.2.4 / 3.2.5) (3) Remove the PU/CU-Board. - Page 75 3. Component replacement Oki Data CONFIDENTIAL (7) Remove the cable of the Motor FAN ④ from the Eject-Assy ⑤ . (9) Remove the two screws (silver/28mm) ⑥ , and remove the Motro FAN ④ . Note! Be careful to install the Motor-FAN ④ in the proper direction.
-
Page 76: Dc Motor (Fuser)
3. Component replacement Oki Data CONFIDENTIAL 3.2.22 DC motor (fuser) (1) Remove the Cover-Rear-Blind. (Refer to 3.2.3) (2) Remove the Cover–Side-R. (Refer to 3.2.5) (3) Remove the power supply unit. (Refer to 3.2.7) (4) Remove the Cover-Assy-Stacker. (Refer to 3.2.20) (5) Remove the Eject-Assy. -
Page 77: Paper Feed Rollers
3. Component replacement Oki Data CONFIDENTIAL 3.2.23 Paper feed rollers (3) Open the cover while pushing the two tabs (a and b) inward. (1) Remove the cassette. (4) Disengage the two tabs by pushing the both ends of the Frame-Assy-Retard ③... - Page 78 3. Component replacement Oki Data CONFIDENTIAL (3) Remove the Frame-Assy-Retard ③ and the spring ④ . ③ ④ Note! After setting the two paper feed rollers ① and ② , check that they do not come off. 3-22 / 45487001TH Rev.1...
-
Page 79: Paper Feed Rollers (Mp Tray)
3. Component replacement Oki Data CONFIDENTIAL 3.2.24 Paper feed rollers (MP tray) (3) Open the paper set cover. (1) Open the MP tray forward by inserting your fingers into the front reccesses. MP tray Paper set cover (2) Release the tab of the paper feed roller cover by pressing the right arm inward (4) Remove the MPT paper feed roller (with gear) ①... - Page 80 3. Component replacement Oki Data CONFIDENTIAL (5) Remove the MPT paper feed roller (without gear) ② while pushing the tab outward. ② (6) Open the retard roller cover while pushing the center part of the MP tray, and remove the retard roller ③ .
-
Page 81: W-Lan Board (For Wireless Model Only)
3. Component replacement Oki Data CONFIDENTIAL (2) Disconnect the LAN-Cable ① and the USB-Cable ② . 3.2.25 W-LAN Board (for Wireless model only) (3) Remove the Cover ③ and W-LAN Board ④ . (4) Remove the W-LAN Board ④ from Cover ③ . -
Page 82: Centro Board (For Centro Model Only)
3. Component replacement Oki Data CONFIDENTIAL 3.2.26 Centro Board (for Centro model only) (1) Remove the five screws (silver) ① , and remove the Plate-Centro ② .(Refer to 3.2.21) (2) Remove the two screws (silver) ③ , and disconnect the FFC Cable ④ and remove the Centro Board ⑤... -
Page 83: Portions Lubricated
3. Component replacement Oki Data CONFIDENTIAL 3.3 Portions Lubricated Portions lubricated are shown in this section. The other portions must not be lubricated. Lubrication is not required during assembly or disassembly, except that the lubricant specified must be applied to portions from which lubricant was wiped. - Page 84 3. Component replacement Oki Data CONFIDENTIAL Plate-Assy-Side-R Plate-Assy-Base EM-30LP Class A Apply a normal amount of MOLYKOTE (EM-30LP) to the Plate-Assy-Side-R hatched areas. (Spring) Spring-Dup-L Spring-Dup-R EM-30LP Class A Apply a normal amount of MOLYKOTE (EM-30LP) to the hatched areas of Spring-ID-R.
- Page 85 3. Component replacement Oki Data CONFIDENTIAL Cassette-Assy EM-30LP Class B Apply a normal amount of MOLYKOTE (EM-30LP) to the sliding areas by one point. Cassette-Assy EM-30LP Class B Apply a normal amount of Plate-Assy-Receive MOLYKOTE (EM-30LP) to the hatched areas. (Sliding areas) 3-29 / 45487001TH Rev.1...
- Page 86 Oki Data CONFIDENTIAL Maintenance menus The Printer can be adjusted by using Maintenance Utility, or button operation on its operator panel. On the panel, maintenance menus are provided in addition to general menus. Select the menu intended for each adjustment purpose.
-
Page 87: System Maintenance Menu (For Maintenance Personnel)
4. Maintenance menus Oki Data CONFIDENTIAL 4.1 System maintenance menu (For maintenance personnel) This menu is activated when the back and <ENTER> and <ON LINE> buttons are held Value Category Item (1st Line) Functions down for 5 seconds while the printer is ready to print. -
Page 88: Maintenance Utility
4. Maintenance menus Oki Data CONFIDENTIAL 4.2 Maintenance Utility The adjustments described in table 4-2 should be made by using Maintenance Utility. Details Section in Operation from on the utility are as follows: Maintenance operator panel Item Adjustment Utility Operation... - Page 89 4. Maintenance menus Oki Data CONFIDENTIAL Section in Operation from Section in Operation from Maintenance operator panel Maintenance operator panel Item Adjustment Item Adjustment Utility Operation (section in this Utility Operation (section in this manual maintenance manual) manual maintenance manual) 10 Send to file Transmits a specified file.
-
Page 90: User Maintenance Menu Functions
4. Maintenance menus Oki Data CONFIDENTIAL 4.3 User maintenance menu functions 4.3.1 Maintenance menu (for end-users) Item Settings Functions Menus System Auto Continue Sets whether a printer is automatically Some general menu categories on the operator panel of the printer serve as maintenance... - Page 91 4. Maintenance menus Oki Data CONFIDENTIAL Item Settings Functions Item Settings Functions Menus System Timeout Network 0 seconds Time of open of Network port after end of Menus Print Print MPtray, 0.00 mm Adjusts the position of a whole print image...
- Page 92 4. Maintenance menus Oki Data CONFIDENTIAL Item Settings Functions Item Settings Functions Menus Print Darkness Sets print darkness. Admin Setup Network IP Version IP v4 Set up the IP version. Adjust setup IP v4+v6 There is only IPv4 and IPv4+v6 as normal IP v6 value.
- Page 93 4. Maintenance menus Oki Data CONFIDENTIAL Item Settings Functions Item Settings Functions Admin Setup Network Enable Sets Enable/Disable of FTP. Admin Setup Network TCP ACK Type1 Sets a type of TCP Acknowledgment. setup Disable [Conditions for display] setup Type2 When Type1 is set, the printer replies to "Enable"...
- Page 94 4. Maintenance menus Oki Data CONFIDENTIAL Item Settings Functions Item Settings Functions Admin Setup Parallel Offline Enable Sets Enable/Disable of a function that Admin Setup Print Personality Auto Selects a printer language. Setup Receive Disable keeps receive-possible state without Setup changing an I/F signal even though an alarm occurs.
- Page 95 4. Maintenance menus Oki Data CONFIDENTIAL Item Settings Functions Item Settings Functions Admin Setup Print Toner Set the toner save level. Admin Setup Print 3inch Specifies paper width of Custom paper as Setup Save Off: Invalidate toner save. Setup Dimension a default value.
- Page 96 4. Maintenance menus Oki Data CONFIDENTIAL Item Settings Functions Item Settings Functions Admin Setup ASCII Specifies PS communication protocol Admin Setup Font 4.00 point Height of the PCL default font. The value Setup Protocol mode of data from USB. Setup...
- Page 97 4. Maintenance menus Oki Data CONFIDENTIAL Item Settings Functions Item Settings Functions Admin Setup Symbol Win 3.1 Heb Admin Setup Symbol ISO-4 UK Setup Win 3.1 L1 Setup ISO-6 ASC Win 3.1 L2 ISO-10 S/F Win 3.1 L5 ISO-11 Swe...
- Page 98 4. Maintenance menus Oki Data CONFIDENTIAL Item Settings Functions Item Settings Functions Admin Setup CR Function CR Sets performance when CR code is Admin Setup Tray Tray3 Sets the # to specify Tray 3 for the paper Setup CR+LF received in PCL.
- Page 99 4. Maintenance menus Oki Data CONFIDENTIAL Item Settings Functions Item Settings Functions Admin Setup Character 10 CPI Specifies character pitch in IBM PPR Admin Setup Symbol German Pitch 12 CPI emulation. Spanish Setup 17 CPI Setup ISO Dutch 20 CPI...
- Page 100 4. Maintenance menus Oki Data CONFIDENTIAL Item Settings Functions Item Settings Functions Admin Setup Symbol Bulgarian Admin Setup Left 0.0inch Sets the amount to shift the horizontal PC-1004 Margin 0.1inch print start position to the right. Setup Setup Win 3.1 Blt PC-775 1.0inch...
- Page 101 4. Maintenance menus Oki Data CONFIDENTIAL Item Settings Functions Item Settings Functions Admin Setup EPSON Symbol ISO-17 Spa Admin Setup EPSON Symbol Win 3.1 Grk ISO-21 Ger PC-869 Setup ISO-25 Fre Setup PC-855 ISO-57 Chi Greek-437 ISO-60 Nor Greek-437 Cy...
- Page 102 4. Maintenance menus Oki Data CONFIDENTIAL Item Settings Functions Item Settings Functions Admin Setup EPSON Form 11 inch Specifies the length of paper. Admin Setup Time Date yyyy/mm/dd Set the format of date. Length 11.7 inch Setup Format mm/dd/yyyy Setup...
- Page 103 4. Maintenance menus Oki Data CONFIDENTIAL Item Settings Functions Item Settings Functions Admin Power Setup Power Enable Sets Enable/Disable of Power Save Mode. Admin Others Resize PCL nn% nn% Specifies the size of partition. Setup Save Disable Setup Setup Setup...
- Page 104 4. Maintenance menus Oki Data CONFIDENTIAL Item Settings Functions Item Settings Functions Admin Others Security Make Execute Enables the encryption function for data Admin Setup Settings Reset Execute Resets a part of user menu to the factory Setup Setup Setup Secure stored in HDD.
-
Page 105: Self-Diagnostic Mode
4. Maintenance menus Oki Data CONFIDENTIAL 4.3.2 Self-diagnostic mode (1) Menu option display switching Hold down the BACK or ONLINE button or momentarily press the MENU LEVEL0 This section describes LEVEL 0 and LEVEL 1. or MENU button to display the option shown in a shaded area XXXX . - Page 106 4. Maintenance menus Oki Data CONFIDENTIAL (1) Menu option display switching LEVEL1 Use the MENU or MENU button to select the option shown in a shaded area ( XXXXX ), and press ENTER to execute the option. Use ENTER or BACK to display the option shown in a non-shaded area ( XXXXX ), and use the MENU or MENU button to select the option.
-
Page 107: Normal Self-Diagnostic Mode (Level 1)
4. Maintenance menus Oki Data CONFIDENTIAL 4.3.2.2 Normal self-diagnostic mode (Level 1) 4.3.2.2.1 Entering self-diagnostic mode (level 1) Note! Entering the System Maintenance mode of C811/C822/C831dn/C841dn The normal self-diagnostic mode menus are as follows: requires a password. Refer to table 4-1 for description on it. -
Page 108: Switch Scan Test
4. Maintenance menus Oki Data CONFIDENTIAL 4.3.2.3 Switch scan test The switch scan test is used for checking entrance sensors and switches. 1. Enter the self-diagnostic mode (level 1) and, until SWITCH SCAN appears on the upper display, press the MENU... - Page 109 4. Maintenance menus Oki Data CONFIDENTIAL Table 4-3 SWITCH SCAN Detail <Item having no function> Asterisk mark (*) is displayed in the lower row of display area. *1: “N” is displayed when unpopulated the TAG. *2: "Sensor read value" is displayed when LCF is installed. "*" is displayed when LCF is uninstalled.
-
Page 110: Motor And Clutch Test
4. Maintenance menus Oki Data CONFIDENTIAL 4.3.2.4 Motor and clutch test The motor and clutch test is used for testing motors and clutches. 1. Enter the self-diagnostic mode (level 1) and, until MOTOR & CLUTCH TEST appears on the upper display, press the MENU... - Page 111 4. Maintenance menus Oki Data CONFIDENTIAL Table 4-4 Panel display Driven unit Condition ID MOTOR ID MOTOR ID is removed ID Fan1 ID Fan2 POW FAN FUSER MOTOR Fuser Motor REGIST CLUTCH Hopping Motor Regist1 Clutch REGIST2 CLUTCH Hopping Motor...
-
Page 112: Test Print
4. Maintenance menus Oki Data CONFIDENTIAL 4.3.2.5 Test print Display Settings Default Function PRINT Starts printing with the press of the ENTER The test printing is used for printing test patterns stored in the PU. Other patterns are stored EXECUTE button, and ends printing with the press of the in the controller. - Page 113 4. Maintenance menus Oki Data CONFIDENTIAL Notes! PAGE setting: MEDIA SIZE By pressing [0] to [9] on the numerical keypad, a number is inputted in the Category Setting value blinking line. MEDIA CUSTOM SIZE LEGAL13 The input position is shifted with the ONLINE button or CANCEL SIZE LEGAL13.5...
- Page 114 4. Maintenance menus Oki Data CONFIDENTIAL • The displays are switched to the following by pressing the MENU ,MENU DB:k** button when test pattern is printed. P=*** DB: ID number of developping voltages setting table [Unit: HEX] P: Number of test-print pages (Unit: sheets)
-
Page 115: Consumable Counter Display
4. Maintenance menus Oki Data CONFIDENTIAL 4.3.2.6 Consumable counter display The consumable counter display is used for viewing the usage of consumables. 1. Enter the self-diagnostic mode and, until CONSUMABLE STATUS appears, press the MENU or MENU button (the MENU... -
Page 116: Print Counter Display
4. Maintenance menus Oki Data CONFIDENTIAL 4.3.2.7 Print counter display 4.3.2.8 Factory-Shipping mode switching The print counter display is used for viewing print counter values. The Factory-Shipping mode switching is used for switching from the Factory to Shipping mode. 1. Enter the self-diagnostic mode and, until PRINTER STATUS appears, press the MENU or MENU button (the MENU button displays the next test option and 1. -
Page 117: Self-Diagnostic Function Setting
4. Maintenance menus Oki Data CONFIDENTIAL 4.3.2.9 Self-diagnostic function setting Option Set Settings Setting Operation Function The self-diagnostic function setting is used for enabling or disabling the error detection by WR POINT 00H~FFH A correction value. Adds a correction value for the sensors. -
Page 118: Led Head Serial Number Display
4. Maintenance menus Oki Data CONFIDENTIAL 4.3.2.10 LED head serial number display 4.3.2.11 Contrast adjustment The LED head serial number display is used for viewing whether downloaded data about This contrast adjustment is used for the adjustment of the panel contrast. -
Page 119: Buzzer Test
4.3.2.12 BUZZER TEST 4.3.3 Printing on stand-alone basis The BUZZER TEST function is used for the buzzer test. B721/B731/ES7131/MPS5501b can perform the following printing on a stand-alone-basis. Configuration Prints information, including printer menu settings, program 1. Enter the self-diagnostic mode (Level 1) and, until the following message versions and control block configuration. -
Page 120: Functions Of Buttons When/After Power-On
4. Maintenance menus Oki Data CONFIDENTIAL 4.3.4 Functions of buttons when/after power-on After the printer is turned on, buttons on the operator panel of B721/B731/ES7131/ MPS5501b function are described below. (1) BACK, ENTER and ONLINE buttons for 5 seconds Start the System Maintenance menu. -
Page 121: Setup After Part Replacement
4. Maintenance menus Oki Data CONFIDENTIAL 4.4 Setup after part replacement Note! When taking out or writing information from/into EEPROM by using The following describes the adjustments necessary after part replacement: Maintenance Utility, use the procedure shown below to place the printer to the... - Page 122 4. Maintenance menus Oki Data CONFIDENTIAL (2) Serial number information setting (applicable Maintenance Utility operation (3) Switching to Shipping mode (applicable Maintenance Utility operation manual, manual, section 2.4.1.1.10.3) section 2.4.1.1.10.4) A SAP serial number is assigned to the printer. The number is placed at the top...
-
Page 123: Manual Density Adjustment Setting
4. Maintenance menus Oki Data CONFIDENTIAL 4.5 Manual density adjustment setting C811/C822/C831/C841 is shipped with the auto density adjustment mode enabled. When the mode is disabled by a user, the printer may print density out of adjustment while being used. -
Page 124: Boot Menu List
4. Maintenance menus Oki Data CONFIDENTIAL 4.6 Boot Menu List To display Boot Menu, turn on the printer while holding down the [ENTER] button. Category Item Settings Function Memo Displaying Boot Menu requires entry of a password. The password defaults to... - Page 125 4. Maintenance menus Oki Data CONFIDENTIAL Category Item Settings Function Menu Set On/Off of Menu Lockout function Lockout On: Menus exept for "Print Secure Job" become invisible. Off: This function doesn't work. Panel Mode1 Set On/Off of Menu Lockout function.
-
Page 126: Cleaning
Oki Data CONFIDENTIAL Cleaning 5.1 Cleaning ..................5-2 5.2 LED lens array cleaning ..............5-3 5.3 Paper feed rollers cleaning ............5-6... - Page 127 5. Cleaning Oki Data CONFIDENTIAL 5.1 Cleaning The inside and outside of the printer must be cleaned with a dry cleaning cloth and a handy vacuum cleaner when necessary. Note! Do not directly touch the image drum terminals, LED lens array and the LED head connectors.
-
Page 128: Led Lens Array Cleaning
5. Cleaning Oki Data CONFIDENTIAL 5.2 LED lens array cleaning LED head cleaning The LED lens array must be cleaned when a vertical white belt or line (void or light print) occurs on the printed side. When a white line or blurred text is printed, perform the following steps shown below. - Page 129 5. Cleaning Oki Data CONFIDENTIAL (3) Open the top cover. (5) Cover the removed ID unit with paper so that it will not be exposed to light. Possible to get burned. Do not touch the fuser unit. It is hot.
- Page 130 5. Cleaning Oki Data CONFIDENTIAL (7) Set ID unit in the printer. (9) Close the front cover. Note! The front cover cannot be closed if the top cover is not closed securely. (8) Close the top cover. 5-5 / 45487001TH Rev.1...
-
Page 131: Paper Feed Roller Cleaning
5. Cleaning Oki Data CONFIDENTIAL 5.3 Paper feed roller cleaning If paper jams occur frequently, clean the paper feed rollers. (3) Wipe the retard roller on the tray with a wet cloth that has been wrung out well. (4) Return the paper tray to the printer. - Page 132 5. Cleaning Oki Data CONFIDENTIAL For MP Tray (3) Open the paper set cover. (1) Open the MP Tray forward by inserting your fingers into the front recesses. MP tray Paper set cover (2) Release the tab of the paper feed roller cover by pressing the right arm inward (4) Wipe the two paper feed rollers with a wet cloth that has been wrung out well.
- Page 133 5. Cleaning Oki Data CONFIDENTIAL (5) Open the retard roller cover forward while pressing the center part of the MP (7) Lower the paper set cover. Tray. Wipe the retard roller with a wet cloth that has been wrung out well.
-
Page 134: Troubleshooting Procedure
Oki Data CONFIDENTIAL Troubleshooting procedure Important notes to start the repair work ........6-2 Matters to be checked before taking corrective actions against abnormalities ..............6-2 Precautions when taking corrective actions against abnormalities ..............6-2 Preparation for troubleshooting ..........6-2 Troubleshooting methods ............6-3 Paper cassette switches and paper size correlation table ..6-84... -
Page 135: Important Notes To Start The Repair Work
6. Troubleshooting procedure Oki Data CONFIDENTIAL 6.1 Important notes to start the repair work (1) Read the basic check/inspection points described in User’s Manual. (2) Get information from customers in detail as much as possible about problem occurrence conditions. (3) Carry out checking under the conditions that are similar to those at occurrence of the problem. -
Page 136: Troubleshooting Methods
6. Troubleshooting procedure Oki Data CONFIDENTIAL 6.5 Troubleshooting methods 6.5.1 LCD message list When a trouble occurs with this printer, perform troubleshooting by following the steps described below. Initializing ATTEN- READY Trouble occurs Panel display Beep Details TION indicator indicator Initializing –... - Page 137 6. Troubleshooting procedure Oki Data CONFIDENTIAL Normal ATTEN- READY Panel display Beep Details TION indicator ATTEN- indicator LCD Status Message READY Beep Details TION indicator Checking Sectors – Displays that a sector of HDD is being represents a blank line.)
- Page 138 6. Troubleshooting procedure Oki Data CONFIDENTIAL ATTEN- ATTEN- LCD Status Message LCD Status Message READY READY Beep Details Beep Details TION TION indicator indicator represents a blank line.) represents a blank line.) indicator indicator Varies Varies – Copy printing. kkk: The number of pages Varies Varies –...
- Page 139 6. Troubleshooting procedure Oki Data CONFIDENTIAL Warning ATTEN- LCD Status Message READY Beep Details TION indicator represents a blank line.) ATTEN- indicator Remedial LCD Status Message READY Beep Details TION indicator measure Varies Varies – Indicates that the new consumable (toner).
- Page 140 6. Troubleshooting procedure Oki Data CONFIDENTIAL ATTEN- ATTEN- Remedial Remedial LCD Status Message LCD Status Message READY READY Beep Details Beep Details TION TION indicator measure indicator measure represents a blank line.) represents a blank line.) indicator indicator Varies On –...
- Page 141 6. Troubleshooting procedure Oki Data CONFIDENTIAL ATTEN- ATTEN- Remedial Remedial LCD Status Message LCD Status Message READY READY Beep Details Beep Details TION TION indicator measure indicator measure represents a blank line.) represents a blank line.) indicator indicator Varies On –...
- Page 142 6. Troubleshooting procedure Oki Data CONFIDENTIAL ATTEN- ATTEN- Remedial Remedial LCD Status Message LCD Status Message READY READY Beep Details Beep Details TION TION indicator measure indicator measure represents a blank line.) represents a blank line.) indicator indicator Varies On –...
- Page 143 6. Troubleshooting procedure Oki Data CONFIDENTIAL ATTEN- ATTEN- Remedial Remedial LCD Status Message LCD Status Message READY READY Beep Details Beep Details TION TION indicator measure indicator measure represents a blank line.) represents a blank line.) indicator indicator Varies Varies –...
- Page 144 6. Troubleshooting procedure Oki Data CONFIDENTIAL ATTEN- ATTEN- Remedial Remedial LCD Status Message LCD Status Message READY READY Beep Details Beep Details TION TION indicator measure indicator measure represents a blank line.) represents a blank line.) indicator indicator Varies On –...
-
Page 145: Operator Alarm
6. Troubleshooting procedure Oki Data CONFIDENTIAL When the printer detects an unrecoverable error, the following service call error is displayed ATTEN- Remedial LCD Status Message READY Beep Details on the LCD. TION indicator measure represents a blank line.) indicator Service call Varies Varies –... - Page 146 6. Troubleshooting procedure Oki Data CONFIDENTIAL ATTEN- ATTEN- LCD Status Error LCD Status Error READY READY Beep Details Beep Details TION TION indicator indicator Message code Message code indicator indicator Change Paper in Blink The media type in the tray and the...
- Page 147 6. Troubleshooting procedure Oki Data CONFIDENTIAL ATTEN- ATTEN- LCD Status Error LCD Status Error READY READY Beep Details Beep Details TION TION indicator indicator Message code Message code indicator indicator Change Paper in Blink The size of paper or media type in the...
- Page 148 6. Troubleshooting procedure Oki Data CONFIDENTIAL ATTEN- ATTEN- LCD Status Error LCD Status Error READY READY Beep Details Beep Details TION TION indicator indicator Message code Message code indicator indicator This wireless Blink The major version is not the same...
- Page 149 6. Troubleshooting procedure Oki Data CONFIDENTIAL ATTEN- ATTEN- LCD Status Error LCD Status Error READY READY Beep Details Beep Details TION TION indicator indicator Message code Message code indicator indicator Install Paper Blink Printing request is issued to an empty...
- Page 150 6. Troubleshooting procedure Oki Data CONFIDENTIAL ATTEN- ATTEN- LCD Status Error LCD Status Error READY READY Beep Details Beep Details TION TION indicator indicator Message code Message code indicator indicator Install New Print – – – This should be appeared after the print –...
- Page 151 The image drum unit is not proper to Error Non Genuine Blink The image drum unit can not be Error Drum the distribution channel (OKI channel Image Drum recognized (Unauthorized third party). mismatch). Error 687 : Black Error 693 : Black Please see HELP...
- Page 152 6. Troubleshooting procedure Oki Data CONFIDENTIAL ATTEN- ATTEN- LCD Status Error LCD Status Error READY READY Beep Details Beep Details TION TION indicator indicator Message code Message code indicator indicator Non Genuine Print Blink The Print Cartridge(image drum unit) Error...
- Page 153 6. Troubleshooting procedure Oki Data CONFIDENTIAL ATTEN- ATTEN- LCD Status Error LCD Status Error READY READY Beep Details Beep Details TION TION indicator indicator Message code Message code indicator indicator Check Paper Blink Warns that inappropriate long paper Error Open Cassette...
- Page 154 6. Troubleshooting procedure Oki Data CONFIDENTIAL ATTEN- ATTEN- LCD Status Error LCD Status Error READY READY Beep Details Beep Details TION TION indicator indicator Message code Message code indicator indicator Open Cover Blink Jam has occurred nearby DUPLEX Error Install New Image Blink Notifies the life of the drum absolutely.
- Page 155 6. Troubleshooting procedure Oki Data CONFIDENTIAL ATTEN- ATTEN- LCD Status Error LCD Status Error READY READY Beep Details Beep Details TION TION indicator indicator Message code Message code indicator indicator Check Print Blink Shows that the toner cartridge lever Error Wait a Moment –...
-
Page 156: Service Call Error List
6. Troubleshooting procedure Oki Data CONFIDENTIAL Table 6-1-2 Service Call Error List ATTEN- LCD Status Error READY Beep Details TION indicator Message code Panel display Cause Check details Solution Result indicator Service Call Blink A fatal error occurred. Fatal Service Call... - Page 157 6. Troubleshooting procedure Oki Data CONFIDENTIAL Panel display Cause Check details Solution Panel display Cause Check details Solution Result Result Service Call Flash File System Failed access to Flash Run forced Service Call The NIC device had Power Off/On 042: Error, 043:...
- Page 158 6. Troubleshooting procedure Oki Data CONFIDENTIAL Panel display Cause Check details Solution Panel display Cause Check details Solution Result Result Service Call High-voltage power Is cable between PU Connect properly. Service Call Error detected at the Is the FAN connector...
- Page 159 6. Troubleshooting procedure Oki Data CONFIDENTIAL Panel display Cause Check details Solution Panel display Cause Check details Solution Result Result Service Call An abnormality 01, 02: Power Off/On. Service Call ThermistorSlope Is the error message Power Off/On. 166: Error was detected with...
- Page 160 6. Troubleshooting procedure Oki Data CONFIDENTIAL Panel display Cause Check details Result Solution Panel display Cause Check details Solution Result Power Off/On An error was Reinstall the PU/CU After turn power Service Call Tag Interface Error 05, 11: 203: Error, 204: detected of the CU board.
- Page 161 6. Troubleshooting procedure Oki Data CONFIDENTIAL Panel display Cause Check details Result Solution Panel display Cause Check details Solution Result Service Call An unexcepted error Power Off/On. Power Off/On An error was Power Off/On. 254: Error occurred during Does error reoccur?
- Page 162 6. Troubleshooting procedure Oki Data CONFIDENTIAL Panel display Cause Check details Solution Panel display Cause Check details Solution Result Result Power Off/On PU CPU ran away Power Off/On. Power off/on An error was After turn power 943: Error out of control due to...
-
Page 163: Preparation For Troubleshooting
6. Troubleshooting procedure Oki Data CONFIDENTIAL 6.5.2 Preparation for troubleshooting (8-3) Two-sided printing jam occurs during transporting paper inside the Duplex unit..................6-57 (1) LCD display error ...................6-31 (8-4) Paper is not supplied from the Duplex unit to the regist roller..6-57 (1-1) LCD does not display anything. -
Page 164: 1) Lcd Display Error
6. Troubleshooting procedure Oki Data CONFIDENTIAL 6.5.2 (1) LCD display error Actions to be taken Check item Check work at NG Memo For the numbers from after the name of the respective connectors, (1-1-3) Check the peripherals of the power supplies refer to section 6.5.2 (18) “Wiring diagram”. -
Page 165: 2) Abnormal Operations Of The Printer After The Power Is Turned On
6. Troubleshooting procedure Oki Data CONFIDENTIAL (1-2) Error message related to the control panel 6.5.2.(2) Abnormal operations of the printer after the power is turned on Actions to be taken (2-1) Any operation does not start at all. Check item... -
Page 166: Abnormal Sound Is Heard
6. Troubleshooting procedure Oki Data CONFIDENTIAL Actions to be taken Actions to be taken Check item Check work Check item Check work at NG at NG (2-1-3) Check the system connection (2-2-3) Check the jumping phenomena of gear tooth. (Abnormal load of the consumable... -
Page 167: Bad Odors Are Generated
6. Troubleshooting procedure Oki Data CONFIDENTIAL (2-3) Bad odors are generated. Actions to be taken Check item Check work at NG (2-3-1) Locating the exact position of generating bad odor Fuser unit Remove the fuser unit and check the odor. - Page 168 6. Troubleshooting procedure Oki Data CONFIDENTIAL (3) Error code numbers and locations of paper jams Message on the display screen Error code(s) Reference page When paper jams occur or paper remains in the printer, “Paper Jam”, or “Paper Remain” is Open Cassette displayed on the operation panel.
- Page 169 6. Troubleshooting procedure Oki Data CONFIDENTIAL Outline drawing of jam locations (382:Exit) (370:Duplex Reversal) J5(380:FEED) J12(400:PAPER SIZE ERROR) (390:MISS FEED AT EXIT sensor (381:TRANSPORT) FRONTFEEDER) WR2 sensor DUP-IN sensor IN2 sensor (372:Missfeed (383:Duplex Entry) DUP-F sensor IN1 sensor at Duplex)
- Page 170 6. Troubleshooting procedure Oki Data CONFIDENTIAL (3) Place the paper tray back into the printer. 391, 392, 393, 394 634, 632, 633, 634 Open Cassette Open Cassette Paper Jam Paper Remain %Tray% %Tray% Remedy when the above messages are displayed Tray1 is applied here as an example.
- Page 171 6. Troubleshooting procedure Oki Data CONFIDENTIAL If you cannot find the jammed paper 1. Open the rear cover by pulling the lock lever on the back side of the printer Open Cover Paper Jam toward you. Front Cover Lock lever...
- Page 172 6. Troubleshooting procedure Oki Data CONFIDENTIAL 5. Pull out the duplex unit by holding the grips on its both sides. 5. Return the duplex unit to the printer. Grip (blue) Grip (blue) (3) Close the front cover. Duplex unit 6. Open the upper cover of the duplex unit and check for jammed paper in the duplex unit.
- Page 173 6. Troubleshooting procedure Oki Data CONFIDENTIAL Open Cover Check Paper Paper Jam Paper Multi Feed Front Cover %Tray% Remedy when the above messages are displayed (1) Insert your finger into the recess on the right side of the printer and pull the front cover open lever to open the front cover forward.
- Page 174 6. Troubleshooting procedure Oki Data CONFIDENTIAL (3) Remove the jammed paper gently. If an edge of jammed paper can be seen Open Cover Open Cover Paper Jam Paper Remain Front Cover Front Cover Remedy when the above messages are displayed (1) If there is any paper on the MP Tray, open the paper set cover and take it out.
- Page 175 6. Troubleshooting procedure Oki Data CONFIDENTIAL (3) Remove ID unit and place it on new paper etc. on a flat surface. Open Cover Open Cover ID unit Paper Jam Paper Remain Top Cover Top Cover Remedy when the above messages are displayed (1) Insert your finger into the recess on the right side of the printer and pull the front cover open lever to open the front cover forward.
- Page 176 6. Troubleshooting procedure Oki Data CONFIDENTIAL (6) Open the registration guide in the direction of the arrow. (9) Pull out the jammed paper gently while tilting the release levers (6) on the fuser unit forward if an edge of jammed paper cannot be seen.
- Page 177 6. Troubleshooting procedure Oki Data CONFIDENTIAL (3) Remove ID unit and place it on new paper etc. on a flat surface. 382, 383, 385 639, 640 Open Cover Open Cover ID unit Paper Jam Paper Remain Top Cover Top Cover...
- Page 178 6. Troubleshooting procedure Oki Data CONFIDENTIAL (6) Hold the fuser unit handle and lift the fuser unit out of the printer. (8) Hold the fuser unit handle and return the fuser unit into its original position. Possible to get burned.
- Page 179 6. Troubleshooting procedure Oki Data CONFIDENTIAL (3) Close the rear cover. 370, 371, 373 641, 642 Check Duplex Unit Check Duplex Unit Paper Jam Paper Remain Remedy when the above messages are displayed (1) Open the rear cover by pulling the lock lever on the back side of the printer toward you.
- Page 180 6. Troubleshooting procedure Oki Data CONFIDENTIAL (5) Pull out the duplex unit by holding the grips on its both sides. (7) Return the duplex unit to the printer. Grip (blue) Grip (blue) (8) Close the front cover. Duplex unit (6) Open the upper cover of the duplex unit and check for jammed paper in the duplex unit.
-
Page 181: Paper Feed Jam (Error 391: 1St Tray)
6. Troubleshooting procedure Oki Data CONFIDENTIAL 6.5.2.(3) Paper feed jam (Error 391: 1st Tray). (3-2) Jam occurs immediately after the paper feed is started. (1st tray) Actions to be taken (3-1) Jam occurs immediately after the power is turned on. (1st tray) -
Page 182: 4) Feed Jam (Error 380)
6. Troubleshooting procedure Oki Data CONFIDENTIAL 6.5.2.(4) Feed jam (Error 380) Actions to be taken Check item Check work at NG (4-1) Jam occurs immediately after the power is turned on. (3-2-4) Check the system connection Actions to be taken... -
Page 183: Jam Occurs Immediately After The Paper Feed Is Started
6. Troubleshooting procedure Oki Data CONFIDENTIAL (4-2) Jam occurs immediately after the paper feed is started. Actions to be taken Check item Check work at NG Actions to be taken Check item Check work (4-2-4) Check the system connection at NG... -
Page 184: Paper Feed Jam (Error 390: Mp Tray)
6. Troubleshooting procedure Oki Data CONFIDENTIAL 6.5.2.(5) Paper feed jam (Error 390: MP Tray) (5-2) Jam occurs immediately after paper feed is started. (Multipurpose tray) Actions to be taken (5-1) Jam occurs immediately after the power is turned on. (Multipurpose tray) -
Page 185: 6) Paper Running Jam (Error 381)
6. Troubleshooting procedure Oki Data CONFIDENTIAL 6.5.2.(6) Paper running jam (Error 381) Actions to be taken Check item Check work at NG (6-1) Jam occurs immediately after the power is turned on. (5-2-4) Check the system connection Actions to be taken... -
Page 186: Jam Occurs Immediately After A Paper Is Taken Into Printer
6. Troubleshooting procedure Oki Data CONFIDENTIAL (6-2) Jam occurs immediately after a paper is taken into printer. Actions to be taken Check item Check work at NG Actions to be taken Check item Check work (6-2-4) Check the system connection... -
Page 187: Jam Occurs In The Middle Of Paper Running Path
6. Troubleshooting procedure Oki Data CONFIDENTIAL (6-3) Jam occurs in the middle of paper running path. (6-4) Jam occurs immediately after paper has reached the fuser. Actions to be taken Actions to be taken Check item Check work Check item... -
Page 188: 7) Paper Unloading Jam (Error 382)
6. Troubleshooting procedure Oki Data CONFIDENTIAL 6.5.2.(7) Paper unloading jam (Error 382) (7-2) Paper unloading jam occurs after a paper is taken into printer. Actions to be taken (7-1) Paper unloading jam occurs immediately after the power is turned on. -
Page 189: 8) Two-Sided Printing Jam (Errors 370, 371, 372, 373 And 383)
6. Troubleshooting procedure Oki Data CONFIDENTIAL 6.5.2.(8) Two-sided printing jam (Errors 370, 371, 372, 373 and 383) Actions to be taken Check item Check work at NG (8-1) Two-sided printing jam occurs immediately after the power is turned on. (7-2-4) -
Page 190: 9) Paper Size Error (Errors 400 And 401)
6. Troubleshooting procedure Oki Data CONFIDENTIAL 6.5.2.(9) Paper size error (Errors 400 and 401) Actions to be taken Check item Check work at NG (9-1) Jam occurs when paper end is located near the IN1 sensor. (8-2-3) Check condition of the paper running path... -
Page 191: 10) Fuser Unit Error (Errors 167 To 177)
6. Troubleshooting procedure Oki Data CONFIDENTIAL 6.5.2.(10) Fuser unit error (Errors 167 to 177) (10-2) Error occurs approx. 1 minute after the power is turned on. Actions to be taken (10-1) Error occurs immediately after the power is turned on. -
Page 192: 11) Motor Fan Error (Errors 122, 127, 128, 918)
6. Troubleshooting procedure Oki Data CONFIDENTIAL 6.5.2.(11) Motor fan error (Errors 122, 127, 128, 918) Actions to be taken Check item Check work at NG (11-1) The low voltage power supply fan does not rotate immediately after the power is (10-2-3) AC power input for the fuse turned on. -
Page 193: 12) Print Speed Is Slow. (Performance Is Low.)
6. Troubleshooting procedure Oki Data CONFIDENTIAL (11-3) All fans of the printer do not rotate. 6.5.2.(13) Option Unit cannot be recognized. Actions to be taken (13-1) Option try unit cannot be recognized. Check item Check work at NG Actions to be taken... -
Page 194: 14) Led Head Cannot Be Recognized.(Errors 134)
6. Troubleshooting procedure Oki Data CONFIDENTIAL 6.5.2.(14) LED head cannot be recognized. (Errors 134) (14-1) Errors 134 (LED HEAD Missing) Actions to be taken Check item Check work at NG (14-1-1) Check the system connection Connecting Check the connecting condition of the FFC by... -
Page 195: 15) Toner Cartridge Cannot Be Recognized.(Errors 543)
6. Troubleshooting procedure Oki Data CONFIDENTIAL 6.5.2.(15) Toner cartridge cannot be recognized. (Errors 543) Note! Toner sensor operation check method using the SWITCH SCAN function of the self-diagnostic mode. (15-1) Error caused by the consumable items. (1) How to check operation of the toner sensor at the printer side. -
Page 196: 16) Fuse Cut Error (Errors 155)
6. Troubleshooting procedure Oki Data CONFIDENTIAL (15-3) Error caused by the defective mechanism 6.5.2.(16) Fuse cut error (Errors 155) Actions to be taken (16-1) Fuse cut error Check item Check work at NG Actions to be taken Check item Check work... -
Page 197: 17) Humidity Sensor Error (Error 123)
6. Troubleshooting procedure Oki Data CONFIDENTIAL 6.5.2.(17) Humidity sensor error (Error 123) Actions to be taken Check item Check work at NG (17-1) Humidity sensor error (17-1-2) Environment condition Actions to be taken Check item Check work Sharp change Is the environment condition changed sharply... -
Page 198: 18) Wiring Diagram
6. Troubleshooting procedure Oki Data CONFIDENTIAL 6.5.2.(18) Wiring diagram To printer main unit To lower tray or upper tray solenoid clutch ID2 FAN TAG PCB(ID) motor clutch HEAD REG1 REG2 clutch clutch Relay Relay STKFL Optoin Tray Boad TRAY1 TRAY1... -
Page 199: Troubleshooting The Abnormal Images
6. Troubleshooting procedure Oki Data CONFIDENTIAL 6.5.3 Troubleshooting the abnormal images (1) Color has faded-out and blurred entirely. (Refer to Figure 6-2 A.) ....6-67 (1-1) Color are faded-out and blurred............6-67 (2) Stain on white print. (Refer to Figure 6-2 B.) ..........6-68 (2-1) Stain on white print (Partial stain).............6-68... -
Page 200: 1) Color Has Faded-Out And Blurred Entirely
6. Troubleshooting procedure Oki Data CONFIDENTIAL 6.5.3.(1) Color has faded-out and blurred entirely. (Refer to Figure 6-2 A.) Actions to be taken Check item Check work at NG (1-1) Color are faded-out and blurred. (1-1-5) ID unit installation condition Actions to be taken... -
Page 201: 2) Stain On White Print. (Refer To Figure 6-2 B.)
6. Troubleshooting procedure Oki Data CONFIDENTIAL 6.5.3.(2) Stain on white print. (Refer to Figure 6-2 B.) Actions to be taken Check item Check work at NG (2-1) Stain on white print (Partial stain) (2-1-2) Fuser unit Actions to be taken... -
Page 202: White Print (Refer To Figure 6-2 C.)
6. Troubleshooting procedure Oki Data CONFIDENTIAL 6.5.3.(3) White print (Refer to Figure 6-2 C.) Actions to be taken Check item Check work at NG (3-1) White print over entire page (3-1-3) High voltage terminal Actions to be taken Check item... -
Page 203: 4) Black Banding/Black Streaking In Vertical Direction
6. Troubleshooting procedure Oki Data CONFIDENTIAL 6.5.3.(4) Black banding/black streaking in vertical direction 6.5.3.(5) Periodic abnormalities (Refer to Figure 6-2 E.) (4-1) Thin vertical line (with color) (Refer to Figure 6-2 D.) (5-1) Periodic abnormality occurs in vertical direction Actions to be taken... -
Page 204: 6) Solid Black Printing
6. Troubleshooting procedure Oki Data CONFIDENTIAL 6.5.3.(6) Solid black printing. (6-1) Solid black printing over the whole page Actions to be taken Check item Check work at NG (6-1-1) High voltage contacting condition CH terminal Check that the terminal coming from the... -
Page 205: Image Quality Issues
6. Troubleshooting procedure Oki Data CONFIDENTIAL 6.5.4 Image Quality Issues symptom Cause Remedy Press the ▼ button and select Some dots in white area After added new toner symptom Cause Remedy When print in the high [menus] > [Print Adjust], and then... -
Page 206: Network Troubleshooting
PC to a printer. address normally. (5) Check the Utilities. Check setting of the Check the setting items of the OKI LPR Set the OKI LPR OKI LPR Utilities. Utilities. Utilities setting items correctly. - Page 207 6. Troubleshooting procedure Oki Data CONFIDENTIAL 6.5.5.1.1 Is the certificate created? 6.5.5.1.2 Is the SSL/TLS setting set to [ON]? Log-on in as the administrator, and select "Admin Setup" "Network Setup" "Security" Log-on in as the administrator, and select "Admin Setup" "Network Setup" "Security"...
- Page 208 6. Troubleshooting procedure Oki Data CONFIDENTIAL 6.5.5.1.3 Check version number of the Web browser Check version number of the Web browser in use. How to check version number. For Internet Explorer Launch the browser and select "HELP" "Version information". Recommended version is Internet Explorer 5.5 and higher.
- Page 209 6. Troubleshooting procedure Oki Data CONFIDENTIAL 6.5.5.1.4 Confirm encryption strength of a printer Solution: Set the encryption strength to "Weak". How to change encryption strength with Telnet Version display of the browser that is confirmed by section "6.5.5.1.3 Check version number of the Web browser"...
-
Page 210: Print Operation Is Not Possible
6. Troubleshooting procedure Oki Data CONFIDENTIAL 6.5.5.2 Print operation is not possible 6.5.5.2.1 Check OS (Operating System) The IPP print (encryption) function is supported by Windows 2000, Windows XP , Windows If print operation is not possible by using the encrypted IPP printer, check the followings. -
Page 211: Cannot Create Certificate
6. Troubleshooting procedure Oki Data CONFIDENTIAL 6.5.5.3 Cannot create Certificate 6.5.5.4 Installation of Certificate is not possible When Certificate cannot be created, the following causes are probable. Take an appropriate When installation of Certificate fails, the following causes are probable. - Page 212 6. Troubleshooting procedure Oki Data CONFIDENTIAL 6.5.5.4.2 "Network card is initialized" Press the "General" tab of the displayed Certificate information, and press "Install Certificate" button. If network card is initialized (to default setup) while creation of Certificate of certifying authority is in progress (during the period starting from creation of CSR up until installation of Certificate), the setup information of the Certificate is deleted.
-
Page 213: Other Questions
6. Troubleshooting procedure Oki Data CONFIDENTIAL 6.5.5.5 Other questions 6.5.5.5.6 The error message "The security certificate was issued by a company you have not chosen to trust. View the certificate to determine whether Other probable questionnaires are described below. you want to trust the certifying authority" is displayed. - Page 214 6. Troubleshooting procedure Oki Data CONFIDENTIAL The "Certificate Import Wizard" is displayed. Install Certificate in accordance with 6.5.5.5.7 The error message "Name of security certificate is invalid or does not the displayed procedure. Select "Automatically select the certificate store based on match the site name"...
-
Page 215: Restrictions When Using Internet Explore 7
6. Troubleshooting procedure Oki Data CONFIDENTIAL 6.5.5.6 Restrictions when using Internet Explore 7 Solution : When "Continue browsing this site (not recommended)" is clicked on the warning screen, the web page will be displayed. Several restrictions are imposed when using Internet Explore 7. This is because security However, it has no effect on the web page function. -
Page 216: Wireless Troubleshooting
6. Troubleshooting procedure Oki Data CONFIDENTIAL 6.5.6 Wireless Troubleshooting *1 : Check once again whether the SSID, security setting, and an encrypting key of the wireless LAN access point are same as the settings of this device. When any one of settings is different, the device cannot be connected to the wireless LAN access point. -
Page 217: Paper Cassette Switches And Paper Size Correlation Table
6. Troubleshooting procedure Oki Data CONFIDENTIAL 6.6 Paper cassette switches and paper size correlation table (1) Source tray Switch Part No. 2052000P4000 Model No: HS12-001 Bit Number Switch Indication Size TRAY1 ~ TRAY4 No cassette ~ Legal13" Legal14" Letter Executive... -
Page 218: Connection Diagrams
Oki Data CONFIDENTIAL Connection diagrams 7.1 Resistance value check ..............7-2 7.2 Parts location ................7-5 7.3 F/W version number ..............7-12... -
Page 219: Resistance Value Check
7. Connection diagrams Oki Data CONFIDENTIAL 7.1 Resistance value check Unit Electrical circuit diagram, connection Part outside view Resistance value ID motor Across both ends of IP2: 1Ω or less Fuser unit motor Across both ends of IP2: 1Ω or less 7-2 / 45487001TH Rev.1... - Page 220 7. Connection diagrams Oki Data CONFIDENTIAL Unit Electrical circuit diagram, connection Part outside view Resistance value Feed motor Across both ends of F1: 1Ω or less PHR-6 PHR-6 COLOR OF COLOR OF PIN No. PIN No. LEAD LEAD Between pin-1 and pin-3: 3.2Ω...
- Page 221 7. Connection diagrams Oki Data CONFIDENTIAL Electrical circuit diagram, Unit Part outside view Resistance value connection Upper (Halogen heater) 800W Thermostat Lower (Halogen heater) Upper 400W 09P-RWZV-K4GG-P4 CZHR-05V-S Between pins -A5 and -A4: Approx. 80.58kΩ to 5338kΩ (0 to 93°C) Upper Between pins -A3 and -A2: Approx.
-
Page 222: Parts Location
7. Connection diagrams Oki Data CONFIDENTIAL 7.2 Parts location (1) Print Controll PCB (PU/CU PCB) Componet side BAT1 HEAD0 STKL C265 TAGZA3 R453 C260 R487 OSC10 IC28 C286 C267 C287 C276 BF27 C224 C305 Board-99M C233 C308 C310 C159 RM31... - Page 223 7. Connection diagrams Oki Data CONFIDENTIAL Soldering side R847 R690 R688 R686 R685 R680 IC508 C704 15 1412 10 8 R865 C747 R705 R704 R696 R862 C748 R863 C749 C714 R689 R857 C750 BF527 BF528 C753 IC507 C623 C738 C739...
- Page 224 7. Connection diagrams Oki Data CONFIDENTIAL (2) Second Tray Control PCB Componet side Soldering side 7-7 / 45487001TH Rev.1...
- Page 225 7. Connection diagrams Oki Data CONFIDENTIAL (3) Control panel PCB (PCQ PCB) (4) Environmental sensor PCB (enlargement) Component side Soldering side CN503 CN501 R23 Q3 R522 R528 HSNS C507 R513 Environmental sensor PCB R525 R524 C509 R511 R510 R509 RM505...
- Page 226 7. Connection diagrams Oki Data CONFIDENTIAL (5) Toner sensor PCB (7) Hopping sensor PCB Componet side 44634799 44413799 Soldering side 44634799 C501 (6) Front sensor PCB (8) Switch PCB LED501 SW501 7-9 / 45487001TH Rev.1...
- Page 227 7. Connection diagrams Oki Data CONFIDENTIAL (9) High-Voltage Poser Supply PCB Componet side Soldering side 7-10 / 45487001TH Rev.1...
- Page 228 7. Connection diagrams Oki Data CONFIDENTIAL (10) Low-Voltage Poser Supply PCB Componet side Soldering side 7-11 / 45487001TH Rev.1...
- Page 229 7. Connection diagrams Oki Data CONFIDENTIAL (11) ID TAG PCB 45177599 (12) TC TAG PCB 45177599 7-12 / 45487001TH Rev.1...
-
Page 230: F/W Version Number
7. Connection diagrams Oki Data CONFIDENTIAL 7.3 F/W version number 7.3.1 Maintenance board indication stamp Stamp No. Board 99M(YU) Series No. (Maintenance Board Use for Series No. In accordance with the following list, a specified part number is stamped on the maintenance Series No.)
Need help?
Do you have a question about the B721 and is the answer not in the manual?
Questions and answers