Bayer HealthCare Contour TS User Manual
Hide thumbs
Also See for Contour TS:
- User manual (37 pages) ,
- Quick reference manual (4 pages) ,
- User manual (23 pages)

Related Manuals for Bayer HealthCare Contour TS


Summary of Contents for Bayer HealthCare Contour TS
- Page 1 Blood Glucose Monitoring System User Guide For Use With ™ TS Blood Glucose Meter ONTOUR and C ™ TS Test Strips ONTOUR...
- Page 2 Welcome to Accuracy and Convenience The C TS Meter balances science and simplicity for ease and ONTOUR accuracy you can depend on. We’re proud to be your partner in helping you manage your diabetes. Unlike many meters, the C TS Meter does not require you to enter ONTOUR a numeric code or put in a coding chip;...
-
Page 3: Table Of Contents
Table of Contents Your C TS System ONTOUR TS Meter Display ONTOUR Meter Features System Information Symptoms of High or Low Blood Sugar Important Things to Know Before You Begin Preparing the Lancing Device Inserting the Test Strip Getting the Blood Drop Testing Your Blood Alternative Site Testing Viewing Stored Test Results... -
Page 4: Your Contour Ts System
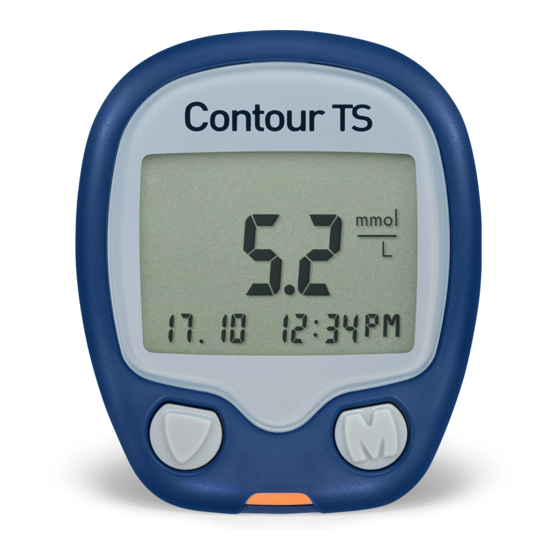
Your C TS Meter: ONTOUR Display Button Button (Scroll) (On/Off, Memory Recall, Enter) Orange Test Strip Port Gray Electrode End: This end (with the gray end facing up) is in- Your C ONTOUR serted into the orange test strip port on the meter. Test Strip: Sample Tip: end of the test strip... -
Page 5: Contour Ts Meter Display
TS Meter Display: ONTOUR A full display, as shown below, indicates that all characters in the display are working properly. You will briefl y see this display each time you turn the meter on. You can see the complete display when the meter is off by pressing and holding the button. -
Page 6: Meter Features
Meter Features Your New C TS Monitoring System is the ONTOUR Perfect Balance of Science and Simplicity ™ The C TS Blood Glucose Monitoring System from ONTOUR Bayer Diabetes Care is designed to make testing your blood glucose levels easier. Essential Features for Testing The C TS System requires No Coding... -
Page 7: System Information
System Information Intended Use TS Test Strips are intended for self-testing by people ONTOUR with diabetes and by healthcare professionals to monitor glu- cose concentrations in whole blood. CAUTION • For in vitro diagnostic use only. External use, do not swallow. - Page 8 Limitations Preservatives: Blood may be collected by healthcare pro- fessionals into test tubes containing heparin. Do not use other anticoagulants or preservatives. Altitude: Up to 3048 meters does not signifi cantly affect results. Lipemic Specimen: Cholesterol concentrations >13.0 mmol/L or triglyceride concentrations >33.9 mmol/L may produce elevated readings.
-
Page 9: Symptoms Of High Or Low Blood Sugar
Symptoms of High or Low Blood Sugar: You can better understand your test results by being aware of the symptoms of high or low blood sugar; this will also help you decide what to do if your results seem unusual. Some of the most common symptoms are: High blood sugar Low blood sugar... -
Page 10: Important Things To Know
Important Things to Know: Your C TS Blood Glucose Meter is specifi c for ONTOUR glucose and has been referenced to plasma/serum values. Methods calibrated to plasma/serum can be 9 to 15% high- er than the results of whole blood glucose assay methods. •... -
Page 11: Before You Begin
Before You Begin: Have all the materials you will need ready before you begin testing. This includes your C TS Meter, the ONTOUR ® ® TS Test Strips, and the Ascensia Lancing ONTOUR ICROLET Device with Ascensia M Lancets. You may also need ICROLET TS Control Solution to run a quality control check. -
Page 12: Preparing The Lancing Device
The following steps (pages 10–14) are shown in the proper order for performing a blood glucose test. Preparing the Lancing Device: Read the Ascensia M Lancing Device insert for ICROLET complete instructions. If your lancing device does not look like the one pictured, follow the instructions that came with your device. -
Page 13: Inserting The Test Strip
Inserting the Test Strip: Remove a test strip from the bottle and fi rmly snap the lid closed. Never store test strips outside the bottle! NOTE: Check the expiration and discard date. Make sure the test strip does not appear torn or damaged. Hold the test strip with the gray end facing up. -
Page 14: Getting The Blood Drop
Getting the Blood Drop: With the gray endcap on your Ascensia M Lancing Device, ICROLET select the puncture depth by rotating the dial on the endcap to a smaller drop for shallower puncture or larger drop for deeper puncture. Adjusting the amount of pressure applied to the punc- ture site will also affect puncture depth. -
Page 15: Testing Your Blood
Testing Your Blood: Hold the meter with the orange test strip port pointing down or toward you. This will ensure your meter is oriented correctly for reading your test result. Immediately touch the tip of the test strip to the drop of blood. The blood is drawn into the test strip through the tip. -
Page 16: Expected Values
Expected Values: Blood glucose values will vary depending on food intake, medication dosages, health, stress or exer- cise. Consult your healthcare professional for the target value that is appropriate for you. Standard medical practice goals for a typical non-pregnant individual with diabetes are: •... -
Page 17: Alternative Site Testing
Alternative Site Testing Blood samples for glucose testing may be taken from sites other than your fi ngertips. Read the instructions with your lanc- ing device. Alternative site testing using blood from the forearm or palm Palm may give glucose results that signifi... -
Page 18: Viewing Stored Test Results
Viewing Stored Test Results: With the meter off, press and release on the meter to view stored test results. The 14 day average will appear on the display with the average of test results taken over the last 14 days. Press to review previous test results. -
Page 19: Testing With A Control Solution
Testing with a Control Solution: Use C TS Control ONTOUR Solutions to practice using the system or to run a qual- ity control test to make sure the meter and the test strips are working properly. Low, Normal and High Control So- lutions are available. - Page 20 Gently rock the control bottle before opening to ensure it is mixed well. Squeeze a small drop of control solution on a clean non- absorbent surface, such as a piece of wax paper. Do not apply control solution to the test strip directly from the bottle.
- Page 21 The meter will automatically rec- ognize and mark ( ) the control result for you. NOTE: does not indi- cate the control test result is within the specifi ed range. Compare your control test result with the Normal Control Range printed on the test strip bottle label or on the bottom of the test strip box.
-
Page 22: Setting The Date, Time And Sound
Setting the Date, Time and Sound: You can set your meter to dis- play different options. To get into setup mode, press and hold for three sec- onds. The complete display will briefl y appear, then go to a display with the time. NOTE: You may turn the meter off at any time during... -
Page 23: Setting The Date
Setting the Date: The date will now appear on the display. The year will be fl ashing. Press to reach the current year. Press to set. The month will now fl ash. Press to reach the current month. Press to set. The day will now fl... - Page 24 Setting the Sound: The fl ashing bell symbol will now appear on the display. This option controls whether you want to hear the “beeps” during testing. Press to choose whether to turn the beeper on or off . Press to set. Setting the 12 or 24 Hour Clock: 24H will now fl...
- Page 25 Setting the Month and Day Format: d.m will now fl ash on the display. Press to choose how you want the date to appear, as month/ day (m/d) or day.month (d.m). Press to set. When you have reached the end of setup, your meter will show you all of the current settings and turn off automatically.
-
Page 26: Error Codes And Symbols
Error Codes and Symbols: WHAT YOU SEE WHAT IT MEANS WHAT YOU SHOULD DO Low Battery. Replace the battery as soon as possible (see page 28). Temperature Move to an area that is within out-of-range. the operating range for the meter: 5°C–45°C. - Page 27 WHAT YOU SEE WHAT IT MEANS WHAT YOU SHOULD DO Test strip not inserted Remove the test strip and insert correctly. it properly (see page 11). Potential software or Remove the test strip and retest hardware issue. using a new test strip. If you continue to have problems, contact Customer Service.
- Page 28 If you do not resolve the problem, contact your WHAT YOU SEE WHAT IT MEANS WHAT YOU SHOULD DO Test result is above • Wash your hands and the test 33.3 mmol/L. site. Repeat the test using a new test strip. •...
- Page 29 local Bayer Diabetes Care Customer Service. WHAT YOU SEE WHAT IT MEANS WHAT YOU SHOULD DO Some display seg- Possible meter Press and hold while the electronics failure. meter is off. Compare meter dis- ments do not appear play with the picture on page 3. when the meter If the display is still not correct, initially turns on.
-
Page 30: Replacing The Battery
Replacing the Battery: The battery should be replaced when the meter continually displays or does not turn on. Your C TS Meter uses one ONTOUR 3-volt lithium battery (DL2032 or CR2032). Press fi rmly on the battery cover and slide in the direction of the arrow. -
Page 31: Caring For The System
WARNING: Keep batteries away from children. Lithium batteries are poisonous. If swallowed, immediately contact your physician or poison control center. Discard batteries according to your local environmental regulations. Caring for the System: • Store meter in the carrying case provided whenever possible. -
Page 32: Transferring Results To A Computer
Transferring Results to a Computer: You can transfer test results from the C TS Meter to ONTOUR a computer, where they can be summarized in a report with graphs and tables. To make use of this feature, you need Bayer Diabetes Care diabetes manage- ment software and a Bayer Data Cable. -
Page 33: Specifi Cations
Specifi cations: Test Sample: Whole blood Test Result: Referenced to plasma/serum glucose Sample Volume: 0.6 µL Measuring Range: 0.6–33.3 mmol/L Measuring Time: 8 seconds Memory Feature: Stores most recent 250 test results Battery Type: One 3-volt (DL2032 or CR2032) lithium battery Battery Life: Approximately 1000 Tests (1 yr. -
Page 34: Symbols Used
Symbols Used: The following symbols are used throughout the product labeling for the C TS Blood Glucose Monitoring System (meter ONTOUR packaging and labeling, test strip packaging and labeling and control solution packaging and labeling). Expiry date (use by last day of month) Batch code Temperature limitations Consult instructions for use... -
Page 35: Service Information
Service Information: If you have a problem and none of the problem solving steps in the user guide help, call your local Bayer Diabetes Care Customer Service. We have trained specialists to help you. Important: Speak to a Bayer Diabetes Care Representative before returning your meter for any reason. -
Page 36: Warranty
Warranty: Manufacturer’s Warranty: Bayer Diabetes Care warrants to the original purchaser that this instrument will be free from defects in materials and workmanship for 5 years from the date of original purchase (except as noted below). During the stated 5-year period, Bayer Diabetes Care shall, at no charge, replace a unit found to be defective with an equivalent or current version of the owner’s model. - Page 37 BAYER DIABETES CARE MAKES NO OTHER EXPRESS WARRANTY FOR THIS PRODUCT. THE OPTION OF REPLACEMENT, DESCRIBED ABOVE, IS BAYER DIABETES CARE’S ONLY OBLIGATION UNDER THIS WARRANTY. IN NO EVENT SHALL BAYER DIABETES CARE BE LIABLE FOR INDIRECT, SPECIAL OR CONSEQUENTIAL DAMAGES, EVEN IF BAYER DIABETES CARE HAS BEEN ADVISED OF THE POSSIBILITY OF SUCH DAMAGES.
-
Page 38: Supplies
Supplies: When calling or writing for supplies be sure to include the number with the name of the replacement part or accessory item. REPLACEMENT PARTS Part Number* Item 40030030 One 3-volt (DL2032 or CR2032) Lithium Battery 99918069 TS User Guide ONTOUR *Part numbers are subject to change without notice. - Page 39 Intermedical d.o.o. MEDINIC d.o.o. Branilaca Sarajeva 20 Daničareva 57 71000 Sarajevo 11000 Beograd Bosna i Hercegovina Srbija Tel: +387 33 202 183 Tel. +381 11 3047744 Fax. +381 11 2837009 Bayer (PTY) Ltd Healthcare Division 27 Wrench Road Islando 1600 South Africa Tel 0 860 102 672 Bayer Consumer Care AG...
Need help?
Do you have a question about the Contour TS and is the answer not in the manual?
Questions and answers