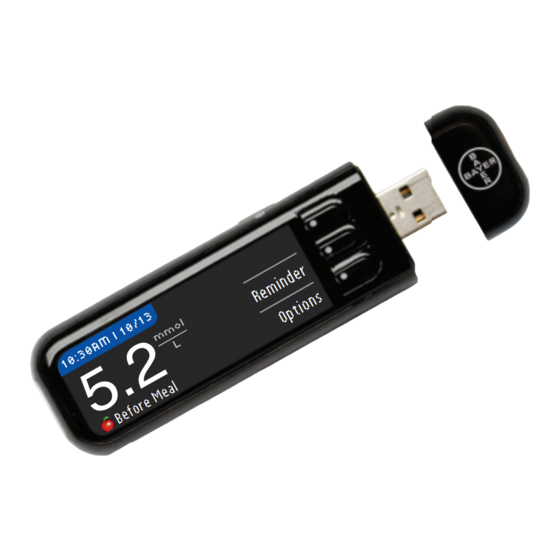
Bayer HealthCare Contour next USB User Manual
Blood glucose monitoring system
Hide thumbs
Also See for Contour next USB:
- User manual (76 pages) ,
- User manual (41 pages) ,
- User manual (47 pages)
Table of Contents
Advertisement
84318354_CntrNext_USB_UG_ENca_FpBp_v2.indd ofc1
84318354_CntrNext_USB_UG_ENca_FpBp_v2.indd ofc1
FC: 18.8 mm BC: 7.5 mm
Footer: 7 mm
1/3rd of the Cross clear
space has been applied.
7mm min.
DATE:
June 27, 2012
Bayer HealthCare
CLIENT:
Contour Next USB mmol User Guide
DESCRIPTION:
English
SCHAWK JOB#:
909036
7414
SKU#:
6.0" (H) x 4.5" (W)
DIMENSIONS:
PUSG0494 REV G
PRINTER SPEC:
FONTS: Helvetica, Helvetica Neue, Zapf Dingbats, Skinny Mini, Mini Micra
COLORS:
Clinical Trial / Global Master Template No: M-GDE-USR-227-R0002
Regional Master Template No: XXXXXXXX
NOTE: THIS COLOR PROOF INDICATES COLOR BREAK ONLY AND MAY NOT ACCURATELY REFLECT ACTUAL PRODUCTION COLOR.
RELEASE: V-2
Uses only Bayer's C
USER GUIDE
18211 NE 68th Street, E120
Redmond, WA 98052
T: 425-881-5454
Cyan
Magenta
INTERNAL: R-X
Blood Glucose
Monitoring System
®
N
blood glucose test strips
ONTOUR
EXT
BAN#:84318354
Contour Next USB mmol User Guide EN
Canada
Alt#1 - 06/26/12 Copy Changes
Alt#2 - 06/27/12 Copy Changes
Yellow
Black
LANGUAGE(S):
® ®
6/27/12 1:22 PM
6/27/12 1:22 PM
June 28, 2012
Rev. 07/12
ENGLISH
Advertisement
Table of Contents

Related Manuals for Bayer HealthCare Contour next USB


Summary of Contents for Bayer HealthCare Contour next USB
- Page 1 June 28, 2012 T: 425-881-5454 DATE: June 27, 2012 BAN#:84318354 Rev. 07/12 Bayer HealthCare CLIENT: Contour Next USB mmol User Guide EN Contour Next USB mmol User Guide Canada DESCRIPTION: English Alt#1 - 06/26/12 Copy Changes SCHAWK JOB#: 909036 Alt#2 - 06/27/12 Copy Changes...
- Page 2 INTENDED USE Bayer’s C ® USB blood glucose monitoring system • If your blood sugar reading is over 13.9 mmol/L, wash and dry ONTOUR (meter, test strips and control solution) is intended for use by persons your hands well and repeat the test with a new strip. If you with diabetes for self-testing, and by health care professionals for get a similar result, call your health care professional as soon use on a single patient.
- Page 3 PRECAUTIONS • Read your C ® USB user guide, the M ® a blood glucose test. The products have been designed to give ONTOUR ICROLET lancing device package insert and all instructional materials accurate results at temperatures between 5ºC and 45ºC. provided in your meter kit before testing.
-
Page 4: Table Of Contents
Table of Contents Rechargeable Battery ® Bayer’s C USB meter has a rechargeable ONTOUR Your Meter and Lancing Device ..........2 battery. You must charge your battery before you can use Meter Overview ..............4 your meter and you cannot do a blood sugar test while the Initial Setup ................6 battery is charging. -
Page 5: Bayer's Contour
® ® Bayer’s C USB Blood Your M 2 Lancing Device ONTOUR ICROLET Glucose Monitoring System Re-setting Handle Protective USB Cap Grip Indent Release Button Top Menu Button Lancet Holder See page 4 Lancet Selection/Scrolling Buttons See page 5 Round Protective Cap Display Screen Endcap Dial Adjustable Endcap... -
Page 6: Meter Overview
Meter Overview Using the Selection/Scrolling Buttons Turning the Meter On or Off • Press and hold the top Menu button to turn the meter L Button on or off. OK Button • Insert a test strip to turn the meter on and remove the test M Button strip to turn the meter off. -
Page 7: Initial Setup
Initial Setup CURRENT DATE & TIME 3. The date and time will Accept appear and you can 10/20/11 Accept or Change. Change 5:57 PM Before use, charge your When you accept the date and time as they appear, you meter. See page 68. are also accepting the date format and time format. - Page 8 High and Low Alerts 2. If you selected Change, press the L or M button to The High and Low Alert feature tells you when your test result is above or below the settings you choose. Alerts select your High Alert level. This can be set between 7.0 - 20.0 mmol/L.
-
Page 9: Getting Ready To Test
Getting Ready to Test Target Ranges The next screen displays the preset blood sugar Target ® Read your C USB user guide, the ranges for Fasting, Before Meal and After Meal blood sugar. ONTOUR ® 2 lancing device insert and all instructional ICROLET materials provided in your meter kit before testing. - Page 10 AutoLog 2. Hold the test strip with the grey end facing toward Your meter comes with an AutoLog feature that lets you the meter. mark your test result as Fasting, Before Meal, After Meal and No Mark. 3. Insert the grey square end firmly into the test strip port Fasting –...
-
Page 11: Preparing The Lancing Device
Preparing the Lancing Device Read the M ® 2 lancing device insert for complete ICROLET 3. Insert the lancet firmly instructions. For Alternative Site Testing instructions, see into the lancing device page 20. until it comes to a full stop. This will re-set the WARNING: Potential Biohazard device. -
Page 12: Getting The Blood Drop For Fingertip Testing
Getting the Blood Drop for Fingertip Testing 1. Press the endcap firmly 4. Immediately touch the against the puncture tip of the test strip to the site and press the blue drop of blood. The blood release button. is pulled into the test strip through the tip. - Page 13 Test Results with AutoLog On Test Results with AutoLog Off Before your test result is displayed, the AutoLog screen appears. Accepted Select Fasting, Before AUTOLOG Meal, After Meal, or Fasting No Mark by pressing Before Meal the OK button when the After applying blood to the test strip when AutoLog is turned After Meal selection is highlighted.
-
Page 14: For Alternative Site Testing (Ast) - Palm
For Alternative Site Testing (AST) - Palm Getting a Blood Drop for Alternative Site Testing 1. Wash your hands and WARNING the puncture site with Ask your health care professional if Alternative Site soap and warm water. Testing is right for you. Rinse and dry well. - Page 15 8. Hold the tip of the test strip in the blood drop until the meter beeps. Do not press the tip against the skin or place the blood on top of the test strip or you could get 5. Maintain steady pressure inaccurate results or errors.
-
Page 16: Test Results
Removing the Used Lancet 1. In one hand, hold the WARNING: Potential Biohazard lancing device with your • The lancing device, lancets, and test strips are for thumb on the grip indent, single patient use. Do not share them with anyone with your other hand, including other family members! Do not use on hold the endcap as... -
Page 17: Cleaning And Disinfection
Cleaning and Disinfection Your C ® USB system should be cleaned For more information see: ONTOUR and disinfected once a week. Use only germicidal wipes FDA Public Health Notification: Use of Fingerstick Devices containing 0.55% sodium hypochlorite (bleach), which has on More than One Person Poses Risk for Transmitting been proven to be safe to use with the C Bloodborne Pathogens: Initial Communication (2010) - Page 18 Disinfecting Your Meter For proper disinfection, you must keep all endcap surfaces wet for 60 seconds. 3. Using a new germicidal wipe, carefully wipe all external and internal surfaces of the endcap until wet. For proper disinfection, you must keep all lancing device Strip Port Buttons surfaces wet for 60 seconds.
- Page 19 High and Low Blood Sugar Alert Screens WARNING Your meter has been preset with a low blood sugar • If your blood sugar reading is under 2.8 mmol/L, (hypoglycemia) value of 3.9 mmol/L and a high blood sugar follow medical advice immediately. (hyperglycemia) value of 13.9 mmol/L.
-
Page 20: Control Solution Testing
Control Solution Testing 6. Squeeze a small drop of control solution on a clean non- Use only Bayer’s C ® control solutions with ONTOUR absorbent surface. Do not apply control solution to your ® ® your C USB meter and C ONTOUR ONTOUR fingertip or to the test strip directly from the bottle. -
Page 21: Setting A Test Reminder After Testing
Setting a Test Reminder After Testing A Reminder for your next test can be set after testing or REMINDER 3. Press the L or M from the Setup menu. A Reminder can be set in 15 minute COUNTDOWN button to select the increments from 15 minutes to 23 hours, 45 minutes. - Page 22 Turning Off a Test Reminder After Testing Getting a Reminder A Reminder can be turned off or changed after testing or When the Reminder time is reached, 20 beeps will sound. from the Setup menu. The meter will turn on and a Reminder screen will appear. HINT: If you do a blood sugar test within 15 minutes of Time for your next when a Reminder is set, the Reminder will turn off.
-
Page 23: Logbook - Adding Carbs, Insulin And Notes Information
Logbook – Adding Carbs, Insulin and 3. You can enter carbs you are eating right now, or anytime today or yesterday. Notes Information CARBS Log Carbs Information If you have just eaten and When did you eat want to use the current You can log carbohydrates (carbs) information after testing carbs? time and date of your... - Page 24 Log Insulin Information after Testing 10:30AM | 10/13 5. The meter will then ask if you want to log 1. Press the Options insulin information. mmol button from your test Reminder CONFIRM results screen and Select the Yes or No Options Before Meal press Log Insulin.
-
Page 25: Adding Notes
Adding Notes You may add Notes to your test result that may help explain 3. Select your insulin type. results. Your notes will be saved in the Logbook. INSULIN 1. From the test result screen, press the Options button. Fast-Acting Select insulin Long-Acting 10:30AM | 10/13... -
Page 26: Log Carbs Information From The Logbook Menu
Log Carbs Information from the Logbook Menu Reviewing the Logbook 1. Press and hold the Menu button until the meter turns on. The Logbook menu contains Log Carbs, Log Insulin and View Logbook. 2. Go to the Main Menu by pressing the Menu button on the To review entries in the Logbook: top of the meter. -
Page 27: Trends (Averages And Summaries)
Trends 2. Press the M button to display the 14 Day Fasting Average. The Trends feature displays your averages and your results as they compare to your targets, over a period of time that If you have marked any test results as Fasting, you will you select. -
Page 28: Setup
Setup Viewing Trends with AutoLog Off 1. Press and hold the Menu button to turn the meter on. You can change options on your meter and personalize it from the Setup menu. The Setup menu displays the current MENU Logbook settings in the meter. - Page 29 Turning Off a Reminder To turn off a reminder, you can use the Setup menu, or do a 4. Once you have selected hours and minutes, press OK. blood sugar test within 15 minutes of the Reminder time. To When you have selected the time for your Reminder, use the Setup menu: select OK.
- Page 30 Setting the Date Setting the Time 1. Press the Menu button to go to the Main Menu. 1. Press and hold the Menu button to turn the meter on. 2. Press the Setup button. 2. Press the Setup button. 3. Press the L or M button to select Date. 3.
- Page 31 Turning AutoLog On/Off Turning the Sound On/Off Your meter comes with AutoLog turned on. We Sound is turned ON when you receive your meter. Some recommend that you keep this feature turned on. error messages and the Reminder bell will override the Sound Off setting.
- Page 32 Changing the Blood Sugar Target Range with Carbs Settings AutoLog On You can set your Carbs Units to Grams, Points, or Choices. When AutoLog is on, your C ® USB meter comes You can also set these the first time you enter carbs ONTOUR information.
- Page 33 Changing Blood Sugar Target Range with AutoLog Off 5. Press the L or M button to select your desired Fasting 1. Press the Menu button to go to the Main Menu. targets. Press OK. 2. Select Setup. TARGET SETUP Fasting: Carbs 3.9-7.2 3.
- Page 34 Setting Trends Range High and Low Alerts The Trends feature displays your averages and your results The High and Low Alerts tell you that your test result is as they compare to your targets, over a period of time that above or below the setting you choose.
-
Page 35: Glucofacts Deluxe
Setting the Language ® Diabetes LUCOFACTS ELUXE 1. Press the Menu button to go to the Main Menu. Management Software 2. Press the Setup button. With G LUCOFACTS ELUXE 3. Press the L or M button to select Language. Press the software, you can view, print, OK button. - Page 36 For Mac Users: ® Features LUCOFACTS ELUXE • Plug your meter into a high-power USB port on your A variety of report styles are available by using the links computer. along the top of your G screen. Highlights LUCOFACTS ELUXE of the reports: •...
-
Page 37: Error Detection Displays
Error Detection Displays Battery Status • An error screen will always have an “E” with a number in Battery Status Displays the lower left hand corner of the display. The battery status will be displayed with a battery symbol on the Apply Blood screen and the Main Menu screen. Used Test Strip It shows how much battery life is left. - Page 38 Rapid Charge If you do not charge the battery, a display will alert If the battery is low when you plug in your meter, it will Rapid you: “Shutting down, Battery is dead.” You must charge Charge for about 1 minute. You can run a blood sugar test as soon as Rapid Charge is complete and you have unplugged immediately.
-
Page 39: Symptoms Of High And Low Blood Sugar
End of Meter Life/Battery Removal Symptoms of High and Low Blood Sugar You can better understand your blood sugar results by being HINT: Carry out this process only when you no longer aware of the symptoms of high or low blood sugar. Some of intend to use the meter. -
Page 40: Technical Information
Technical Information Measuring Range Your meter’s measuring range is 1.1 - 33.3 mmol/L. Principles of the Procedure • If your blood sugar reading is under 1.1 mmol/L, the The C ® USB blood glucose test is based on ONTOUR “Follow Medical Advice Immediately” screen will measurement of electrical current caused by the reaction display and the meter will beep twice. - Page 41 Accuracy Precision The C ® USB blood glucose monitoring A repeatability study was conducted with the ONTOUR system was tested on 100 capillary blood samples using ® USB blood glucose monitoring system using ONTOUR ® test strips. Two replicates were tested with 100 venous whole blood specimens with glucose levels from ONTOUR each of three lots of C...
-
Page 42: Battery Status
Service Information Symbols Used The following symbols are used throughout the product If you have a problem and none of the problem solving labeling for the C ® USB blood glucose ONTOUR messages on the meter help, call Bayer Diabetes Care monitoring system (meter packaging and labeling, and Customer Service at 1-800-268-7200 (available 9 a.m. -
Page 43: System Specifications
System Specifications The C ® USB meter has been tested for radio ONTOUR frequency interference at the frequency range and test levels Test Sample: Capillary and venous whole blood specified by ISO 15197: 2003. To avoid radio frequency Test Result: Referenced to plasma/serum glucose interference, do not use the C USB meter near ONTOUR... -
Page 44: Caring For Your Meter
Caring for Your Meter WARNING: Potential Biohazard ® CAUTION: Avoid exposing meter and test strips to The C USB system is not intended for ONTOUR excessive humidity, heat, cold, dust, or dirt. use on multiple patients. All products or objects which come in contact with human blood, even after cleaning, should be handled as if capable of •... -
Page 45: Warranty
Warranty warranty of the performance of the C ® Manufacturer’s Warranty: Bayer Diabetes Care warrants to ONTOUR meter when used with any test strips other than the original purchaser that this instrument will be free from ® test strips or when the C defects in materials and workmanship for 5 years from the ONTOUR ONTOUR... -
Page 46: Control Solution Testing
Index Service Information ................76 Alert (High and Low Alerts) ..............8 Setup ....................49 Alternative Site Testing (AST) ............20 AutoLog On or Off ..........55 AutoLog (Meal Markers) ..............13 Carbs Settings ..........56 Averages (see Trends) ..............46 Date ..............52 Battery (To Charge) ................ - Page 47 Bayer Inc. ONTOUR LUCOFACTS ICROLET and No Coding logo are registered trademarks of Bayer HealthCare LLC, used under license by Bayer Inc. All other trademarks are the property of their respective owners. ©2012 Bayer. All rights reserved.
Need help?
Do you have a question about the Contour next USB and is the answer not in the manual?
Questions and answers