Bayer HealthCare CONTOUR NEXT User Manual
Hide thumbs
Also See for CONTOUR NEXT:
- User manual (47 pages) ,
- User manual (41 pages) ,
- User manual (47 pages)

Subscribe to Our Youtube Channel
Related Manuals for Bayer HealthCare CONTOUR NEXT


Summary of Contents for Bayer HealthCare CONTOUR NEXT
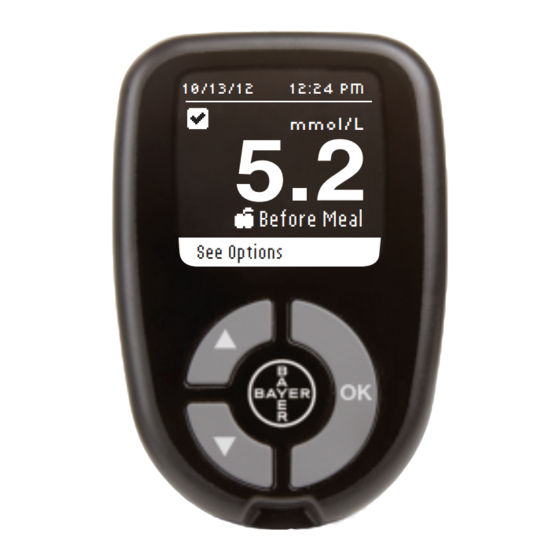
- Page 1 ® ® Blood Glucose Monitoring System 10/13/12 12:24 PM mmol/L Before Meal See Options ® Uses only C blood glucose test strips from Bayer ONTOUR USER GUIDE...
-
Page 2: Intended Use
INTENDED USE ® The C blood glucose monitoring system from Bayer ONTOUR (meter, test strips and control solution) is intended for use by persons with diabetes for self-testing and by health care professionals for use on a single patient. The C system is intended ONTOUR for the quantitative measurement of glucose (from 0.6 mmol/L to... - Page 3 of clinical conditions that may adversely affect the measurement of glucose in peripheral blood. Talk to Your Health Care Professional • Before setting any Target ranges on your meter, • Before changing your medication based on test results, • If your blood sugar reading is under 2.8 mmol/L follow medical advice immediately, •...
- Page 4 PRECAUTIONS • Read your C ® user guide, the lancing device ONTOUR package insert and all instructional materials provided in your meter kit before testing. Please follow all instructions for use and care exactly as described to help avoid inaccurate results. •...
- Page 5 ® • Do not perform a blood glucose test when the C ONTOUR meter is connected to a computer. • Use only approved equipment from the manufacturer or certified body such as UL or TUV. • It is advisable to avoid use of electronic devices in very dry environments, especially if synthetic materials are present.
-
Page 6: Your Meter Features
Your Meter Features ® Easy: The C blood glucose monitoring system is ONTOUR about simplicity. You will notice this the first time you use it. Automatic: The C meter from Bayer is designed with ONTOUR No Coding technology, to automatically code itself every time you insert a test strip. -
Page 7: Table Of Contents
Table of Contents Intended Use, Important Safety Information ......i ® Your C Meter ...........2 ONTOUR Initial Setup ................5 Getting Ready to Test ............6 Getting the Blood Drop – Fingertip Testing ......10 Test Results .................13 Alternative Site Testing (AST) - Palm ........16 Expected Test Result Values ..........26 Control Solution Testing ............27 Test Reminders ..............30... -
Page 8: Your Contour Next Meter
® Your C Meter ONTOUR Up/Down Scroll Buttons Press to scroll up OK Button Press and hold Press and hold to to keep scrolling turn the meter On Press to or Off scroll down Press to accept a Press and hold highlighted selection to keep scrolling Using the Meter Buttons... - Page 9 Date Time 13.10.12 12:24 Test Result mmol/L In Target Before Meal AutoLog Data Port Meal Marker See Options Test Strip Port Listed below are symbols that appear on the C ® ONTOUR meter screen. These symbols will appear in the left side of the screen, as shown here: Language: English...
- Page 10 ® Your C Test Strip ONTOUR Grey Square End Insert this end into the test strip port Sample Tip Blood sample pulled in here ®...
-
Page 11: Initial Setup
Initial Setup 1. Press and hold the OK button until the meter turns on. After a welcome screen, you will see the Select Language screen. LANGUAGE 2. Press the M button if needed to English Français select your desired language. Press the M button to scroll down to see Español Português... -
Page 12: Getting Ready To Test
Getting Ready to Test ® Read your C user guide, the lancing ONTOUR device insert and all instructional materials provided in your meter kit before testing. Please follow all instructions for use and care exactly as described. Examine product for missing, damaged, or broken parts. -
Page 13: Preparing The Lancing Device
Preparing the Lancing Device The lancing device graphics are for illustration purposes only. Your lancing device may look different. Refer to your lancing device insert for detailed instructions on preparing the lancing device. For Alternative Site Testing instructions, see page 16. WARNING: Potential Biohazard The lancing device provided by Bayer is intended for single patient use only. - Page 14 3. Insert the lancet firmly into the lancing device until it comes to a full stop. 4. Twist off the round protective lancet cap. Save it for disposing of the used lancet. 5. Replace the endcap. 6. Rotate the endcap dial to adjust the puncture depth.
-
Page 15: Inserting The Test Strip
Inserting the Test Strip ® 1. Remove a C test strip from strip from ONTOUR the bottle. Tightly close the bottle lid ottle lid immediately after you have removed the emoved the test strip. 2. Hold the test strip with the grey square end facing toward the meter. -
Page 16: Getting The Blood Drop - Fingertip Testing
Getting the Blood Drop – Fingertip Testing 1. Press the lancing device firmly against the puncture site and press the release button. 2. Stroke your hand and finger toward the puncture site to form a drop of blood. Do not squeeze around the puncture site. - Page 17 Apply More Blood Apply More Blood to continue testing. If the first blood drop is not enough, the meter will beep twice and display “Apply More Blood to continue testing.” You have about 30 seconds to apply more blood onto the same strip. (E01) If you do not re-apply enough blood Too Little Blood...
- Page 18 AutoLog Your meter comes with an AutoLog feature that lets you mark your test result as Fasting, Before Meal, After Meal and No Mark. Fasting – The Fasting marker is used when testing blood sugar levels after going without food or drink for at least 8 hours.
-
Page 19: Test Results
Test Results Test Results with AutoLog On • Your C ® meter comes with AutoLog on. ONTOUR You can turn AutoLog off using the Setup menu (see page 45). AUTOLOG After you place blood on the test strip, your test result will not display until you Select Mark make an AutoLog selection. - Page 20 10/13/12 10:20 PM mmol/L After making your selection, your test result appears. Press the OK button to move to See Options. After Meal See Options HINT: The screen above shows a result that is within the Target Range you set for an After Meal result. The screens below show an After Meal result that is Below Target and an After Meal result that is Above Target.
- Page 21 Test Results with AutoLog Off Testing... After applying blood to the test strip when AutoLog is Off, your result will appear. You may see the 5 second countdown screen. 12/05/12 10:20 PM mmol/L Your test result appears. Press the OK button to move to See Options.
-
Page 22: Alternative Site Testing (Ast) - Palm
Alternative Site Testing (AST) - Palm WARNING Ask your health care professional if Alternative Site Testing is right for you. IMPORTANT: For Alternative Site Testing, use the clear endcap on your lancing device provided by Bayer. Your ® meter can be used for fingertip or palm ONTOUR testing. - Page 23 Getting a Blood Drop for Alternative Site Testing 1. Wash your hands and the puncture site with soap and warm water. Rinse and dry well. 2. Attach the clear AST endcap to the lancing device provided by Bayer. Refer to the lancing device insert for detailed instructions.
- Page 24 6. Lift the device straight up and away from the skin without smearing the blood. 7. Test immediately after you have formed a small, round blood drop. Immediately touch the tip of the test strip to the drop of blood. The blood is pulled into the test strip through the tip. Do not test the blood sample from palm if you get: •...
- Page 25 Apply More Blood to continue testing. If the first blood drop is not enough, the meter will beep twice and display “Apply More Blood to continue testing.” You have about 30 seconds to apply more blood onto the same strip. (E01) If you do not re-apply enough blood Too Little Blood...
- Page 26 Ejecting and Disposing of the Used Lancet 1. Do not use your fingers to remove the lancet from the lancing device. Your Bayer device has an automatic lancet ejection feature. 2. Refer to the separate lancing device insert provided by Bayer for instructions on automatic ejection of the lancet.
-
Page 27: Caring For Your Meter
WARNING: Potential Biohazard • The lancing device, lancets and test strips are for single patient use. Do not share them with anyone including other family members! Do not use on multiple patients. • Always dispose of the used test strip and lancet as medical waste. -
Page 28: Cleaning And Disinfection
Cleaning and Disinfection ® Your C system should be cleaned and ONTOUR disinfected once a week. Use only germicidal wipes containing 0.55% sodium hypochlorite (bleach), which has been proven to be safe to use with the C meter ONTOUR and lancing device. Cleaning is the removal of visible dirt and debris, but does not reduce the risk for transmission of infectious diseases. -
Page 29: Cleaning Your Meter
For more information, see: FDA Public Health Notification: Use of Fingerstick Devices on More Than One Person Poses Risk for Transmitting Bloodborne Pathogens: Initial Communication (2010) http://www.fda.gov/MedicalDevices/Safety/ AlertsandNotices/ucm224025.htm Cleaning Your Meter Supplies Needed for Cleaning: • Germicidal wipes containing 0.55% sodium hypochlorite (bleach) •... - Page 30 Disinfecting Your Meter Supplies Needed for Disinfecting: • Germicidal wipes containing 0.55% sodium hypochlorite (bleach) • Paper towels • Timing device 1. Before disinfecting, clean the meter as described in Cleaning Your Meter. For proper disinfection, you must keep all meter surfaces wet for 60 seconds.
- Page 31 1. Before disinfecting, clean the lancing device as described above in Cleaning Your Lancing Device. 2. Remove the endcap and lancet, if present. For proper disinfection, you must keep all endcap surfaces wet for 60 seconds. 3. Using a new germicidal wipe, carefully wipe all external and internal...
-
Page 32: Expected Test Result Values
Expected Test Result Values Blood sugar values will vary depending on food intake, medication dosages, health, stress, or activity. Non diabetic plasma glucose concentrations are normally maintained within a relatively narrow range, roughly 3.9 mmol/L – 6.1 mmol/L in the fasting state. WARNING You should consult with your health care professional for glucose values specific to your needs. -
Page 33: Control Solution Testing
Control Solution Testing ® CAUTION: Use only C control ONTOUR solutions from Bayer (Normal, Low and High) ® with your C blood glucose ONTOUR monitoring system. Using any other control solution or any other combination of control solution and strips can cause inaccurate results. Quality Control •... - Page 34 1. Remove the test strip from the bottle and firmly snap the lid closed. 2. Hold the test strip with the grey square end facing up. 3. Insert the grey square end of the test strip into the test strip port until the meter beeps.
- Page 35 12/05/12 10:20 PM 10. The meter will count down for CONTROL TEST 5 seconds and the control test mmol/L result will display on the meter. It will be automatically marked as a control test and stored in the Logbook. Control test results will Main Menu not be included in your blood sugar averages.
-
Page 36: Test Reminders
Test Reminders A reminder for your next test can be set after testing or from the Setup menu. See page 40 for Setting a Reminder from the Setup Menu. Setting a Reminder After Testing 12/05/12 10:20 PM mmol/L 1. With the test strip still in the meter, press the OK button when See Options is highlighted. - Page 37 Turning Off a Reminder After Testing 1. Press the OK button and if the Countdown is currently on, the screen will show Reminder in. REMINDER 2. To stop the Countdown, select Stop. Reminder in: Press the OK button. 30 mins A screen confirms your choice.
-
Page 38: Getting A Reminder
Reminder in: 2 hrs 30 mins A screen confirms the Reminder Countdown time. OPTIONS When the Reminder feature is on, the clock symbol is in the header area of Main Menu many of the menu screens. Add Note Change Reminder Remove the test strip from the meter. -
Page 39: Logbook
Logbook Reviewing the Logbook The Logbook contains blood sugar test results and notes that you have made to those test results. The Logbook will hold up to 800 results. When the maximum is reached, the oldest test result will be removed as a new test is completed and saved to the Logbook. -
Page 40: Notes
Notes Adding a Note You may add Notes to your test result that may help explain results. Your Notes will be saved in the Logbook. 12/05/12 10:20 PM mmol/L 1. From the test result screen, press the OK button when See Options is highlighted. -
Page 41: Trends (Averages And Summaries)
Trends (Averages and Summaries) The Trends feature displays your average and a summary of your test results as they compare to your targets, over a period of time that you select. The options available are 7, 14, 30 and 90-day averages. Your meter has been preset to 14-day averages. - Page 42 Before Meal Average (14 Day) mmol/L 4. Continue to press the M button to see your 14-day Before Meal Average. Readings: 25 5. Press the M button to see your Before Meal Summary (14 Day) 14-day Before Meal Summary. 3 Above Target This example shows 3 test results 20 In Range Above Target, 20 test results In Range...
- Page 43 Overall 8. Continue to press the M button to see Average (14 Day) your Overall 14-day Average. This mmol/L example includes ALL your results for 14 days and shows an overall average for 58 readings of Readings: 58 6.6 mmol/L. Before Meal Average (14 Day) If it happens that your AVERAGE is...
- Page 44 Viewing Trends with AutoLog Off If you have AutoLog turned off, you will only see trends for your overall Target. 1. Turn on the meter by pressing and holding the OK button. 2. Press the M button to select Trends and then press the OK button.
-
Page 45: Setup
Setup In Setup you can: Turn a Reminder on or off or Set a Reminder, Change the Date, Change the Time, Set Sound on or off, Turn AutoLog on or off, view or set Target ranges, Change the Language, Change the Display Background or Enter the Customer Service Mode. -
Page 46: Setting A Reminder
Setting a Reminder SETUP 1. Press and hold the OK button until Reminder: Off the meter turns on. Date 2. On the Setup Menu, you will see a list Time of options with the Reminder option Sound highlighted. AutoLog SETUP 3. - Page 47 Date 1. Press and hold the OK button until DATE the meter turns on. mm/dd/yy 2. From the Setup Menu, use the M 8/23/12 button to highlight the Date. Press the OK button. Change 3. Change will be highlighted. Press the Go Back OK button.
- Page 48 DATE Change Day: 9/23/12 7. Change day (highlighted) by using the L or M button. Press the OK button. Continue Date set: 9/23/12 8. A screen confirms your date setting. Done will be highlighted. Press the OK button. Done Change Time SETUP 1.
- Page 49 TIME Select Time Format: 1:03 4. Change the time format if needed. Press the OK button. 12-hour clock 24-hour clock TIME Change hour: 5. Change the hour (highlighted) by 2:03 using the L or M button. Press the OK button. Continue TIME Change minutes:...
- Page 50 Time set: 2:05 8. Done will be highlighted. Press the OK button. Done Change Sound Your meter comes with the Sound turned on. Certain error messages and the Reminder bell override any Sound setting. One long beep indicates a confirmation when Sound is On. Two beeps indicates an error or something that needs your attention when Sound is On.
-
Page 51: Autolog
AutoLog Your meter comes with AutoLog turned On. AutoLog Settings SETUP 1. Press and hold the OK button until Time the meter turns on. Sound AutoLog: On 2. From the Setup menu, choose AutoLog and press the OK button. Targets Language AUTOLOG 3. - Page 52 Blood Sugar Target Ranges ® Your C meter comes preset with blood sugar ONTOUR Target ranges for Fasting, Before Meal, and After Meal results. The preset range is 3.9 - 7.2 mmol/L for Fasting and Before Meal, and 3.9 - 10.0 mmol/L for After Meal. These Target ranges are only available when AutoLog is ON.
- Page 53 TARGETS 5. To change the Target, press the M Fasting: button to highlight Change and 3.9 - 7.2 mmol/L press the OK button. Accept Change TARGETS 6. Use the L or M button to change the Fasting: highlighted value. When you see the value you want, press the OK button, –...
- Page 54 TARGETS Before Meal: 10. To change the Target, press the M 3.9 - 7.2 mmol/L button to highlight Change and press the OK button. Accept Change TARGETS 11. Use the L or M button to change the highlighted Before Meal Target Before Meal: value.
- Page 55 14. The After Meal Target range will TARGETS appear (3.9 – 10.0 mmol/L). You can Accept the highlighted Target by After Meal: 3.9 - 10.0 mmol/L pressing the OK button. 15. To change the After Meal Target, Accept press the M button to select Change Change and press the OK button.
- Page 56 Setting Targets When AutoLog is OFF SETUP 1. Press and hold the OK button until Sound the meter turns on. AutoLog 2. From the Setup Menu, select Targets. Targets Press the OK button. Language Display TARGETS Target ranges are your blood sugar 3.
- Page 57 TARGETS Overall: 5. To change the preset Target, use the 3.9 - 10.0 mmol/L M button to highlight Change and press the OK button. Accept Change 6. If you select Change, press the L or M TARGETS button until you see the Target value Overall you want.
- Page 58 Language 12:35 AM 1. Press and hold the OK button until the meter turns on. Logbook Trends Setup SETUP AutoLog 2. From the Setup Menu, scroll down to Targets Language and press the OK button. Language Display Customer Service 3. Press the L or M button to highlight LANGUAGE your choice.
- Page 59 Display Background You can change the Display to show black background with white text, or white background with black text. SETUP 1. Press and hold the OK button until Targets the meter turns on. Language Display 2. From the Setup menu, scroll down to Display and press the OK button.
-
Page 60: Caring For Your Meter
Customer Service (on the Setup Menu) This option is needed only if you are speaking to a Bayer Diabetes Care Helpline representative. It is not for use at any other time. The Helpline representative will give you a code to use to verify certain settings. Caring for Your Meter •... -
Page 61: Transferring Results To A Computer
Transferring Results to a Computer ® You can transfer test results from the C ONTOUR meter to a computer, where they can be summarized in a report with graphs and tables. To make use of ® this feature, you need G diabetes LUCOFACTS ELUXE... -
Page 62: Changing The Batteries
Changing the Batteries Turn off your meter before changing your batteries. Press firmly on the battery cover and slide in the direction of the arrow. HINT: If you put the new batteries in the meter within 5 minutes of taking the old ones out, all your settings and results will be saved. -
Page 63: Error Detection Displays
Error Detection Displays The meter display screen provides information for test result, strip, or system errors. If there is an error the meter will beep 2 times. Follow the on-screen instructions. Press the OK button if needed. If you experience continued errors, contact Bayer Diabetes Care Helpline at 1-800-268-7200. - Page 64 Strip Errors (E02) (E03) (E04) Used Test Strip Strip Upside Down Wrong Strip Remove used strip. Remove strip and Inserted Repeat test with a insert correctly. Remove strip. new strip. Repeat test with strip. ONTOUR A strip error displays if a used strip is inserted, the strip is inserted upside down, or the wrong strip is inserted.
-
Page 65: System Support Information
System Support Information Speak to a Bayer Diabetes Care Helpline Representative at 1-800-268-7200 before returning your meter for any reason. Checklist When speaking with the Bayer Diabetes Care Helpline: ® Have your C ONTOUR ¯ blood glucose meter, ® test strips, ONTOUR ®... -
Page 66: Technical Information
Technical Information Accuracy ® The C blood glucose monitoring system ONTOUR was tested in 100 capillary blood samples using 600 ® test strips. Two replicates were tested ONTOUR with each of 3 lots of C test strips for a ONTOUR ®... - Page 67 User Accuracy A study evaluating glucose values from fingertip capillary blood samples obtained by 221 lay persons showed the following results: 100% within ± 0.83 mmol/L of the medical laboratory values at glucose concentrations below 5.55 mmol/L and 98.9% within ± 15% of the medical laboratory glucose concentrations at or above 5.55 mmol/L.
-
Page 68: Symptoms Of High Or Low Blood Glucose
Symptoms of High or Low Blood Glucose You can better understand your test results by being aware of the symptoms of high or low blood glucose. According to the Canadian Diabetes Association (www.diabetes.ca), some of the most common symptoms are: Low blood glucose High blood glucose (Hypoglycemia):... -
Page 69: Specifications
Specifications Test Sample: Venous or capillary whole blood Test Result: Referenced to plasma/serum glucose Sample Volume: 0.6 μL Measuring Range: 0.6 - 33.3 mmol/L Countdown Time: 5 seconds Memory: Stores most recent 800 test results Battery Type: Two 3-volt lithium batteries (DL2032 or CR2032) Battery Life: Approximately 1000 tests (1 yr. - Page 70 ® Principles of the Procedure: The C blood ONTOUR glucose test is based on measurement of electrical current caused by the reaction of the glucose with the reagents on the electrode of the strip. The blood sample is drawn into the tip of the test strip through capillary action.
- Page 71 Limitations Preservatives: Blood may be collected by health care professionals into test tubes containing heparin. Do not use other anticoagulants or preservatives. Peritoneal Dialysis Solutions: Icodextrin does not interfere ® with C test strips. ONTOUR Interference: Reducing substances occurring in the blood naturally or from therapeutic treatments will not significantly affect results.
-
Page 72: Warranty
ONTOUR manufactured or recommended by Bayer HealthCare. 3. Bayer HealthCare reserves the right to make changes in design of this instrument without obligation to incorporate such changes into previously manufactured instruments. 4. Bayer HealthCare has no knowledge of the performance ®... - Page 73 5. Bayer HealthCare makes no warranty of the performance ® of the C meter or test results when used ONTOUR ® with any control solution other than C ONTOUR control solution. 6. Bayer HealthCare makes no warranty of the performance...
-
Page 74: Index
Index After Meal Marker (AutoLog) ............12 Alternative Site Testing (AST) ............16 AutoLog (Meal Markers) ..............12 Averages (Trends) ................35 Batteries ................... 55 Low Batteries ................55 Replacement ................56 Before Meal Marker (AutoLog) ............12 Care and Maintenance ..............54 Control Solution Testing .............. - Page 75 Target Settings ................46 Time ..................42 Specifications ................... 63 Summaries (Trends) ................35 Symptoms of High or Low Blood Glucose ........62 System Support Information ............59 Target Ranges (Fasting, Before Meal, After Meal) ......46 Target Settings.................. 46 Technical Information ...............
- Page 76 Manufactured for: Bayer HealthCare LLC Subsidiary of Bayer Corporation 430 South Beiger Street Mishawaka, IN 46544 USA Distributed in Canada by: Bayer Inc. 2920 Matheson Blvd East, Mississauga, Ontario L4W 5R6 Canada www.diabetes.bayer.ca Bayer Customer Service is available at: 1-800-268-7200 www.diabetes.bayer.ca...
Need help?
Do you have a question about the CONTOUR NEXT and is the answer not in the manual?
Questions and answers