Bayer HealthCare Contour User Manual
Blood glucose monitoring system
Hide thumbs
Also See for Contour:
- User manual (35 pages) ,
- Quick test manual (2 pages) ,
- Quick reference manual (2 pages)
Table of Contents
Advertisement
Advertisement
Table of Contents

Related Manuals for Bayer HealthCare Contour


Summary of Contents for Bayer HealthCare Contour
- Page 1 BLOOD GLUCOSE MONITORING SYSTEM USER GUIDE...
- Page 2 ® Thank you for choosing the C blood glucose ONTOUR monitoring system! We are proud to be your partner in helping you manage your diabetes. Our goal is to make this the simplest, most accurate meter you will ever use. The C blood glucose monitoring system is ONTOUR...
-
Page 3: Table Of Contents
Table of Contents Your Testing Tools Your Meter Display Your Meter Features Symptoms of High or Low Blood Sugar Important Things to Know Before You Begin Testing Getting Ready to Test Getting the Blood Drop Testing Your Blood Set-up for Basic (L-1) and Advanced (L-2) Modes Setting the Date, Time and Sound Setting Advanced Mode (L-2) Features Using Advanced Mode... -
Page 4: Your Testing Tools
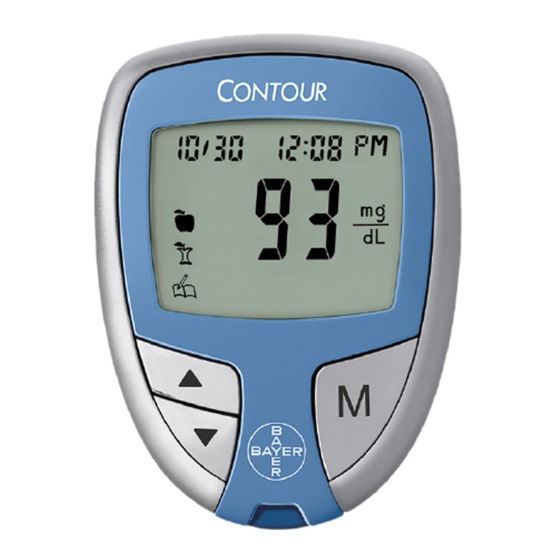
® Your Meter: ONTOUR Display Up/Down Memory Button Scroll Buttons (On/Off, Memory Recall, Enter) Test Strip Port ® Your Test Strip: ONTOUR Gray End Insert this end into the test strip port. Sample Tip Blood sample pulled in here. ® 2 lancing device ICROLET and lancets... -
Page 5: Your Meter Display
Your Meter Display: The picture below shows all the symbols that appear on your meter display. To view, with the meter off, press and hold ▲ or ▼. All dis- play segments will appear for 10 seconds. If you need more than 10 seconds to check the display, press and hold ▲... -
Page 6: Your Meter Features
Your Meter Features: Easy: The C blood glucose monitoring system is ONTOUR about simplicity. You will notice its uncomplicated approach the first time you see it. Simple things like the use of three large buttons and a clear display are sure to make this your favorite meter right from the start. -
Page 7: Symptoms Of High Or Low Blood Sugar
Symptoms of High or Low Blood Sugar: You can better understand your test results by being aware of the symptoms of high or low blood sugar. According to the American Diabetes Association, some of the most common symptoms are: High blood sugar Low blood sugar (Hyperglycemia): (Hypoglycemia):... -
Page 8: Important Things To Know
Important Things to Know: Always keep the test strips in the original bottle. Tightly close the bottle immediately after remov- ing a test strip. The bottle is designed to keep the test strips dry. Exposure to room humidity from leaving the bottle open or not storing them in the original bottle can damage your test strips. -
Page 9: Before You Begin Testing
IMPORTANT NOTE: • Your meter has been preset and locked to display results in mg/dL (milligrams of glucose per deciliter). In some countries, the meters are preset to display units in mmol/L (millimoles of glucose per liter); • Results in mg/dL will never have a decimal point; •... -
Page 10: Getting Ready To Test
The following steps (pages 8–13) are shown in the proper order for performing a blood glucose test. Getting Ready to Test: Your lancing device may not be the one shown here. Please check your lancing device insert for complete instructions on its use. Read the M 2 or the ICROLET Ascensia M... - Page 11 Twist off the round protective lancet cap. Be sure to save it for disposing of the used lancet. Replace the gray endcap prior to getting your blood drop. Remove a test strip from the bottle. Tightly close the bottle lid immediately after you have removed the test strip.
-
Page 12: Getting The Blood Drop
Getting the Blood Drop: The puncture depth Use the depends on the endcap Gray setting and the amount of endcap pressure applied to the puncture site. You will determine which combination works best for you. Shallow Deep Puncture Puncture Press the endcap firmly against the puncture site and press the blue release button with your thumb. -
Page 13: Testing Your Blood
Testing Your Blood: Immediately touch the tip of the test strip to the drop of blood. The blood is pulled into the test strip through the tip. Hold the tip of the test strip in the blood drop until the meter beeps. Do not press the tip against the skin or place the blood on... - Page 14 You can set your meter to use special marker options by using Advanced Mode (L-2). See pages 18–23. Expected Values: Blood glucose values will vary depend- ing on food intake, medication dosages, health, stress, or exercise. Consult your healthcare professional for the target value that is appropriate for you.
- Page 15 Removing the used lancet: In one hand, hold the lancing device with your thumb on the grip indent, with your other hand, hold the gray endcap dial as shown, and gently snap off the endcap. Place the round protective lan- cet cap on a flat surface with the Bayer logo facing down.
-
Page 16: Set-Up For Basic (L-1) And Advanced (L-2) Modes
Set-up for Basic (L-1) and Advanced (L-2) Modes: Your new C meter is pre-set for the Basic Mode ONTOUR and offers the same easy test procedure in either the Basic or Advanced Mode. BASIC MODE (L-1) ADVANCED MODE (L-2) • 7 day HI and LO summary •... -
Page 17: Setting The Date, Time And Sound
Setting the Date, Time and Sound: Your C meter allows you to set the date, time, and ONTOUR sound as you like them. You can view 12 or 24 hour time; • month/day or day.month, and; • choose to have your meter beep or not. •... - Page 18 Setting the Month and Day Format: m/d will now flash on the display. Press ▲ or ▼ to select the format you wish (m/d for month/day format or d.m for day.month format). Press M to set. Setting the Date: The year will be flashing. Press ▲...
- Page 19 Setting the Sound: The flashing bell symbol will now appear on the display along with the word “ ”. This option controls whether you want to hear the beep sound during testing. To turn the beep sound off during testing, press ▲ or ▼ to display “...
-
Page 20: Setting Advanced Mode (L-2) Features
Setting Advanced Mode (L-2) Features: If you selected Advanced Mode (L-2 on your display) you can change your meter’s personal low and high blood glucose settings. By person- alizing these settings, your meter will help you ONTOUR track these HI and LO results. The LO setting will flash (default 72). -
Page 21: Using Advanced Mode
You have now completed your meter set-up for ONTOUR Advanced Mode! Using the Markers: If you have set-up your meter in Advanced Mode, your meter will display three markers after you test your blood. Pre-meal = Marks a test result that was taken before a meal. - Page 22 If you do not want to mark the test result: Remove the used test strip to automatically save the test result in the meter memory with no markers. Dispose of the used test strip and lancet properly. This will also turn the meter off.
- Page 23 Using the Alarm: When the alarm sounds, the meter will automatically turn on. The alarm will beep 20 times, and the display will show the pre-meal test result you marked when you set the alarm. Pressing any button will silence the alarm. You can now run another test by placing a test strip in the test strip port and following the testing instructions (page 8).
- Page 24 To Cancel an Alarm: When the meter is off, press M to turn on the meter. The date and time will appear along with the Press ▲ or ▼ two times and the alarm icon will disappear. Press M to cancel the alarm. After performing a test: TO MARK RESULTS YOU WILL SEE...
- Page 25 YOU WILL SEE WHAT IT MEANS Result is marked as a pre-meal test. You can now set an alarm. Alarm is set to go off in the amount of time you have set (1.0 –2.5 hours) to remind you to run a post-meal test.
-
Page 26: Viewing Stored Results
Viewing Basic Mode Results: Press M to turn your meter on. Press M again to view the memory. The 14 day average will appear in the center of the display with the number of results shown at the top of the display. - Page 27 When appears on the display, you have viewed all of the results in the memory. NOTES: Averages include the specified time period plus the current day. The meter will hold 480 results in the memory. When the maximum is reached, the oldest test result will be removed as a new test is completed and saved to the memory.
- Page 28 Viewing Advanced Mode Results: In Advanced Mode (L-2), you have all of the options described in Basic Mode plus additional items available. Press M to turn your meter on. Briefly press M again to view the 14 day average in- cluding the number of results used to obtain the average.
- Page 29 Press ▲ to view the 7 day average. You will see the average in the center of the display and the number of results along the top. Press ▲ to view the 30 day average. This will display the average in the center and the number of readings along the top.
-
Page 30: Alternative Site Testing (Forearm Or Palm)
Alternative Site Testing (AST): Use AST only when it has been Use the more than two hours after any Clear one of the following: endcap a meal, diabetes medication, or exercise. IMPORTANT: Do not use Alternative Site Testing under the following conditions. Use fingertip testing in any of these cases: •... - Page 31 For palm testing, For forearm it is not necessary to testing only, rub the skin or pump rub the testing the device. area vigorously until it feels warm to increase blood flow. Press the clear endcap firmly against the puncture site and then press the blue release Press the clear...
-
Page 32: Control Solution Testing
Control Solution Testing: Use only Bayer’s C control solutions (Normal, ONTOUR Low, or High) to practice on the system or to run a check to make sure the meter and the test strips are working properly. Using anything other than C ONTOUR control solution could present incorrect results. - Page 33 NOTE: Gently rock the control bottle before opening to ensure it is mixed well. Squeeze a small drop of control solution on a clean nonabsorbent surface (such as a piece of wax paper). Do not apply control solution to the test strip directly from the bottle.
- Page 34 Compare your control test result with the Normal Control Range printed on the test strip bottle label or on the bottom of the test strip box. NOTE: Low and High control range values can be found on the bottom of the test strip box.
-
Page 35: Transferring Results To A Computer
Transferring Results to a Computer: You can transfer test results from the C meter to a ONTOUR computer, where they can be summarized in a report with graphs and tables. To make use of this feature, you need Bayer’s diabetes management software and a data cable from Bayer. -
Page 36: Error Codes And Symbols
Error Codes and Symbols: If you do not resolve the problem, contact Bayer WHAT YOU SEE WHAT IT MEANS WHAT YOU SHOULD DO Dead batteries. Replace the batteries. (will flash for 10 seconds and Call Bayer Diabetes Care Cus- then the meter tomer Service at 1-800-348-8100 will turn off) for the Free Batteries for Life... - Page 37 Diabetes Care Customer Service at 1-800-348-8100. WHAT YOU SEE WHAT IT MEANS WHAT YOU SHOULD DO Incorrect sensor Remove the test strip and retest type. using a new test strip. Make cer- tain that you are using a C ONTOUR test strip from Bayer.
- Page 38 If you do not resolve the problem, contact Bayer Diabetes Care Customer Service at 1-800-348-8100. WHAT YOU SEE WHAT IT MEANS WHAT YOU SHOULD DO Control test result • Test strip or control • Check all expiration dates and is out of range solution is past the discard dates.
-
Page 39: Changing The Batteries
Changing the Batteries: Batteries should be replaced when the meter continually displays or the meter briefly shows and then turns off (See Error Codes and Symbols, page 34). Turn off your meter before changing your batteries. Press firmly on the battery cover and slide in the direction of the arrow. - Page 40 Place new batteries under the prongs and into the battery compartment with the “+” side up. Slide the battery cover back into place, lining up with the open slots, and close firmly. WARNING: Keep batteries away from children. Lithium batteries are poisonous. If swallowed, immediately contact your physician or poison control center.
-
Page 41: Caring For The System
Caring for the System: • Store meter in the carrying case provided whenever possible. • Wash hands and dry them thoroughly before handling to keep the meter and test strips free of oils and other contaminants. • Handle the meter carefully to avoid damaging the electronics or causing other malfunctions. -
Page 42: Technical Information
Technical Information: Accuracy: The accuracy of the C blood glucose monitoring ONTOUR system has been assessed in a correlation study conducted by health- care professionals. In this study, 108 fresh capillary blood specimens were tested with the C blood glucose monitoring system by ONTOUR 108 untrained people with diabetes using three test strip lots. -
Page 43: Specifi Cations
Potential Biohazard Healthcare professionals or persons using this sys- tem on multiple patients should follow the infection control procedure approved by their facility. All prod- ucts or objects which come in contact with human blood, even after cleaning, should be handled as if capable of transmitting viral diseases. -
Page 44: Warranty
5 years from the date of origi- nal purchase (except as noted below). During the stated 5-year period, Bayer HealthCare shall, at no charge, replace a unit found to be defective with an equivalent or current version of the owner’s model. - Page 45 Bayer HealthCare makes no warranty of the performance of the ® meter or test results when used with any control ONTOUR solution other than C control solution. ONTOUR BAYER HEALTHCARE MAKES NO OTHER EXPRESS WAR- RANTY FOR THIS PRODUCT. THE OPTION OF REPLACE- MENT, DESCRIBED ABOVE, IS BAYER HEALTHCARE’S ONLY...
-
Page 46: Service And Supplies
Service Information: If you have a problem and none of the problem solving steps in this user guide help, call Bayer Diabetes Care Customer Service. In the U.S.A., call toll free: 1-800-348-8100 (7 days a week/24 hours a day). We have trained specialists to help you. Important: Speak to a Bayer Diabetes Care Customer Service Representative before returning your meter for any... - Page 47 40453291 Bayer’s USB Data Cable *Part numbers are subject to change without notice. These parts are available in the United States from: Bayer HealthCare LLC Customer Service Department Order Entry P.O. Box 2004 Mishawaka, Indiana 46546 or call 1-800-348-8100 to order REFERENCES American Diabetes Association, www.diabetes.org...
- Page 48 Bayer HealthCare LLC Mishawaka, IN 46544 USA www.bayerdiabetes.com/us Bayer, the Bayer Cross, C ONTOUR ICROLET Clinilog, No Coding and the No Coding logo are trademarks of Bayer. 99C71519 Rev. 2/08...
Need help?
Do you have a question about the Contour and is the answer not in the manual?
Questions and answers