Table of Contents
Advertisement
Quick Links
Download this manual
See also:
User Manual
Advertisement
Table of Contents

Related Manuals for advidia A-200


Summary of Contents for advidia A-200
- Page 1 A-200 Installation Manual A-200 Speed Dome Installation Manual V1.0.2...
- Page 2 A-200 Installation Manual Thank you for purchasing our product. If there is any question or request, please do not hesitate to contact the dealer or tech support at (713) 621-9779 This manual is applicable to A-200. This manual may contain several technically inaccurate points or printing errors, and the content is subject to change without notice.
-
Page 3: Regulatory Information
A-200 Installation Manual Regulatory Information FCC Information FCC compliance: This equipment has been tested and found to comply with the limits for a digital device, pursuant to part 15 of the FCC Rules. These limits are designed to provide reasonable protection against harmful interference when the equipment is operated in a commercial environment. -
Page 4: Safety Instruction
A-200 Installation Manual Safety Instruction These instructions are intended to ensure that user can use the product correctly to avoid danger or property loss. The precaution measure is divided into Warnings and Cautions: Warnings: Neglecting any of the warnings may cause serious injury or death. - Page 5 A-200 Installation Manual Do not aim the camera at the sun or extra bright places. A blooming or smear may occur otherwise (which is not a malfunction however), and affecting the endurance of sensor at the same time. Please use the provided glove when open up the dome cover, avoid direct contact with the dome cover, because the acidic sweat of the fingers may erode the surface coating of the dome cover.
-
Page 6: Table Of Contents
A-200 Installation Manual Table of Contents Chapter 1 Installation............................1 Package Contents ..............................1 Installation and Cabling ............................2 1.2.1 Installing the A-200 ............................2 1.2.2 Connecting the Cables ............................. 5 DIP Switch Settings ............................... 6 1.3.1 DIP Switches ..............................6 1.3.2 Address Settings ............................... -
Page 7: Chapter 1 Installation
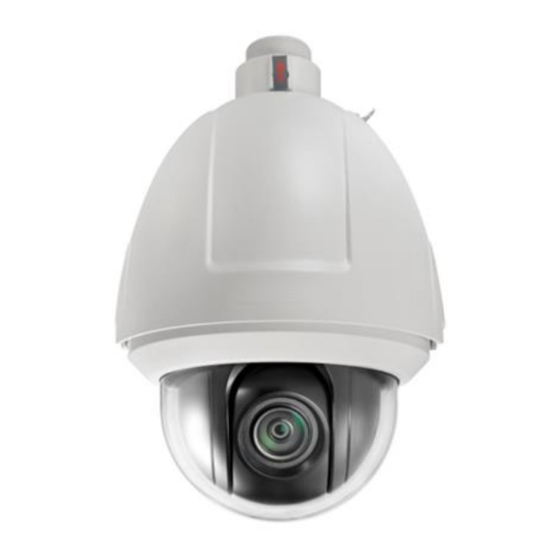
A-200 Installation Manual Chapter 1 Installation 1.1 Package Contents Please make sure that the device in the package is in good condition and all the assembly parts are included. The main package contents are shown in Figure 1-1. Pendant adapter... -
Page 8: Installation And Cabling
A-200 Installation Manual 1.2 Installation and Cabling 1.2.1 Installing the Speed Dome Steps: 1. Loosen the two lock screws on both sides of the speed dome. Pull the lower dome to separate it from the back box as shown in Figure 1-3. - Page 9 Figure 1-4 DIP Switches SD Card Slot Figure 1-5 SD Card Slot for Network Dome 6. Mounting the speed dome to the A-200-WM. Steps: (1) Apply thread tape to the thread of the pendant adapter and rotate the pendant adapter to the mount.
- Page 10 A-200 Installation Manual ② ① Loosen the Lock Screws Pendant Adapter Lock Screw Figure 1-6 Install the Pendant Adapter (3) Hook the back box of the speed dome to the mount with the safety cable. Route the cables through the mount.
-
Page 11: Connecting The Cables
RS485 communication cable, please refer to Appendix 2 24V AC power cable, please refer to Appendix 3 The cable connections of the A-200 speed dome are shown in the following figures. Please refer to the following figure for connecting the RS-485, power and video cables. -
Page 12: Dip Switch Settings
A-200 Installation Manual Black 1 Yellow&Green 2 Label Red 3 Label Yellow 1 Orange 2 Label White 1 Green 2 Video Output Red&White AUDIO-IN Green&White Blue&White AUDIO-OUT Orange OUT 2 Yellow COM 2 Brown OUT 1 COM 1... -
Page 13: Address Settings
A-200 Installation Manual Figure 1-10 DIP Switch Settings Notes: The default dome address is 0; the default baud rate is 2400; and the default value of the 120Ω terminator is OFF. For HD-SDI speed dome, it adopts self-adaptive PELCO-D, PELCO-P and private protocol which cannot set by the DIP switches. - Page 14 A-200 Installation Manual Table 1-3 Set the Dome Address from 0 to 71 DIP Switch SW1 Settings Address OFF OFF OFF OFF OFF OFF OFF OFF ON OFF OFF OFF OFF OFF OFF OFF OFF ON OFF OFF OFF OFF OFF OFF...
-
Page 15: Baudrate Settings
A-200 Installation Manual DIP Switch SW1 Settings OFF OFF ON OFF OFF OFF OFF OFF ON OFF ON OFF OFF ON OFF OFF ON OFF ON OFF OFF OFF ON OFF ON OFF ON OFF OFF ON OFF ON OFF ON... -
Page 16: Protocol Settings
AD Manchester Self-adaptive Others Note: The A-200 does not support Manchester Code protocol. 1.3.5 Communication Mode Settings Position 7 of DIP switch SW2 is for setting the RS485 communication mode of the dome to simplex or half-duplex. Table 1-6 Set Communication Mode of the Dome... -
Page 17: Terminal Resistor Settings
A-200 Installation Manual 1.3.6 Terminal Resistor Settings Open the bubble of the dome and you will find the 120Ω terminal resistor on the side of the dome as shown below. Figure 1-11 Termination Resistor In half-duplex mode, you can switch the position 2 to ON to enable the resistor;... -
Page 18: Chapter 2 Mount Dimension
A-200 Installation Manual Chapter 2 Mount Dimension 2.1 A-200-WM Figure 2-1 Long-arm Wall Mount 2.2 A-200-CornerMount Please use the wall mount with corner adapter according to your requirements. -
Page 19: A-200-Polemount
A-200 Installation Manual Figure 2-2 Corner Mount 2.3 A-200-PoleMount Please use the wall mount with pole adapter according to your needs. - Page 20 A-200 Installation Manual Figure 2-3 Pole Mount...
-
Page 21: Pendant Mount
A-200 Installation Manual 2.4 A-200-LPM Figure 2-4 Long Pendant Mount... -
Page 22: Chapter 3 Mounting Applications
For wooden walls, you can just use self-tapping screws to attach the mount. 3.1 Wall Mounting Applications 3.1.1 Mounting Components A-200-WM Wall Mount Applicable to indoor/outdoor pendant domes. Figure 3-1 Wall Mount Mounting Accessories... -
Page 23: Wall Mounting
A-200 Installation Manual 3.1.2 Wall Mounting Before you start: Wall mounting is applicable to indoor/outdoor solid wall construction. The following are the mandatory requirements for wall mounting: The wall must be thick enough to install the expansion screws. Please make sure that the wall is strong enough to withstand more than 8 times the weight of the dome and the mount. -
Page 24: Corner Mounting Applications
A-200 Installation Manual Nuts and Washers Expansion Screws Figure 3-4 Secure the Mount 4. Install the speed dome to the mount. Please refer to Section 1.2 Installation and Cabling for installation details. Note: Follow the same instructions described above for the short-arm wall mounting. For outdoor applications, please use the water-proof measures. - Page 25 A-200 Installation Manual Figure 3-5 Wall Mount Corner Mount Please use the corner adapter with the wall mount in corner mounting applications. Figure 3-6 Corner Adapter Mounting Accessories Figure 3-7 Hex Screws (M8×30), Nuts, Spring Washers and Flat Washers...
-
Page 26: Corner Mounting
A-200 Installation Manual 3.2.2 Corner Mounting Before you start: The corner mount is applicable to indoor/outdoor 90° solid construction corners. The following are the mandatory requirements for corner mounting: The wall must be thick enough to install the expansion screws. -
Page 27: Pole Mounting Applications
A-200 Installation Manual Figure 3-9 Secure the Wall Mount to the Corner 4. Install dome to the mount. Please refer to Section 1.2 Installation and Cabling for installation details. Note: Follow the same instructions described above for the short-arm wall mounting. For outdoor applications, please use the prescribed water-proofing measures. - Page 28 A-200 Installation Manual Figure 3-10 Wall Mount Pole Adapter Please use the pole adapter with the wall mount in the pole mounting applications. Figure 3-11 Pole Adapter Pole Mounting Hoops Please use the with the pole adapter. The following dimensions of stainless steel pipe clamps are optional:φ59-82mm, φ84-108mm, φ103-127mm, φ130-152mm, φ155-178mm, φ180-203mm,...
-
Page 29: Pole Mounting
A-200 Installation Manual Mounting Accessories Figure 3-13 Hex Screws (M8×30) and Spring Washers 3.3.2 Pole Mounting Before you start: The pole mounting is applicable to the indoor/outdoor solid pole construction. The followings are the mandatory requirements for mounting: The mounting dimensions of the stainless steel pipe clamps must meet the diameter of pole. - Page 30 A-200 Installation Manual 2. Install the pole adapter. (1) Pull the control wire, video cable and power cable through the center hole. (2) Secure the three stainless steel pipe clamps to the pole, and tighten the screws of the clamps with a screwdriver.
-
Page 31: Pendant Mounting Applications
A-200 Installation Manual installation details. Note: Follow the same instructions described above for the short-arm wall mounting. For outdoor applications, please use the prescribed water-proofing measures. The short-arm wall mount is not recommended for outdoor applications. 3.4 Pendant Mounting Applications 3.4.1 Mounting Components... -
Page 32: Pendant Mounting
A-200 Installation Manual Figure 3-19 Pendant Adapter 3.4.2 Pendant Mounting Before you start: Pendant mounting is applicable to indoor/outdoor solid ceiling construction. The following are the mandatory requirements for pendant mounting: The ceiling must be thick enough to mount the expansion screws. - Page 33 Note: For outdoor applications, please apply the water-proof thread compound to the threads. Figure 3-21 Install the Pendant Pole 3. Install the A-200 speed dome to the mount. Please refer to Section 1.2 Installation and Cabling for installation details. Note: If the ceiling is not high enough, you can install the dome to the mounting base without using pendant pole.
-
Page 34: Appendix
A-200 Installation Manual Appendix Appendix 1 Static, Interference Lightning and Surge Protection This product adopts TVS plate lightning protection technology to avoid damage caused by pulse signals below 3000W, like lightning strikes, surges, etc. Based on the actual outdoor situation, necessary protection measures must be taken. - Page 35 A-200 Installation Manual When the speed dome is installed in environment that is relatively insulated from the earth, e.g., cement pole or cement wall, then only the control center requires proper grounding locally. Refer to the following figure. Power Power...
- Page 36 A-200 Installation Manual Notes: Because the signal transmission media of fiber optical speed dome and network speed dome are isolated from the control center, they must be grounded locally to protect dome against damages. If the dome is installed in strong thunderstorm area, it must be grounded locally to release lightning or suchlike high energy to protect dome against damages.
- Page 37 A-200 Installation Manual Grounding for Metal Pole Installation: When the speed dome is installed in an environment that is conductive to the earth, e.g., metal pole, then the grounding of the dome can be achieved by properly grounding metal pole, meanwhile, the control center must be grounded locally as well.
-
Page 38: Appendix 2 Waterproof
A-200 Installation Manual Appendix 2 Waterproofing Notes: The long-arm wall mount is recommended for the outdoor installation of the A-200 speed dome. You cannot use the short-arm wall mount or pendant mount for outdoor application, because it is not water-proof. - Page 39 A-200 Installation Manual Figure A-6 Long-arm Wall Mount...
-
Page 40: Appendix 3 Bubble Maintenance
A-200 Installation Manual Appendix 3 Bubble Maintenance The dome bubble is a transparent plastic. Dust, oil and finger prints, etc. will cause scratches or image blur. Please refer to the following method to clean the bubble. Handling dust Use oil free soft brush or blowing dust ball to clean the dust. -
Page 41: Appendix 4 Rs485 Bus Connection
A-200 Installation Manual Appendix 4 RS485 Bus Connection General Property of RS485 Bus RS485 is a half-duplex communication bus which has 120Ω characteristic impendence; the maximum load ability is 32 payloads (including controller device and controlled device). RS485 Bus Transmission Distance... - Page 42 A-200 Installation Manual Controller Device Figure A-9 Star Shape Connection The best way to overcome this is to add a RS485 distributor. This product can effectively change the star-shape connection to satisfy the requirement of RS485 industry standards, thus avoiding these problems and improving the communication reliability.
- Page 43 A-200 Installation Manual Problem Possible Reasons To Solve the Problem 2. RS485+ or RS485-wire is 2. Repair the RS485 wire. controlled broken. but not 3. The speed dome is too far away 3. Add a terminal resistor. smoothly. from the remote control device.
-
Page 44: Appendix 5 24Vac Wire Gauge & Transmission Distance
A-200 Installation Manual Appendix 5 24VAC Wire Gauge & Transmission Distance The following table describes the maximum distance of each different wire gauge when the loss rate of 24VAC voltage is less than 10%. For an AC driven device, the maximum voltage loss rate is 10% allowable. -
Page 45: Appendix 6 Table Of Wire Gauge Standards
A-200 Installation Manual Appendix 6 Table of Wire Gauge Standards American Cross-sectional Bare Wire British Wire Wire Gauge Area of Bare Gauge(mm) Gauge SWG Wire(mm2) 0.750 0.4417 0.800 0.5027 0.900 0.6362 1.000 0.7854 1.250 1.2266 1.500 1.7663 2.000 3.1420 2.500 4.9080...