Advertisement
Quick Links
Model #
Description
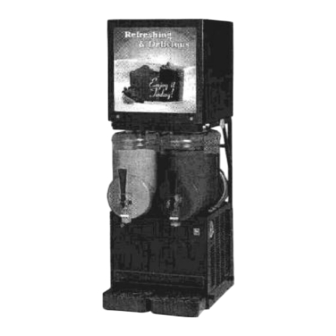
PAF2-SS
(2x) 7 Ib. Hoppers
PAF2-BL
(2x) 7 Ib. Hoppers
PAF3-SS
(3x) 7 Ib. Hoppers
PAF3-BL
(3x) 7 Ib. Hoppers
OPTIONAL: Rear lit display add "RLD" suffix e.g. PAF2-SS-RLD
Electrical: 120V line cord included,
water line required
Powder Auto fill Systems
Solid-state level sensors
Out of powder sensors
20-second fill delay Door
safety switch Product
strength control
Finish
Width
Stainless Steel
14.25"
Black
14.25"
Stainless Steel
21.5"
Black
21.5"
Depth: 16"
Height: 41" Plumbing: 1/4"
43-05 20th Ave. Long Island City, NY 11105
Tel: 800.935.2211 718.932.1414 Fax: 718.932.7860
Visit us on the web: www.cecilware.com
Height
Ship Wt.
41"
701bs.
41"
701bs.
41"
105 lbs.
41"
105 lbs.
N135A FEB2000
Advertisement

Related Manuals for Cecilware PAF2-SS


Summary of Contents for Cecilware PAF2-SS
- Page 1 (3x) 7 Ib. Hoppers Black 21.5" 41" 105 lbs. OPTIONAL: Rear lit display add "RLD" suffix e.g. PAF2-SS-RLD Electrical: 120V line cord included, Depth: 16" Height: 41" Plumbing: 1/4" water line required 43-05 20th Ave. Long Island City, NY 11105 Tel: 800.935.2211 718.932.1414 Fax: 718.932.7860...
- Page 2 Carefully unpack the PAF-2 unit and inspect immediately for shipping damage. Your equipment was shipped in a carton designed to give it maximum protection in normal handling, and it was thoroughly inspected before leaving the factory. In case of damage, contact the shipper, not Cecilware. Water Inlet Connection: This equipment is to be installed to comply with the applicable Federal, State, or Local Plumbing Codes having jurisdiction.
- Page 3 3. Place the PAF-2 on top of the support frame, and secure with the two large knob screws supplied.
- Page 4 4. Attach the two probes onto the back of the bowls. Replace the left and right side bowl covers making sure the holes line up with plastic nozzles (holes are located towards inside). Attach water connection (1/4" flare fitting) Plug both the PAF-2 and the Ugolini unit into the same, 120VAC 60 HZ grounded duplex outlet, To test unit, turn on the power switch, located inside and activate (push up and hold) rinse switches.
-
Page 5: Filling The Hoppers
FILLING THE HOPPERS: Remove hoppers, fill with product, and replace. Hoppers hold 4 to 6 depending on product density NOTE: Hoppers are equipped with product chutes, which have sliding, no spill, closures These are designed to prevent spillage when filling and removing hoppers. PRODUCT STRENGTH ADJUSTMENT: Water flow rate is factory set at 0.75 oz per second. - Page 6 SANITIZING: All food dispensing units should be sanitized periodically. All parts to be sanitized must be cleaned first. To prepare a sanitizing solution: ADD 2 TSP. OF LIQUID CLOROX BLEACH (5.25% CONCENTRATION) TO 1 GALLON OF WATER AT ROOM TEMPERATURE (70° - 90°F). Soak all parts for a minimum of 3 min.
- Page 7 POWDER AUTOFILL MODEL PAF-2 (FRONT VIEW) 1. HOPPERS LEFT [CD284] AND RIGHT [CD299] CAPACITY 7LBS EACH 2. POWER ON-OFF SWITCH [L299A] 3. RINSE SWITCH LEFT AND RIGHT [L642A] 4. MIXING CHAMBER WITH MIXING BLADE [CD63A] 5. SPEED CONTROL POTENTIOMETER LEFT AND RIGHT [L557A]...
- Page 8 POWDER AUTOFILL MODEL PAF-2 (REAR VIEW) 6. CABINET HOUSING 7. AUGER MOTOR 24 V.DC LEFT AND RIGHT [CD290] 8. RELAY (2) PRODUCT AND WHIPPER MOTORS [B129A] 9. RELAY (1) DOOR SAFETY [B129A] 10. SPEED CONTROLS 28 V. DC (2) [L556A] 11.
-
Page 9: Troubleshooting Guide
POWDER AUTO FILL HOPPER ASSEMBLY AND RELATED PARTS TROUBLESHOOTING GUIDE... - Page 10 WARNING: To reduce the risk of electrical shock, unplug the dispenser power cord before repairing or replacing any internal components of the unit. Before any attempt is made to replace a component, be sure to check all electrical connections for proper contact.
- Page 11 PROBLEM PROBABLE CAUSE REMEDY a) Leaking Water Dispense Valve a) Replace Water Dispense Valve Water drips from b) Mixing Chamber clogged. b) Clean Mixing Chamber. mixing chamber a) Product throw too high a) Adjust product throw rate. (See "Product Strength Product too strong.
-
Page 13: Bottom Plate
POWDER AUTO FILL INSTRUCTIONS 4" ADAPTER UGOLINI DISPENSER BOTTOM PLATE #SD65A 4 INCH LEGS (4) When mounting 4 inch legs, attach the bottom plate #SD65A to the Ugolini Dispenser as shown NI42A CECILWARE CORPORATION 43-05 20 AVE. L.I.C. NY 11105...
Need help?
Do you have a question about the PAF2-SS and is the answer not in the manual?
Questions and answers