Western Digital ShareSpace User Manual
Network storage system
Hide thumbs
Also See for ShareSpace:
- User manual (176 pages) ,
- Quick install manual (9 pages) ,
- Reference manual (8 pages)
Table of Contents
Advertisement
Quick Links
Advertisement
Table of Contents

Related Manuals for Western Digital ShareSpace


Summary of Contents for Western Digital ShareSpace
- Page 1 WD ShareSpace ™ Network Storage System User Guide...
-
Page 2: Important Safety Instructions
12. In accordance with workstation regulation standards, do not place this device in the visual field of the user due to the glossy front of the case. WARNING! The WD ShareSpace uses a lithium battery, type CR2032. There is danger of an explosion if the battery is incorrectly replaced. Replace only with the same or equivalent battery type recommended by the manufacturer. -
Page 3: Table Of Contents
Table of Contents Introduction ........1 Format and Configuration ........1 Specifications . - Page 4 Creating Users .......20 Creating Folder Shares ..... . .23 Network Storage Manager .
- Page 5 Environmental Compliance (China) ......102 Warranty Information ........102 GNU General Public License (“GPL”).
-
Page 6: Introduction
Format and Configuration WD ShareSpace is preformatted for maximum capacity as a RAID 5 volume (for four-drive systems) or a single large, spanned volume (for two-drive systems). For more information on how to set up RAID, see “Manage RAID” on page 57. -
Page 7: Getting Started
WD SHARESPACE USER MANUAL Getting Started Kit Contents Drive mounting rails Network storage system (only included with two-drive systems) with four or two drives AC adapter Installation CD with Quick Install Guide Ethernet cable and power cords application software and user manual... -
Page 8: System Requirements
WD SHARESPACE USER MANUAL System Requirements Note: For optimum performance, the following system and network requirements are recommended. Compatibility may vary depending on user’s hardware configuration and operating system. Important: For highest performance and reliability, it is recommended that you install the latest updates and service pack (SP). For Macintosh, go to the Apple menu and select Software Update. -
Page 9: Recording Your Wd Product Information
WD SHARESPACE USER MANUAL Recording Your WD Product Information In the following table, write the serial number and model number of your new WD product found on the label on the bottom of the device. Also, write the purchase date and other notes such as your operating system and version. -
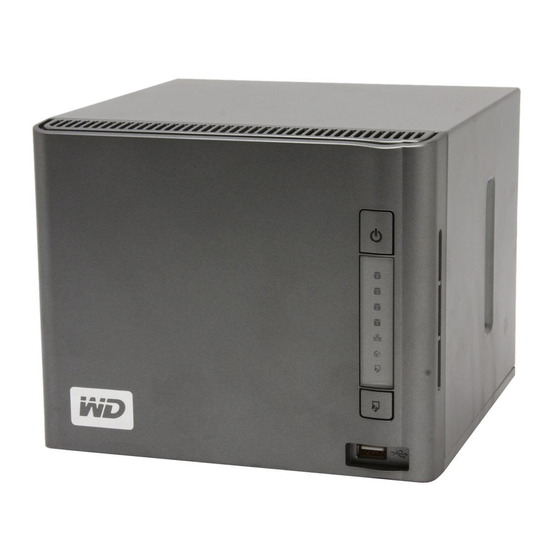
Page 10: Features
WD SHARESPACE USER MANUAL Features System View Power button Power port LED indicators Reset button USB backup button Ethernet port USB port 1 (Auto-backup) USB ports 2 and 3 Kensington ® security slot Power Button Important: The device powers on automatically upon initial connection to power, which may take up to three minutes. -
Page 11: Led Indicators
• System initialize operation in progress Flashing • One flash per second—system is formatting a USB hard drive • One flash per second (backup)—USB device to WD ShareSpace • Two flashes per second (backup)—WD ShareSpace to USB device • System initialize operation completed... -
Page 12: Usb Backup Button
WD SHARESPACE USER MANUAL USB Backup Button The USB backup button allows you to back up data from a USB hard drive to the device or from the device to a USB hard drive. The USB backup feature only works on USB port 1. -
Page 13: Hardware Setup
WD SHARESPACE USER MANUAL Hardware Setup Connect the Network Storage System Follow the steps below to connect the network storage system to a small home/office network. 1. Connect one end of the Ethernet cable into the Ethernet port located on the back of the device. -
Page 14: System Setup & Wd Discovery
Windows 2000/XP/Vista (below) and Mac (page 10) to successfully set up the device and map a network drive. This section also describes how to use WD Discovery™ to do the following (Windows only): • Configure WD ShareSpace • Map a network drive • Browse network shares •... - Page 15 WD SHARESPACE USER MANUAL 7. The WD Discovery screen appears. Click on WDShareSpace in the Network Drives Found list and point to and click Configure. 8. The login page appears. Continue device setup by following the instructions for “Setting up the Device” on page 11.
-
Page 16: Setting Up The Device
WD SHARESPACE USER MANUAL Setting up the Device Follow the steps below to continue setting up the device for all operating systems. 1. Enter “admin” in both the Administrator Name and Password fields and click Login. 2. Click Next. 3. Read the license agreement, then click I Agree... - Page 17 My Network Places. To connect more than one storage device to the same network, you must specify a unique device name for each storage device. Caution: When renaming WD ShareSpace, it forces all the network computers to remap their shared network resources. Change the device name only when necessary.
- Page 18 WD SHARESPACE USER MANUAL 6. Accept the default DHCP (Dynamic Host Configuration Protocol) client settings. If you are not using DHCP, click Static and manually assign the IP address. Click Next. 7. The Summary screen appears. Click Finish. To begin sharing and storing data on the network storage system, follow the instructions under “Mapping a Network Drive”...
-
Page 19: Mapping A Network Drive
USER MANUAL Mapping a Network Drive To access and store data on WD ShareSpace after setting up the device, you must first map a network drive to one or more of the default shares. This section contains network drive mapping steps that you must follow for Windows 2000/XP/Vista and Mac. - Page 20 WD SHARESPACE USER MANUAL 6. Click Yes. Skip to step 8 if you want to map the drive manually. 7. All share folders available on the device will be mapped as network drives automatically. Available drive letters are assigned backwards from Z. When the mapping completes, you will find your network drives on the page.
- Page 21 WD SHARESPACE USER MANUAL Mac OS X 1. In Finder, click Go and point to Connect to Server. 2. Enter “smb://wdsharespace” and click Connect. Note: If you renamed the network storage system in step 4 of “Setting up the Device” on page 11, enter “smb://newdevicename.”...
-
Page 22: Browse Network Shares
WD SHARESPACE USER MANUAL Browse Network Shares To access data on a share using WD Discovery: Use WD Discovery to easily browse network shares without having to manually enter drive paths. 1. Ensure that the device is powered on and connected to the network. -
Page 23: Desktop Shortcut Creation
Click OK. Turning Identify LED On or Off Users with multiple WD ShareSpace devices can use the Identify LED feature to find out which WD ShareSpace in the network is currently being accessed via WD Discovery. WD Discovery allows you to turn on or turn off Identify LED on a networked WD ShareSpace device. - Page 24 4. The Identify LED on the target device is turned on. The LED icon appears to the left of the device name in WD Discovery. To turn off the Identify LED on a remote networked WD ShareSpace device: 1. Ensure that the device is powered on and connected to the network.
-
Page 25: Creating Users
WD SHARESPACE USER MANUAL Creating Users Creating users allows the administrator to share data on WD ShareSpace across the network by creating user accounts. The administrator can also edit and delete user accounts in the Users menu. You must first access Network Storage Manager to set up a user account. - Page 26 WD SHARESPACE USER MANUAL 3. Type in the administrator name and password. In the Tool list, click Network Storage Manager. In the Language list, click the language for your region. Click Login. To create a new user account: 1. Click Users in the basic mode home screen.
- Page 27 WD SHARESPACE USER MANUAL To modify a user account: 1. Select the user account to modify, then click the Modify icon 2. Make the necessary changes, then click Submit. To delete an existing user account: 1. Select the user account you want to delete, then click the Delete icon 2.
-
Page 28: Creating Folder Shares
Creating Folder Shares Shares are folders that can be used to organize and store files on your WD ShareSpace network storage system. Shares can be shared with everyone (public) or with selected users on your network (private). The device comes preconfigured with two shares: •... - Page 29 WD SHARESPACE USER MANUAL 5. Click Submit. To delete existing shares: WARNING: Deleting a share erases all data on the share. All files and folders on the share will be lost. 1. Select the share to delete. 2. Click the Delete icon 3.
-
Page 30: Network Storage Manager
WD SHARESPACE USER MANUAL Network Storage Manager Network Storage Manager is a powerful and convenient web-based remote management solution for WD ShareSpace. Accessing Network Storage Manager You can manage and configure your network storage system by entering the web-based user interface. -
Page 31: Network Storage Manager Features
WD SHARESPACE USER MANUAL Network Storage Manager Features The web-based management utility includes the following features: • LAN access—the device supports local area network access of the web-based user interface, enabling management from anywhere in the network. • Secured access—the device can be accessed and configured by the web-based, password protected user interface over SSL (Secure Socket Layer). -
Page 32: User Interface Overview
WD SHARESPACE USER MANUAL User Interface Overview The web-based user interface is designed to logically access and manage the features of the device. Upon logging in, the web user interface defaults to basic mode. Basic mode provides access to the most common device configuration options. -
Page 33: Basic Mode
WD SHARESPACE USER MANUAL Basic Mode The basic mode provides access to the most common configuration options. Click any of the menu buttons to display more configuration options. The table below describes the menu options available in basic mode. Category... - Page 34 Device Name Use this option to enter or change a device name and/or a description of the device. The device name is the name by which your WD ShareSpace is identified on the LAN. 1. Click Device Name in basic mode home screen.
- Page 35 WD SHARESPACE USER MANUAL 4. Click Submit. Network The device’s network mode is set to DHCP Client by default, which is appropriate for most environments. By selecting Static IP, you can set the network mode and change the IP address, netmask, gateway, and DNS (Domain Name Service) server IP address.
- Page 36 WD SHARESPACE USER MANUAL System Status The System Status option displays general information about the system, such as device name, firmware version, current date/time, system uptime, IP address, volume usage, and volume RAID type. Click System Status in the basic mode home screen...
- Page 37 WD SHARESPACE USER MANUAL To perform network storage system reboot: 1. Click Reboot in the basic mode home screen. 2. On the Reboot page, click Reboot. 3. Click OK. NETWORK STORAGE MANAGER - 32...
-
Page 38: Advanced Mode
WD SHARESPACE USER MANUAL Advanced Mode Advanced mode provides access to additional options not available in the basic mode. When in basic mode, click Advanced Mode on the toolbar to view Network Storage Manager in advanced mode. The advanced mode page include six tabs, each subdivided into several menu buttons providing more management options for maximum flexibility and security of the device. - Page 39 WD SHARESPACE USER MANUAL System The System tab allows you to set the system date and time, set up alarm notification, change the admin password, perform software or firmware upgrades, create a backup copy of the system files, restore system to factory defaults, enable the system identification LED, generate and set up a SSL certificate, configure the UPS (Uninterruptible Power Supply), or perform system reboot or shutdown.
- Page 40 WD SHARESPACE USER MANUAL General Setup The General Setup submenu allows you to perform basic configuration of device. Here, you can provide a name and brief description for the device, select a compatible web access protocol, and set the time zone. You can set the date and time manually or enable automatic time synchronization via NTP (Network Time Protocol) Service.
- Page 41 WD SHARESPACE USER MANUAL Alerts Setup Using the Alerts Setup submenu, you can configure e-mails or popup messages that provide alerts for system conditions, fan operability, over temperature; hard drive, volume, network, and USB status; and user and group events. These alerts help the system administrator(s) manage and detect events or errors.
- Page 42 WD SHARESPACE USER MANUAL 7. Click Submit. To configure alerts to send pop-up messages when an event occurs: Note: Pop-up notification only works with Windows. For a list of events, see “System Events” on page 103. 1. On the Alerts Setup page, click Enable next to Pop-Up Notification.
- Page 43 WD SHARESPACE USER MANUAL 4. Click Submit. Admin Password The Admin Password menu allows you to change the administrator’s password. To change the admininistrator’s password: 1. In the Old Password field, enter the old password. 2. In the New Password field, enter the new password. The maximum length of the password must not be more than 16 alphanumeric characters.
- Page 44 WD SHARESPACE USER MANUAL Automated The Automated tab provides information about the current firmware version and connects to the WD website for automatic downloading of the latest firmware. 1. Click Check New Firmware. 2. Click Download if new firmware is available.
- Page 45 WD SHARESPACE USER MANUAL 1. Download the latest firmware file from support.wdc.com. 2. Enter the path to the firmware file or click Browse to locate the file (e.g., wdg4nc40000-01.02.03.img). Important: Do not rename the firmware file. 3. Click Submit to transfer the firmware file from the computer to the network storage system.
- Page 46 WD SHARESPACE USER MANUAL To back up the current system configuration settings: 1. On the Configuration Management page, click Save current configuration. 2. Click Save. 3. Specify a file name and location for saving the file. 4. Click Save. To restore configuration settings: 1.
- Page 47 WD SHARESPACE USER MANUAL To restore the device to factory defaults: Performing a factory default reset will erase all settings in the network storage system. System configuration will reset the device to default factory settings. All information and data will be lost. The LAN settings (including port settings) are not changed.
- Page 48 WD SHARESPACE USER MANUAL To turn on the system identification LED: 1. Click ON under System Identification. 2. Click Submit. To turn on system identification LED: 1. Click On to enable the system identification LED. 2. Click Submit. The system identification LED on the front panel lights blue.
- Page 49 WD SHARESPACE USER MANUAL To generate an SSL certificate and key pair automatically: 1. On the Advanced Setup page, click on the highlighted word HERE. The SSL Certificate/Key Generation dialog appears. 2. Enter the identification information you want to include in the SSL certificate/key pair, then click Submit.
- Page 50 WD SHARESPACE USER MANUAL To set up extend span mode: The Extend Span option allows you to manually extend disk volume or have the system automatically extend disk volume when you install a new hard drive. Note: The system will perform a file system check before performing the extend disk operation. This may take a considerable amount of time depending on the size of the volume and data on that volume.
- Page 51 WD SHARESPACE USER MANUAL UPS Setup The UPS Setup tab allows you to modify UPS settings. To enable the UPS service: 1. Click the UPS Setup tab. 2. Click Enable in UPS service. 3. Enter the timeout value. 4. Click Submit.
- Page 52 WD SHARESPACE USER MANUAL To perform network storage system shutdown: 1. Click Shutdown/Reboot in the System tab home screen. 2. On the Shutdown/Reboot page, click Shutdown. 3. Click OK. To perform network storage system reboot: 1. Click Shutdown/Reboot in the System tab home screen.
- Page 53 WD SHARESPACE USER MANUAL The LAN submenu allows access to all network configuration options including setting the connection method, changing the IP address, netmask, gateway, and DNS (Domain Name Service) server IP address, and enabling the jumbo frame feature. To configure the network settings: Note: If connected to a home network, contact the Internet Service Provider (ISP) to obtain the static IP address.
- Page 54 WD SHARESPACE USER MANUAL Services The Services menu allows you to set protocols for sharing files and folders on the device. • Universal Plug and Play (UPnP) is a set of computer network protocols that simplifies the implementation of networks in the home by allowing devices to connect seamlessly.
- Page 55 WD SHARESPACE USER MANUAL To enable UPnP NAT Traversal for Web Access & FTP: 1. Click Enable in UPnP for Web Access & FTP. 2. Click Submit. The UPnP NAT Traversal combines with the UPnP feature and NAT feature. Universal Plug and Play (UPnP) is an architecture for pervasive peer-to-peer network connectivity of PCs and intelligent devices.
- Page 56 WD SHARESPACE USER MANUAL To create a new workgroup for the system: 1. On the Workgroup/Domain Setup page, click Workgroup. 2. Enter a name for the workgroup in the Workgroup Name field. 3. Click Submit. To set up a workgroup name: 1.
- Page 57 WD SHARESPACE USER MANUAL Storage The Storage tab provides all necessary options required for individual storage disk configuration and maintenance. This tab also includes an option to change the system’s RAID configuration, set a share name, and format and safely remove the USB hard drives connected to the system.
- Page 58 WD SHARESPACE USER MANUAL Disk Manager The Disk Manager submenu displays the connected hard drives in the device. This submenu also displays detailed information about the hard drives, such as disk size, disk description, and status. Drive status messages include the following: •...
- Page 59 WD SHARESPACE USER MANUAL Volumes and RAID Management The Volumes menu includes two tabs—Manage Volume and Manage RAID. Manage Volume The Manage Volume tab lists all the volumes available on the device and provides detailed information about each volume such as description, RAID type, usage, size, and volume status.
- Page 60 WD SHARESPACE USER MANUAL To modify the volume: 1. Click the Manage Volume tab in Volumes. Note: Only logical volumes in the extended partition can be modified. 2. Choose the volume you want to modify, then click the Modify icon.
- Page 61 WD SHARESPACE USER MANUAL Manage Volume Options manual manual manual manual extend extend extend extend Manage Volume span span span span available options available available + 2 Drives available + 3 Drives available starting mode + 0 Drives + 1 Drive...
- Page 62 WD SHARESPACE USER MANUAL Manage RAID Configure RAID on the hard drives using the Manage RAID tab on the Volume Management submenu. WARNING! Changing the RAID configuration causes all volumes and data to be lost. RAID (Redundant Array of Independent Drives) refers to an array of multiple independent hard drives that provide high performance and reliability.
- Page 63 WD SHARESPACE USER MANUAL Default RAID configuration The default RAID configuration for each hard drive installed in the network storage system is as follows: • If one, two, or three hard drives are installed, the default RAID configuration is Span.
- Page 64 Folder Shares Shares are folders that can be used to organize and store files on your WD ShareSpace network storage system. Shares can be shared with everyone (public) or with selected users on your network (private). The device comes preconfigured with two shares: •...
- Page 65 WD SHARESPACE USER MANUAL To create a share on the volume: 1. Click the Create icon 2. Enter a share name in the Share field. The share name can contain up to 32 characters, including alphabetic, numeric, or underscore characters.
- Page 66 The USB Shares menu includes three tabs—USB Disk, USB to WD ShareSpace Backup, and WD ShareSpace to USB Backup. Use these tabs to format a USB hard drive, remove a USB hard drive, and perform backup operations from a USB hard drive to the network storage system and vice-versa.
- Page 67 3. Click OK. USB to WD ShareSpace Backup Use the USB to ShareSpace Backup tab to set a destination share or source share for a different USB storage backup method. To set a destination share name for the USB hard drive to WD ShareSpace backup: 1.
- Page 68 WD SHARESPACE USER MANUAL WD ShareSpace to USB Backup Use the WD ShareSpace to USB Backup tab to set a source share for this backup method. To set a source share name for WD ShareSpace to USB hard drive backup: 1.
- Page 69 WD SHARESPACE USER MANUAL Manage Quota The Manage Quota tab in the Quota Management menu provides the quota information for each volume and allows administrators to modify the quota settings. To configure disk quota: 1. Select the volume you want to modify, then click the Modify icon 2.
- Page 70 WD SHARESPACE USER MANUAL DataVolume User Quota (or ExtendVolume User Quota) The DataVolume User Quota (ExtendVolume User Quota) tab provides user quota information details and allows administrators to modify the user quota setting. To modify the user quota setting: 1. Select the volume you want to modify, then click the Modify icon.
- Page 71 WD SHARESPACE USER MANUAL Downloads The Downloads menu includes two tabs—Setup Destination Share and Change Password. This menu provides configuration options for setting up the share folder and controlling how users access the contents of the shared folder by setting up passwords.
- Page 72 WD SHARESPACE USER MANUAL Change Password The Change Password tab allows you to change the Downloader’s password. To change the Downloader’s password: 1. On the Downloads page, click the Change Password tab. 2. Enter a password in the Change Password field. The maximum length of the password must not be more than 16 alphanumeric characters.
- Page 73 WD SHARESPACE USER MANUAL Media The Media tab provides access to the iTunes menu. iTunes Enable the iTunes Server Service and customize the service settings using the iTunes menu. iTunes Server Service allows iPod and iTunes users to share and play music on the network storage system.
- Page 74 WD SHARESPACE USER MANUAL To enable or disable the iTunes Server Service: 1. On the iTunes Server Service page, click Enable next to iTunes Service. Or, deselect the option to disable it. 2. Specify how often iTunes can scan the device for new music files.
- Page 75 WD SHARESPACE USER MANUAL Users The Users tab provides access to the following configuration options: • Users • Groups • Folder Share Permissions • USB Share Permissions Users The Users menu allows administrators to create, edit, and delete user accounts from Access Control list management.
- Page 76 WD SHARESPACE USER MANUAL To create a new user account: With this feature, you can create user accounts on the network storage system and further customize these accounts with privilege levels. 1. Click the Create icon Note: The user name and password can contain up to 15 characters, including alphabetic, numeric, underscore, space, and most special characters.
- Page 77 WD SHARESPACE USER MANUAL To delete an existing user account: 1. Select the user account you want to delete, then click the Delete icon 2. Click OK. Groups The Groups submenu allows the administrator to create, edit, and delete a group from Access Control list management.
- Page 78 WD SHARESPACE USER MANUAL To modify a local group: 1. Select the group account you want to modify, then click the Modify icon 2. Make the necessary changes, then click Submit. To delete a local group: 1. Select the group you want to delete, then click the Delete icon 2.
- Page 79 WD SHARESPACE USER MANUAL To edit the access rights of users or groups: 1. Select a user or group, then click the Edit icon 2. Click Enable next to Public Access allow everyone to access to the share. 3. Select an access option.
- Page 80 WD SHARESPACE USER MANUAL USB Share Permissions Use the USB Shares menu allows to set access control for the two USB ports on the back of the device. The three types of access control that you can assign to a user or group include: •...
- Page 81 WD SHARESPACE USER MANUAL Status The Status tab provides access to the following configuration options. • System Status • System Logs System Status The System Status menu displays general information about the system, such as device name, version, current date/time, system uptime, IP address, volume usage, and volume RAID type.
- Page 82 WD SHARESPACE USER MANUAL System The System tab displays system logs on the device. The System Logs record significant problems that occur in the system. You can obtain information from the following conditions or errors that may occur in the system components, hardware or software components.
- Page 83 WD SHARESPACE USER MANUAL CIFS The CIFS (Common Internet File System) tab displays logs of file and services requested on the device. The FTP (File Transfer Protocol) tab displays logs of the requests and records transferred between the device and client computers.
- Page 84 WD SHARESPACE USER MANUAL Settings The Settings tab assigns the order and number of log entries that appear on the Logs page. To configure the log settings: 1. On the Settings tab, click Show log entries in reverse order to display the entries in reverse chronological order.
-
Page 85: Mionet Remote Access
MioNet Remote Access Remote Access Setup WD ShareSpace comes with MioNet enabled by default. If MioNet is not already installed on the client computer, follow the instructions under “System Setup” on page 9. The Remote Access menu allows you to configure the MioNet service on... -
Page 86: Accessing Data Via Ftp
USER MANUAL Accessing Data via FTP You can access data in a shared folder on WD ShareSpace from anywhere using an FTP client software program. An FTP client software program must be installed on the broadband-connected computer you are using to access the device. -
Page 87: Scheduled Downloads
WD SHARESPACE USER MANUAL Scheduled Downloads Downloader is powerful management tool for maintaining download tasks. With a user-friendly interface, the Downloader supports multiple simultaneous downloads with various functions to manage downloads. Use Downloader to download files to a default share folder in the network storage system and share the files among many users. - Page 88 WD SHARESPACE USER MANUAL User Interface Overview The Downloader user interface includes two tabs — Tasks and Settings. Tasks The Tasks tab includes a table that displays the file transfer processes. The status of the file download is displayed using icons located on the File Name column and located immediately below the Submit button provides detailed information about the meaning of each status icon.
- Page 89 WD SHARESPACE USER MANUAL Command icons The Downloader Tasks tab includes the following commands: Icon Command Description Creates a download task. Start Starts a specific download task. Stop Ends the download task. Delete Deletes download task from the table. Help Displays the online guide.
- Page 90 WD SHARESPACE USER MANUAL To stop and resume a download task: 1. Select a task in the Tasks table. 2. Click Stop to stop the download task. 3. Click Start to resume download task. To delete a download task: 1. Select a task in the Tasks table.
- Page 91 WD SHARESPACE USER MANUAL To customize the Downloader settings: 1. On the Downloader page, click the Settings tab. 2. Select a number to specify the maximum number of simultaneously running downloads in the Max. Running No. field. 3. Specify the decimal numbers to limit the downloaded speed if you don't want to consume the entire available bandwidth in Downloader in the Download Speed field.
-
Page 92: External Usb Drive Sharing & Backup
WD SHARESPACE USER MANUAL External USB Drive Sharing & Backup Sharing Data on a USB Hard Drive You can share data on your USB drive with other users connected to the network storage system. To share data on a USB hard drive: 1. - Page 93 Network Storage Manager utility. See “To set a source share name for WD ShareSpace to USB hard drive backup:” on page 63 for more information. 2. Connect a USB hard drive to the USB port 1 located on the front panel.
- Page 94 WD SHARESPACE USER MANUAL 4. Press the USB backup button and hold for at least three seconds, then release. The USB backup LED flashes green to indicate the data backup is in progress. The system will back up data from the pre-selected source share folder on the network storage system to the USB hard drive first partition.
-
Page 95: Replacing A Drive
WD SHARESPACE USER MANUAL Replacing a Drive The network storage system is a limited user-serviceable product which allows for servicing of the four internal 3.5-inch SATA hard drives in the enclosure. Important: Only WD hard drive assemblies can be inserted into the network storage system enclosure. - Page 96 WD SHARESPACE USER MANUAL To replace an internal drive: 1. Turn off the system and all the peripherals connected to it. 2. Unplug all cables from the power outlets. 3. Place the enclosure on a flat, stable surface. 4. Observe ESD precautions when handling a system component.
- Page 97 WD SHARESPACE USER MANUAL 7. Remove the drive carrier. (a) Flex the back pin of the side rail from the hard drive and gently pull the side-rail down away from the hard drive. (b) Remove the drive from the drive carrier.
- Page 98 WD SHARESPACE USER MANUAL 11. Replace the system cover. (a) Carefully place the system cover on the unit so that the tabs on the cover align with the slots on the unit. (b) Slide the cover toward the front of the unit until it is fully closed.
-
Page 99: Troubleshooting
WD SHARESPACE USER MANUAL Troubleshooting For any issue, first ensure that you are using the latest firmware for WD ShareSpace. The latest firmware includes the latest network and SATA disk drivers. See “Update (Firmware)” on page 38 for instructions. First steps checklist •... - Page 100 WD SHARESPACE USER MANUAL 6. Release the reset button by removing the paperclip. The device will automatically reboot itself. The reset operation is complete when the device has rebooted and the LAN connection lights and HDD LEDs are on. A successful reset results in restoring the device name, IP address, and admin user name and admin password to factory default (WDShareSpace, DHCP client, and admin).
- Page 101 WD SHARESPACE USER MANUAL System cannot connect to a network and network status indicator does not light. • Make sure the network cable is securely attached to the correct connector on the rear panel of the device. • Try a different network cable.
- Page 102 WD SHARESPACE USER MANUAL I received a banner warning message, email alert, or pop-up screen indicating that a volume has failed. Do the following: 1. Verify hard drive status in the Disk Manager submenu. See “Disk Manager” on page 53. If the status of any drive is “Failed,” visit WD Technical Support at support.wdc.com...
- Page 103 WD SHARESPACE USER MANUAL How do I manually create an SSL certificate and key on a Linux system? Do the following: 1. Generate a RSA private key by typing the following commands: /usr/bin/openssl genrsa 1024 > server.key /bin/cat server.key From the Mozilla Firefox browser, select Tools.
- Page 104 WD SHARESPACE USER MANUAL Event type and Event Event Critical Warning Event ID state value Volume events Volume [1,2] Volume [1,2] RAID volume in normal mode Volume [1,2] RAID volume in degraded mode Volume [1,2] RAID(0,1,5) volume resyncing Progress Volume [1,2]...
- Page 105 WD SHARESPACE USER MANUAL Event type and Event Event Critical Warning Event ID state value USB [1,2,3] USB disk unsafely removed USB [1,2,3] USB disk format OK USB [1,2,3] USB disk format fail User events [User ID] User quota is normal...
-
Page 106: Appendix
WD SHARESPACE USER MANUAL Appendix Regulatory Compliance FCC Class B Information This device has been tested and found to comply with the limits of a Class B digital device, pursuant to Part 15 of the FCC Rules. These limits are designed to provide reasonable protection against harmful interference in a residential installation. -
Page 107: Environmental Compliance (China)
WD SHARESPACE USER MANUAL Environmental Compliance (China) Warranty Information Obtaining Service WD values your business and always attempts to provide you the very best of service. If this Product requires maintenance, either contact the dealer from whom you originally purchased the Product or visit our product support website at support.wdc.com for information on how to obtain service or a Return Material... -
Page 108: Gnu General Public License ("Gpl")
GNU General Public License (“GPL”) Firmware incorporated into WD ShareSpace includes third party copyrighted software licensed under the GPL (“GPL Software”). In accordance with the GPL: 1) the source code for the GPL Software may be obtained at support.wdc.com/ download/gpl;... -
Page 109: Wd Service And Support
WD. WD reserves the right to change specifications at any time without notice. Western Digital, WD, the WD logo, and MioNet are registered trademarks in the U.S. and other countries; and WD ShareSpace and WD Discovery are trademarks of Western Digital Technologies, Inc. Other marks may be mentioned herein that belong to other companies. -
Page 110: Index
WD SHARESPACE USER MANUAL Index replacing 90 Drive format 1 admin login password change 38 audio e-mail notifications streaming in iTunes 69 setup 36 Auto backup 87 Environmental compliance (China) 102 ESD precautions 90 Europe, CE compliance 101 backup button 7... - Page 111 WD SHARESPACE USER MANUAL connect the system 8 advanced mode 33 HDD standby basic mode 28 enable 45 features 26 media tab 68 network tab 47 ICES/NMB-003 compliance 101 status tab 76 Indicators 6 storage tab 52 indicators 6 system tab 34...
- Page 112 UPS 45 usb shares 61 UPS service usb disk enabling 46 usb to network storage system backup USB Disk tab 61 WD ShareSpace to USB backup volumes 54 USB hard drive manage RAID disconnect 62 manage volume format 61 volumes and RAID management 54...
- Page 113 WD SHARESPACE USER MANUAL modify 71 user quota 65 modify 65 users creating 20 folder shares 73 groups 72 usb shares 75 users tab 70 volume delete 55 modify 55 volumes 54 Warranty 102 Warranty, limited 102 service 104 support 104...
Need help?
Do you have a question about the ShareSpace and is the answer not in the manual?
Questions and answers