Western Digital WDBWWD0080KBK User Manual
Personal cloud storage
Hide thumbs
Also See for WDBWWD0080KBK:
- Quick installation manual (7 pages) ,
- Product specifications (2 pages)
Table of Contents
Advertisement
Advertisement
Table of Contents

Related Manuals for Western Digital WDBWWD0080KBK


Summary of Contents for Western Digital WDBWWD0080KBK
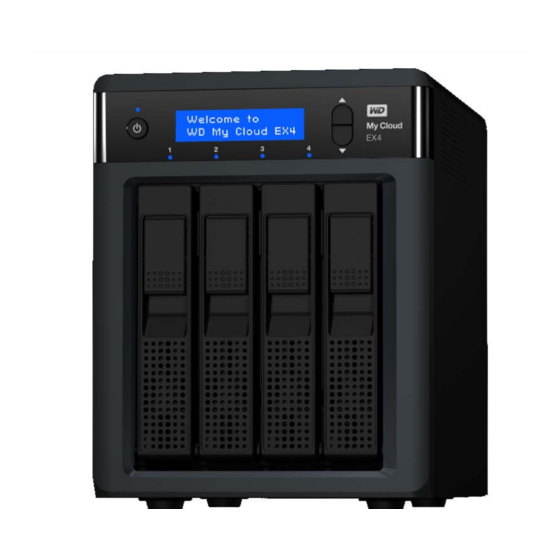
- Page 1 WD My Cloud EX4 ™ Personal Cloud Storage User Manual...
-
Page 2: Wd® Service And Support
Service and Support ® Should you encounter any problem, please give us an opportunity to address it before returning this product. Most technical support questions can be answered through our knowledge base or e-mail http://support.wd.com support service at . If the answer is not available or if you prefer, please contact WD at the best telephone number shown below. -
Page 3: Table Of Contents
Table of Contents WD® Service and Support....... . ii Registering Your WD Product ......ii Important User Information . - Page 4 Internal Backups ........59 Cloud Backups .
- Page 5 Appendix B: Joomla Setup Guide ......144 Appendix C: phpBB Setup Guide......148 Appendix D: Supported RAID Modes.
-
Page 6: Important User Information
IMPORTANT USER INFORMATION Important User Information Important Safety Instructions Recording Your WD Product Information Important Safety Instructions This device is designed and manufactured to assure personal safety. Improper use can result in electric shock or fire hazard. The safeguards incorporated into this unit will protect you if you observe the following procedures for installation, use, and servicing. -
Page 7: Recording Your Wd Product Information
IMPORTANT USER INFORMATION Recording Your WD Product Information Remember to write down the following WD product information, which is used for setup and technical support. Your WD product information is found on the label on the bottom of the device. Serial Number Model Number Purchase Date... -
Page 8: Product Overview
PRODUCT OVERVIEW Product Overview About the System Features About the Online Learning Center Package Contents Pre-installation Instructions Handling Precautions Product Components About the System The WD My Cloud EX4 personal cloud storage system is a high-performance system providing secure wireless access to your media and files from any computer, tablet, or smartphone when connected to a wireless router. -
Page 9: About The Online Learning Center
PRODUCT OVERVIEW Stream media to your connected devices – Stream videos and photos to connected ® ® TVs, media players, gaming consoles and other DLNA /UPnP devices. Features a Twonky ® 7.2 and a DLNA-certified 1.5 media server. And with My Cloud EX4’s iTunes server, you can easily stream your music collection. -
Page 10: Package Contents
PRODUCT OVERVIEW Package Contents WD My Cloud EX4 Personal Cloud Storage device Ethernet cable AC power adapter Quick Install Guide WD My Cloud EX4 Personal Cloud Storage Device Quick Install Guide Ethernet cable AC adapter* For information on additional accessories for this product, visit: www.shopwd.com www.wdstore.com Canada... -
Page 11: Pre-Installation Instructions
PRODUCT OVERVIEW Web Browsers Internet Explorer 8.0 and later on supported Windows computers Safari 5.0 and later on supported Mac computers Firefox 12 and later on supported Windows and Mac computers Google Chrome 14 and later on supported Windows and Mac computers Local Network ... -
Page 12: Product Components
PRODUCT OVERVIEW Product Components Front View Scroll buttons LCD Display Power LED Power button Drive LEDs Drive Bay Doors WD MY CLOUD EX4 PERSONAL CLOUD STORAGE USER MANUAL... -
Page 13: Back View
PRODUCT OVERVIEW Back View External DC In USB ports Ethernet ports Power port Reset button Kensington ® Security Slot Component Icon Description Ethernet port Connects the device to a local network. USB 3.0 port Connects to a USB hard drive for additional storage. Reset button RESET Restores settings such as the administrator user name and password... -
Page 14: Getting Started
GETTING STARTED Getting Started Physically Connecting the Device Getting Started Using Online Setup Software Getting Started Without Online Setup Software Accessing Content It’s easy to set up the WD My Cloud EX4 Personal Cloud Storage device -- all you have to do is unpack your device, connect it, and wait for the Power LED on the front of your device to turn a solid Blue. - Page 15 GETTING STARTED Follow the steps below to connect the WD My Cloud EX4 Personal Cloud Storage device to a home or small office network. Important: To avoid overheating, make sure the device is upright as shown in the illustration above and nothing is blocking or covering the slots and openings on the top and bottom of the device.
- Page 16 GETTING STARTED The WD My Cloud EX4 device allows you to scroll though the various informational messages on your device by pressing the scroll buttons: Alerts When an alert occurs, the alert message displays on the LCD screen as well as the Alert icon and window within the WD My Cloud EX4 Dashboard.
- Page 17 GETTING STARTED Front Panel Hard Drive (HDD) LEDs The following table describes the front panel hard drive LED behavior. Function Color Appearance Function Description No Drive Black ------ Drive is not present. (off) Drive Present, No Blue Solid Drive is present but there is no activity. Activity Active Drive Blue...
-
Page 18: Getting Started Using Online Setup Software
GETTING STARTED Getting Started Using Online Setup Software The online setup software walks you through the steps necessary to easily connect your device to your home or small office network. Use the following steps to download and run the online setup software, discover the device and get started using your device. The online setup software is available from WD’s Online Learning Center at http://wd.com/setup/wdmycloudex4. - Page 19 The Getting Started window displays. 6. Click Get Started. 7. Read the Western Digital License Agreement that displays, then select the “I accept the terms of the License Agreement” check box and click Next. WD MY CLOUD EX4 PERSONAL CLOUD STORAGE...
- Page 20 GETTING STARTED Connecting the Device to your Network 1. Review the information on the screen, then check your device to ensure that the device name displays on the LCD of your WD My Cloud EX4. 2. When the LED on your WD My Cloud EX4 device is solid blue, click Next. The software discovers your device.
- Page 21 GETTING STARTED Creating a Personal Cloud WD My Cloud EX4 web access provides fee-free remote access to your WD My Cloud EX4 personal cloud device. Once you create your account, you can access your device using your mobile devices with Internet access and from the WD My Cloud desktop application.
- Page 22 Click Yes if you receive a warning prompt. On the My Cloud screen, select a language from the pull-down menu, then click Review the Western Digital License Agreement, then select I accept the terms of the License Agreement, and click Next.
-
Page 23: Getting Started Without Online Setup Software
GETTING STARTED Getting Started Without Online Setup Software If you do not use the online setup software to get started, you can still: Use your WD My Cloud EX4 personal cloud storage device as an external hard drive, dragging and dropping files to and from it. ... - Page 24 GETTING STARTED If you’re operating systems Then... is... Mac OS X In a Finder window, click WDMyCloudEX4 under the shared items (Leopard, Snow Leopard, Lion, in the side bar. Mountain Lion) If presented with an authorization page, select Guest, and then click Connect to display the Public share: Double-click the Public folder to display the subfolders: Shared Music, Shared Pictures, Shared Videos, and Software.
-
Page 25: The Dashboard At A Glance
THE DASHBOARD AT A GLANCE The Dashboard at a Glance Launching the Dashboard Accessing the Dashboard for the First Time The Dashboard Home Page Obtaining Customer Support Common Tasks Use the WD My Cloud EX4 dashboard to configure settings and to manage the device as you prefer. -
Page 26: Accessing The Dashboard For The First Time
THE DASHBOARD AT A GLANCE IF you want to launch from . . . THEN . . . Mac OS X Click the Safari icon > bookmark icon > Bonjour. Double-click the WD My Cloud EX4 device on the network. Mobile Devices IOS Devices: Open a browser. - Page 27 THE DASHBOARD AT A GLANCE 5. Enter your First Name, Last Name, and Email address to create an admin login for your WD My Cloud EX4 device, then click Save. If you’d like to add additional users, enter the User Name, First Name, Last Name, and Email address of the additional users, then click Save for all additional users.
-
Page 28: The Dashboard Home Page
THE DASHBOARD AT A GLANCE The Dashboard Home Page The WD My Cloud EX4 Home page has an information bar at the top right, an icon bar across the page, and an instant overview of the status of the device’s main functions and links for updating settings. - Page 29 THE DASHBOARD AT A GLANCE Icon Name Actions Users Create, change, and delete users and grant them full or limited access to particular shares. Shares Create, change, and delete shares (folders) and grant specific users full, limited, or no access to particular shares Cloud Access Set up, change, and remove remote cloud access to particular shares.Monitor remote access status.
- Page 30 THE DASHBOARD AT A GLANCE Viewing Device Status and Making Updates on the Home Page The main body of the Home page shows the status of the device and its functions and provides shortcuts to the most necessary tasks. Capacity The Capacity panel displays the amount of free storage left on your WD My Cloud EX4 device.
- Page 31 THE DASHBOARD AT A GLANCE Device The Device section identifies the overall health of the system, indicates the current version of your firmware and, informs you if firmware updates are available. Diagnostics The Diagnostics panel displays a snapshot of the system’s components and identifying the overall health of the WD My Cloud EX4 device.
- Page 32 THE DASHBOARD AT A GLANCE 1. To view whether an updated version of the firmware is available, click the arrow on the right side of the panel to display firmware availability: If an update is available, click Install and Reboot to update your device. 2.
- Page 33 THE DASHBOARD AT A GLANCE CPU: Click the right arrow to view the CPU activity. Click Back to return to the Device Activity pane. Click Close to return to the Home page. Memory: Click the right arrow to view the Memory activity. Click Back to return to the Device Activity pane.
- Page 34 THE DASHBOARD AT A GLANCE Cloud Devices The Cloud Devices panel displays the number of cloud devices currently accessing the WD My Cloud EX4 device remotely. 1. To add cloud access for a user, click the plus sign (+) in the lower right of the panel to display: 2.
- Page 35 THE DASHBOARD AT A GLANCE 2. Enter the required information and click Next. 3. To assign a password, click the toggle button , enter a password, then confirm your password. Click Next. 4. To assign a group to the new user, click the check box next to a group, then click Next. 5.
- Page 36 THE DASHBOARD AT A GLANCE 1. To view the installed apps, click the arrow in the lower right of the panel to display: Note: To install an app, see “Managing Apps on the WD My Cloud EX4” on page 83. 2.
- Page 37 THE DASHBOARD AT A GLANCE Viewing Alert Details 1. On the Dashboard, click the Alert icon in the upper right corner. 2. Select the arrow next to the alert you’d like to view from the Alert list or click View All to review details for all of your alerts.
-
Page 38: Obtaining Customer Support
THE DASHBOARD AT A GLANCE Obtaining Customer Support To open the Support page: 1. Click the Help icon on any page to display the Help menu. 2. Click Support to display the following page: If a problem occurs with the WD My Cloud EX4 device, WD Technical Support will need information about your WD My Cloud EX4 device to troubleshoot and determine the best solution. -
Page 39: Common Tasks
THE DASHBOARD AT A GLANCE Common Tasks The next few chapters step you through the procedures for configuring and using the WD My Cloud EX4 device. The following table provides shortcuts to instructions for some common tasks. How do I ... See ... -
Page 40: Managing Users, Groups And Shares
MANAGING USERS, GROUPS AND SHARES Managing Users, Groups and Shares About Users About Groups About Shares Viewing Users Viewing Groups Viewing a List of Shares Adding a Single User Adding a Group Creating a New Share Adding Multiple Users Editing Group Settings Making a Share Private Editing User Settings Assigning Share Access to... -
Page 41: Viewing Users
MANAGING USERS, GROUPS AND SHARES Viewing Users 1. On the navigation bar, click Users to display the Set Up Users screen. 2. To view user details, click a user name on the left pane. The user’s profile and share access information display. A user can have view only, read/write, or no access to a share. - Page 42 MANAGING USERS, GROUPS AND SHARES 2. Enter the User Name, First Name, Last Name and Email address (optional) of the user you’d like to add in the applicable fields, the click Next. 3. To assign a password, click the toggle button , enter a password, then confirm your password.
- Page 43 MANAGING USERS, GROUPS AND SHARES 5. Enter the Quota Amount, or leave the values blank for unlimited space, then click Save. (See “Quota Rules” on page 43 for information on quotas.) You’re new user account displays on the left pane of the Set Up Users screen. Adding Multiple Users Use the following steps to add multiple user accounts.
- Page 44 MANAGING USERS, GROUPS AND SHARES Create Multiple Users 1. Enter the following information on the Create Multiple Users screen, then click Next: Username Prefix: Enter a prefix for your user name. This will be added to the Account Prefix to create the User Name. (Example: HR) ...
- Page 45 MANAGING USERS, GROUPS AND SHARES 4. You’re new user accounts displays on screen. Click Save to save them to your device. Import Multiple Users 1. Click Download. This downloads a .txt file identifying the format you’ll need to set up your user import file.
-
Page 46: Editing User Settings
MANAGING USERS, GROUPS AND SHARES Editing User Settings 1. On the Set Up Users screen, select the user whose information you’d like to edit. The User Profile and Share Access panels display. 2. Modify the required and optional settings as desired. To update the user’s access to shares, See “Assigning Share Access to Users”... - Page 47 MANAGING USERS, GROUPS AND SHARES Assigning Share Access to Users Once a user account is created, you can assign access to the various shares on your WD My Cloud EX4 device using the following steps. 1. On the Set Up User screen, select the user for which you’d like to assign a share. Note: Only private shares can be edited.
- Page 48 MANAGING USERS, GROUPS AND SHARES Assigning a Group to a User Use the following steps to assign a Group to a user account. 1. On the Set Up Users screen, select the user from the left pane. 2. In the Group Membership field, click Configure. 3.
-
Page 49: About Groups
MANAGING USERS, GROUPS AND SHARES 3. Enter the amount of space you’d like to assign to the user on the WD My Cloud EX4 device. To assign unlimited space, leave the Quota Amount field(s) blank. 4. Click Save. Removing a User Use the following steps to delete users from the WD My Cloud EX4 device. -
Page 50: Adding A Group
MANAGING USERS, GROUPS AND SHARES 3. To view group details, click a group name on the left pane. The group profile information displays. Adding a Group 1. To add a group, click in the lower left side of the Set Up Groups screen. 2. - Page 51 MANAGING USERS, GROUPS AND SHARES Editing Group Settings 1. On the Set Up Groups screen, select the Group whose information you’d like to edit. The Group Profile and Share Access panel displays. 2. Modify the required and optional settings as desired. To update the group’s access to shares, See “Assigning Share Access to Groups”...
-
Page 52: Removing A Group
MANAGING USERS, GROUPS AND SHARES Assigning Quotas to a Group Use the following steps to assign a quotas to a Group. A quota determines the amount of space assigned to the user on the WD My Cloud EX4 device. (See “Quota Rules” on page 43 for information on quotas.) 1. -
Page 53: About Shares
MANAGING USERS, GROUPS AND SHARES About Shares A share is an area on the WD My Cloud EX4 device for storing files (similar to a folder or directory). Note: In this manual, we use the terms share and folder interchangeably. A share can be public so that all users can access the contents, or private to limit access to selected users. -
Page 54: Creating A New Share
MANAGING USERS, GROUPS AND SHARES 2. Click a share to display its profile and user access information. Note: Only private shares can be edited. Public shares always have read/write access and are therefore greyed out. Creating a New Share You can create a share and designate it as public or private. For example, if the share contains financial information, you may want to make the share private. - Page 55 MANAGING USERS, GROUPS AND SHARES Enable Recycle Bin (optional) The Recycle Bin contains any files deleted from the WD My Cloud EX4 device. If you’d like to use the Recycle Bin, click the toggle button (Default is OFF.) Note: The Recycle Bin is only available for Windows SMB files.
-
Page 56: Making A Share Private
MANAGING USERS, GROUPS AND SHARES Editing Share Settings 1. On the Set Up Shares screen, select the share you’d like to edit. The Share Profile panel display. 2. Modify the required and optional settings as desired. Making a Share Private If you decide to limit access to a public share, use the following steps to convert it to a private share. -
Page 57: Backing Up And Retrieving Files
BACKING UP AND RETRIEVING FILES Backing Up and Retrieving Files About Backups Managing a USB Device and USB Backups Remote Backups Internal Backups Cloud Backups About Backups There are various ways to backup your data on the WD My Cloud EX4 device. These include: ... - Page 58 BACKING UP AND RETRIEVING FILES Creating a USB Backup Use the following steps to backup your data on your WD My Cloud EX4 to or from a USB device. On the navigation bar, click Backups to display the Backups screen. Click USB Backups, if not already selected.
- Page 59 BACKING UP AND RETRIEVING FILES In the USB Backup Jobs area, click the arrow to begin your backup. The progress of the backup displays in the USB Backup Jobs area. Viewing the Details of a USB Backup Job On the USB Backups screen, under USB Backup Jobs, select the job you’d like to modify, then click the Edit Job button Review the USB Details screen, then click Close to close the screen.
-
Page 60: Remote Backups
BACKING UP AND RETRIEVING FILES Editing a USB Backup Job On the USB Backups screen, under USB Backup Jobs, select the job you’d like to modify, then click the Edit Job button In the USB Backup area, make the necessary changes to your job, then click Save. Deleting a USB Backup Job On the USB Backups screen, under USB Backup Jobs, select click the Delete Job button... - Page 61 BACKING UP AND RETRIEVING FILES Click Remote Backup. Click the Create Remote Backup button. Place a check mark in the box next to the share you’d like to backup, then click Next. In the Remote IP field, enter the IP address of the remote backup server. (Example 192.168.1.16) In the Password field, enter the password for the remote backup server, then click Next.
- Page 62 BACKING UP AND RETRIEVING FILES Place a check mark in the box next to the share where you’d like to back up your data, then click Next. Complete the following fields to create a Remote backup job, then click Next: Job Name Enter a Job Name for your backup.
- Page 63 BACKING UP AND RETRIEVING FILES Viewing the Details of a Remote Backup Job On the Remote Backup screen, under Remote Backup Jobs, click the Details button next to the job you’d like to view. Review the Details screen, then click Close to close the screen. Recovering a Remote Backup Use the following steps to recover the data you saved on your remote server.
-
Page 64: Internal Backups
BACKING UP AND RETRIEVING FILES Deleting a Remote Backup On the Remote Backup screen, under Remote Backup Jobs, click the Delete button next to the job you’d like to view. In response to the confirmation message, click OK. The selected Remote Backup job is now deleted and removed from the Remote Backup Jobs list. - Page 65 BACKING UP AND RETRIEVING FILES Recurring Backup If you’d like to use the Recurring Backup feature,: Click the toggle button to enable the Recurring Backup feature. Select the frequency of the backup: Daily, Weekly, Monthly Select a time (hour and minutes) from the pull-down menu. If you did not enable the Recurring backup field: •...
-
Page 66: Cloud Backups
BACKING UP AND RETRIEVING FILES Deleting an Internal Backup Job On the Internal Backups screen, under Internal Backup Queue, select the Delete button. In response to the confirmation message, click OK. The selected Internal Backup job is now deleted and removed from the Internal Backup Jobs list. Cloud Backups A cloud backup allows you to create remote backups that are accessible over the internet and through various mobile devices. - Page 67 BACKING UP AND RETRIEVING FILES Click Elephant Drive at the top of the screen. In the ElephantDrive field, click the toggle button to turn on your ElephantDrive cloud backup. Click Register. The Register screen displays. Enter the following information, then click Register: ...
- Page 68 BACKING UP AND RETRIEVING FILES Click Cloud Backups, if not already selected. Click Elephant Drive at the top of the screen. In the Access Backups field, click Login. Enter the E-mail and Password you used when you registered with ElephantDrive in Step 6 on page 62.
- Page 69 BACKING UP AND RETRIEVING FILES Enabling an Amazon S3 Cloud Backup Note: Before creating your Cloud backup, sign-up with for the Amazon S3 service at http://aws.amazon.com/s3. Once your Amazon S3 account is setup, use the following steps to create a cloud backup. On the navigation bar, click Backups to display the Backups screen.
- Page 70 BACKING UP AND RETRIEVING FILES Private Key: Enter the Private Key supplied to you by Amazon S3. Remote Path: Enter the remote path for your cloud. This is normally your Bucket name. Click Next. Enter the following information, then click Next: Type Select one of the following options: •...
- Page 71 BACKING UP AND RETRIEVING FILES Select Autoupdate Date and Time from the pull-down menus (Weekly or Monthly option). 11. If you don’t select Autoupdate, in the Backup Now field, indicate whether you want to begin the backup now. Select Yes to begin your backup now.
-
Page 72: Managing Storage On The Wd My Cloud Ex4
MANAGING STORAGE ON THE WD MY CLOUD EX4 Managing Storage on the WD My Cloud EX4 Storage Types RAID Storage iSCSI Storage Storage Types There are several ways to manage your storage on the WD My Cloud EX4 device: RAID Storage ... -
Page 73: Changing The Raid Mode
MANAGING STORAGE ON THE WD MY CLOUD EX4 RAID Mode Description RAID 1 In RAID 1 mode, the RAID controller duplicates all data from one drive to a second drive in the drive group. RAID 1 provides complete data redundancy but doubles the required data storage capacity. - Page 74 MANAGING STORAGE ON THE WD MY CLOUD EX4 On the navigation bar, click Storage to display the Storage screen. Click RAID, if not already selected. Click Change RAID Mode at the bottom of the screen. Review the Warning message, then click OK. Select the RAID mode you’d like to use for your WD My Cloud EX4 server.
- Page 75 MANAGING STORAGE ON THE WD MY CLOUD EX4 RAID 0 Data is striped across multiple hard drives, enabling accelerated reading and recording of data by combining the work of two or more drives to increase performance. RAID 1 Two instantaneous copies of the data are recorded on separate hard drives so if one of them fails, other(s) continue to read/write data until the faulty hard drive is replaced.
- Page 76 MANAGING STORAGE ON THE WD MY CLOUD EX4 If you choose not to use the entire volume for your RAID selection, you can configure the remaining disk space as Spanning by selecting the Configure the remaining disk space as Spanning check box. Click Next.
-
Page 77: Iscsi Storage
MANAGING STORAGE ON THE WD MY CLOUD EX4 Auto-Rebuilding your RAID The Auto-Rebuilding option allow you to automatically rebuild the RAID for your WD My Cloud EX4 device in case of drive corruption. Use the following steps to enable the auto- rebuild option. - Page 78 MANAGING STORAGE ON THE WD MY CLOUD EX4 Creating an iSCSI Target Use the following steps to create an iSCSI target On the navigation bar, click Storage to display the Storage screen. Click iSCSI, if not already selected. Click the toggle button to enable iSCSI.
- Page 79 MANAGING STORAGE ON THE WD MY CLOUD EX4 Size: The size of your target and the unit of information for that size (e.g. GB, TB) Click Next. If you’d like to assign security for your target, click CHAP. Enter an existing User Name and Password, then confirm the Password.
- Page 80 MANAGING STORAGE ON THE WD MY CLOUD EX4 Deleting an iSCSI Target Use the following steps to delete an iSCSI target. On the Storage page, click iSCSI. Under iSCSI Target list, click Details next to the target you’d like to delete. Ensure that this is the target you want to delete, then click Delete.
-
Page 81: Volume Virtualization
MANAGING STORAGE ON THE WD MY CLOUD EX4 In the iSCSI iSNS Client field, click the toggle button Click Configure. Enter the iSNS client server address, then click Save. Volume Virtualization Volume Virtualization simplifies scalability by allowing you to map iSCSI targets on other network storage devices and present them as volumes on your WD My Cloud EX4 device. - Page 82 MANAGING STORAGE ON THE WD MY CLOUD EX4 Creating a Virtualized Volume Use the following steps to create a virtualized volume on your device. On the Storage page, click Volume Virtualization, if not already selected. Click Create. In the Device IP field, enter the IP address of the device where the iSCSI target resides, then click Next.
- Page 83 MANAGING STORAGE ON THE WD MY CLOUD EX4 To add authentication to the target, click the toggle button , enter a User Name and Password, then click Next. Disabled authentication is the default. To keep the default, ensure that the Authentication field is Off, then click Next.
- Page 84 MANAGING STORAGE ON THE WD MY CLOUD EX4 Review the Volume Virtualization summary to ensure that your settings are correct, then click Save. A virtual volume is created. Connecting a Virtualized Volume to a Target Use the following steps to connect a virtualized volume on your device. On the Storage page, click Volume Virtualization, if not already selected.
- Page 85 MANAGING STORAGE ON THE WD MY CLOUD EX4 Once your virtual volume is formatted, click Close. The state of the volume is changed to Connect. Your new virtual volume is now available on your WD My Cloud EX4 device. Modifying a Virtualized Volume Use the following steps to modify a virtualized volume on your device.
-
Page 86: Disk Status
MANAGING STORAGE ON THE WD MY CLOUD EX4 Make the necessary changes to the volume, then click Save. When the modified settings are saved, the virtual volume is connected again. Disk Status The Disk Status screen identifies the health of the disk drives as well as the status and information on each drive used in your WD My Cloud EX4 device. - Page 87 MANAGING STORAGE ON THE WD MY CLOUD EX4 Review the hard drive information, then click Close. The Hard Drive Information screen displays the following data: Vendor The vendor from whom the hard drive was obtained. Model The model number of the hard drive selected. Serial Number The serial number of the hard drive selected.
-
Page 88: Managing Apps On The Wd My Cloud Ex4
MANAGING APPS ON THE WD MY CLOUD EX4 Managing Apps on the WD My Cloud EX4 About Apps Managing Apps About Apps Apps is short for Applications. Apps are little self-contained programs used to enhance the existing functions of your device or service. The WD My Cloud EX4 device provides various apps that allow you to use your device more productively. - Page 89 MANAGING APPS ON THE WD MY CLOUD EX4 Adding an App Use the following steps to add an app to your WD My Cloud EX4 device. 1. On the navigation bar, click Apps to display the Apps screen. 2. Click in the lower left side of the screen.
- Page 90 MANAGING APPS ON THE WD MY CLOUD EX4 Manually Adding an App If you have an app you’d like to add that is not listed on the Add an App screen, use the following steps to manually add that app to your WD My Cloud EX4 device. Note: WD recommends that you fully understand the nature of any app before you install it on your device.
- Page 91 MANAGING APPS ON THE WD MY CLOUD EX4 Deleting an App Use the following steps to delete an app from your WD My Cloud EX4 device. 1. On the navigation bar, click Apps to display the Apps screen. 2. From the Apps list in the left pane, select the app that you’d like to delete from the device.
- Page 92 MANAGING APPS ON THE WD MY CLOUD EX4 3. Click the Updates Available link. 4. Select the app you’d like to update from the list, then click Update. If you’d like to view the details of the update, click Details. ...
-
Page 93: Accessing Your Cloud Remotely
ACCESSING YOUR CLOUD REMOTELY Accessing Your Cloud Remotely Enabling Cloud Access for the WD My Cloud EX4 Device Configuring Cloud Access for a User Mobilizing Your Files with WD My Cloud EX4 Mobile Apps About WD My Cloud Mobile App WD My Cloud Desktop Application A personal cloud is your content, at home, secure and under your control. - Page 94 ACCESSING YOUR CLOUD REMOTELY In the left pane, select the user you’d like to configure for cloud access. To give the user access to the WDMyCloud.com web site: In the WDMyCloud.com Login for <user name> area, click one of the following icons: ...
-
Page 95: Mobilizing Your Files With Wd My Cloud Ex4 Mobile Apps
Apple iPhone, iPod touch, iPad, Android tablet, or Android smartphone. Requirements include: Western Digital WD My Cloud EX4 personal cloud storage connected to the Internet. Your device access code generated by your WD My Cloud EX4 device. - Page 96 ACCESSING YOUR CLOUD REMOTELY For more features and instructions for using WD Photos, see its online Guide Me page and Quick Tips, and go to http://wdphotos.wd.com. Installing WD Photos on Your Mobile Device Important: Make sure the photos you want to view on the mobile device are stored in the Shared Pictures subfolder in the Public share of your WD My Cloud EX4 device.
-
Page 97: About Wd My Cloud Mobile App
ACCESSING YOUR CLOUD REMOTELY Enter the activation code generated on the WD My Cloud EX4’s dashboard and tap Activate. Note: You must generate one code for each app you want to activate. Codes are valid for 48 hours from the time of request and can be used one time only. For details on how to generate an activation code, see . - Page 98 ACCESSING YOUR CLOUD REMOTELY Show off the photos stored on your WD My Cloud EX4 device. Connect to other cloud sites such as Dropbox, Google Drive, and Skydrive from your tablet or smartphone. Stream and enjoy music and video files stored on your WD My Cloud device. Note: Video streaming performance is best over your LAN and when your mobile device is connected using Wi-Fi wireless connections.
- Page 99 ACCESSING YOUR CLOUD REMOTELY In the Add Manually section, tap to the left of WD Device. Enter the activation code generated on the WD My Cloud’s dashboard and tap Activate. You must generate one code for each app you want to activate. Codes are valid for 48 hours from the time of request and can be used one time only.
-
Page 100: Wd My Cloud Desktop Application
ACCESSING YOUR CLOUD REMOTELY Tap a file to display it. Note: If you have problems installing the WD My Cloud app, visit http://websupport.wd.com/rn/wdmycloud.asp . For more features and instructions, see the app’s online Guide Me page, Help, FAQs, and tips, or go to http://wdmycloud.wd.com . - Page 101 ACCESSING YOUR CLOUD REMOTELY Installing WD My Cloud Desktop Windows Open a web browser. For browser requirements, see “Web Browsers” on page 6. In the address field, type http://wd.com/setup/wdmycloudex4 to display the Welcome to the Learning Center page: Click WD My Cloud EX4 to display the download page: In the Software Downloads area, click Go to Downloads.
- Page 102 ACCESSING YOUR CLOUD REMOTELY In the WD My Cloud for desktop area, click Download. The setup software downloads to your computer. Access your downloaded files, then double-click wdmycloud.exe (Windows) Select a language from the pull-down menu, then click OK. Read the WD License Agreement, then click I accept the terms of the License Agreement.
- Page 103 ACCESSING YOUR CLOUD REMOTELY 10. Read the Apple License Agreement, then click I accept the terms of the License Agreement. 11. Click Install. Installation begins. 12. Once the installation is complete, click Done to close the WD My Cloud installer. Complete Steps 1 - 5 above.
- Page 104 ACCESSING YOUR CLOUD REMOTELY Select a language from the pull-down menu Read the WD Software License Agreement, than click I accept the terms of the License Agreement. Click Install. The installation begins. Once the installation is complete, click Done to close the WD My Cloud installer. Launching WD My Cloud Desktop Once you’ve installed the WD My Cloud Desktop application, use the following steps to access your WD My Cloud EX4 media files.
- Page 105 ACCESSING YOUR CLOUD REMOTELY IF you want to launch from . . . THEN . . . Windows 7/Vista Click > All Programs. In the left panel, select WD My Cloud>WD My Cloud. Mac OS X Click Finder>Applications Select WD My Cloud>WD My Cloud. Accessing WD My Cloud Desktop Use the following steps to access the WD My Cloud Desktop application.
-
Page 106: Playing/Streaming Videos, Photos, & Music
PLAYING/STREAMING VIDEOS, PHOTOS, & MUSIC Playing/Streaming Videos, Photos, & Music Media Servers Media Storage Enabling/Disabling DLNA and iTunes Accessing Your Personal Cloud Using Media Players Accessing Your Personal Cloud Using iTunes Media Servers The WD My Cloud EX4 Personal Cloud Storage device is designed to serve as your home's media server. -
Page 107: Media Types Supported
PLAYING/STREAMING VIDEOS, PHOTOS, & MUSIC Media Types Supported Audio files Video files Image Files JPEG DivX FLAC DVR-MS LPCM M2TS MPEG1 MPEG2 MPEG4 QTIF SPTS Xvid Note: Some devices may not support playback of all these files. Please refer to your device’s user manual to see which formats are supported. -
Page 108: Media Storage
PLAYING/STREAMING VIDEOS, PHOTOS, & MUSIC Media Types Supported by iTunes Note: iTunes 10.4 or later only supports music files. See Knowledge Base Answer ID 8412 for additional information on iTunes supported versions. The iTunes Media Server supports the following file extensions: FLAC, M4A, MP3, MP4A and WAV. - Page 109 PLAYING/STREAMING VIDEOS, PHOTOS, & MUSIC 1. In the DLNA area Media Streaming field, click the toggle button to enable/disable DLNA. Note: Media Streaming is ON by default. 2. Click View Media Players. This displays a list of the media players/receivers on your home network.
- Page 110 PLAYING/STREAMING VIDEOS, PHOTOS, & MUSIC Rescanning/Rebuilding the DLNA Database The WD My Cloud EX4 device automatically rescans and rebuilds the DLNA database, however, if you suspect that your database is corrupted, use the following steps to either rescan or rebuild your DLNA database. Important: Use caution when completing this procedure.
- Page 111 PLAYING/STREAMING VIDEOS, PHOTOS, & MUSIC 4. If you’d like to change the default MP3 Tag Codepage, select the page from the pull- down menu. 5. In the Auto Refresh field, select the frequency of the media refresh for iTunes from the pull-down menu.
-
Page 112: Accessing Your Personal Cloud Using Media Players
PLAYING/STREAMING VIDEOS, PHOTOS, & MUSIC Accessing Your Personal Cloud Using Media Players Now that you have copied your files to one of the Shared folders, you can use a variety of media players to stream media. The following types are supported: ... -
Page 113: Accessing Your Personal Cloud Using Itunes
PLAYING/STREAMING VIDEOS, PHOTOS, & MUSIC DLNA Devices See specific DLNA media device user manuals for instructions on connecting a DLNA device to your local area network so you can access content on the WD My Cloud device. Go to http://www.dlna.org for a list of DLNA-certified devices and for further information. - Page 114 PLAYING/STREAMING VIDEOS, PHOTOS, & MUSIC 2. Click WDMyCloudEX4 under the Shared section of the left pane. If you have copied music to the /Public/Shared Music folder or a video to/Public/Shared Videos, and it is in a format supported by iTunes, it should be listed in the right pane. 3.
-
Page 115: Configuring Settings
CONFIGURING SETTINGS Configuring Settings General Network ISO Mounting Media Utilities Notifications Firmware Update The Settings option on the navigation bar allows the Administrator to view and customize the WD My Cloud EX4 device’s system, network, media, utilities, notifications, and firmware settings. - Page 116 CONFIGURING SETTINGS Accessing the General Screen On the Navigation bar, click Settings. The General page displays. Device Profile 1. In the Device Profile section of the General page, view or modify the following settings: Device Name Enter a unique name for your device to identify it on the network. The device name can be up to 15 characters long and can not include special characters (e.g., @, #, $ etc.).
- Page 117 CONFIGURING SETTINGS Language and Clock In this section of the General page, you can change the language that displays in the WD My Cloud EX4 device’s interface and set the date and time. The date and time are synchronized to the NTP (Network Time Protocol) server by default. You have the option of setting the date and time manually or allowing the NTP to access the Internet and automatically set the time.
- Page 118 CONFIGURING SETTINGS Cloud Access Use the following steps to turn cloud access on or off for all users (i.e., control whether computers and mobile devices can access the content on the WD My Cloud EX4 device) Note: This turns on cloud access for the entire device. To turn on access for an individual user, see “Configuring Cloud Access for a User”...
- Page 119 CONFIGURING SETTINGS 4. Select a connection type: Auto: Click Auto. Manual: Click Manual, then enter the External Port 1 (HTTP) and External Port 2 (HTTPS) numbers. Win XP: Click Win XP. 5. Click Save. 6. In the Dashboard Cloud Access field, click the toggle button to turn on access to the Dashboard from the cloud remotely.
- Page 120 CONFIGURING SETTINGS Energy Saver The Energy Saver fields allow you to reduce the energy required to run your WD My Cloud EX4 device. Use the following information to configure the energy saving options on your WD My Cloud EX4 device. 1.
- Page 121 CONFIGURING SETTINGS Web Access Timeout Automatically logs you out of the system after a designated amount of time. • From the Web Access Timeout drop-down menu, select an amount of time you’d like to use for your system timeout. The system updates automatically.
- Page 122 CONFIGURING SETTINGS Services This section of the General screen enables or disables various services available on your WD My Cloud EX4 device. Distributed File System: Enabling this function allows you to improve data availability. Distributed File System is disabled by default. 1.
- Page 123 CONFIGURING SETTINGS 5. Click Get Remote Share Folder to connect to your remote folder. 6. Click Save. Active Directory Enabling this function allows you WD My Cloud EX4 device to join an existing windows domain. Active Directory is disabled by default. 1.
-
Page 124: Network
CONFIGURING SETTINGS Remote Share Folder Enter the name of the remote folder where you’d like to store your information or click Get Remote Share Folder, then select the folder from the Select a Folder pull-down list at the right of the field. -
Page 125: Network Services
CONFIGURING SETTINGS Network Profile The Network Profile section of the Network screen displays network information for the WD My Cloud EX4 device. The Network Profile section displays the following information: MAC Address The Media Access Control (MAC) address for this device. IPv4 IP Address The IP version 4 address for this device. - Page 126 CONFIGURING SETTINGS 1. Review or update the following: IPv4 Network Mode By default, the network mode is set to DHCP, which means the WD My Cloud EX4 device automatically gets the IP address and other settings from your network. Select the method of assigning the device’s unique IPv4 address: •...
- Page 127 CONFIGURING SETTINGS SMB2 Server Message Block, version 2. Select this option to support Windows File History in Windows 8. • To enable/disable SMB2, click the toggle button Note: If you enable SMB2, read/write performance will be impacted. FTP Access File Transfer Protocol enables the transfer of data from one computer to another through a network.
- Page 128 CONFIGURING SETTINGS WebDAV Service Web Distributed Authoring and Versioning (WebDAV). Select this option to enable WebDAV service for your network. • To enable/disable WebDAV Service, click the toggle button Note: In order to connect to the WebDAV service, use the following IP address: http://<server ip address>:8080/Public LLTD Link Layer Topology Discovery protocol.
-
Page 129: Port Forwarding
CONFIGURING SETTINGS Workgroup The Workgroups feature allows devices in the same workgroup to access one another. This option is only available for Windows operating systems. Each time you add a device to your network, assign it the same workgroup name to enable access. 1. -
Page 130: Iso Mounting
CONFIGURING SETTINGS Adding Port Forwarding Services 1. To Add to add port forwarding service(s) to your WD My Cloud EX4 device. 2. On the Port Forwarding Settings screen, click either Select the default service scan or the Customize a port forwarding service, then click Next. ... -
Page 131: Creating An Iso Image
CONFIGURING SETTINGS Creating an ISO Image An ISO image is a file that is an exact copy of an existing file system. Use the following steps to create an ISO image. 1. On the Navigation bar, click Settings, then click ISO Mount. 2. - Page 132 CONFIGURING SETTINGS 10. Click Next. Your ISO image is created. 11. Click Finish. Creating an ISO Share Use the following steps to create an ISO share. 1. On the Navigation bar, click Settings, then click ISO Mount. 2. Click Create ISO Share. 3.
- Page 133 CONFIGURING SETTINGS 5. Enter a description for your ISO share, then click Next. 6. Complete the following fields: Enable Media Serving: To enable Media server for the ISO Share, click the toggle button FTP Access: To enable FTP Access for the ISO Share, click the toggle button ...
- Page 134 CONFIGURING SETTINGS 2. Review the ISO Share details, then click Close. Modifying an ISO Share Use the following steps to modify an ISO share. 1. On the ISO Mount screen, select next to the ISO Share that you’d like to modify. 2.
-
Page 135: Media
CONFIGURING SETTINGS Media On the Media screen, you can enter DLNA (Digital Living Network Alliance) media server and iTunes media player settings so that you can enjoy media in every room in your house. 1. On the Navigation bar, click Settings, then click Media in the left panel. Note: DLNA and iTunes only works on your local network. -
Page 136: Utilities
CONFIGURING SETTINGS Utilities On the Utilities page, you can test the WD My Cloud EX4 device and get diagnostic information, restore the device to factory defaults, reboot or shut down the device, and import or export a configuration file. Settings To access the Utilities screen, click , then click Utilities in the left pane. -
Page 137: System Restore
CONFIGURING SETTINGS System Restore The system restore allows the Administrator to perform a full factory restore on the WD My Cloud EX4 device. This option restores your device to factory default settings with no data loss. Important: Before doing a factory restore or a system update, you may choose to save your device’s current configuration. -
Page 138: Scan Disk
CONFIGURING SETTINGS Device Maintenance The Device Maintenance area allows you to shutdown and reboot your WD My Cloud EX4 device. This area also displays the amount of time the device has been up and running. Shutting down the Device Use the following steps to safely shut down your WD My Cloud EX4 device. 1. -
Page 139: Notifications
CONFIGURING SETTINGS WARNING! The Format Disk option erases all of the user data and shares permanently, retaining default shares. Data recovery programs cannot be used to restore data; all user data and shares are permanently deleted. Formatting your disk will take several hours to complete. Formatting Your Disk Use the following steps to format the disks on your WD My Cloud EX4 device. - Page 140 CONFIGURING SETTINGS Notification Email The Notification Email area allows you to set up email alerts and SMS notifications for specified users. Enabling Email Alerts 1. On the Navigation bar, select Settings, then click Notifications from the left pane. 2. To enable Alert emails, click the toggle button 3.
-
Page 141: Firmware Update
CONFIGURING SETTINGS Notification Display The Notification Display allows you to select the type of notifications that are sent to you. 1. On the Notification Display screen, select the level of notifications you’d like to view on the Alert icon, using the slider bar. ... - Page 142 CONFIGURING SETTINGS Auto Update Auto Update allows you to schedule your the WD My Cloud EX4 device to conveniently check for available software updates and install them automatically. This is the easiest way of ensuring the WD My Cloud EX4 firmware is current. Note: After a firmware update installs, the WD My Cloud EX4 device reboots.
- Page 143 CONFIGURING SETTINGS If an update is available, click Install and Reboot. Manual Update If you need to perform a manual update, this is where you’ll go to perform that task. Note: Ensure that you’ve downloaded the firmware file you need to install on your device from the WD Tech Support Downloads page at http://support.wd.com/product/ download.asp.
-
Page 144: Appendix
APPENDIX Appendix Appendix A: WD My Cloud EX4 Quick User Guide Appendix B: Joomla Setup Guide Appendix C: phpBB Setup Guide Appendix D: Supported RAID Modes Appendix E: RAID Migrations Appendix F: Safe Mode Firmware Update Procedures Appendix A: WD My Cloud EX4 Quick User Guide Logging into WD My Cloud EX4 1. - Page 145 APPENDIX The Dashboard Home Page The WD My Cloud EX4 Home page has an information bar at the top right, an icon bar across the page, and an instant overview of the status of the device’s main functions and links for updating settings. Logout Button Navigation Icons...
- Page 146 APPENDIX Viewing the Home Page The Home is your gateway to the WD My Cloud EX4 device. From this page you can: View the capacity of the device, Quick status and links to download information. Links desktop and mobile apps. ...
- Page 147 APPENDIX Quick Status The Quick Status area displays the total number of FTP, HTTP, and P2P downloads performed. Cloud Access Links The Cloud Access Links allow you to access the software necessary to gain access to the WD My Cloude EX4 device from your desktop and mobile apps. Downloads and Applications Information The Downloads and Applications area displays information on the number of downloads and apps available on your device.
- Page 148 APPENDIX Apps The Apps page provides access to the various apps available for your use on the WD My Cloud EX4 device. Available apps vary depending on what your administrator has implemented. WD MY CLOUD EX4 PERSONAL CLOUD STORAGE USER MANUAL...
-
Page 149: Appendix B: Joomla Setup Guide
APPENDIX Appendix B: Joomla Setup Guide Joomla is an award-winning content management system (CMS), which allows you to build Web sites and powerful online applications. For additional information on Joomla, Joomla is one of the many apps available for use from your WD My Cloud EX4 device. Provided in this section are the steps you’ll need to setup Joomla. - Page 150 APPENDIX 6. Review the Joomla Pre-installation check to ensure that all items passed, then click Next. 7. Read the Joomla license declaration, then click Next. 8. Complete the Database Configuration screen with the following information. then click Next. Database Type: Select MySQL if not already selected. ...
- Page 151 APPENDIX Remove: Removes the old database. 9. Keep the FTP Configuration screen default settings as they are and click Next. 10. Complete the Database Configuration screen with the following information:. Site Name: Enter a name for your Joomla site. Your Email: Enter the email address of the individual that will act as the adminis- trator for the Joomla site.
- Page 152 APPENDIX 13. Review the information on the screen, then click Remove installation folder. 14. At the top of this page, click Site. Your Joomla site has been created and installed on your WD My Cloud EX4 device. WD MY CLOUD EX4 PERSONAL CLOUD STORAGE USER MANUAL...
-
Page 153: Appendix C: Phpbb Setup Guide
APPENDIX Appendix C: phpBB Setup Guide phpBB™ is a popular Internet forum package written in the PHP scripting language. You can use phpBB to create your own customized forum that can be accessed and commented on from any internet connection. phpBB is one of the many apps available for use from your WD My Cloud EX4 device. - Page 154 APPENDIX 6. Review the Installation compatibility information, then click Start Install. 7. On the Database configuration screen, enter the following information, then click Proceed to Next Step. Database Type: Select MySQL if not already selected. Database server hostname or DSN: Enter localhost. ...
- Page 155 APPENDIX 8. Review the Database connection screen to ensure that it was performed successfully, then click Proceed to next step. Complete the Administrator Configuration screen with the following information, then click Proceed to next step. Default board language: Select the language for your bulletin board from the pull-down menu.
- Page 156 APPENDIX 10. Review the Administrator details screen to ensure that the administrator configuration was performed successfully, then click Proceed to next step. 11. Review the screen, then click Proceed to next step. 12. Review the information on the screen, then click Proceed to next step. Note: Keep the default settings on this screen for now.
- Page 157 APPENDIX 13. Review the information on the screen, then click Proceed to next step. 14. Review the information on the screen. phpBB is now installed. WD MY CLOUD EX4 PERSONAL CLOUD STORAGE USER MANUAL...
-
Page 158: Appendix D: Supported Raid Modes
APPENDIX Appendix D: Supported RAID Modes Provided below is a chart identifying those modes that are supported for RAID storage. Supported RAID Modes 1 Disk 2 Disks 3 Disks 4 Disks Spanning RAID 0 RAID 1 Yes, 2 RAIDs RAID 5 RAID 10 Hot Spare (for RAID 5 only) JBOD... -
Page 159: Appendix F: Safe Mode Firmware Update Procedures
APPENDIX Appendix F: Safe Mode Firmware Update Procedures If you see the following screen, use the steps outlined below to recover your server from safe mode. Note: Before performing these steps, downloaded WD My Cloud EX4 firmware from the WD support website (http://support.wd.com and save it to a location to which you can browse from your computer. -
Page 160: Regulatory And Warranty Information
REGULATORY AND WARRANTY INFORMATION Regulatory and Warranty Information Regulatory Compliance Warranty Information (All Regions Except Australia/New Zealand) Warranty Information (Australia/New Zealand only) Regulatory Compliance Federal Communications Commission (FCC) Class B Information Operation of this device is subject to the following two conditions: This device may not cause harmful interference. -
Page 161: Warranty Information (All Regions Except Australia/New Zealand)
REGULATORY AND WARRANTY INFORMATION KC Notice (Republic of Korea only) Class B Device 1 Please note that this device has been approved for non-business purposes and may be used in any environment, including residential areas. Korean KCC certification ID: MSIP-REM-WDT-D8C «... -
Page 162: Warranty Information (Australia/New Zealand Only)
REGULATORY AND WARRANTY INFORMATION extended warranties available for purchase. WD shall have no liability for any Product returned if WD determines that the Product was stolen from WD or that the asserted defect a) is not present, b) cannot reasonably be rectified because of damage occurring before WD receives the Product, or c) is attributable to misuse, improper installation, alteration (including removing or obliterating labels and opening or removing external enclosures, unless the product is on the list of limited user-serviceable products and the specific alteration is within the scope... - Page 163 Your original box and packaging materials should be kept for storing or shipping your WD product. To conclusively establish the period of warranty, check the warranty expiration (serial number required) via http:// support.wd.com. Western Digital Technologies, Inc. 3355 Michelson Drive, Suite 100 Irvine, California 92612 Phone: 949-672-7000 E-mail: support@wd.com...
-
Page 164: Index
INDEX Index automatic support requesting 33 auto-rebuilding 72 about apps 83 backups 55 backups 52 about 52 disk status 81 ElephantDrive 62 DLNA 108 USB 52 internal backups 59 Box contents 5 iSCSI 72 media servers 101 Capacity panel 25 shares 48 changing 68 Volume Virtualization 76... - Page 165 INDEX deep sleep 115 ElephantDrive backup 61 deleting iSCSI iSNS Client 75 an app 86 iTunes 105 an iSCSI target 75 end user guide 139 an ISO Share 129 Energy Saver 115 internal backups 61 deep sleep option 115 Port Forwarding Services 125 LCD option 115 remote backups 59 LED option 115...
- Page 166 INDEX viewing 44 iTunes GS Mark 155 accessing personal cloud with 108 disabling 105 enabling 105 hard disk overview 101 viewing information 81 refreshing 106 How do I? 34 streaming media 108 streaming media in 108 ICES/NMB-003 compliance 155 icons Joomla navigation (end user) 140 setup guide 144...
- Page 167 INDEX media players iTunes 103 accessing WD My Cloud EX4 107 accessing your personal cloud using Package contents 5 password media types 102 updating 41 other 107 phpBB Setup Guide 148 WD 107 Port Forwarding 124 media servers adding 125 about 101 deleting 125 overview 101...
- Page 168 INDEX remote backups 55 system activity 27 creating 55 system alerts deleting 59 dismissing 32 viewing 58 icons 31 remote cloud access System Configuration about 88 about 132 Remote Server System Diagnostics general settings 124 about 131 remote server 124 system diagnostics 26 removing a group 47 system health 26...
- Page 169 INDEX Utilities media server settings 103 about 131 mobile apps 90 quick user guide 139 system report 33 viewing user settings 35 a list of shares 48 WD My Cloud EX4 Dashboard alert details 32 launching 20 apps 83 WD Photos details of an ISO Share 128 about 90 DLNA Information 104...
- Page 170 Western Digital, WD, the WD logo, My Book, My Passport, and WD TV are registered trademarks in the U.S. and other countries; and WD My Cloud, WD SmartWare, WD GreenPower, WD My Cloud EX4, WD Photos, WD TV Live, WD TV Live Plus are trademarks of Western Digital Technologies, Inc.
Need help?
Do you have a question about the WDBWWD0080KBK and is the answer not in the manual?
Questions and answers
can i install two 14tb Seagate ironwolf nas pro